 Boats For Sale:


1989 Ski Nautique Rebuild |
Post Reply 
|
Page 12> |
| Author | |
DAY_TRIP 
Newbie 

Joined: August-24-2009 Location: Juno Beach Fl Status: Offline Points: 38 |
 Post Options Post Options
") Thanks(0) Thanks(0)
 Quote Reply Quote Reply
 Topic: 1989 Ski Nautique Rebuild Topic: 1989 Ski Nautique RebuildPosted: July-18-2014 at 9:21pm |
|
Thought I would post here that the nautique is for sale. Finished another rebuild and have to many boats. If anyone is interested please give me a call. Boat is in great condition. Jim. 561-719-0317. This is the craigslist post. http://miami.craigslist.org/pbc/boa/4574069143.html
|
|
 |
|
|
DAY_TRIP
Newbie
Joined: August-24-2009 Location: Juno Beach Fl Status: Offline Points: 38 |
Post Options
Thanks(0)
Quote Reply
Posted: July-04-2010 at 11:40am |
|
Thanks seacamper!
Just a update on the ACME 1442. three adults, full tank of gas, bimini top up, in salt water; 3000 rpms = 30 mph 4500 rpms = 44 mph wide open is still 5000 rpms, didn't go there last time do to traffic. |
|
|
|
|
seacamper
Platinum Member 

Joined: June-24-2010 Location: Florida Status: Offline Points: 1056 |
Post Options
Thanks(0)
Quote Reply
Posted: July-04-2010 at 1:18am |
|
Awsome.
|
|
|
|
|
DAY_TRIP
Newbie
Joined: August-24-2009 Location: Juno Beach Fl Status: Offline Points: 38 |
Post Options
Thanks(0)
Quote Reply
Posted: June-29-2010 at 12:31am |
|
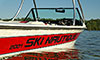
Akabulla,
The hatch works out great for access and anchor storage. Here is on pic of it in the water. I have the gas tank cover panel made just need to paint it. 
|
|
|
|
|
akabulla
Gold Member

Joined: November-15-2008 Location: United States Status: Offline Points: 649 |
Post Options
Thanks(0)
Quote Reply
Posted: June-28-2010 at 12:27pm |
|
Looks great! Very impressive. Did you put a bulk head in place under the ski pole? All I saw was exposed foam.
I really like the idea of the hatch behind the ski pole. I wish I put one there because with the bulk head further back it is a bear to run any cables with the engine in. If I had a hatch I would have direct access to the bulkhead and the piping. Great job again! |
|
|
|
|
DAY_TRIP
Newbie
Joined: August-24-2009 Location: Juno Beach Fl Status: Offline Points: 38 |
Post Options
Thanks(0)
Quote Reply
Posted: June-28-2010 at 10:01am |
|
Thanks Kapla, I'll take some and post them up. Still doing some finishing touches but 98% there.
|
|
|
|
|
kapla
Grand Poobah 

Joined: March-27-2008 Location: BA, Argentina Status: Offline Points: 6148 |
Post Options
Thanks(0)
Quote Reply
Posted: June-27-2010 at 1:35pm |
|
good to hear!!
any pictures of the finished boat? |
|
|
<a href="">1992 ski nautique
|
|
|
|
|
DAY_TRIP
Newbie
Joined: August-24-2009 Location: Juno Beach Fl Status: Offline Points: 38 |
Post Options
Thanks(0)
Quote Reply
Posted: June-27-2010 at 1:05am |
|
Guys,
Wanted to update you on my progress. The boat is on the water and runs great. I put a ACME 1442 on it and it is unreal! I am turning 5000 rpms and don't know how fast I am running yet but will next time I go out. I like the ski better than the footer! unreal performance. |
|
|
|
|
uk1979
Platinum Member
Joined: June-13-2007 Location: United Kingdom Status: Offline Points: 1410 |
Post Options
Thanks(0)
Quote Reply
Posted: March-23-2010 at 12:48pm |
|
Jim,I don't have the same exhaust as you on mine,Im running one each side off some old Edelbrock,s M1 from USA EBay, its how you fitted your drive in, I may need to do the same and fab something up for my PCM 1.23.1 to fit along with some kind of cradle as the boat is pre cradle type.
Your mounts on the Hurth look like Stainless Steel to me. Thanks for your help I will take you up on it, Roger. |
|
|
Lets have a go
56 Starflite 77 SN 78 SN 80 BFN |
|
|
|
|
DAY_TRIP
Newbie
Joined: August-24-2009 Location: Juno Beach Fl Status: Offline Points: 38 |
Post Options
Thanks(0)
Quote Reply
Posted: March-23-2010 at 11:33am |
|
No problem Roger. Do you need more photos around the exhaust area? If you are using the pcm tranny and the 89 exhaust there should be no mods required. The hurth is much wider that is what drove the 2.5" offset. I also had to put 4" to 3" transitions on for the riser difference, maybe that is what you mean? I bought them for $30 each.
|
|
|
|
|
uk1979
Platinum Member
Joined: June-13-2007 Location: United Kingdom Status: Offline Points: 1410 |
Post Options
Thanks(0)
Quote Reply
Posted: March-23-2010 at 8:30am |
|
Thanks Jim that's a big help, I see now how you got over the new drive into the boat and you have been making pipes too great work.
Just what I needed to push on with mine. Thanks again Roger. |
|
|
Lets have a go
56 Starflite 77 SN 78 SN 80 BFN |
|
|
|
|
DAY_TRIP
Newbie
Joined: August-24-2009 Location: Juno Beach Fl Status: Offline Points: 38 |
Post Options
Thanks(0)
Quote Reply
Posted: March-22-2010 at 10:53pm |
|
Hey Roger,
Attached are a few shots from around the engine. Kind of dusty! If you need anything specifically just let me know. The front mounts are unmodified. The rears you can see are move back. This is an 89 so it has the header mounted right behind the engine and that did change alot because of the Hurth tranny. Had to offset the 4" tube to miss the tranny. Hope this helps and don't hesitate if you need any dimensions whatever. 


|
|
|
|
|
uk1979
Platinum Member
Joined: June-13-2007 Location: United Kingdom Status: Offline Points: 1410 |
Post Options
Thanks(0)
Quote Reply
Posted: March-21-2010 at 11:10pm |
|
Thanks Jim will look out for them.
Roger. |
|
|
Lets have a go
56 Starflite 77 SN 78 SN 80 BFN |
|
|
|
|
DAY_TRIP
Newbie
Joined: August-24-2009 Location: Juno Beach Fl Status: Offline Points: 38 |
Post Options
Thanks(0)
Quote Reply
Posted: March-21-2010 at 11:01pm |
|
I will post some photos for you no problem. What I found was that the front mounts fit perfectly. Now the hurth was 2.25" shorter to the coupling but the mounts were 3" farther aft. I actually cut the cradle behind the forward mounts and slide it aft about 3". Worked fine.
|
|
|
|
|
uk1979
Platinum Member
Joined: June-13-2007 Location: United Kingdom Status: Offline Points: 1410 |
Post Options
Thanks(0)
Quote Reply
Posted: March-21-2010 at 9:44pm |
|
Nice sharp boat there Jim, if you have pictures of the engine and drive in the boat please post as I will be first fitting my Chevy & 1.23.1 soon.
Thanks Roger. |
|
|
Lets have a go
56 Starflite 77 SN 78 SN 80 BFN |
|
|
|
|
DAY_TRIP
Newbie
Joined: August-24-2009 Location: Juno Beach Fl Status: Offline Points: 38 |
Post Options
Thanks(0)
Quote Reply
Posted: March-21-2010 at 9:06pm |
|
Thought iwould post some updated photos. Progress wise I have the engine and tranny in which was somewhat of a task. I went from the 351 ford to a chevy 350. Also changed from the PCM tranny to a hurth 1.23-1 so I had some fit up to do but not much. I did have to widen the engine cover. I do have the pcm 1.23 if anyone is interested. It was under water in fresh water I am told. I did open it up to see what it looked like before I shipped to Eric for a rebuild and it looked fine. No signs of rust or broken parts. It never did go to Eric so it needs a rebuild.
Anyway as you can see ther is no carpet. I build molds and made diamond pattern non skid. Toltal pain so that check is in the box and it is non skid in the paint if I do this again. Does look really good though. I have poped a new dash pod, made out of fiberglass, using the old one. I don't want the dual speedos so I will install a built in GPS for speed. 

|
|
|
|
|
uk1979
Platinum Member
Joined: June-13-2007 Location: United Kingdom Status: Offline Points: 1410 |
Post Options
Thanks(0)
Quote Reply
Posted: January-01-2010 at 8:50am |
|
Thanks Jim had a look for Alexseal,its available in the UK thanks for passing on your knowledge.
|
|
|
Lets have a go
56 Starflite 77 SN 78 SN 80 BFN |
|
|
|
|
DAY_TRIP
Newbie
Joined: August-24-2009 Location: Juno Beach Fl Status: Offline Points: 38 |
Post Options
Thanks(0)
Quote Reply
Posted: December-31-2009 at 1:18pm |
|
Hi UK. The paint I used is called Alexseal. It is a urethane like Awlgrip. Very easier to use. I sprayed it but it can be rolled and tipped if you don't want to spray it. I also used a very cheap ($35) gravity feed spray gun from Harbor Frieght and it came out just fine. It is pricey but the durability and shine retention is great. The bottom is just epoxy with Graphite in it (30% by volume). makes a very tough finish.
|
|
|
|
|
uk1979
Platinum Member
Joined: June-13-2007 Location: United Kingdom Status: Offline Points: 1410 |
Post Options
Thanks(0)
Quote Reply
Posted: December-30-2009 at 5:41pm |
|
Jim great work don’t tease us let us know the name of the paint you used, and how you found using it.
|
|
|
Lets have a go
56 Starflite 77 SN 78 SN 80 BFN |
|
|
|
|
Kristof
Grand Poobah
Joined: October-08-2007 Location: Bree, Belgium Status: Offline Points: 3391 |
Post Options
Thanks(0)
Quote Reply
Posted: December-28-2009 at 4:48pm |
|
Lookin' good there Jim!
Keep the pics coming! |
|
|
- Gun control means: using BOTH hands!
- Money doesn't make one happy, but when it rains cats and dogs, it's still better to cry in a Porsche than on a bicycle... |
|
|
|
|
DAY_TRIP
Newbie
Joined: August-24-2009 Location: Juno Beach Fl Status: Offline Points: 38 |
Post Options
Thanks(0)
Quote Reply
Posted: December-28-2009 at 12:17am |
|
Some progress shots,
Barrier coating the bottom with epoxy and graphite 
Just painted the topsides yesterday. Rub rail should go on this week. 

ONE OF THE BAREFOOTER FOR GOOD MEASURE 
|
|
|
|
|
DAY_TRIP
Newbie
Joined: August-24-2009 Location: Juno Beach Fl Status: Offline Points: 38 |
Post Options
Thanks(0)
Quote Reply
Posted: November-07-2009 at 11:18am |
|
Sorry just saw this. How solid is relative. stand alone they are flexible. As you start to glass them in the hull as well as tie in bulkheads and the floor they are extremely rigid. It is exactly how an airplane wing is built with thin metal sections but will carry very high loads. The glass thickness on the stringers before they were installed was three plys of biax on the outters and 3-6 on the inners. More layers near the center where the moment(loading)is the greatest. Once you tape them in and glass the floor down you will add 3-4 more layers on all of them.
The real issue is where you need a hard point to bolt to or through. A good example is at the engine mounts. At that location I actually used some mahogany that my dad had laying around. Trying to use the existing stringers as a mold would be practicaly impossible for several reasons. I would not be afraid to use wood. In fact it is much easier and faster. If you seal it with two coats of quality epoxy and take extreme care in drilling holes or screewing to it you will have no problems. As Pete mentioned in your other post everywhere you intend to drill through, drill and oversized hole and fill it with thickened epoxy and then redrill with the correct sized hole and it will never be a problem. I did my Barefooter that way. |
|
|
|
|
YooperSully
Senior Member 

Joined: August-07-2009 Location: Hancock,MI Status: Offline Points: 316 |
Post Options
Thanks(0)
Quote Reply
Posted: October-30-2009 at 2:28pm |
|
I like the idea of fiberglass stringers/no wood. How solid are these? If you could leave your existing stringer in until these were fabbed up, you could slip them over the existing and trim until they fit like a glove. Would some fiberglass rods end to end and some type of matting and epoxy work as a slush for the inside of these?
|
|
|
87' 2001
|
|
|
|
|
DAY_TRIP
Newbie
Joined: August-24-2009 Location: Juno Beach Fl Status: Offline Points: 38 |
Post Options
Thanks(0)
Quote Reply
Posted: September-21-2009 at 7:23pm |
|
Thanks Kapla! I am using seats from Veada==>veada seats and the bases are Garelick ==>. Pedestool
|
|
|
|
|
kapla
Grand Poobah
Joined: March-27-2008 Location: BA, Argentina Status: Offline Points: 6148 |
Post Options
Thanks(0)
Quote Reply
Posted: September-21-2009 at 6:18pm |
|
Looking good..What kind of seats are you using? not the oem, as i see a different hole pattern..
btw happy b-day |
|
|
<a href="">1992 ski nautique
|
|
|
|
|
DAY_TRIP
Newbie
Joined: August-24-2009 Location: Juno Beach Fl Status: Offline Points: 38 |
Post Options
Thanks(0)
Quote Reply
Posted: September-21-2009 at 5:04pm |
|
Thanks Guys. The hatch will be great for anchor and rope storage.
|
|
|
|
|
uk1979
Platinum Member
Joined: June-13-2007 Location: United Kingdom Status: Offline Points: 1410 |
Post Options
Thanks(0)
Quote Reply
Posted: September-21-2009 at 7:07am |
|
Day-Trip nice work thanks for the link, keep the post coming.
|
|
|
Lets have a go
56 Starflite 77 SN 78 SN 80 BFN |
|
|
|
|
SN206
Grand Poobah

Joined: February-25-2009 Location: Fort Worth, TX Status: Offline Points: 2339 |
Post Options
Thanks(0)
Quote Reply
Posted: September-21-2009 at 12:00am |
|
Looking good. Like the hatch idea.
|
|
|
...those who have fallen and those who will.
|
|
|
|
|
DAY_TRIP
Newbie
Joined: August-24-2009 Location: Juno Beach Fl Status: Offline Points: 38 |
Post Options
Thanks(0)
Quote Reply
Posted: September-20-2009 at 11:41pm |
|
Installed the front section of the cocpit sole today.

|
|
|
|
|
DAY_TRIP
Newbie
Joined: August-24-2009 Location: Juno Beach Fl Status: Offline Points: 38 |
Post Options
Thanks(0)
Quote Reply
Posted: September-20-2009 at 12:14pm |
|
Guys,
I have posted some updated photos here ==>Link to Ski Nautique rebuild. If you are interested this is a link to all the boat photos in my gallary==>Photos from DAYTRIP |
|
|
|
|
Post Reply
|
Page 12> |
 Tweet
Tweet
|
| Forum Jump | Forum Permissions You cannot post new topics in this forum You cannot reply to topics in this forum You cannot delete your posts in this forum You cannot edit your posts in this forum You cannot create polls in this forum You cannot vote in polls in this forum |


 Topic Options