 Boats For Sale:


Another BFN Rebuild |
Post Reply 
|
Page <1 1516171819 31> |
| Author | |
TRBenj 
Grand Poobah 

Joined: June-29-2005 Location: NWCT Status: Offline Points: 21131 |
 Post Options Post Options
") Thanks(0) Thanks(0)
 Quote Reply Quote Reply
 Posted: August-12-2010 at 12:57pm Posted: August-12-2010 at 12:57pm |
|
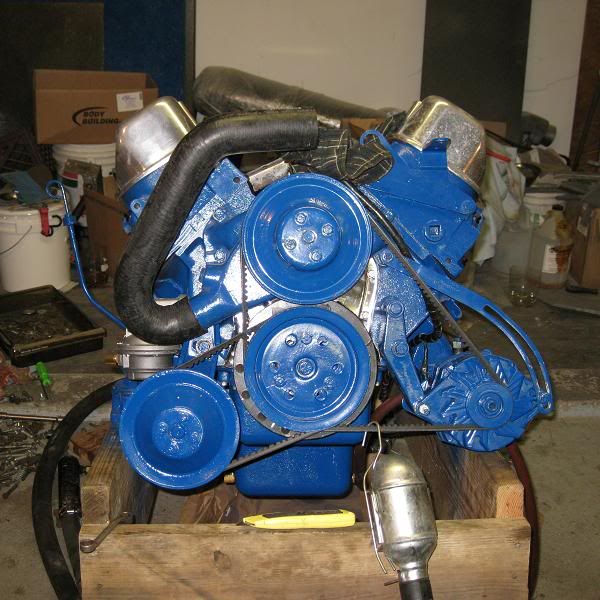
I just realized that I hadnt posted these yet. As I mentioned earlier, the engine assembly is getting close- just need to set the preload on the rockers, then button up the top end. The plan is to install the motor in the boat once the bilge is finished and accessories are installed. The last things we'll do before breaking in the cam will be to add the EOS assembly lube, install the intake, finish assembling the cooling system, install the wiring harness, prime the oil pump, and fire it up. We're using 30w VR1 for the break in, then plan to switch to 20w50.
|
|
 |
|
|
Keeganino
Grand Poobah

Joined: October-27-2009 Location: North Carolina Status: Offline Points: 2063 |
Post Options
Thanks(0)
Quote Reply
Posted: August-12-2010 at 12:52pm |
 I know what you mean! I have a stack of receipts from all the trips to Ace, Harbor Freight, Lowes, HD, Oreilly, Advanced, etc. One day I might add them all up, but right now it does not really matter and I don't want to know. As for the hours.. lets just say that it was a lot more than 200, but I did a lot more than just stringers. I could maybe do a second boat in 200. I know what you mean! I have a stack of receipts from all the trips to Ace, Harbor Freight, Lowes, HD, Oreilly, Advanced, etc. One day I might add them all up, but right now it does not really matter and I don't want to know. As for the hours.. lets just say that it was a lot more than 200, but I did a lot more than just stringers. I could maybe do a second boat in 200.
|
|
|
"working on these old boats may not be cost effective but as it shows its what it brings into your life that matters" -Roger
1973 Skier |
|
|
|
|
TRBenj
Grand Poobah
Joined: June-29-2005 Location: NWCT Status: Offline Points: 21131 |
Post Options
Thanks(0)
Quote Reply
Posted: August-11-2010 at 7:49pm |
|
Dollars or hours? I guess it doesnt matter since we're not keeping track of either. Id be scared to know the real numbers!
|
|
|
|
|
dochockey
Gold Member 

Joined: September-16-2009 Location: Colorado Status: Offline Points: 638 |
Post Options
Thanks(0)
Quote Reply
Posted: August-11-2010 at 1:09pm |
|
How much invested so far?
 Awesome! Awesome!
|
|
|
1989 Teal Ski Nautique
1967 Mustang Harris Float Sunfish |
|
|
|
|
TRBenj
Grand Poobah
Joined: June-29-2005 Location: NWCT Status: Offline Points: 21131 |
Post Options
Thanks(0)
Quote Reply
Posted: August-05-2010 at 1:27pm |
|
Paul, all of the cloth tapes were 8.7oz. The sheet cloth (used on the floor) was 8.9oz. The biax was USC's 1708, which according to them, "Contains double bias(17oz) stitched at 45degrees along with one layer of 3/4oz mat". The mat used on the top of the floor (for impact resistance) was 1.5oz.
We put 7 layers of glass on the mains (2,2,4,4,8,8,biax), and one layer of biax over the top. We used this same schedule on 2 small ribs and 2 bulkheads. All other ribs/bulkheads got 2/4/8. The secondaries got 2/4/8/biax. The coosa floor got 2 layers of cloth on the bottom, the top got 2 layers as well, plus another layer of mat. The glass over foam section in front got 2 layers of mat and one cloth. If I were to do this again with wood (no foam), I would have used a similar schedule everywhere, with the exception of the coosa floor. The glass on both sides was really necessary for screw retention with the coosa (foam/fiberglass based), less so for strength. I probably wouldnt have put glass on the underside of a ply floor- but a layer or 2 on top (esp the mat) for impact resistance would still be good. By itself, coosa is quite strong- but the glass makes it much stronger and stiffer. As far as weight goes, we did a rough measurement with comparable sized pieces, and it showed that the coosa weighs about 2/3 of ply. I expect this will result in a comparable weight to the factory job, even with all the extra ribs, bulkheads and glass. Of course, it will weigh a ton less than last year since everything was soaking wet- plus we're lightening up the engine a bit. |
|
|
|
|
gun-driver
Grand Poobah
Joined: July-18-2008 Location: Pittsburgh, Pa Status: Offline Points: 4112 |
Post Options
Thanks(0)
Quote Reply
Posted: August-05-2010 at 12:47pm |
|
Tim,
What weight matt and cloth did you use and did you have to use more or less than with wood? Also, how does the composite campare to wood weight wise? |
|
|
|
|
TRBenj
Grand Poobah
Joined: June-29-2005 Location: NWCT Status: Offline Points: 21131 |
Post Options
Thanks(0)
Quote Reply
Posted: August-04-2010 at 2:16pm |
|
Thats a good question, Gary- finding time has been the biggest challenge!
I thought I was done fairing, but decided to do one more coat last night. 

|
|
|
|
|
Gary S
Grand Poobah

Joined: November-30-2006 Location: Illinois Status: Offline Points: 14096 |
Post Options
Thanks(0)
Quote Reply
Posted: August-04-2010 at 1:13am |
|
Beautiful Tim,truly a labor of love. What I'd like to know is where are you getting the time to do all this

|
|
|
|
|
TRBenj
Grand Poobah
Joined: June-29-2005 Location: NWCT Status: Offline Points: 21131 |
Post Options
Thanks(0)
Quote Reply
Posted: August-03-2010 at 5:54pm |
|
Well Joe bowed out of last year's NE reunion, which allowed me to take home a few trophies that essentially already had his name engraved on them. I feel obligated to return the favor this year.
The showdown may have to wait until GL '11. |
|
|
|
|
79nautique
Grand Poobah

Joined: January-27-2004 Location: United States Status: Offline Points: 7872 |
Post Options
Thanks(0)
Quote Reply
Posted: August-03-2010 at 5:45pm |
|
All I know it's time to quit goofing off and get it finished someone has to get close to Joe's beast at the east reunion's speed runs

|
|
|
|
|
TRBenj
Grand Poobah
Joined: June-29-2005 Location: NWCT Status: Offline Points: 21131 |
Post Options
Thanks(0)
Quote Reply
Posted: August-03-2010 at 5:24pm |
|
It would take quite a bit for the air vents to leak enough to cause an issue... the new lines should direct everything to the bilge. The bilge pump outlets are on the transom, so no worries there.
Heres what the under-bow area used to look like: 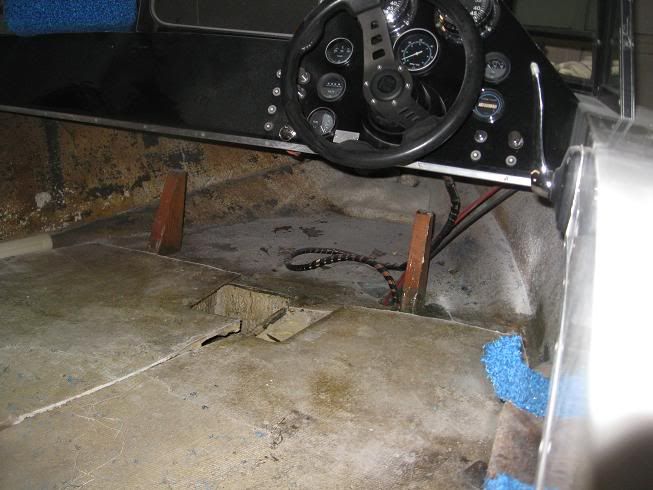
|
|
|
|
|
79nautique
Grand Poobah
Joined: January-27-2004 Location: United States Status: Offline Points: 7872 |
Post Options
Thanks(0)
Quote Reply
Posted: August-03-2010 at 5:19pm |
|
ok I didn't notice the angle pieces and thought most had the half raised area like the 79 did. It'll stay dry as long as the seam between the top deck and hull doesn't leak or the bilge hose does spring a leak, If I recall your pretty tight and rigid where the air tubes are located under the scoop so that should stay good and seal up as well.
|
|
|
|
|
TRBenj
Grand Poobah
Joined: June-29-2005 Location: NWCT Status: Offline Points: 21131 |
Post Options
Thanks(0)
Quote Reply
Posted: August-03-2010 at 5:09pm |
Actually, there was no airbox at all, originally- the floor was as flat as a pancake, all the way to the nose. The kick panel was attached to a few pieces of wood that came out of the floor... I think they were just stuck into the foam! Grinch's '79 BFN had an airbox that spanned the whole width, just like the older boats (my Tique and Skier are set up this way), no idea why this boat was made differently. We decided that a drivers side air box would be beneficial- the area raised off the floor should provide a good (dry) place to mount accessories (like a heater) and also allow an easy way to mount the carpeted panels to hide everything. Leaving the port side open increases the storage capacity under the bow. To answer your question, the airbox still has an angle. You can see it in this picture: 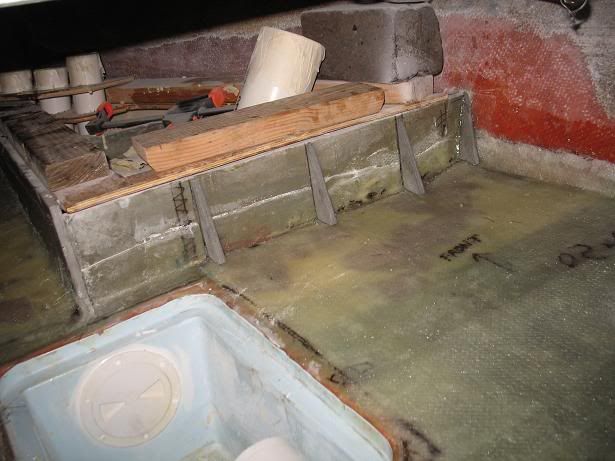
The vertical panel that the little triangles mount against is actually the rib that goes all the way to the hull... it was strategically located to provide support right at the rear edge of the airbox. The angle might be a touch steeper, but it should still function nicely as a footrest. The newer boats (like dad's '03) have airboxes with vertical rear panels, FYI- but I think the angle will make it more comfortable. |
|
|
|
|
79nautique
Grand Poobah
Joined: January-27-2004 Location: United States Status: Offline Points: 7872 |
Post Options
Thanks(0)
Quote Reply
Posted: August-03-2010 at 4:31pm |
|
Tim regarding the air box, area under the helm, but from memory it looks like yours is straight up and down from what I recall, wasn't it sloped before? If so why the change? I'm just recalling I always used that area on mine as a foot rest more than anything else, and was wondering if maybe you added more vents/tubes forcing the change or it was moved back further thus not needed to be sloped any more.
|
|
|
|
|
79nautique
Grand Poobah
Joined: January-27-2004 Location: United States Status: Offline Points: 7872 |
Post Options
Thanks(0)
Quote Reply
Posted: August-03-2010 at 4:10pm |
|
it's kinda werd, I can't see them but if I quote the thread then it showes up, in this case I had all ready cut that area before so I didn't see the rocker adjustment pictures, soo cool you didn't brunstucky it and crossed your T's and dotted the I's
|
|
|
|
|
TRBenj
Grand Poobah
Joined: June-29-2005 Location: NWCT Status: Offline Points: 21131 |
Post Options
Thanks(0)
Quote Reply
Posted: August-03-2010 at 3:18pm |
|
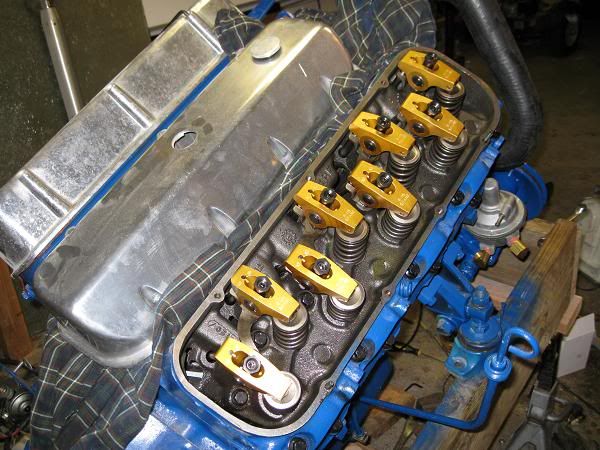
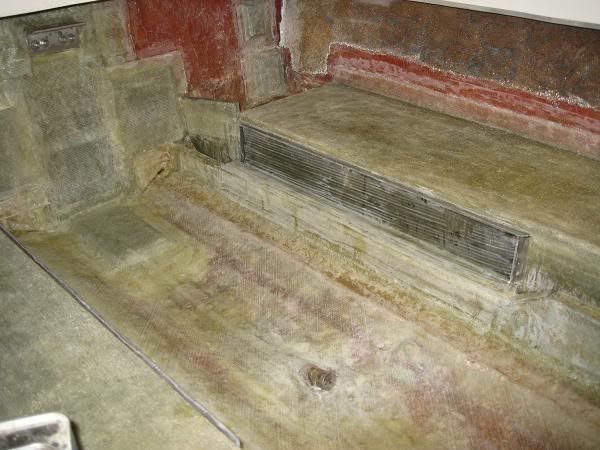
Chris, can you see the pictures or not? Your first comment about the valvestems indicates that you cant, while the comment about the motorbox and pylon indicate that you can.
We did blue (sharpie) the valvestems, install the rockers (with preload) and roll the engine over by hand a bunch of times. The picture I posted shows where the roller tip travelled across the stem. I didnt break out the calipers, but you would need them to tell how far off center we are- it is very close. I think we're good here. The narrow gap at the pylon was done on purpose. The original set up was actually so tight to the pullies that there was a notch out of the floor so the RWP would clear. There was zero clearance, which was a major PITA. We decided to move the pylon forward a bit, and bring the floor right up to the flange. Thats a 5" square base, so with the 2.5" diameter pylon and the 1/4" of floor we left just past the flange, we still have 1.5" of surface for the box to rest on. You can see the wear on the flange where the box sat previously- it was essentially right up against the pole. We have tons of clearance up top due to the straight pylon, so no issue there (we had a boom clamp and a SDBM installed last year, as seen in the first post of this thread). Where we are actually anticipating issues is on the motorbox width- the EMI manifolds are quite a bit taller and wider than the previous cast irons... we may end up having to split and widen the box. |
|
|
|
|
79nautique
Grand Poobah
Joined: January-27-2004 Location: United States Status: Offline Points: 7872 |
Post Options
Thanks(0)
Quote Reply
Posted: August-03-2010 at 3:01pm |
you realy should blue the tips of the valve stem and cycle the engine a couple of times and then measure it and verify that it is actually in the center. With the valve closed the roller should be off center past the center of the stem, then be centered mid travel of the lift and then off center an equal amount at full lift compared to your starting point. So if you blue them cycle three - four times by spinning the crank by hand, removing the rocker and then using calibers measure the blue areas and they should be equal on both sides of the stem, there is a wrtten procedure on Comps cams website I also posted it on another thread as well. another note you might be a little tight on the motor box, doesn't look like you left much room between the pylon and the opening in the floor for the front lip of the motorbox. With the straight pylon maybe it's not an issue and rubbing on the very bottom won't be an issue. |
|
|
|
|
TRBenj
Grand Poobah
Joined: June-29-2005 Location: NWCT Status: Offline Points: 21131 |
Post Options
Thanks(0)
Quote Reply
Posted: August-03-2010 at 2:34pm |
|
Ha, I guess nothing is impossible, but dont count on that happening Larry!
|
|
|
|
|
75 Tique
Grand Poobah

Joined: August-12-2004 Location: Seven Lakes, NC Status: Offline Points: 6107 |
Post Options
Thanks(0)
Quote Reply
Posted: August-03-2010 at 2:20pm |
|
Come on Tim, you guys got 17 days to get it done so your parents can bring it up to Epsom. |
|
|
_____________
“So, how was your weekend?” “Well, let me see…sun burn, stiff neck, screwed up back, assorted aches and pains….yup, my weekend was great, thanks for asking.” |
|
|
|
|
TRBenj
Grand Poobah
Joined: June-29-2005 Location: NWCT Status: Offline Points: 21131 |
Post Options
Thanks(0)
Quote Reply
Posted: August-03-2010 at 2:14pm |
|
Thanks guys!
I know the finished product will be well worth the effort. It is nice not having to rush this project... but if you asked me last fall when I though we would be done, I guarantee that I wouldnt have told you August. 
|
|
|
|
|
Keeganino
Grand Poobah
Joined: October-27-2009 Location: North Carolina Status: Offline Points: 2063 |
Post Options
Thanks(0)
Quote Reply
Posted: August-03-2010 at 2:06pm |
|
Amazing work even if you did "struggle" with some of the design issues.
I hope to see her someday. Dropping the red boat off today to get the timing set. They rebuilt it, they can fire it up the first time!
|
|
|
"working on these old boats may not be cost effective but as it shows its what it brings into your life that matters" -Roger
1973 Skier |
|
|
|
|
Waterdog
Grand Poobah

Joined: April-27-2006 Location: United States Status: Offline Points: 2020 |
Post Options
Thanks(0)
Quote Reply
Posted: August-03-2010 at 2:00pm |
|
There's jet's flying over your head that don't have that kind of craftsmanship in the repairs. WELL DONE TIM !
|
|
|
|
|
8122pbrainard
Grand Poobah

Joined: September-14-2006 Location: Three Lakes Wi. Status: Offline Points: 41040 |
Post Options
Thanks(0)
Quote Reply
Posted: August-03-2010 at 1:18pm |
|
Tim,
I'm still keeping a eye on your progress! Look'n great!!
|
|
|
|
|
Kristof
Grand Poobah

Joined: October-08-2007 Location: Bree, Belgium Status: Offline Points: 3391 |
Post Options
Thanks(0)
Quote Reply
Posted: August-03-2010 at 12:20pm |
|
Very very nice job Tim!!
|
|
|
- Gun control means: using BOTH hands!
- Money doesn't make one happy, but when it rains cats and dogs, it's still better to cry in a Porsche than on a bicycle... |
|
|
|
|
BuffaloBFN
Grand Poobah

Joined: June-24-2007 Location: Gainesville,GA Status: Offline Points: 6094 |
Post Options
Thanks(0)
Quote Reply
Posted: August-03-2010 at 10:48am |
|
You have surely raised the bar from where I left it, top marks!
|
|
|
|
|
WakeSlayer
Grand Poobah

Joined: March-15-2006 Location: United States Status: Offline Points: 2138 |
Post Options
Thanks(0)
Quote Reply
Posted: August-02-2010 at 6:55pm |
|
Wow.
|
|
|
Mike N
1968 Mustang |
|
|
|
|
502Python
Senior Member 
Joined: August-03-2009 Location: Clifton IL Status: Offline Points: 167 |
Post Options
Thanks(0)
Quote Reply
Posted: August-02-2010 at 6:51pm |
|
Looks great. Nice work!
|
|
|
1999 Sport Nautique-Python Powered
1999 Ski Nautique-Python Powered |
|
|
|
|
TRBenj
Grand Poobah
Joined: June-29-2005 Location: NWCT Status: Offline Points: 21131 |
Post Options
Thanks(0)
Quote Reply
Posted: August-02-2010 at 6:38pm |
|
Thanks Chris!
Its been a full month since the last real update- which means Ive been slacking on pictures (again). Progress has been pretty slow- without any sort of deadline, I guess that can happen. The weather here has been exceptionally nice- easily the warmest July I can remember. We might have had one or 2 days of rain, but really not very many good "garage days". So, Ive been spending my time on the water, and chipping away at other projects that keep me closer to the lake. The good news is that my newest lift is finally in- so now theres a Correct Craft at my dock. 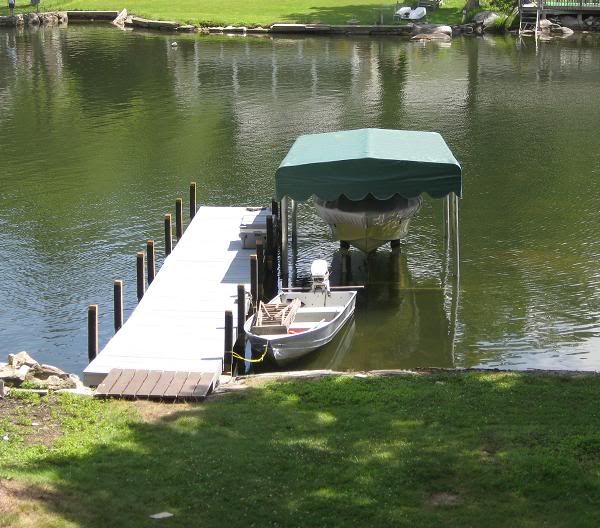
Lets see now, where was I... oh yes, the BFN. Like I mentioned, the airbox is finished- all taped in and sanded. The battery box lid is in decent shape as well. 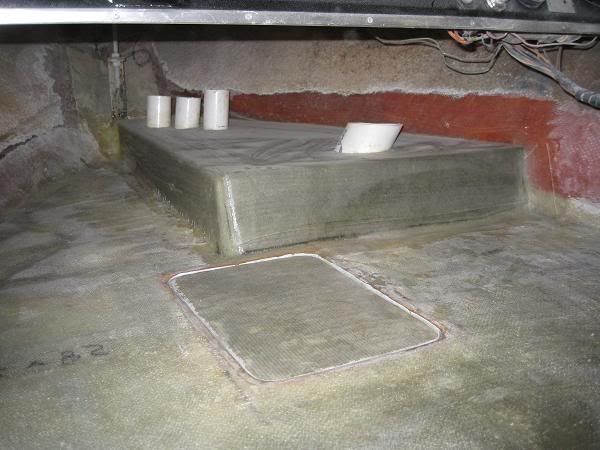
We test fit the cradle, then dropped the engine in for a mock-alignment to see if we were in the ballpark with our cradle construction. No pictures to show that step, but it came out really close to where we thought it should. 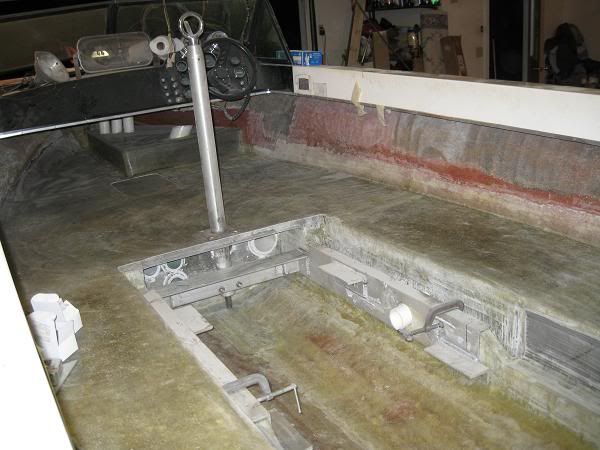
Once the cradle location was finalized, we cut the pylon hole in the floor, then trimmed the rear edge of the front floor section. Hopefully this will give us a bit more clearance between the pullies and floor... you couldnt sneak a finger past them, let alone an arm- which made for an interesting reach for the drain plug. 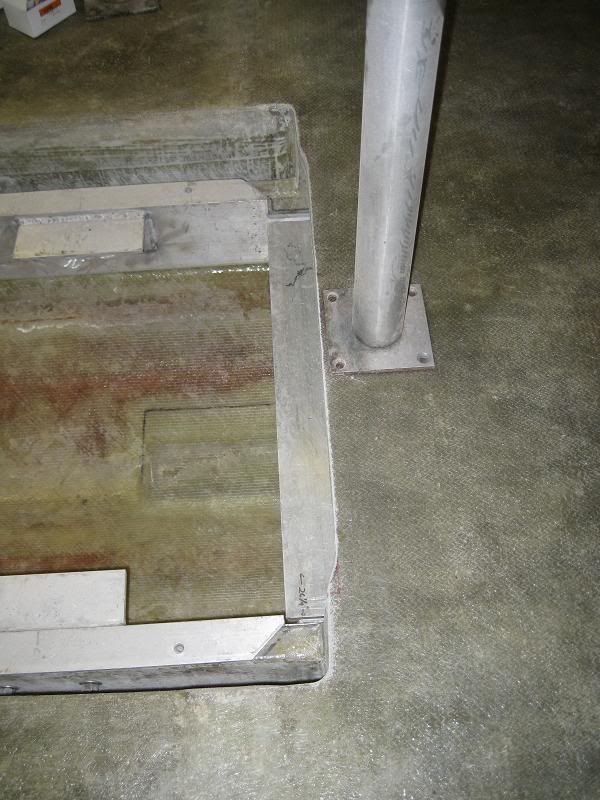
We also glassed down the pylon cup. 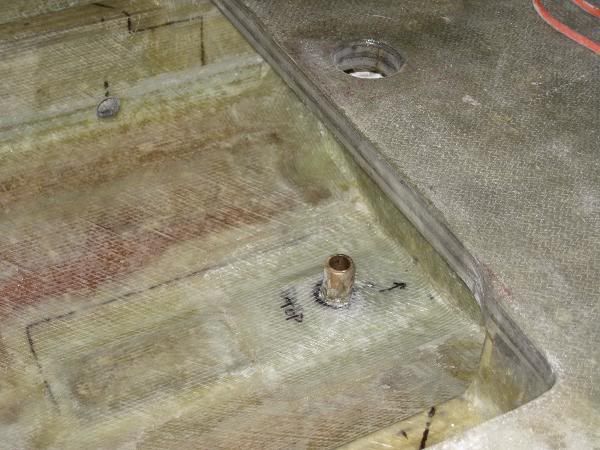
Here is the bottom side of the removable panel. It needs some final sanding and smoothing, then its ready for paint. 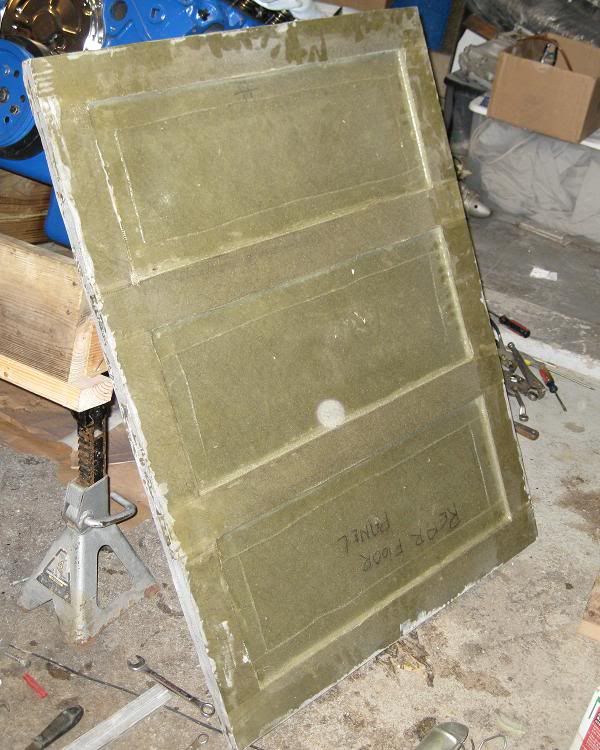
The top got 2 layers of cloth and one of mat. With just the 3/4" supports on each side, it had minimal deflection with one person standing on it... nice. 
In the meantime, engine assembly has been ongoing. This picture is old (it is nearly all dressed at this point), but you get the idea. 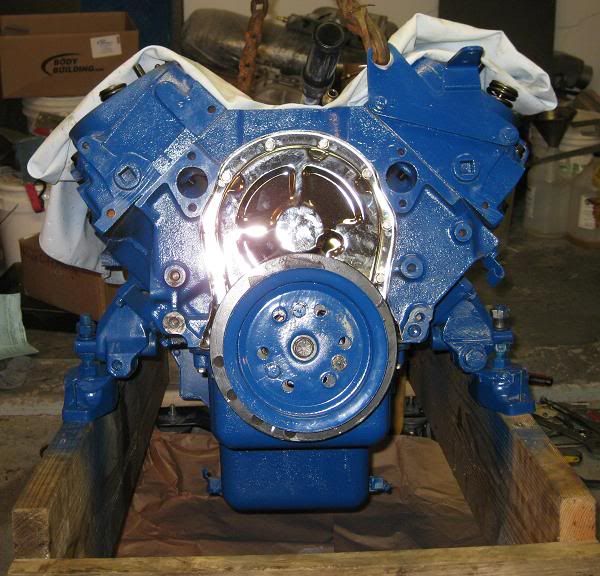
Dad removed the inner valvesprings to lighten up the pressure during cam break in. I anticipated needing shorter pushrods with the new cam (which has a larger base circle), but the roller tips appeared to be centered on the valvestem... bonus. 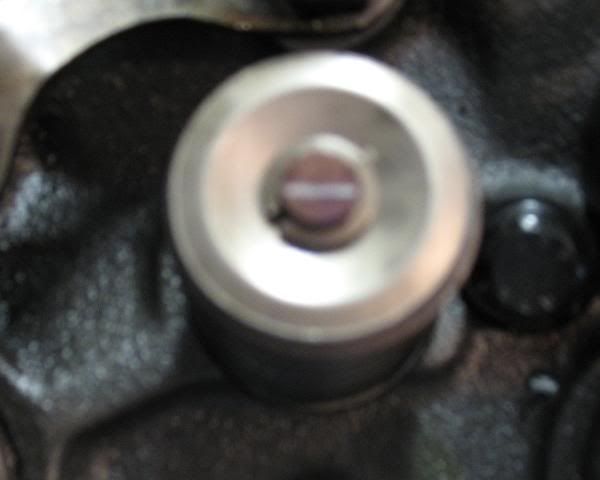
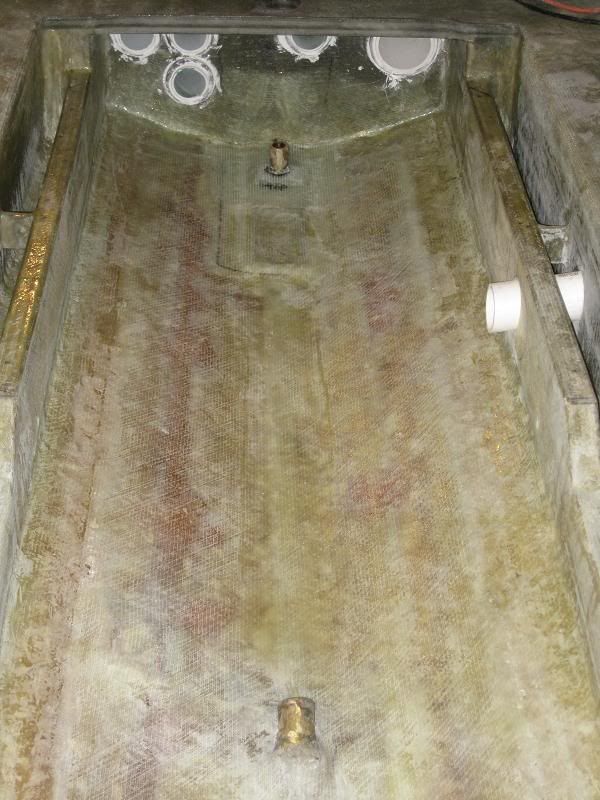
The majority of my time recently has been spent sanding and fairing the bilge in preparation for paint. No up to date pics, but theres not much to see anyways. I think one more coat of resin and a quick scuff should have it in decent shape. Here are a couple quick shots after the major grinding and sanding prior to fairing. 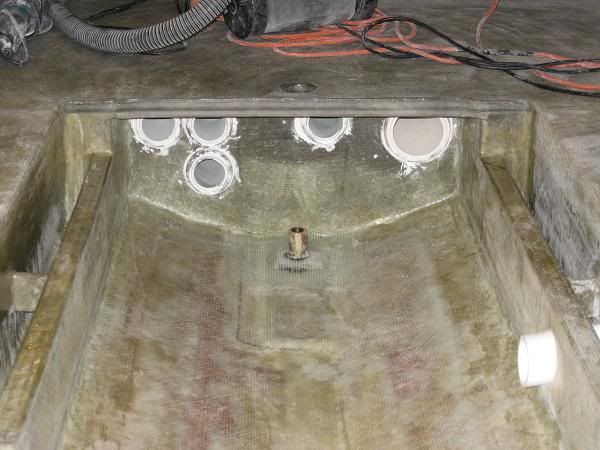
During the mock alignment, we ended up using 2 thin SS washers under the rear to get the shaft centered in the log. That would explain why the shaft was riding on the bottom of the log for who knows how long. Also as it turns out, the rear end of the strut was out of round, causing the shaft to bind with the bushings installed, so its currently sitting in the freezer so we can pull one of the new XPC bushings back out and fix the strut. Getting closer! |
|
|
|
|
SNobsessed
Grand Poobah
Joined: October-21-2007 Location: IA Status: Offline Points: 7102 |
Post Options
Thanks(0)
Quote Reply
Posted: July-24-2010 at 12:02am |
|
Great rebuild Tim, I hope to see it someday. It will still be floating when you're an old man!
|
|
|
“Beer is proof that God loves us and wants us to be happy.”
Ben Franklin |
|
|
|
|
C-Bass
Platinum Member

Joined: November-18-2008 Location: Columbus, IN Status: Offline Points: 1248 |
Post Options
Thanks(0)
Quote Reply
Posted: July-23-2010 at 3:42pm |
|
You're reading the wrong side of that ruler eric...that's 8 cm
|
|
|
|
|
Post Reply
|
Page <1 1516171819 31> |
 Tweet
Tweet
|
| Forum Jump | Forum Permissions You cannot post new topics in this forum You cannot reply to topics in this forum You cannot delete your posts in this forum You cannot edit your posts in this forum You cannot create polls in this forum You cannot vote in polls in this forum |


 Topic Options
 TRBenj wrote: