 Boats For Sale:


Wet sanding...purgatory or punishment? |
Post Reply 
|
Page 12> |
| Author | |
89Ski_Nautique 
Senior Member 

Joined: May-26-2009 Location: Windermere, FL Status: Offline Points: 160 |
 Post Options Post Options
") Thanks(0) Thanks(0)
 Quote Reply Quote Reply
 Topic: Wet sanding...purgatory or punishment? Topic: Wet sanding...purgatory or punishment?Posted: April-29-2010 at 4:08am |
|
Wet sanding, purgatory or punishment you decide. It all started with an innocent comment from Linda that our boat did not shine like the “other ” Correct Craft boats on Lake Butler. So, that sent me searching on the CCFAN site for a solution. Found one from Tim, his post outlined the steps of how to restore gel coat to resemble the original factory finish. This seemed straight forward and relatively simple, Clearly this wouldn’t take too long to accomplish. Little did I know. OK, I was off to purchase the sanding and polishing supplies. Several weeks passed and many lessons later, I finally finished the job.

Perhaps the wet sanding and polishing tasks would have been a lot easier, if you did not have to fix previous gelcoat repair mistakes and maintenance short cuts like paint over gelcoat repairs. Once I removed the graphics and started sanding I uncovered many “hidden” gelcoat repair shortcuts and “painting fixes” instead of a proper gelcoat repairs. (More on the gelcoat later). 
Wet sanding by hand is no picnic for anyone especially for a rookie like me. I realized when starting out for my first time, I thought for the first time out of the gate I probably be better off by block sanding the hull/deck by hand. If I had to do it over again I would use power tools! Clearly, wetsanding would more tolerable if there was cocktail lounge conveniently located in your garage, while being served Bombay and Tonic drinks by Keria Knightley. OK, back to the wetsanding, my main motivation was just get an improved finish, fix the bogus gelcoat fixes and help save on repair costs, compared to spending a whole bunch of $$ on a 21 year old boat. Decals / Graphics: My first task was to make sure all of the exterior graphics and decals could be obtained prior to removing any of the old graphics/decals. I found them and listed the sources below. Fortunately Bruce Foutz at N3 Boatworks now can reproduce a complete set of graphics. 2 - Correct Craft w/Globe decal, white; Southeast Marine. 2 - PCM, AME 4000, AWSA decals; Southeast Marine. 2 - “Ski Nautique ”w/ small “2001” graphics, white w/gray shadow; N3. 1 - “Competition Ski Nautique” graphic , white w/gray shadow; N3. 4 - Bow Stripe graphics, yellow w/black stripes; N3. 1 - Stern Stripe graphics, yellow w/black stripes; N3. 100’ - 1/2" Pinstripes, 100' - 1/4" Pinstripes, Misc – Warning Caution Decals – Paul Oxley Misc – Other Correct Craft Decals – Wendel Carpenter 1 – Correct Craft Glove Box Decal – Marty Mabe 2 – Gold and Blue AWSA Decal – Marty Mabe 2 – 1989 World Championship Decal – Tim Benjamin The compounding, polishing supplies outlined in Tim’s previous post are the same compounds outlined below. The compounds and pad combinations are repeated below and these combination Tim identified worked great. 
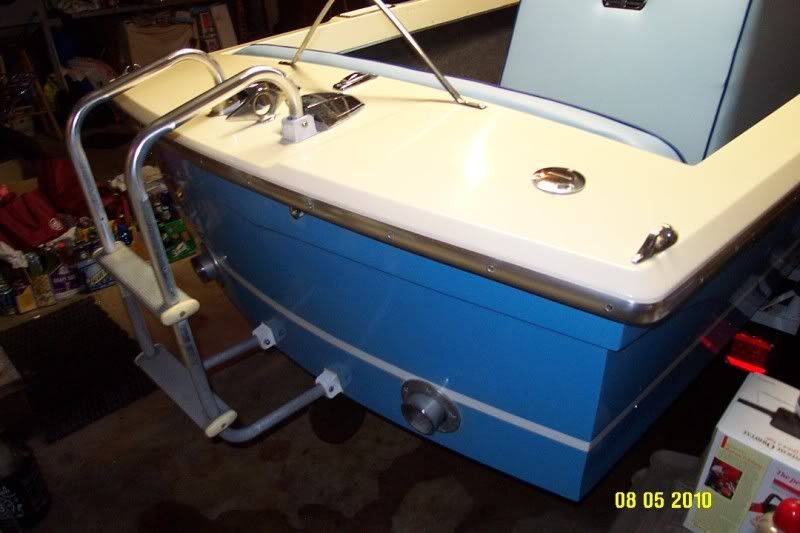
1 – 10 amp variable speed polisher 1000-3500 RPM, Easy-to-read LCD display Variable Speed Polisher Note: This unit in now on sale @ $49.99 regularly $59.99, 1000-3500 RPM, soft start, ball bearing construction. Convenient On/Off switch, No trigger to hold just set the speed as indicated on LCD panel. This was a good buy for polisher that will hardly be used in my garage. In my opinion this is a good low cost alternative in comparison to the higher priced Milwaukee or Dewalt polishers. As side note, I think all of these manufacturers build and assemble their polishers in China. Be sure to toss the junk backing plate that comes with this unit and use the one identified below. 1 - 3M 05954 Super Duty Rubbing Compound 1- 3M 06085 Perfect-It Rubbing Compound 1 - 3M 05928 Finesse-It II Polishing Compound 3M Compounds and 3M Polish 1 – BP 2027 Motor Guard Backing Plate 7" buffing pad backing plate, Hook-It Backing Plate 2 - 41-025 Lake Country Compound Pad 2 - 41-725 Lake Country Compound Pad 2 – 41-625 Lake Country Polishing Pad Lake Country Compound and Polishing Pads Many Sheets - 320, 400, 600, 800, 1000, 1200 wet/dry sand paper I had a few problem areas that required attention. First the stern problem area, as indicated in the photos below, it appears there were two depth finder sending unit(s) or similar hardware mounted on the stern. The holes were attempted to be “filled” by one of the previous owner(s). Beside the obvious fill problem it appeared like the gelcoat was not catalyzed properly since the white gelcoat resin was easily removed when Acetone was applied to these areas. 

The dash/deck problem area: As indicated in the photos below, the dash was painted using black pigmented paint and or some sort of clear coat paint that was sprayed on by one of the previous owner(s). The glove box lid and cup holders had overspray as well 

Starboard Side problem area: As indicated in the photos below, the hull in select areas was painted using color match white paint and a yellow paint color matched to resemble the faded yellow gelcoat by one of the previous owner(s). Also it appears that it was applied with a roller? There was an irregular paint line that was masked/covered up by the hull pinstripes. Later it was confirmed by RC fiberglass techs that it was indeed paint over gelcoat. 
Other miscellaneous gelcoat repairs: I removed the extra unwanted mooring hardware that was attached to the deck, consequently I needed to have these holes filled as well. Needed to fix the scrapes on the keel and few other thin spots where the gelcoat was worn away starting expose the fiberglass. 

Torn Decals/Graphics: Overall for 21 year old boat the graphics were in reasonably good condition, except the one of the “swoosh” bow stripes was “fixed” to resemble to factory appearance. The gel coat underneath the stripe appeared to be deeply cut with an exacto knife to create the gray accent outline pin stripe. Some of the warning caution decals just had new decals applied over the old faded decals, these were removed in preparation for sanding. 

Lesson# 1: Since, I am the third owner, I learned an important lesson. Find a boat that is as close as possible to the original factory appearance and condition. Closely inspect any previous gelcoat or fiberglass repairs. First I removed all the old graphics and decals using a Wagner heat gun and cleaned up the adhesive residue using acetone. Note: Be sure not to overheat the gelcoat surface. Before wet sanding I put down several old towels to protect the recently repaired trailer and had plenty of clean towels on hand to catch the wet sanding runoff. 
Now armed with bucket and sprayer w/ a little soap added to the water… I was ready for action. I started to sand around the hardware components and quickly realized that you need to remove the deck/hull hardware. Since this was my first attempt at sanding, compounding and polishing, I made sure I masked off any parts that were still attached to the hull/deck…like the rubrail. 
Also, I removed the stern hardware assemblies, and noted one of the previous owner(s) used silicone sealant instead of 3M 4200 sealant adhesive for the pitot tube pickups, swim platform brackets, etc. Make sure you heed Pete’s advice and don’t use silicone sealant because this stuff does not stick/seal very well. Next I cleaned out as much of the silicone sealant the best I could and as a good measure injected CPES into the holes. 

Lesson #2: Remove as much of the hull/deck hardware from the boat as possible. Although probably known to most of you…my next lesson was with sand paper. It occurred to me when I naively used a 3M P600 grit (ISO grid designation system) wet/dry sand paper, mistaking it for the familiar US scale 600 grit (CAMI grit designation system) wet/dry sand paper. This P600 grit paper was cutting like a 320 grit sand paper. I believe Tim may have already posted this important tidbit of information already, it just didn’t dawn on me until I was using the P600 sandpaper. I have listed below a relative comparison table for the different sand paper designation systems starting with 240 grit. FEPA P-Scale) CAMI P240 240 P280 P320 P360 320 P400 P500 360 P600 400 P800 500 P1000 600 P1200 P1500 800 P2000 1000 P2500 Lesson #3: There are two designation systems which specify the average grit size. These grit designation systems are in general the same up to 220 grit, and then begin to diverge for the micro grits. Make sure you know which papers you are using…because in my case the P600 paper was actually more like 380 grit paper when referencing the familiar CAMI designation system. Call it drinking the Kool-Aid or Madison Street marketing hype, but I discovered the 3M wet/dry sand paper products to be better than the other brands of wet/dry sand paper. From my personal experience, the 3M sand papers seemed provide consistent cutting, seemed to last longer, less prone to clogging and in general held up better when soaked in water. Lesson #4: When faced with a decision on which sand paper products to purchase, stick with the tried and true 3M wet/dry sand paper products. Next, I sanded the hull/deck 2 times using 320, 400, 600 in some areas, but mostly 800, 1000, 1200. I must have missed a few spots in between wetsanding levels because you can still see a few faint scratches on the deck. I realized quickly that you don’t have to use an abrasive 320, 400, 600 grit regimen all the time, only when needed perhaps start at 800 or higher depending on the level of scratches and/or oxidation. 

Lesson #5: Be sure to thoroughly wipe down the hull/deck to remove any of the prior sand paper grit or compound abrasive grit material. Lesson #6: Use the least amount of abrasive sandpaper as required to sand out the problem areas. I know it sounds obvious… but when I first started I used 320 grit on one side of the hull to remove oxidation when perhaps 600-800 grit would have worked well in most areas. Since the boat needed gelcoat repairs perhaps applying the compounds at this stage was premature, maybe I should have done these next three steps after the gelcoat fixes? Next, applied the Super Duty rubbing compound. Next, applied the Perfect-It Rubbing Compound. Next, applied Finesse-It II Polishing Compound. Even with the slow start feature I still managed to sling polishing compound all over the place. I seemed to do better with the rubbing compounds vs. the polishing compound. Maybe there are better techniques to apply the liquid compound to the surface… I managed to get splatter all over and needed to thoroughly clean the interior surfaces of the boat. By the time I applied the second coat applied Finesse-It II Polishing Compound, I finally managed to keep the splatter to a minimum (used less compound too). Lesson #7: Pay attention to the polish/ compound splatter and use the polisher outside, spread the compound on the surface evenly with the pad, be sure to thoroughly cover the interior surfaces of the boat. While I had the boat in pieces, I fixed few other items, including the stereo wiring rat’s nest, replaced the observer seat back rest hardware with the correct size stainless steel hardware and replaced the all the speedometer tubing all the way from the pitot tubes, to the stabilizer tubes and finally to the speedometers. Now that the dash was buffed and free of paint, I installed the windshield with new gasket material. I used weather-strip gasket I picked from Lowes. The 10 foot length was enough to do the entire windshield. I installed the seats with the correct stainless steel hardware. Now the boat was shipped off to RC Fiberglass in Orlando, FL for the gelcoat repairs. To me color matching 21 a year old UV aged gelcoat is more art than science, I needed someone like Randy Arnold for assistance. No way I could get this done myself with acceptable results without getting help. Those bogus starboard side gelcoat repairs especially the faded areas fixed w/ yellow paint I mentioned earlier came back to haunt me. In order to get acceptable results for good color match required me to authorize a re-gelcoat of the entire yellow stripe all the way around, plus fix a few more gelcoat issues pointed out by Randy. Randy does excellent work I highly recommend him to anyone in need of gelcoat/fiberglass repairs in Central FL. I believe Woody uses RC Fiberglass as well. Here’s how it looks with the new yellow gelcoat and other gelcoat fixes. I replaced the old Bimini top cleats with new cleats to help clear the windshield frame these have 15 degree vertical offset to help clear the windshield frame. Installed the remaining hull and deck hardware this time using 3M 4200 adhesive sealant. 

Still need the decals to be completed but will post final photos with new decals and vinyl graphics ……Not quite ready for Linda’s final inspection. 

Admittedly, I am not going to win any best in show awards, overall I am pleased with the results. It displays very well out on the Butler Chain of Lakes, The Bay Hill Marina has much newer boats that don’t look as good as our 21 year old vessel. This boat was only going to be a starter boat only a temporary boat until I could find a ’93 or newer boat. We now may just hang onto it. Hopefully this post will help another CCFAN member with a similar task in the future. Finally, a big thanks the following individuals for their contributions. 1. Lil’ Bull (Bull); Bull’s Inboard Marine Power, Orlando, FL 2. Randy Arnold; RC Fiberglass, Orlando, FL - Gelcoat Repairs 3. Bruce Foutz @ N3 Boatworks - Ski Nautique Graphics, Bow and Stern Graphics, Pinstripes 4. David Wood (Woody); South East Marine, Orlando, FL - Correct Craft Graphics, and General CC Advice - 5. Wendel Carpenter; E&W Signs, Orlando, FL - Other Correct Craft Decals - 5. CCFAN member Marty Mabe - AWSA and Glove Box Decals 7. CCFAN member - Paul Oxley - Warning Caution Decals 8. CCFAN member - Tim Benjamin - 1989 World Champoinship Decals And thanks to Tim, Hollywood and Pete for their advice and information in their posts that helped provide me with the confidence to tackle this job. I really have a new appreciation for all the effort that goes into maintaining these older Correct Craft boats. One Final Lesson: I should have listened to my dad’s advice…which was to practice golf and get a PGA tour card…get a well paying career with PGA tour so you can pay someone to do this type of work for you. Final Photos: 


|
|
 |
|
|
eric lavine
Grand Poobah 
Joined: August-13-2006 Location: United States Status: Offline Points: 13413 |
Post Options
Thanks(0)
Quote Reply
Posted: April-29-2010 at 10:05am |
|
yeah, but then you could end up like John Daly
|
|
|
"the things you own will start to own you"
|
|
|
|
|
Air206
Grand Poobah
Joined: September-28-2008 Location: Roanoke, VA Status: Offline Points: 3004 |
Post Options
Thanks(0)
Quote Reply
Posted: April-29-2010 at 10:38am |
|
Great Write UP! Well done Man! Thanks..........

|
|
|
|
|
Riley
Grand Poobah
Joined: January-19-2004 Location: Portland, ME Status: Offline Points: 7966 |
Post Options
Thanks(0)
Quote Reply
Posted: April-29-2010 at 10:38am |
|
Great thread and your boat is looking good! We're about to start the same task. There's something about bringing an old boat back that adds a lot of enjoyment to it, rather than paying someone else to do it or buying that original, mint condition boat.
|
|
|
|
|
Air206
Grand Poobah
Joined: September-28-2008 Location: Roanoke, VA Status: Offline Points: 3004 |
Post Options
Thanks(0)
Quote Reply
Posted: April-29-2010 at 10:44am |
|
It's only "new" for 2 hours..........

|
|
|
|
|
WakeSlayer
Grand Poobah

Joined: March-15-2006 Location: United States Status: Offline Points: 2138 |
Post Options
Thanks(0)
Quote Reply
Posted: April-29-2010 at 11:24am |
|
Wow. Great write up, Randy!!!
Thanks for taking the time to do that. Very well written and detailed. It always feels good to tackle such an enormous project and bring it all the way home. Your boat looks awesome!!! MIke |
|
|
Mike N
1968 Mustang |
|
|
|
|
MI-nick
Gold Member 

Joined: January-12-2009 Location: Ypsilanti, MI Status: Offline Points: 815 |
Post Options
Thanks(0)
Quote Reply
Posted: April-29-2010 at 11:49am |
|
did I read correctly that you re-gelled the entire yellow stripe...after you wetsanded and buffed it?? am I crazy or is that a tremendous waste of time??

anyway, it looks really good now!! |
|
|
As far as I can tell, I'm not quite sure...
|
|
|
|
|
Keeganino
Grand Poobah

Joined: October-27-2009 Location: North Carolina Status: Offline Points: 2063 |
Post Options
Thanks(0)
Quote Reply
Posted: April-29-2010 at 1:44pm |
|
Boat looks great and your trials and errors will help the entire community. I am getting ready to wet sand my hull and repaint the waterline and replace the decals. Thanks for a great write up!

|
|
|
"working on these old boats may not be cost effective but as it shows its what it brings into your life that matters" -Roger
1973 Skier |
|
|
|
|
Okie Boarder
Gold Member
Joined: August-31-2009 Location: OK Status: Offline Points: 779 |
Post Options
Thanks(0)
Quote Reply
Posted: April-29-2010 at 2:39pm |
|
Great write and and a great job. It is definitely a lot of work restoring gel like that. I did mine last year. Now all you have to do is maintain it well and it will keep it's shine.
|
|
|
|
|
MartyMabe
Grand Poobah

Joined: February-21-2006 Location: High Point,NC Status: Offline Points: 4004 |
Post Options
Thanks(0)
Quote Reply
Posted: April-30-2010 at 7:51pm |
|
Great job, Randall
|
|
|
|
|
jbear
Grand Poobah

Joined: January-21-2005 Location: Lake Wales FL. Status: Offline Points: 8193 |
Post Options
Thanks(0)
Quote Reply
Posted: April-30-2010 at 11:37pm |
|
Wow what a post Randy. You left no detail out I would think. Boat looks just awesome. You gotta feel great about it and Linda must be very proud of you.
Whole thing written like a true engineer. john |
|
|
"Loud pipes save lives"
AdamT sez "I'm Canadian and a beaver lover myself"... |
|
|
|
|
PAPA
Senior Member
Joined: October-06-2009 Location: Fremont, In Status: Offline Points: 202 |
Post Options
Thanks(0)
Quote Reply
Posted: May-01-2010 at 11:21am |
|
Randy, Nice job ! Boat came out looking great. Thanks for posting in such detail as I am contemplating wet sanding our 1977. You can definately be proud of your work. John.
|
|
|
|
|
MartyMabe
Grand Poobah
Joined: February-21-2006 Location: High Point,NC Status: Offline Points: 4004 |
Post Options
Thanks(0)
Quote Reply
Posted: May-02-2010 at 12:09am |
|
Well guys, I'm in the same boat. Was gonna wait till this fall to do my wet-sanding and re-decaling, but I got an e-mail from someone upon the return trip from the White Lake 'Mini'.So I had to start the 'punishment' as Randy calls it on the 93.
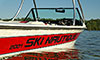
And again, the son-in-law was supposed to help but skipped out saying he had to go look at a car. He's getting a Nissan Armada now., well it'll be my daughter's. So 6 hours straight of wet-sanding Saturday the 1st with 2000 grit 3M only.Probably will wet-sand again Sunday the 2nd, Only the Purple, then maybe start with the compounding and buffing.I might be done with it this weekend.My hands are all cramping so if I misspell something, so be it. If it turns out OK, and this person gives it the OK, I'll let you know why this had to be done right away.(No Donald, I'm not selling it!) Although I was offered $8500 for it the other day. Here's a few pics: 


|
|
|
|
|
Kristof
Grand Poobah
Joined: October-08-2007 Location: Bree, Belgium Status: Offline Points: 3412 |
Post Options
Thanks(0)
Quote Reply
Posted: November-07-2010 at 6:20pm |
Since I'm in for the punishment or purgatory this winter, just a question... So it would be OK to sand the first time (thicker grit) with a power tool? I have two DA rotary sanders, one that works on compressed air and one on electricity. Would you wetsand with this tool or dry? |
|
|
|
|
BuffaloBFN
Grand Poobah

Joined: June-24-2007 Location: Gainesville,GA Status: Offline Points: 6094 |
Post Options
Thanks(0)
Quote Reply
Posted: November-07-2010 at 10:51pm |
|
Kristof, your boat is about the same age as mine...so no!
Get an assortment of paper and see what makes a difference. Every 'scratch' from one grit has to be removed by the next. Trust me, your boat will look a lot bigger when you realize what you're in for...don't make it worse. Trade in your sanders for a good buffer. 
|
|
|
|
|
BuffaloBFN
Grand Poobah
Joined: June-24-2007 Location: Gainesville,GA Status: Offline Points: 6094 |
Post Options
Thanks(0)
Quote Reply
Posted: November-07-2010 at 10:52pm |
|
And don't sand any of it dry.
Edit-I forget you're other thread...sand it dry if you're re-gelling.? Edit 2-Found it, you want to wet sand to restore the true color of your boat and then have the repair done. You don't want the repair matched to the wrong color. |
|
|
|
|
Gary S
Grand Poobah

Joined: November-30-2006 Location: Illinois Status: Offline Points: 14096 |
Post Options
Thanks(0)
Quote Reply
Posted: November-07-2010 at 11:14pm |
|
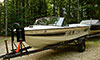
I did mine with a DA sander and was very happy with the finish.I ended up starting with 320 and finished up with 2000.If I ever have to do this again Im going to get one of these
|
|
|
|
|
Kristof
Grand Poobah
Joined: October-08-2007 Location: Bree, Belgium Status: Offline Points: 3412 |
Post Options
Thanks(0)
Quote Reply
Posted: November-08-2010 at 7:02am |
|
Gary,
Mine looks similar to the one in the link you posted. Greg, Since the red has faded beyond recognition I'll wetsand it with the sander Gary mentionned first. Then afterwards wetsand by hand with the finer papers and follow the procedure by polishing and buffing with the advised 3M products. Got me a good buffer for that purpose... 
|
|
|
|
|
BuffaloBFN
Grand Poobah
Joined: June-24-2007 Location: Gainesville,GA Status: Offline Points: 6094 |
Post Options
Thanks(0)
Quote Reply
Posted: November-08-2010 at 7:24am |
|
OK then, I'll hush.
|
|
|
|
|
Kristof
Grand Poobah
Joined: October-08-2007 Location: Bree, Belgium Status: Offline Points: 3412 |
Post Options
Thanks(0)
Quote Reply
Posted: November-08-2010 at 8:47am |
|
Correct me if I'm wrong Greg, but you got up REALLY early this morning.
Normally Pete's always the first to reply...
|
|
|
|
|
8122pbrainard
Grand Poobah

Joined: September-14-2006 Location: Three Lakes Wi. Status: Offline Points: 41045 |
Post Options
Thanks(0)
Quote Reply
Posted: November-08-2010 at 9:34am |
Kristof, Sorry but I missed this thread yesterday. I must be needing to go to the eye doctor! Greg's not up early, he just hadn't gone to bed yet!!
The electric will work wet as long as you use wet/dry hook and loop paper. A spray bottle of water in one hand and the RO in the other. You really don't need much water. A squirt every once in awhile just to keep the sanding slurry from clogging up the paper is all that's needed. |
|
|
|
|
Riley
Grand Poobah
Joined: January-19-2004 Location: Portland, ME Status: Offline Points: 7966 |
Post Options
Thanks(0)
Quote Reply
Posted: November-08-2010 at 10:33am |
|
Pete, have you used an electric sander on a boat for wet sanding? After watching David wet sand our Mustang starting with 400 and working up to 1500, I can see how it would be tempting go use one, but wonder if it would come out as good.
|
|
|
|
|
8122pbrainard
Grand Poobah
Joined: September-14-2006 Location: Three Lakes Wi. Status: Offline Points: 41045 |
Post Options
Thanks(0)
Quote Reply
Posted: November-08-2010 at 10:55am |
Bruce, It works great! I've used the electric on glass as well on painted wood. Since the electric is more aggressive, I do recommend starting with a finer grit paper. Dave (mojo) used it on his mahogany colored glass. |
|
|
|
|
Riley
Grand Poobah
Joined: January-19-2004 Location: Portland, ME Status: Offline Points: 7966 |
Post Options
Thanks(0)
Quote Reply
Posted: November-08-2010 at 2:47pm |
|
I'll have to buy one for my son, he's got a job coming up soon. Maybe the customer won't know the difference.
|
|
|
|
|
Kristof
Grand Poobah
Joined: October-08-2007 Location: Bree, Belgium Status: Offline Points: 3412 |
Post Options
Thanks(0)
Quote Reply
Posted: November-08-2010 at 6:33pm |
|
So, Pete, what grit would you suggest to start with? 600? 800?
|
|
|
|
|
8122pbrainard
Grand Poobah
Joined: September-14-2006 Location: Three Lakes Wi. Status: Offline Points: 41045 |
Post Options
Thanks(0)
Quote Reply
Posted: November-08-2010 at 7:27pm |
|
Kristof,
That really depends on how bad the gel is oxidized. I'd start with 600 but if that's not doing it, go with a light pass with 400. You'll see Gary started with 320 but his boat is older and his gel was pretty badly oxidized. |
|
|
|
|
Kristof
Grand Poobah
Joined: October-08-2007 Location: Bree, Belgium Status: Offline Points: 3412 |
Post Options
Thanks(0)
Quote Reply
Posted: November-08-2010 at 7:30pm |
|
Thanks Pete
|
|
|
|
|
Swatkinz
Platinum Member

Joined: December-03-2003 Location: Lexington, SC Status: Offline Points: 1307 |
Post Options
Thanks(0)
Quote Reply
Posted: November-10-2010 at 2:38pm |
|
Randall, where did you get your vertical offset cleats for the bimini? I just put a bimini on my boat this summer and my only regret is that I couldn't figure out how to get the bimini installed to fold over the windshield. vertical mounting posts never occurred to me. Thanks too for the tutorial on your boat's facelift. It looks great
|
|
|
Steve
2011 Sport/Air 200 Excalibur 343 2017 Boatmate Tandem Axle Trailer Former CC owner (77, 80, 95, 88, all SNs) Former Malibu owner (07, 09) |
|
|
|
|
Hollywood
Moderator Group

Joined: February-04-2004 Location: Twin Lakes, WI Status: Offline Points: 13523 |
Post Options
Thanks(0)
Quote Reply
Posted: November-10-2010 at 2:42pm |
|
You and Bama are really putting some of us (I'm feeling exceedingly guilty) to shame with those 89s you're shining up.
|
|
|
|
|
Gary S
Grand Poobah
Joined: November-30-2006 Location: Illinois Status: Offline Points: 14096 |
Post Options
Thanks(0)
Quote Reply
Posted: November-11-2010 at 2:00am |
|
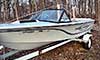
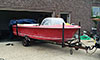
Kristof,Here is the boat when I got it and the last one is from after I sanded it this summer.I started with 400 but it was not doing much.Some places I used 220.I don't think yours is that bad,so start with 400 and see how it looks.Be careful on the edges,on mine that is where the gelcoat is the thinnist.
|
|
|
|
|
Post Reply
|
Page 12> |
 Tweet
Tweet
|
| Forum Jump | Forum Permissions You cannot post new topics in this forum You cannot reply to topics in this forum You cannot delete your posts in this forum You cannot edit your posts in this forum You cannot create polls in this forum You cannot vote in polls in this forum |


 Topic Options
 89Ski_Nautique wrote: