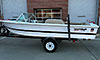
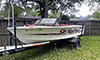
 Boats For Sale:


1969 Mustang Stringer Rebuild |
Post Reply 
|
Page <1 1011121314 15> |
| Author | ||
vondy 
Platinum Member 

Joined: November-29-2007 Location: Dallas, Texas Status: Offline Points: 1116 |
 Post Options Post Options
") Thanks(0) Thanks(0)
 Quote Reply Quote Reply
 Posted: June-15-2011 at 9:18pm Posted: June-15-2011 at 9:18pm |
|
|
Here's one for ya Pete. I was hoping to keep my strut on the boat but had to remove the bolts to completely grind the bilge. Well of course the strut fell off so once everything is said and done I'll have to get that back on. I feel like it may be more involved than just applying 5200 and bolting back up.
Also, there was no wood backing plate for the strut, bolted straight to the hull, is that normal? |
||
 |
||
|
8122pbrainard
Grand Poobah 

Joined: September-14-2006 Location: Three Lakes Wi. Status: Offline Points: 41040 |
Post Options
Thanks(0)
Quote Reply
Posted: June-15-2011 at 9:57pm |
|
Check just to make sure there's no wood buried in the glass. I have seen thickened areas around the struts using glass only and no wood. Well, now you know the strut wasn't bedded very well in a decent compound. It's probably good it came off!! When you get ready to put it back on, dry fit it and with a new cutlass bearing (might as well  ) get the shaft back up into the log. See if the shaft turns freely (is happy) when it's roughly centered in the log. If not, see which direction you need to move the shaft to make it turn easier and we'll look at shimming the strut. ) get the shaft back up into the log. See if the shaft turns freely (is happy) when it's roughly centered in the log. If not, see which direction you need to move the shaft to make it turn easier and we'll look at shimming the strut.
|
||
|
||
|
vondy
Platinum Member
Joined: November-29-2007 Location: Dallas, Texas Status: Offline Points: 1116 |
Post Options
Thanks(0)
Quote Reply
Posted: June-16-2011 at 3:04am |
|
|
Looked like clear silicone sealing up the bottom of the strut. I assume I should use 5200 when reinstalling?
|
||
|
||
|
8122pbrainard
Grand Poobah
Joined: September-14-2006 Location: Three Lakes Wi. Status: Offline Points: 41040 |
Post Options
Thanks(0)
Quote Reply
Posted: June-16-2011 at 9:10am |
|
Probably and one of the reasons "I hate silicone"!! 
Yes, 5200 is my choice. |
||
|
||
|
vondy
Platinum Member
Joined: November-29-2007 Location: Dallas, Texas Status: Offline Points: 1116 |
Post Options
Thanks(0)
Quote Reply
Posted: June-16-2011 at 11:26am |
|
|
Should have the floor, vinyl and all, down at the latest Sunday. Have to if I'm going to meet my deadline. Turning back to the engine now. I've brought some stuff up in another post but want to consolidate here now.
First I need to get this rear main seal out. It's rope. No luck so far and I believe I'll have to lift the crank up a bit. Question is, what happens if I remove the main bearing caps and lift the crank off of the rear enough to get to the seal? Can I simply bolt everything back into place without things getting out of wack? Would it do me any good to replace the main bearings with out doing any machining to the crank? Don't have the time or money to rebuild the engine. Perhaps next year. Last question for this post... I put on my new double roller. Simply pulled the old one off and put the new one on without turning the valve train over at all so my assumption is everything should still be in the same place. The sprocket on this new one has 3 positions for advancing, retarding, etc. I am also assuming that is irrelevant in my case here. I don't see how it could change anything if I didn't move anything. Thanks guys! I'm seeing that light. 
|
||
|
||
|
WakeSlayer
Grand Poobah

Joined: March-15-2006 Location: United States Status: Offline Points: 2138 |
Post Options
Thanks(0)
Quote Reply
Posted: June-16-2011 at 2:07pm |
|
|
You should be able to push that seal through. If not I would only loosen the cap bolts just enough to be bale to do so. Mine came out very easily without loosening anything. I did re-torque the cap bolts afterwards. IIRC they did move a tad on a few of them. Make sure you have the torque order and specs for your engine if you do. Did you not replace the front seal while you had the timing cover off?
I had my disty out when I replaced my timing set. so I just lined up the marks on the crank and cam and started over on the timing. Easy enough. Are you painting the motor now? Or waiting til next winter? Sorry, haven't looked at the other thread. |
||
|
Mike N
1968 Mustang |
||
|
||
|
vondy
Platinum Member
Joined: November-29-2007 Location: Dallas, Texas Status: Offline Points: 1116 |
Post Options
Thanks(0)
Quote Reply
Posted: June-16-2011 at 2:20pm |
|
|
Mike, I tried pushing, just mushes the seal down. I also screwed a small screw in and tried pulling, no luck either, just pulled material out. It took a bit to get the rope out of the cap itself, left lots of debris that needed cleaning out.
Timing cover is still off, I have the seal, going to tackle the rear seal first. Yes will paint the motor now. Got to clean the beast first. I thought about using degreaser and a pressure washer once everything is back together. Making sure to protect and stay away from the carb intake area with the pressure washer. What do y'all think about that? |
||
|
||
|
WakeSlayer
Grand Poobah
Joined: March-15-2006 Location: United States Status: Offline Points: 2138 |
Post Options
Thanks(0)
Quote Reply
Posted: June-16-2011 at 2:47pm |
|
|
I scrubbed the daylights out of mine with a citrus based degreaser and then wiped with acetone. I did not have the luxury of a power washer being middle of winter when I did it.... I did clean and panit whilst I had the entire engine stripped down. manifolds, covers, bellhousing, oil pan, etc everything was off it.
|
||
|
Mike N
1968 Mustang |
||
|
||
|
vondy
Platinum Member
Joined: November-29-2007 Location: Dallas, Texas Status: Offline Points: 1116 |
Post Options
Thanks(0)
Quote Reply
Posted: June-17-2011 at 3:37am |
|
|
Well guys I'm afraid this rear seal is going to beat me. When I push it only mushes it down. I screwed a small screw into the other end to pull with pliers and it just pulls out bits of seal. I loosed the bearing caps but the crank will not raise up any. Should I pull the caps off of all but the front one and try to raise it?
|
||
|
||
|
vondy
Platinum Member
Joined: November-29-2007 Location: Dallas, Texas Status: Offline Points: 1116 |
Post Options
Thanks(0)
Quote Reply
Posted: June-20-2011 at 6:53pm |
|
|
When it comes to lag bolts, is there any specific metal I should be using? Regular stainless?
What if I went with a bolt like this? 
That way I could pull the engine without having to pull the lags. |
||
|
||
|
WakeSlayer
Grand Poobah
Joined: March-15-2006 Location: United States Status: Offline Points: 2138 |
Post Options
Thanks(0)
Quote Reply
Posted: June-20-2011 at 6:57pm |
|
|
I like that idea, and wish I would have done that on the Mustang. That is my plan for the 67 when I get to it.
|
||
|
Mike N
1968 Mustang |
||
|
||
|
TX Wind
Senior Member 

Joined: March-29-2011 Location: near Dallas Status: Offline Points: 333 |
Post Options
Thanks(0)
Quote Reply
Posted: June-20-2011 at 6:59pm |
|
|
Absolutely, positively stainless. You've put the last stringer job you should have to do in a lifetime in there right? So why not the last bolt as well?
|
||
|
||
|
vondy
Platinum Member
Joined: November-29-2007 Location: Dallas, Texas Status: Offline Points: 1116 |
Post Options
Thanks(0)
Quote Reply
Posted: June-20-2011 at 7:10pm |
|
|
I didn't know if I needed a certain grade of stainless or some other material that holds up better than stainless.
|
||
|
||
|
8122pbrainard
Grand Poobah
Joined: September-14-2006 Location: Three Lakes Wi. Status: Offline Points: 41040 |
Post Options
Thanks(0)
Quote Reply
Posted: June-20-2011 at 7:27pm |
|
Jeff, I can tell you haven't been around wood boats very much!!! Lifetime? You are optimistic!!!! Guess what, stainless rusts if kept moist!! There are those that made the mistake of using them for their wood boat restorations. They found out the hard way later that only silicon bronze should be used.
David, McMaster does have the hanger bolts in 18-8 stainless. That's the best grade they are made in. You will want to make sure the holes in the new stringers get a good CPES treatment and then plenty of 5200. Traditionally silicone bronze lags were used but I think those days are long passed. |
||
|
||
|
8122pbrainard
Grand Poobah
Joined: September-14-2006 Location: Three Lakes Wi. Status: Offline Points: 41040 |
Post Options
Thanks(0)
Quote Reply
Posted: June-20-2011 at 8:54pm |
|
|
David,
I took a closer look at the hanger bolts. I don't feel you'll get them long enough. With the tapered wood wedges under the mounts, I've seen/removed lags 6-7" long!!! There is a alternate to your idea plus you can go to a better grade of stainless if you want. Epoxy type 316 SS threaded rod in the hole. It's a common and favorite method the Grougeon (West Systems) boys used. The hole needs to be about 1&1/2 the diameter of the threaded rod so for 3/8", I'd go with a 1/2" hole. CPES'd well and then set is resin with a high strength filler. At work, we've been epoxy setting threaded rod in concrete instead of concrete expansion anchors for years. Haven't had one loosen up yet!!! We have however had PLENTY of the expansion anchors fail through the years!! The last epoxy set we did last month was using 1&1/2" threaded rod for anchoring a press break weighing 120,000 pounds.
|
||
|
||
|
vondy
Platinum Member
Joined: November-29-2007 Location: Dallas, Texas Status: Offline Points: 1116 |
Post Options
Thanks(0)
Quote Reply
Posted: June-20-2011 at 9:12pm |
|
|
||
|
8122pbrainard
Grand Poobah
Joined: September-14-2006 Location: Three Lakes Wi. Status: Offline Points: 41040 |
Post Options
Thanks(0)
Quote Reply
Posted: June-20-2011 at 9:37pm |
|
|
David,
The problem with Mcmaster, you can never get a direct link to the exact part/product on their site. I've tried many times!! Some work but most don't. When using their search (BTW a fantastic one) just key in on the 316 stainless material. Don't worry about all the other specs that pop up in the search. Keep us informed if you want to carry through with this idea and we'll talk. The only problem I see is it may create some issues with adjustability in the future, BUT, you are doing a top notch stringer job so it will last for years!!
|
||
|
||
|
TX Wind
Senior Member
Joined: March-29-2011 Location: near Dallas Status: Offline Points: 333 |
Post Options
Thanks(0)
Quote Reply
Posted: June-21-2011 at 12:40pm |
|
Pete, I was overstating it a bit as a compliment to the fine job he has done on the stringers. I do know that stainless will rust. My father is a marine contractor remember?
However, your suggestion with epoxy setting the bolts is an excellent one. We used epoxy set in the wind industry to set foundation bolts into the bedrock. We tensioned the bolts to 620,000 pounds. I never calculated it but they told me that it would launch a 4.25" Nut about 5 miles if it broke. The thrust vector equivalent at the top is the same as a 757 so the foundation is under a dynamic torquing load in excess of 22,000,000 foot lbs. This often exceeds the compressive strength of even the best concrete, so epoxy bedding is also used to create the foot for the tower and spread the load across the concrete foundation to prevent pulverizing the concrete. Epoxy is some good *************** David. Our field break tests of our epoxy were around 18,000 psi for compressive strength compared to 3000 for the typical sidewalk. By the way Pete. Since you're a Wisconsin boy, I built a couple of the windfarms up by Fond du Lac. I worked for Alliant Energy and we built a windfarm for Wisconsin Energy. Talk about awkward since they are competitors. And cold? You guys have to be kidding me. I'm still defrosting. I'll take a TX 100 over a Wisconsin -20 any day of the week. Oh and for the record Pete, we used a different foundation in Wisconsin. |
||
|
||
|
8122pbrainard
Grand Poobah
Joined: September-14-2006 Location: Three Lakes Wi. Status: Offline Points: 41040 |
Post Options
Thanks(0)
Quote Reply
Posted: June-21-2011 at 12:49pm |
|
Jeff, I drive by the farm all the time on my way up north. I'm always amazed at the size of it - from Hwy. 41, you can't see far enough west to even see how far they go. How many are in that farm? |
||
|
||
|
TX Wind
Senior Member
Joined: March-29-2011 Location: near Dallas Status: Offline Points: 333 |
Post Options
Thanks(0)
Quote Reply
Posted: June-21-2011 at 1:11pm |
|
|
Ahhh...the ones off 41 are on your left. I did not build those but if I remember correctly there were about 80 there. My direct responsibility was for Bluesky/ Greenfields which were actually two farms rolled into one representing 88 turbines off of 151 near Malone. In relative terms the Wisconsin turbines were actually some of the smaller turbines I installed. Only 1.67 MW compared to the more typical 2.1MW and some 2.5MW I had put up. My function was as the Civil Construction Manager which means I was responsible for coordination of all of the construction from the clearing of trees to the erection and final walkdowns excluding tower wiring and substation. I was also indirectly involved with Cedar Ridge which has another 50 turbines or so and is also in the same area.
They are literally beyond the imagination they are so large Pete. I was in constant amazement everyday. |
||
|
||
|
TX Wind
Senior Member
Joined: March-29-2011 Location: near Dallas Status: Offline Points: 333 |
Post Options
Thanks(0)
Quote Reply
Posted: June-21-2011 at 1:30pm |
|
|
Some unique perspectives Pete. The little dot on top is a man. Compare the crane hook to him.

Now a close up of the man. 
Talk about balls.....this guy would lean out to the end of his harness and grab the rotor to help guide it in. Mostly so he could see alignment. At nearly 50 tons it's too heavy for him to really move it much. |
||
|
||
|
TX Wind
Senior Member
Joined: March-29-2011 Location: near Dallas Status: Offline Points: 333 |
Post Options
Thanks(0)
Quote Reply
Posted: June-21-2011 at 1:48pm |
|
|
So there you go David. Pete has just completely over engineered your mounting bolt issue on a reasonable budget. That's the way it should be.
Pete, we are so blessed to have you on this site. You are the rarest form of engineer; anally meticulous and yet practical. In my experience most engineers can't build a shoe box if their mother's life depended on it. But you could give it a helm an engine and a prop. God knew Jesus couldn't be here for a while so he gave us ski boats to walk on water with. Then he gave us Pete to keep us from screwing them up. |
||
|
||
|
vondy
Platinum Member
Joined: November-29-2007 Location: Dallas, Texas Status: Offline Points: 1116 |
Post Options
Thanks(0)
Quote Reply
Posted: June-22-2011 at 12:52pm |
|
|
Jeff come put one of those beast in my back yard, with all the wind we have been getting around here I could power most of the area.
Thinking a little more about this idea, it would cause some adjustment issues in the future. You could not adjust the wedges with two anchor bolts sticking out. Unless you cut a slot in the wedges so you could slide them back and forth. But then your relying only on down force of the bolt to hold the wedges in place. Guess I'll stick with regular lags. Or if I could find hanger bolts long enough that would be a better idea. If I pull then engine I can put her right back in without messing the the lags. But if the alignment is off, the lags will still be removable. Thoughts? |
||
|
||
|
vondy
Platinum Member
Joined: November-29-2007 Location: Dallas, Texas Status: Offline Points: 1116 |
Post Options
Thanks(0)
Quote Reply
Posted: June-22-2011 at 5:38pm |
|
|
So I just got back from a shop down the street that specializes in screw, bolts, etc. They did not have any hanger bolts in stainless, neither did the hardware store I went to. Don't even see any on McMaster's. There are some here hangers they have 5 and 6 inchers. What size diameter is normal for the mounts? 3/8?
|
||
|
||
|
TX Wind
Senior Member
Joined: March-29-2011 Location: near Dallas Status: Offline Points: 333 |
Post Options
Thanks(0)
Quote Reply
Posted: June-22-2011 at 5:55pm |
|
Sure thing David. I just happen to have a spare 600 ton crane sitting around and an extra generator in my backyard. I know what you mean about the wind lately. I thought my Mastercraft was a submarine this weekend. The old S&S Mastercrafts sit extremely low as it is. The nose was constantly under water. I would think the down force on the wedges would be plenty myself. If you use stud bolts you could align first, mark and then drill the wedge. |
||
|
||
|
vondy
Platinum Member
Joined: November-29-2007 Location: Dallas, Texas Status: Offline Points: 1116 |
Post Options
Thanks(0)
Quote Reply
Posted: June-23-2011 at 12:53pm |
|
|
I measured my old lags and they are 1/2 inch diameter and 6 inches long. What do you think Pete? I know you got some wedges on your boat
|
||
|
||
|
8122pbrainard
Grand Poobah
Joined: September-14-2006 Location: Three Lakes Wi. Status: Offline Points: 41040 |
Post Options
Thanks(0)
Quote Reply
Posted: June-23-2011 at 2:53pm |
|
David, Go back with the same size. Before the days of the adjustable engine mount. most boat manufacturers used slotted cast iron wedges. You move them fore to aft for the height adjustment and then there's holes in them so you screw them to the stringer to keep their position. CC went the "less expensive" route with the wood scraps laying around the shop!! The cast irons are around but not made anymore. They usually come from parted out wood boats. I do know a couple people that still have them if that's a option you want to go with. For me, there's really nothing wrong with the wood. The cast ones are just a bit easier to use.
|
||
|
||
|
vondy
Platinum Member
Joined: November-29-2007 Location: Dallas, Texas Status: Offline Points: 1116 |
Post Options
Thanks(0)
Quote Reply
Posted: June-23-2011 at 2:59pm |
|
|
I would love anything that is easier to adjust. You say they basically have slots to slide the wedges up and down? That way you don't have to re drill if you have to make an adjustment. You think you could get me some? Before the stringer job I used 4 wedges, two for the front because I could not get the alignment right without adjusting the front.
|
||
|
||
|
8122pbrainard
Grand Poobah
Joined: September-14-2006 Location: Three Lakes Wi. Status: Offline Points: 41040 |
Post Options
Thanks(0)
Quote Reply
Posted: June-23-2011 at 4:08pm |
|
|
David,
Call: Ted Cartner @ 847 395 8902 or Jim Staib @ 815 344 WOOD There are two sizes of the cast iron wedges. You'll most liely want the smaller ones. Yes, when you make a height adjustment to ether the front or back, it's typical to have to adjust the other end as well. |
||
|
||
|
vondy
Platinum Member
Joined: November-29-2007 Location: Dallas, Texas Status: Offline Points: 1116 |
Post Options
Thanks(0)
Quote Reply
Posted: June-23-2011 at 5:46pm |
|
|
Thanks Pete!
I just got off the phone with Ted, he's sending me 4 of the small ones today. Hopefully I'll get them by Saturday. He suggest the longer ones but those are 9 inches long and I know I didn't leave that much of a notch in my floors for those. So getting the smaller 6 inch ones, pretty much the same length as my last ones. Originally I only had wedges in the back. Not sure how they ever thought you could align it perfectly without some for the front. |
||
|
||
|
Post Reply
|
Page <1 1011121314 15> |
 Tweet
Tweet
|
| Forum Jump | Forum Permissions You cannot post new topics in this forum You cannot reply to topics in this forum You cannot delete your posts in this forum You cannot edit your posts in this forum You cannot create polls in this forum You cannot vote in polls in this forum |


 Topic Options
 vondy wrote: