 Boats For Sale:


How to - Replace Rudder Packing |
Post Reply 
|
| Author | |
bhectus 
Platinum Member 

Joined: July-04-2010 Location: Gator Country! Status: Offline Points: 1809 |
 Post Options Post Options
") Thanks(4) Thanks(4)
 Quote Reply Quote Reply
 Topic: How to - Replace Rudder Packing Topic: How to - Replace Rudder PackingPosted: March-04-2012 at 2:44am |
|
Figured I would document the process for others since I was needing to put new rudder port packing/grease in the SS today. I had recently gotten a new steering cable and the steering just didn't feel to good still, and after seeing how dried up and nasty the prop shaft packing was I figured the rudder's packing was most likely in similar shape. So hopefully this helps some of you!
First, on my '97 Super Sport, the rudder packing I used is 3/16". I chose to use the standard wax packing rope as that is what the local dealer stocks and it was cheap and I'm on a tight budget AND I don't like waiting for things. 1.) First thing you want to do is remove the prop-guard on your trailer. If you don't have a removeable one, leave your boat short on the trailer so that your rudder can be pulled all the way out. 
2.) You can use blocks, or a floor jack to support the rudder from the bottom. This is an important step! You'll wish you didn't skip this step when you remove the rudder securing bolt later. 3.) The tools you will want to have. That weird looking wrench in the middle can be found in the plumbing section of your local HD or Lowes. It is one of Pete's favorites! It's actually a really handy tool for this project in getting the packing nut off. (It's really a basin nut wrench for under the sink) 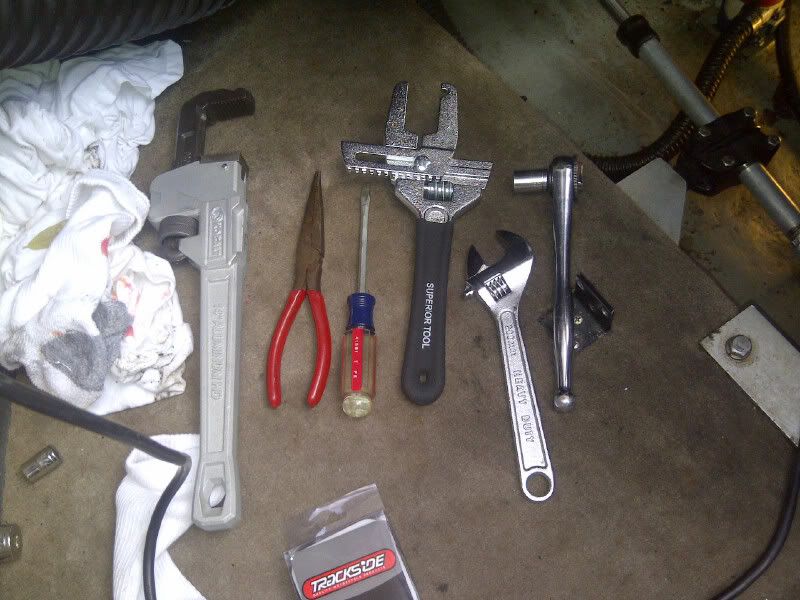
4.) Cut the safety wire and remove. Next, unbolt the clamp bolt and then the bolt on top of the rudder shaft. (this is where you will wish you had the rudder supported if you forgot to, it will most likely fall out.) 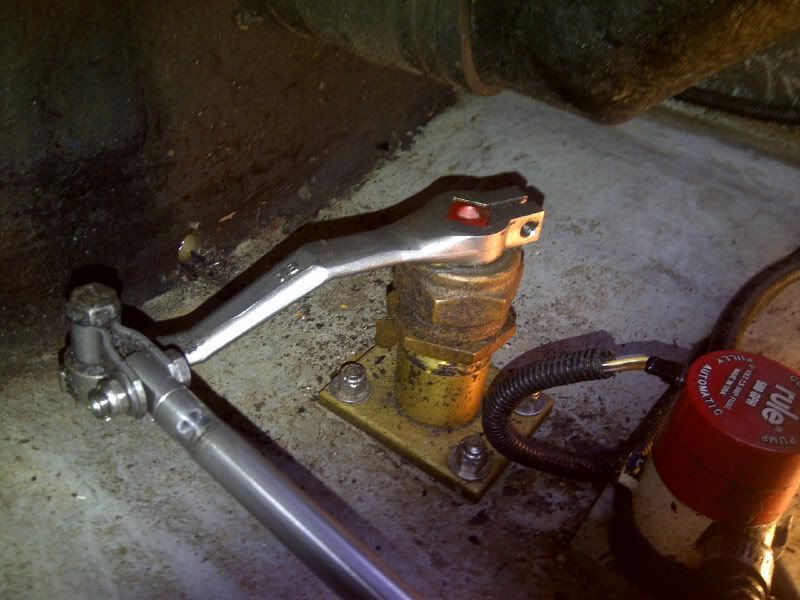
5.) Now you can stretch, I chose to get back under the boat and drop down the rudder. There was no grease left and it was really dry. Most likely the source of my steering problem. Use some good marine grease and give the shaft a nice thin layer of grease. 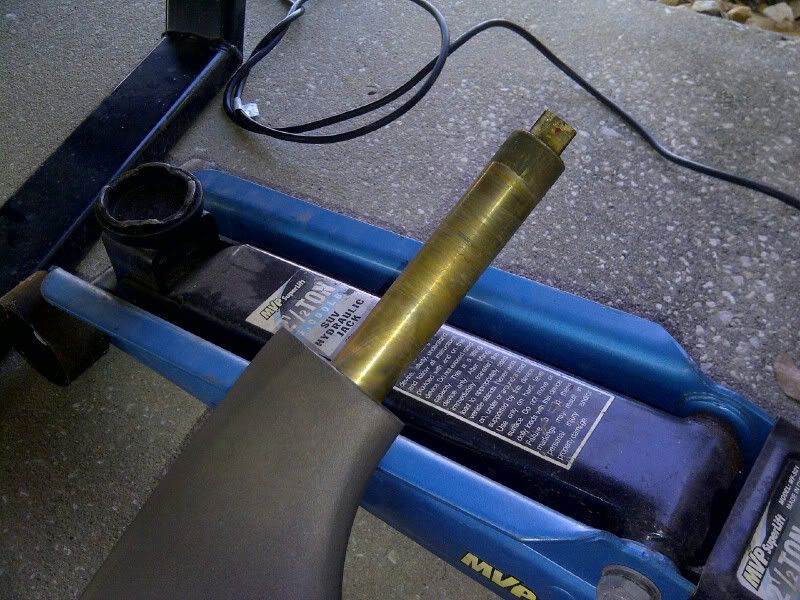
6.) Here's where that funky wrench is a lifesaver. Loosen the lock ring and then remove the packing nut. Lefty loosy on my v-drive, I assume it is the same for DD's. Once you get the packing nut all the way off you will need to remove the old packing rings. Mine had 4 rings. Don't discard them, you'll need to keep at least one and use to cut your new packing rope to length. This makes it easy. Here is what the old stuff will look like. 2 rings removed, 2 still in the nut: 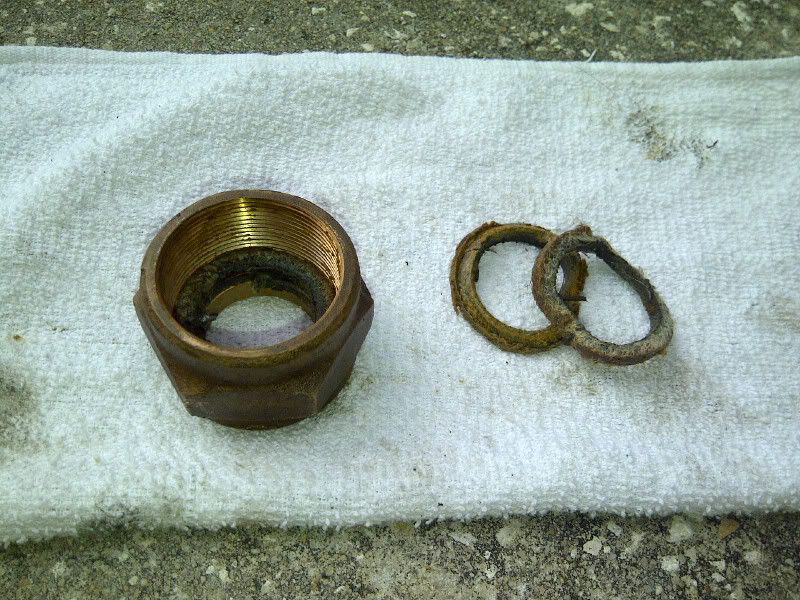
7.) Make sure to clean all the excess wax/buildup inside the packing nut, then put your new rings in. Make sure to stagger them. (I chose to run each 180 degrees different from the one below.) 8.) My rudder log didn't have a zerk fitting so I hand-loaded some more marine grease from the top, then re-inserted the rudder back in. Clean the excess off and then install packing nut. Leave it somewhat loose at this point. 9.) Grease both sides of tiller arm washer and re-install that, then replace tiller arm. Snug down top-bolt but do not overtighten. It just needs to be snug enough to hold the rudder in place. Too tight and it will affect your steering. Re-install clamp bolt. 10.) Put some new safety wire on in between the rudder bolt and clamp bolt, twist up and snip off the excess. 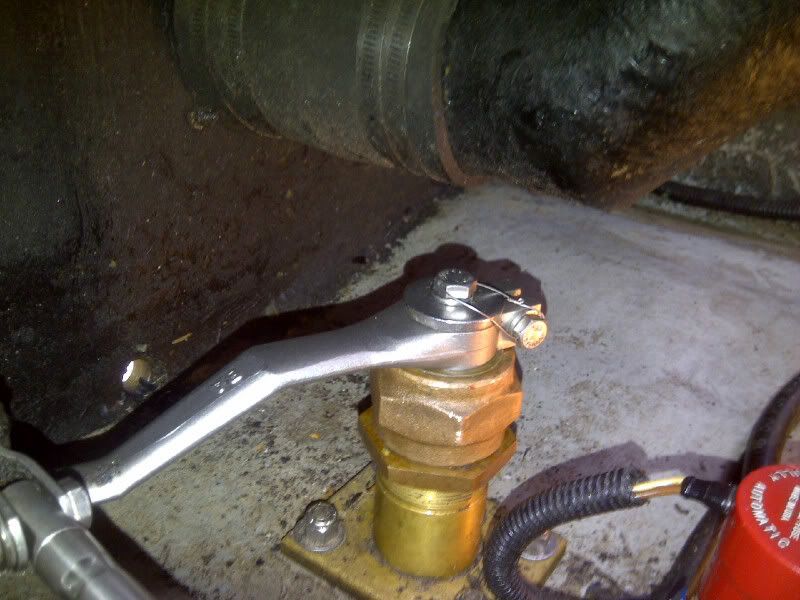
11.) Tighten up the packing nut. It isn't as big a deal here as it is on the prop-shaft packing as there is little to no worries of overheating, but you don't want too tight. That's it! You will probably have to re-adjust the packing nut after your first trip on the water, after that you should be good. 
|
|
|
'02 Ski Nautique 196 w/ 5.7 Apex bowtie - Sold
'87 Barefoot - sold '97 Super Sport Nautique - originally custom built for Walt Meloon '97 Ski Nautique '83 SN 2001 |
|
 |
|
|
KRoundy
Platinum Member

Joined: August-23-2010 Location: Lake Stevens Status: Offline Points: 1702 |
Post Options
Thanks(0)
Quote Reply
Posted: March-04-2012 at 2:50am |
|
You are awesome. Thanks for posting this. How long did it take to do the complete job?
|
|
|
Previous: 1993 Electric Blue/Charcoal Ski Nautique
Current: 2016 Ski Nautique 200 Open Bow |
|
|
|
|
bhectus
Platinum Member
Joined: July-04-2010 Location: Gator Country! Status: Offline Points: 1809 |
Post Options
Thanks(0)
Quote Reply
Posted: March-04-2012 at 2:59am |
|
All in all about a hour and a half. But one thing lead to another and then I ended up cleaning my bilge, center locker, removed dash pod, installed amplifier, tower speakers, and wired everything up. I was in the driveway all day. I love days like today, I feel so accomplished! hahaha!
|
|
|
'02 Ski Nautique 196 w/ 5.7 Apex bowtie - Sold
'87 Barefoot - sold '97 Super Sport Nautique - originally custom built for Walt Meloon '97 Ski Nautique '83 SN 2001 |
|
|
|
|
connorssons
Platinum Member
Joined: January-17-2009 Location: Michigan Status: Offline Points: 1414 |
Post Options
Thanks(0)
Quote Reply
Posted: March-04-2012 at 3:00am |
|
Nice job on the post, now you can do my 72 sep its a real bitch getting under the motor.

|
|
|
|
|
Kristof
Grand Poobah 
Joined: October-08-2007 Location: Bree, Belgium Status: Offline Points: 3390 |
Post Options
Thanks(0)
Quote Reply
Posted: March-04-2012 at 4:15pm |

I love DIY's!! We need more of them here... On my BMW forum, we have a separate DIY section. Very helpful. Maybe something for CCF? |
|
|
- Gun control means: using BOTH hands!
- Money doesn't make one happy, but when it rains cats and dogs, it's still better to cry in a Porsche than on a bicycle... |
|
|
|
|
crobi2
Senior Member 

Joined: April-05-2011 Location: Texas Status: Offline Points: 112 |
Post Options
Thanks(0)
Quote Reply
Posted: March-04-2012 at 4:58pm |
|
Nice post! I did mine last month and now that I've done it, the steering is nice and smooth. As soon as it stiffens up, I'll do it again. I wanted to just add a grease fitting, but the angle was terrible for my drill.
I used some mercruiser quicksilver spline grease on it and I barely had to tighten the nut to keep the water out. I'm hoping that grease lasts a while. |
|
|
C-Rob
2000 SAN |
|
|
|
|
Bri892001
Grand Poobah

Joined: September-27-2008 Location: Boston MA Status: Offline Points: 4945 |
Post Options
Thanks(0)
Quote Reply
Posted: March-05-2012 at 5:07pm |
|
Nice job and thanks for the write up. It will come in handy.
|
|
|
|
|
dwcar
Platinum Member

Joined: February-11-2007 Location: Houston Texas Status: Offline Points: 1103 |
Post Options
Thanks(0)
Quote Reply
Posted: March-06-2012 at 4:28pm |
|
Very nice documentation. I plan on doing mine soon.
|
|
|
83Ski
|
|
|
|
|
rcthorpe
Groupie 
Joined: February-28-2012 Location: Gobles, MI Status: Offline Points: 45 |
Post Options
Thanks(0)
Quote Reply
Posted: March-06-2012 at 4:54pm |
|
Did mine last week. Added the grease zerk (even though without an o ring seal it will eventually wash out; made me feel good).
|
|
|
|
|
mdvalant
Grand Poobah

Joined: May-06-2009 Location: Bellevue, IA Status: Offline Points: 2059 |
Post Options
Thanks(0)
Quote Reply
Posted: March-06-2012 at 5:20pm |
Are you kidding? Most these guys won't let you take your boat ANYWHERE to get any work done on it, it's ALL DIY! hahaha |
|
|
|
|
nautique frk
Platinum Member

Joined: February-16-2004 Location: United States Status: Offline Points: 1784 |
Post Options
Thanks(0)
Quote Reply
Posted: March-08-2012 at 1:04am |
|
Great Post Thank You !
|
|
|
|
|
Kristof
Grand Poobah
Joined: October-08-2007 Location: Bree, Belgium Status: Offline Points: 3390 |
Post Options
Thanks(0)
Quote Reply
Posted: March-08-2012 at 4:00pm |
Ain't that the truth |
|
|
- Gun control means: using BOTH hands!
- Money doesn't make one happy, but when it rains cats and dogs, it's still better to cry in a Porsche than on a bicycle... |
|
|
|
|
tjamesbo
Senior Member
Joined: July-13-2008 Location: United Kingdom Status: Offline Points: 110 |
Post Options
Thanks(0)
Quote Reply
Posted: May-06-2012 at 8:26am |
|
Mine on my 89 SN 2001 measures up at a quarter so its now In 5 yes 5! rings came out so I have put 5 back in here is the piccie Is there any minimum thread engagement here a.k.a the propseal I think there is adequate engagement here I will count the number of turns any views??
 Boyd |
|
|
|
|
eric lavine
Grand Poobah
Joined: August-13-2006 Location: United States Status: Offline Points: 13413 |
Post Options
Thanks(0)
Quote Reply
Posted: May-06-2012 at 9:29am |
|
one thing i can add is on the ends, you want to cut them at a 45 degree angle so the packing overlaps and then 180 your next piece
|
|
|
"the things you own will start to own you"
|
|
|
|
|
bsucics
Senior Member

Joined: July-18-2006 Location: United States Status: Offline Points: 109 |
Post Options
Thanks(0)
Quote Reply
Posted: May-07-2012 at 8:51pm |
|
James - curious about your post. I also have a 89 SN 2001 and am waiting on my rope to repack. It doesn't look like you have a lot of threads left - I'd be inclined to go with 4 rings. Let me know how it turned out with 5 - do you already have it back on the water?
|
|
|
|
|
gun-driver
Grand Poobah
Joined: July-18-2008 Location: Pittsburgh, Pa Status: Offline Points: 4112 |
Post Options
Thanks(0)
Quote Reply
Posted: May-07-2012 at 9:35pm |
|
I just did my '85 SN and used 3 rings of 1/4" rope.
If you measure how much your rudder sticks up out of the mount its only an inch(going off my '85) so anymore than that isn't doing anything. You can see in Bret's picture #5 the top inch is all that gets sealed. James thats way to much packing. |
|
|
|
|
craigmeade
Newbie 
Joined: February-02-2020 Location: Florida Status: Offline Points: 25 |
Post Options
Thanks(0)
Quote Reply
Posted: May-28-2020 at 1:39pm |
|
any chance you could reload the images?
|
|
|
|
|
Post Reply
|
|
 Tweet
Tweet
|
| Forum Jump | Forum Permissions You cannot post new topics in this forum You cannot reply to topics in this forum You cannot delete your posts in this forum You cannot edit your posts in this forum You cannot create polls in this forum You cannot vote in polls in this forum |


 Topic Options
 Kristof wrote: