 Boats For Sale:


SkiBum’s 87 SN |
Post Reply 
|
| Author | |
SkiBum 
Gold Member 

Joined: November-17-2006 Location: United States Status: Offline Points: 587 |
 Post Options Post Options
") Thanks(0) Thanks(0)
 Quote Reply Quote Reply
 Topic: SkiBum’s 87 SN Topic: SkiBum’s 87 SNPosted: June-27-2007 at 3:03am |


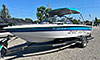
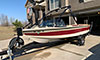
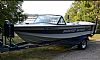
I started this project before Christmas. At the time I was on leave while I was in transit from the 101st to my new assignment as a drill at Ft. Knox. Just wanted to fix the rattle from the cracked floor and shed a few hundred pounds of water soaked foam weight. The floor and foam removal went pretty well. It was a challenge to remove the stringers and to accurately replicate them. (Never did get that right). Made a big mess pouring the foam but the new glass floor was very nice. I should have stopped there. But I started on the gelcote. Had more cracks than any boat should be allowed and still float. Tried to grind the gelcote off only where the cracks existed - ended up grinding off all of the gelcote. Learned a few things about applying gelcote. Started with a dump gun the industry uses to build molds. (Not the best tool in the shed). Then I went to a cheap paint gun. Finally learned that I could get very good results with a high quality automotive sprayer. (Yeah, I usually learn things the hard way). The sanding was a real thrill. Tried various "shortcuts" using an air powered sander that was under powered from an aging compressor; used abrasive pads on an orbital; but the best results come from just hand sanding. When it came time to put it all back together I learned that installing carpet in a boat is not high up on my skill set. Then I set the engine in place. Found out my stringers were an inch too tall and I could not go low enough on the mounts to align the drive shaft. Then there was getting everything else back in place. As it stands now I still have to finish wet sanding the bottom. Need to finish the new dash box and get the observer bench upholstered by a pro. On the water she looks great. Hole shot with the new ACME 540 is not as impressive as I had hoped. However, the wake is totally reshaped with less rooster tail and a smoother approach. The perfect pass is great too. Thank you to everyone that helped out along the way. I really could not have, nor would I have attempted such work without this site and all of the great people who contribute. |
|
 |
|
|
SkiBum
Gold Member
Joined: November-17-2006 Location: United States Status: Offline Points: 587 |
Post Options
Thanks(0)
Quote Reply
Posted: June-27-2007 at 3:08am |
|
Planning to add more photos in the coming days. The big family houseboat trip kicks off in the morning.
|
|
|
|
|
Bob's2001
Senior Member 
Joined: March-28-2005 Location: Lake Jackson TX Status: Offline Points: 241 |
Post Options
Thanks(0)
Quote Reply
Posted: June-27-2007 at 3:58am |
|
Bill, boat looks awesome. After following your build threads I expected no less. You da man!
|
|
|
Bob Ed
83 2001 |
|
|
|
|
nuttyskier2002
Gold Member
Joined: September-28-2005 Location: United States Status: Offline Points: 669 |
Post Options
Thanks(0)
Quote Reply
Posted: June-27-2007 at 5:12am |
|
Great looking boat! Any big job like you took on here is always a learning experience. I bet you're very proud of her. Can you tell that she's lighter in the water without all of the water in the foam?
|
|
|
95 Malibu Echelon w/Mercruiser 350 Magnum Skier
Former boats: 88 Ski Centurion Tru Trac II 59 Chris Craft Capri (woody) |
|
|
|
|
8122pbrainard
Grand Poobah 

Joined: September-14-2006 Location: Three Lakes Wi. Status: Offline Points: 41040 |
Post Options
Thanks(0)
Quote Reply
Posted: June-27-2007 at 7:32am |
|
Bill, I knew from the start that you were going to get through this project with great results and the pictures sure prove it. Fantastic! You have also made a great contribution to this site with your step by step threads on all the work you did. I'm sure it will, and has given many people the knowledge needed on stringers, floors and gel. Thanks
|
|
|
|
|
skicat
Platinum Member
Joined: May-18-2006 Location: Duluth, GA Status: Offline Points: 1128 |
Post Options
Thanks(0)
Quote Reply
Posted: June-27-2007 at 10:41am |
|
Great looking boat Bill. You put a lot of work into it & looks like you can now reap your rewards. Enjoy your houseboat trip!
|
|
|
|
|
81nautique
Grand Poobah

Joined: September-03-2005 Location: Big Rock, Il Status: Offline Points: 5769 |
Post Options
Thanks(0)
Quote Reply
Posted: June-27-2007 at 11:27am |
|
Bill, That's one of the most ambitious projects I've seen here. Well documented also and I think your efforts will help many to come. Great looking work, enjoy.
|
|
|
You can’t change the wind but you can adjust your sails
|
|
|
|
|
bkhallpass
Grand Poobah

Joined: March-29-2005 Location: United States Status: Offline Points: 4723 |
Post Options
Thanks(0)
Quote Reply
Posted: June-27-2007 at 3:07pm |
|
I like it! BKH
|
|
|
Livin' the Dream
|
|
|
|
|
Nautique2001
Grand Poobah

Joined: June-14-2004 Location: Massachusetts Status: Offline Points: 2832 |
Post Options
Thanks(0)
Quote Reply
Posted: June-27-2007 at 4:23pm |
|
Wow, congratulations on the results. Looks really clean. You'll enjoy the 540 for the water skiing. Much easier throttle response.
Ken |
|
|
|
|
eric lavine
Grand Poobah
Joined: August-13-2006 Location: United States Status: Offline Points: 13413 |
Post Options
Thanks(0)
Quote Reply
Posted: June-27-2007 at 5:07pm |
|
oh no....another trailer queen
|
|
|
"the things you own will start to own you"
|
|
|
|
|
75 Tique
Grand Poobah

Joined: August-12-2004 Location: Seven Lakes, NC Status: Offline Points: 6106 |
Post Options
Thanks(0)
Quote Reply
Posted: June-27-2007 at 5:30pm |
|
Bill,
Very nice work. To see the finished product we would never know of all the hurdles you confessed to hurdling. Appreciate your candor, we can all learn from each other that way. Now, go out and enjoy. |
|
|
_____________
“So, how was your weekend?” “Well, let me see…sun burn, stiff neck, screwed up back, assorted aches and pains….yup, my weekend was great, thanks for asking.” |
|
|
|
|
jon4pres
Senior Member

Joined: September-19-2005 Location: United States Status: Offline Points: 275 |
Post Options
Thanks(0)
Quote Reply
Posted: June-27-2007 at 5:58pm |
|
First - The boat looks amazing. I can not believe you got that gelcoat transition between the white and the blue so strait without using a pinstripe. The new graphics look great and are fitting, everything about the boat is brand new.
Second - Thanks for documenting the process if it had not been from your thread and advice there is no way I could have done as much as I have of my project. I also appreciate you documenting your alterations from the accepted method(didn't want to call them mistakes). It helped me to realize that there is more than one way to do this project. Third - Go enjoy it. You deserve it after all the work you put in it. |
|
|
|
|
jbear
Grand Poobah

Joined: January-21-2005 Location: Lake Wales FL. Status: Offline Points: 8193 |
Post Options
Thanks(0)
Quote Reply
Posted: June-27-2007 at 11:24pm |
|
Bill;
The finished product is all we knew it would be given the type of person we know you to be. The way you went thru this process, documenting every step of the way in words and pictures is quite an addition to our site. Guys will be refering to your pictures and instructions for a long while. The guys at Fort Knox might not know it now but....time will come when I bet they'll be glad they knew you. Thanks; john |
|
|
"Loud pipes save lives"
AdamT sez "I'm Canadian and a beaver lover myself"... |
|
|
|
|
copcraft
Senior Member
Joined: October-07-2006 Location: United States Status: Offline Points: 165 |
Post Options
Thanks(0)
Quote Reply
Posted: June-28-2007 at 1:58am |
|
Skibum
Great Job. You have definitely inspired me to do the stringer work on mine (at times I wish you hadn't). You did us all a great service by documenting your work and answering my questions along the way. Your boat looks fantastic! David |
|
|
|
|
Waterdog
Grand Poobah

Joined: April-27-2006 Location: United States Status: Offline Points: 2020 |
Post Options
Thanks(0)
Quote Reply
Posted: June-28-2007 at 10:13am |
|
Atta boy Bill. Your work ethic is unmatched. |
|
|
|
|
leo0648
Senior Member
Joined: January-30-2007 Location: United States Status: Offline Points: 115 |
Post Options
Thanks(0)
Quote Reply
Posted: June-29-2007 at 4:37am |
|
Its about damn time...just kidding.
Looks awesome. Can't wait to see the other pics. |
|
|
|
|
SkiBum
Gold Member
Joined: November-17-2006 Location: United States Status: Offline Points: 587 |
Post Options
Thanks(0)
Quote Reply
Posted: July-01-2007 at 2:58am |
|
The boat really looks good on the water. I have been pleased with the results. As for being lighter in the water without all the soaked foam - I believe there is a big difference for the better. The wake at 34.2mph is nominal. The ACME 540 has reshaped the rooster tail which contributed to the transformation. However, at slower speeds such as 26 to 30 mph the wake is much smaller than before surgery. The hole shot is weak, not sure why. However driving through the course the boat feels like it is on rails. It is a pleasure to drive now. I think that actually attaching the floor to the hull helped a lot. And remember those bent tracking fins? It was crunch time and I still had not taken them in to be fixed. So, I used my carpenters laser level to check for straightness as I pounded the curves out of the fins on an anvil with a hammer. In the end they were square and are working just fine. One of the modifications (sorry for all the origional only fans out there) is the observer bench seat. I built this seat in where it gets narrower toward the driver seat. The upholstery is garbage but I'll have the seat itself redone by a pro. I gained easier access into and out of the driver seat - little more ergonomic. Thanks again for the support and the comments. Don't worry Eric, the boat pulls about 20 sets a day - and only goes to the trailer when it is too dark to ski any longer. 


|
|
|
|
|
SkiBum
Gold Member
Joined: November-17-2006 Location: United States Status: Offline Points: 587 |
Post Options
Thanks(0)
Quote Reply
Posted: July-01-2007 at 9:14pm |
|
In the military after each mission we conduct an after action review to figure out what went well and what should be done better next time. As far as the gelcote work on my boat here are my thoughts:
It was good that I grinded off all the old gel because the boat was severely cracked. Take David's advice and use a heat gun with epoxy resin to repair those cracks. I used Bondo as a filler to smooth out the grind marks. Good enough, but I added small grooves because of how I sanded with the orbital sander. Just be careful sanding. The best way I found to apply the gelcote is with a high quality automotive canister type spray gun. Just thin with styrene until it sprays nicely. Because the gel is so thin it takes at least three, probably four to five coats to get a good finish. I tried not sanding until the last layer. That left a thicker orange peel. I tried sanding between layers. On the dark color that left a strange grain like appearance. Best bet is just be very careful in the application to minimize sanding. A word about sanding. Only wet sand. I tried to cheat by using the orbital with 320 grit. That left scratches and sanded too much material. Dont do it. Wet sanding the initial orange peel with a 320 grit is a much better option. The picture below shows what happens when I sanded too much material: 
Here is another simple thing that I screwed up. Pete strongly recommended using a high quality 3M striping tape. I used some green stuff from the automotive store. The result was that I did not get the finish I wanted: 
Wet sand only. Go through 320, 400, 600, 800, 1000, and 2000. The finish will be nice. Even a dope like me I was able to produce a pretty decent finish. If you don't make the same mistakes I made yours can be much better. There is some wax residue on the boat in this photo but it shows a smooth transition line and a good finish. 
|
|
|
|
|
SkiBum
Gold Member
Joined: November-17-2006 Location: United States Status: Offline Points: 587 |
Post Options
Thanks(0)
Quote Reply
Posted: July-01-2007 at 9:57pm |
|
There are some not so origional parts to the boat. Obviously the gel and graphics are not origional. Mrs Bum and I took a stab at making the motor box into a clamshell. I cut the box leaving about six inches on the bottom. Then reinforced the bottom with 3/8" thick wood moulding covered in glass for rigidity. I wrapped the bottom of the upper half of the box in aluminum channel for rigidity. We didn't do so hot at carpeting the bottom or upholstering the top. Truly a weakness.
However, in the end, I am satisfied. It is very convenient to only lift the top of the lid to access what I need in the engine compartment and not the whole motor box. Also changed to a different style of take apart motor box hinges that are flush without a pin. 
|
|
|
|
|
81nautique
Grand Poobah
Joined: September-03-2005 Location: Big Rock, Il Status: Offline Points: 5769 |
Post Options
Thanks(0)
Quote Reply
Posted: July-02-2007 at 10:29am |
|
Bill,
The only thing that matters is that everytime you look at that boat you know it's you're own blood sweat and tears that got it looking the way it does. You will never stop learning and to take on such a large project your first time out I think you did outstanding. I look at mine and I can pick out all the things I did wrong, end of the day everyone's wiped out from having fun and nobody's complaining. Awesome job, I still can't believe your work ethic and determination. |
|
|
You can’t change the wind but you can adjust your sails
|
|
|
|
|
82tique
Senior Member

Joined: June-04-2004 Location: United States Status: Offline Points: 339 |
Post Options
Thanks(0)
Quote Reply
Posted: July-13-2007 at 7:53pm |
|
Somehow I missed this post while I was out in the gulf fishing over the 4th....
Just wanted to add my congrats and respect for an incredible job. The boat is simply awesome.Cool thing is that people will be checking out your work for years to come whenever they reference this site! (Just curious...how much did those new factory decals cost?) |
|
|
Life is Good.
|
|
|
|
|
SkiBum
Gold Member
Joined: November-17-2006 Location: United States Status: Offline Points: 587 |
Post Options
Thanks(0)
Quote Reply
Posted: July-13-2007 at 8:27pm |
|
Thanks.
With shipping all three were $215.00. $40.00 was for the stern graphics. |
|
|
|
|
Quigs85SN2001
Groupie 
Joined: September-30-2006 Location: Davisburg, MI Status: Offline Points: 67 |
Post Options
Thanks(0)
Quote Reply
Posted: July-14-2007 at 1:03pm |
|
Bill,
Your boat looks amazing. I've followed your progress since you started back in December. I could tell early on that it was going to be beautiful when you were done. You have great attention to detail. What amazed me the most is the pace that you completed the project. Thank you for the excellent documentation on the project. Its just a matter of time before my '85 needs stringers, and now I have a great resource to tap into. Brian |
|
|
|
|
Post Reply
|
|
 Tweet
Tweet
|
| Forum Jump | Forum Permissions You cannot post new topics in this forum You cannot reply to topics in this forum You cannot delete your posts in this forum You cannot edit your posts in this forum You cannot create polls in this forum You cannot vote in polls in this forum |


 Topic Options