 Boats For Sale:


Trailer Wiring Ideas |
Post Reply 
|
| Author | ||
M3Fan 
Grand Poobah 

Joined: October-22-2005 Location: United States Status: Offline Points: 3185 |
 Post Options Post Options
") Thanks(0) Thanks(0)
 Quote Reply Quote Reply
 Topic: Trailer Wiring Ideas Topic: Trailer Wiring IdeasPosted: July-31-2007 at 4:24pm |
|
|
I'm planning on re-wiring the boat trailer in the near future. I know there's been posts on this before but I've been trying to think up the most ideal way to wire the trailer so that there are as few points of failure as possible. In my mind, that means no tap-splice connectors (which are all over), and as few butt-splice connectors as possible. One extreme would be to run a dedicated hot and ground to every fixture, or perhaps every major "area" of the boat (R, L fender, R, L rear, center light bar). Then most of your connections would be up at the tounge and not further back on the trailer.
I'm not going to purchase any wiring "kits" or anything- I'd rather do this with good quality wire and all separate wires so that there's enough wire to avoid tap splicing or any other goofy wiring techniques. I'm also thinking of using the non-heat-shrink plain-jane crimp connectors. The heat shrink seems like it would trap moisture no matter what. So, if you were going to rewire a trailer from scratch and really had the time to think about how you wanted to do it, how would you do it? |
||
|
2000 SN GT40 w/99 Graphics/Gel
2016 SN 200 OB 5.3L DI https://forum.fifteenoff.com |
||
 |
||
|
TRBenj
Grand Poobah

Joined: June-29-2005 Location: NWCT Status: Offline Points: 21107 |
Post Options
Thanks(0)
Quote Reply
Posted: July-31-2007 at 4:49pm |
|
|
Even if you run a hot and ground to every fixture, they still have to be tap-spliced in somewhere since theres only one of each coming from the tow vehicle. I ran a dedicated hot(tail) and ground all the way back on each side and tapped in as necessary. I didnt trust grounding to the frame of the trailer. The only place you'll have to use butt splices are at the harness and the tail lights.
Definitely dont skip the heat shrink. Get the adhesive lined stuff that waterproofs the connection. They also make butt splices with the adhesive lined shrink material built in. For the tap-splices, I got the ones that are supposedly waterproof- they were filled with some sort of goo. Also make sure you use good quality tinned wire. I oversized mine a bit (14 awg). The worst connections that I found happened to be inside the connector that plugged into the tail lights. For $10-15 each, I highly recommend replacing the whole light and connector assembly. My install could have been a little cleaner. I suggest making the connections at the tail lights first, and running all the wires to the front (cut them long). Move from back to front, tap-splicing and adding service loops as you go (I put one at each tail). Tighten everything down/together with zip ties. The last step would be to make the connections at the tongue: the tap splice for the tail lights and the butt connectors for the 4-pin harness. I left a small service loop at this end as well. |
||
|
||
|
M3Fan
Grand Poobah
Joined: October-22-2005 Location: United States Status: Offline Points: 3185 |
Post Options
Thanks(0)
Quote Reply
Posted: July-31-2007 at 5:02pm |
|
|
Tim,
Where did you find the heat shrink tubing and connectors that you speak of? Still seems like a moisture trap to me as the covering/adhesive wears out but I'll trust you on this one. With the multi-hot and ground setup the splices would be made up by the hitch rather than in an area where they'd be dunked on a weekly basis, which is the only advantage I could think of to running dedicated wires. It also eliminates a single point of failure on each side. Overkill, I know, but I'm just trying to think of all the options here. |
||
|
2000 SN GT40 w/99 Graphics/Gel
2016 SN 200 OB 5.3L DI https://forum.fifteenoff.com |
||
|
||
|
M3Fan
Grand Poobah
Joined: October-22-2005 Location: United States Status: Offline Points: 3185 |
Post Options
Thanks(0)
Quote Reply
Posted: July-31-2007 at 5:03pm |
|
|
Service loop = Outstanding idea.
|
||
|
2000 SN GT40 w/99 Graphics/Gel
2016 SN 200 OB 5.3L DI https://forum.fifteenoff.com |
||
|
||
|
TRBenj
Grand Poobah
Joined: June-29-2005 Location: NWCT Status: Offline Points: 21107 |
Post Options
Thanks(0)
Quote Reply
Posted: July-31-2007 at 5:11pm |
|
McMaster-Carr Splice part numbers: 7063K32 9895K15 wire: 7587K974 7587K95 7587K061 7587K973 |
||
|
||
|
M3Fan
Grand Poobah
Joined: October-22-2005 Location: United States Status: Offline Points: 3185 |
Post Options
Thanks(0)
Quote Reply
Posted: July-31-2007 at 6:10pm |
|
|
Tim, could you be a little more specific? I'm still a little hazy on what parts to use.

|
||
|
2000 SN GT40 w/99 Graphics/Gel
2016 SN 200 OB 5.3L DI https://forum.fifteenoff.com |
||
|
||
|
boat dr
Grand Poobah
Joined: June-27-2004 Location: United States Status: Offline Points: 4245 |
Post Options
Thanks(0)
Quote Reply
Posted: July-31-2007 at 6:47pm |
|
|
why are you trying to complicate this?But a good wishbone wiring harness, the type that has two brown wires per side.
Purchase two LED types stop and tail lights. Either 2 or 4 clearance lights,depending on your needs. If you use high quality lights and wiring with good 3M butt splices it will only live for 10 years. Use the best spices and cheap lights and you will get 2 or three,a cheap harness will be the weak link and will fail at the trailer connector........boat dr |
||
|
||
|
Hollywood
Moderator Group 

Joined: February-04-2004 Location: Twin Lakes, WI Status: Offline Points: 13510 |
Post Options
Thanks(0)
Quote Reply
Posted: July-31-2007 at 6:55pm |
|
|
I just cross my fingers and if that doesn't work, kick the lights until they come on or fall completely off!
|
||
|
||
|
8122pbrainard
Grand Poobah

Joined: September-14-2006 Location: Three Lakes Wi. Status: Offline Points: 41040 |
Post Options
Thanks(0)
Quote Reply
Posted: July-31-2007 at 7:08pm |
|
|
If you really want to go all out, here's what I've done:
1.On my channel frame trailer I ran 1/2" pvc pipe as a conduit to protect the wiring. I have a tubular frame that this wasn't required. 2. Use marine grade tinned wire. 3. Do run a ground wire to each lamp. 4. Solder each splice. 5. Adhesive lined heat shrink each splice. This all equals 0 problems. |
||
|
||
|
TRBenj
Grand Poobah
Joined: June-29-2005 Location: NWCT Status: Offline Points: 21107 |
Post Options
Thanks(0)
Quote Reply
Posted: July-31-2007 at 8:04pm |
|
Pete, the tubular frames Ive seen do get water in them. I have a channel and thought of using conduit, but I figured it would do a better job of holding water in than it would keeping it out. How do you keep it perfectly sealed? |
||
|
||
|
boat dr
Grand Poobah
Joined: June-27-2004 Location: United States Status: Offline Points: 4245 |
Post Options
Thanks(0)
Quote Reply
Posted: July-31-2007 at 8:08pm |
|
|
Conduit = one of two evils
#1 contained moisture #2 added abrasion Both will render an open or shorted circuit. Pick your poison. |
||
|
||
|
8122pbrainard
Grand Poobah
Joined: September-14-2006 Location: Three Lakes Wi. Status: Offline Points: 41040 |
Post Options
Thanks(0)
Quote Reply
Posted: July-31-2007 at 8:17pm |
|
Tim and Doc, The conduit is to protect the wiring from physical damage like getting ripped off the trailer and not to protect it from moisture. It is open at both ends (no fittings) and in the middle where wire is branched to clearance lamps. Insulation and integrity of splices are there for moisture protection. Wire is run underground and in water all the time. You may have a 40KV underground line through you back yard. Doc, I'd rather have the wire sliding around the inside of the low coefficient of friction pvc pipe that the rough inside of a steel tube. Pvc pipe to protect wiring. 
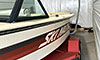
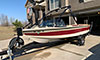
Another picture. This trailer I did not use marine grade wire and haven't had a problem since I rebuilt it 27 years ago. I have smashed a tail light on a stump though!! 
The one hole conduit clamps I was even able to find in aluminum. No rust. |
||
|
||
|
Munday
Gold Member
Joined: August-17-2004 Location: United States Status: Offline Points: 538 |
Post Options
Thanks(0)
Quote Reply
Posted: August-02-2007 at 9:48pm |
|
|
I went along inside of channel and screwed addul clamps to the boards with short screws.
I also use the solder and heat shrink method. But like doc says seems like every 5 or 6 years I get angry do the Hollywood to the lights and have to replace the lights,leave a little extra wire at tail lights so you can make it up easy next time..... Munday |
||
|
||
|
The Dude
Platinum Member

Joined: October-19-2004 Location: Houston Status: Offline Points: 1334 |
Post Options
Thanks(0)
Quote Reply
Posted: August-03-2007 at 12:15am |
|
|
That's a lot of work.
|
||
|
Mullet Free since 93
95 Sport |
||
|
||
|
BuffaloBFN
Grand Poobah

Joined: June-24-2007 Location: Gainesville,GA Status: Offline Points: 6094 |
Post Options
Thanks(0)
Quote Reply
Posted: August-03-2007 at 12:26am |
|
|
trailer lights were the achilles heel of my trailer till I went to soldered connections...the rest of my trailer is so well built(way different than some I've seen) that it's almost a good hiding place in the event of a nuclear blast
|
||
|
||
|
8122pbrainard
Grand Poobah
Joined: September-14-2006 Location: Three Lakes Wi. Status: Offline Points: 41040 |
Post Options
Thanks(0)
Quote Reply
Posted: August-03-2007 at 7:19am |
|
Not if you divide the work by the 27 years (and still going) of life I've gotten out of good wiring practices. |
||
|
||
|
weitekampt
Senior Member 

Joined: July-08-2006 Location: Fisher, IL Status: Offline Points: 457 |
Post Options
Thanks(0)
Quote Reply
Posted: August-05-2007 at 11:59pm |
|
|
I agree with BuffaloBFN on the soldering thing. When I bought my boat in 2000, I bought cheap (non-marine) lights for new sidemarkers since none of the originals still worked. Unbelievably, all of the lights work. But I did spend the time to pull the wire out and solder the new lights and heat shrink them good. The tail end of the trailer is all original except for the license plate light and still works like new. I trailer 100% of the time and nothing has let me down. I also agree with boatdr aobut the LED lights. When I win the lottery I am going to convert the trailer to LED.
Long story short, run new wire just like the factory did but solder all the connections and heat shrink them. But the silicon filled splices and call it good. Hey, congrats on the little girl! |
||
|
||
|
graybee
Newbie 
Joined: July-11-2007 Location: United States Status: Offline Points: 7 |
Post Options
Thanks(0)
Quote Reply
Posted: August-12-2007 at 12:08am |
|
|
In the most recent Trailer Boat there is a nice article about building a simple light bar. It is worth a look - and sure to keep your lights out of the water.
|
||
|
1979 Southwind 18 PCM351
|
||
|
||
|
Post Reply
|
|
 Tweet
Tweet
|
| Forum Jump | Forum Permissions You cannot post new topics in this forum You cannot reply to topics in this forum You cannot delete your posts in this forum You cannot edit your posts in this forum You cannot create polls in this forum You cannot vote in polls in this forum |


 Topic Options
 M3Fan wrote: