New Interior for 62 Classic (long) |
Post Reply 
|
| Author | |
RainDog 
Platinum Member 

Joined: February-21-2007 Location: Mke/Grn Lake WI Status: Offline Points: 1387 |
 Post Options Post Options
 Thanks(0) Thanks(0)
 Quote Quote  Reply Reply
 Topic: New Interior for 62 Classic (long) Topic: New Interior for 62 Classic (long)Posted: August-01-2007 at 2:03am |
|
Some of the guys at GL encouraged me to post regarding the new interior I put in literally days before the GL reunion.
Did anyone ever start on a small project only to lead to the next step, and the next, and the next, etc. No, I'm sure that never happened to anyone here - LOL. A simple motor cover to be done during a weekend when the wife and kids were gone turned into cover, seats, floor and an entire re-upholstery project. Since it deviates from the original design, I thought I'd share my goals first. The Classic is being used as a general purpose family boat and hobby (obsession as per wife) for myself. Originality is respected, but only after functionality. I wanted an interior that was comfortable, period looking and provided as much storage as possible. I thought about the space along side the doghouse and how it is used. It gets filled with anchors, fenders, coolers, skis, towels, vests, etc. When loaded, you can't walk from the front of the boat to the rear because of all the junk in the way. I thought I could make storage areas and a sundeck if I planned things out well. I stole the idea of a sundeck from the Riva Aquarama wood boats. The "sun pads" that flank the doghouse are just big enough for my wife and I to stretch out on each side and put our feet on the gunwale or rear bench seat. I wanted to keep the top of the doghouse and sunpads below the gunwale to maintain the straight '60 line from bow to stern. But the 327 Gray marine had a 4 bbl fitted to it which increased height substantially vs the dual side draft carbs and manifolds. I'm not up to restoring the side drafts, so I made a "speed hump" (aka the Liberator as per Mojo) that provided clearance for the carb and manifold. The remainder of the engine cover and sun pads remain below the gunwale line. When I constructed the engine cover, I saw a bunch of open space above the transmission. So I stole an idea from the old Centurys for a small storage area and a 'hidden' fold down rear hatch. This eventually will be fitted with a shaker, glasses, ice bucket and bottle holder. 
I had to recreate new wood for all the seat backs, bases, floors and motor cover. I raised the drivers seat riser by 2" and used 2-1/2" foam to increase seating position by 3" which helps greatly with visibility at slower speeds. Rear seat is raised 1" which helps to soak the kids when needed! I also made inserts so we can store under the seats. I wanted to document the construction better, but I lost the charger for the digital camera. I had to borrow a friends just to get the pics before it went to the upholsters. 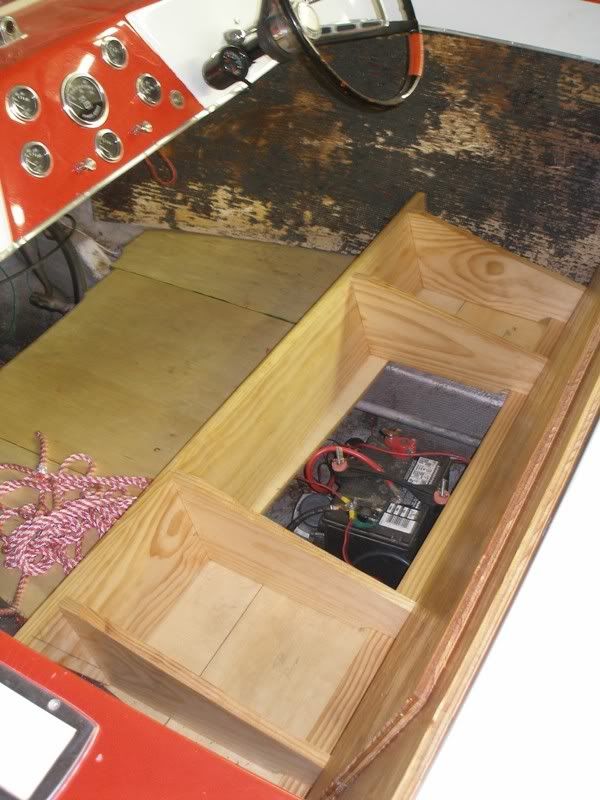
Front seat base and new floor. 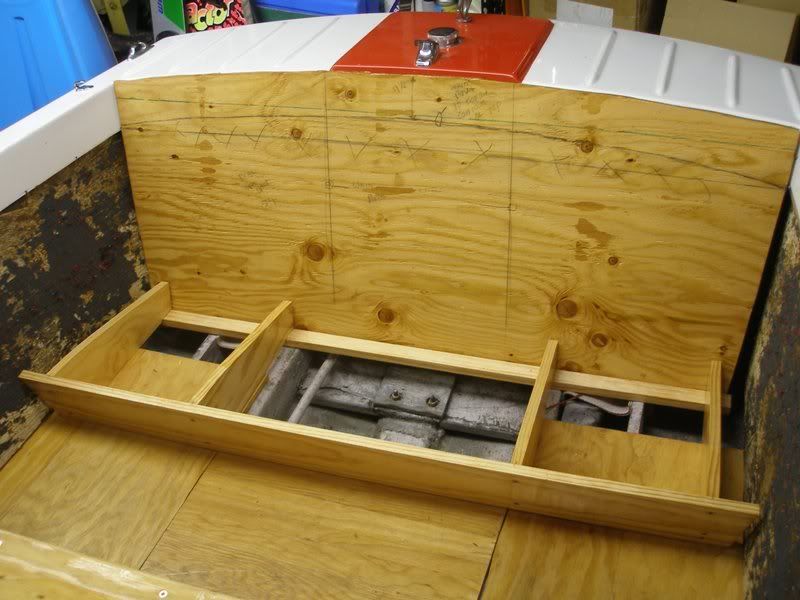
Rear seat base and floor 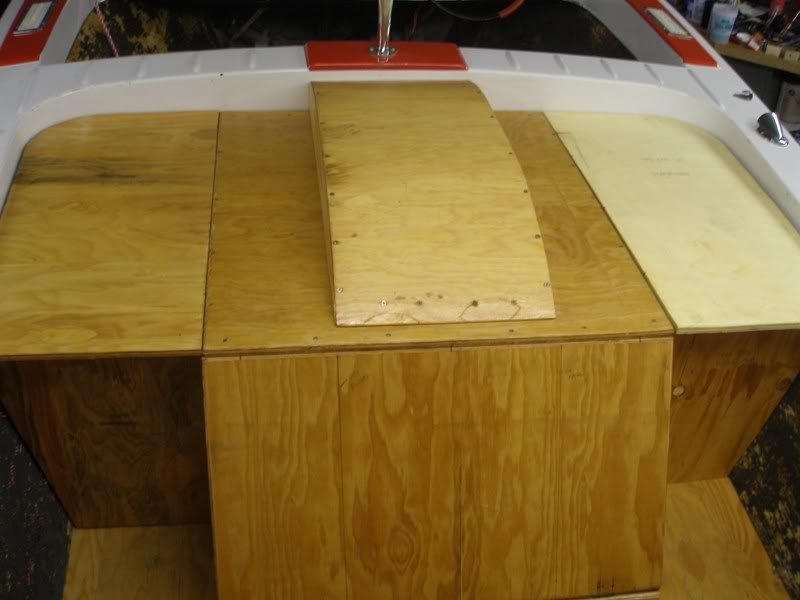
Motor cover, speed hump, sun pads and vertical dividers from stern. All wood was coated on all 6 surfaces with penetrating epoxy. Stainless steel square drive screws were used on all structural assembly. 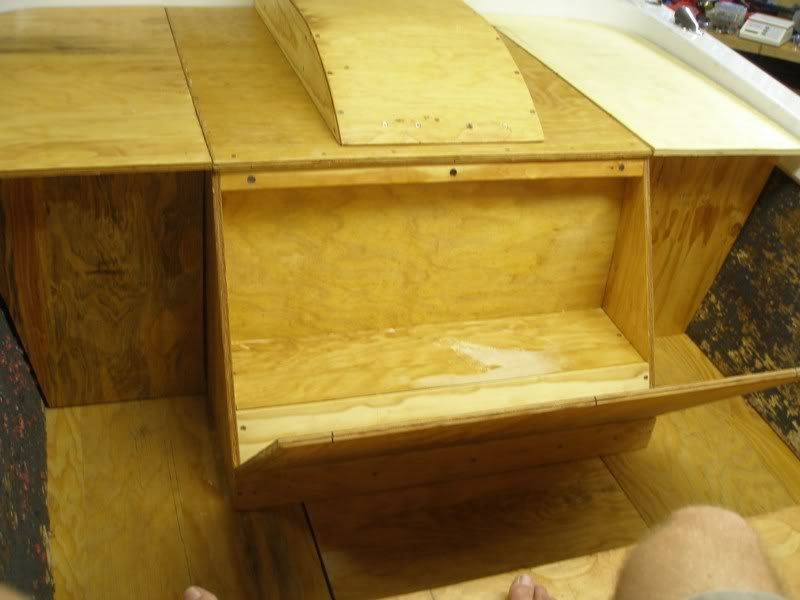
Rear storage hatch The finished product (well, almost) 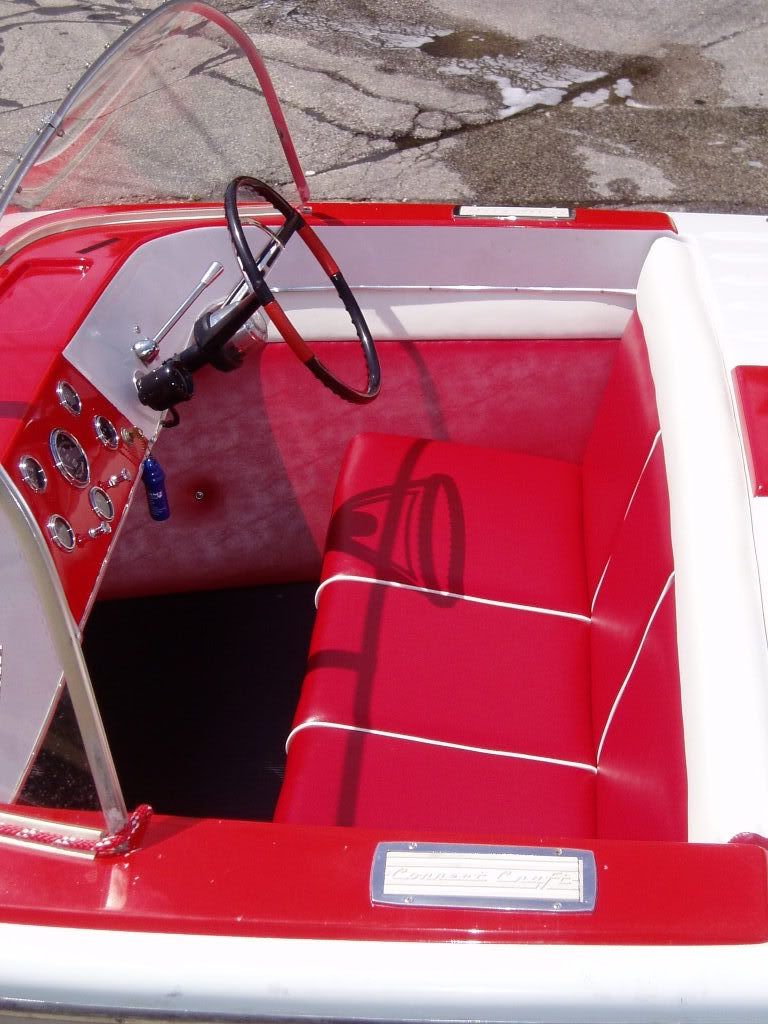
Front cockpit. 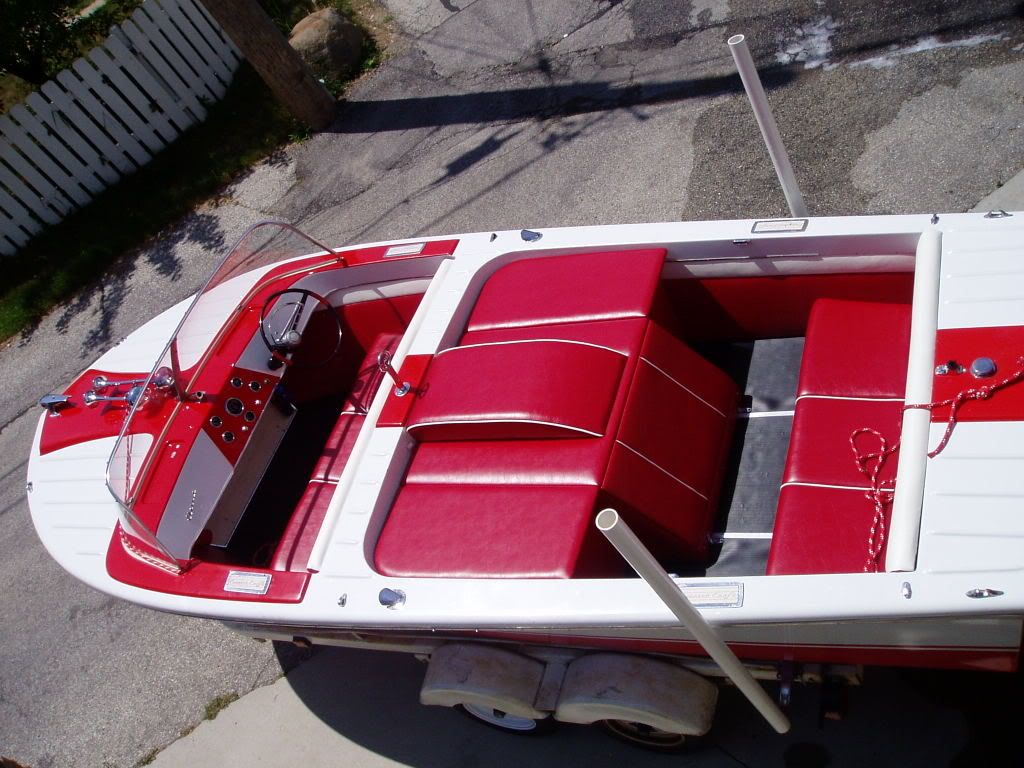
Shot from above. I used black ribbed industrial matting from McMaster Carr for the flooring. I couldn't find white matting and I liked the classic look and how the black 'grounded' the boat and broke up the white and red. Hasn't been too hot on the feet yet. It is not glued down yet that is why you see bubbles. 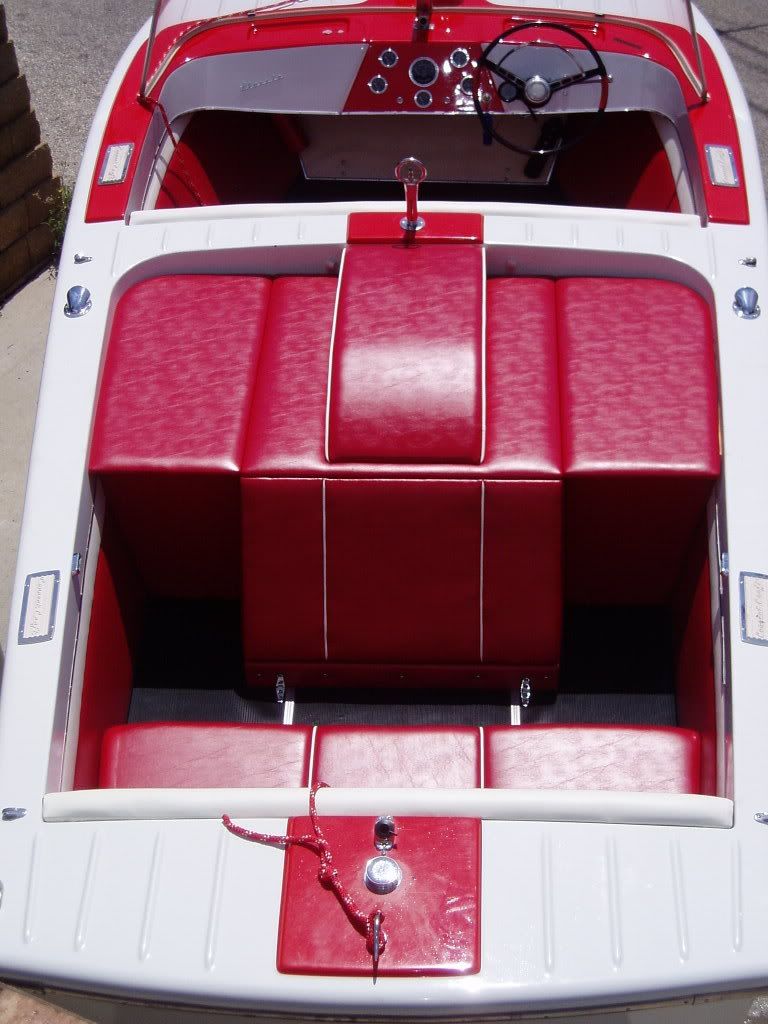
Rear cockpit. 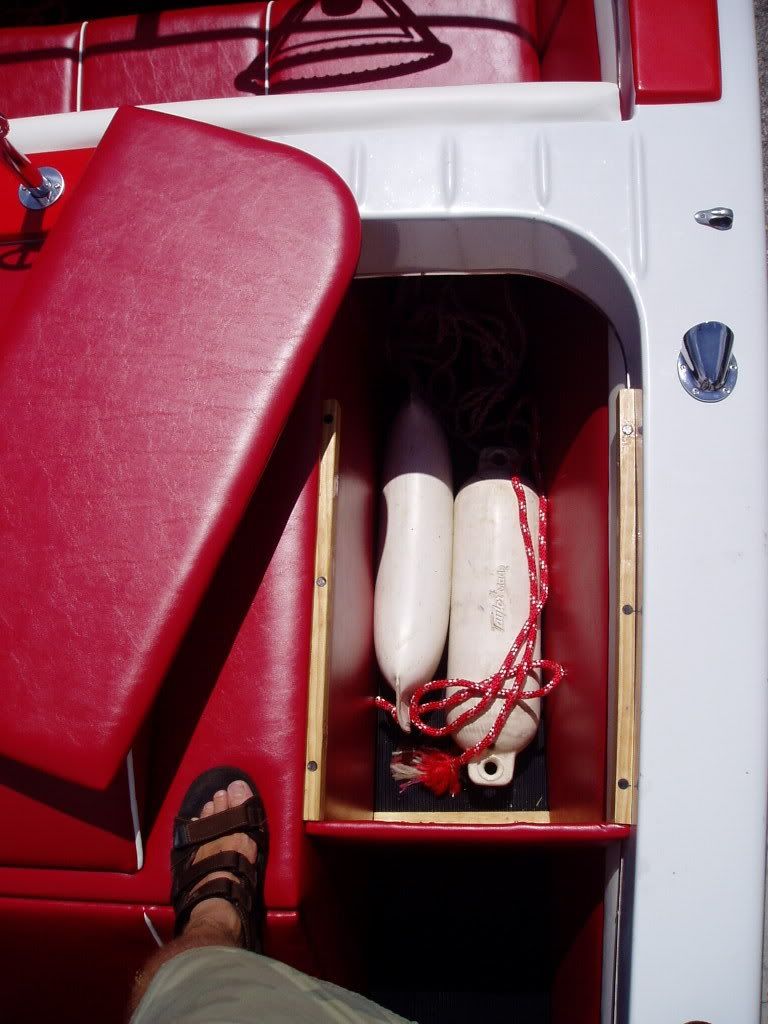
Storage! We can fit a ton of stuff in here. The black dots are neodymium magnets embedded in epoxy. They help hold all of the panels in place. 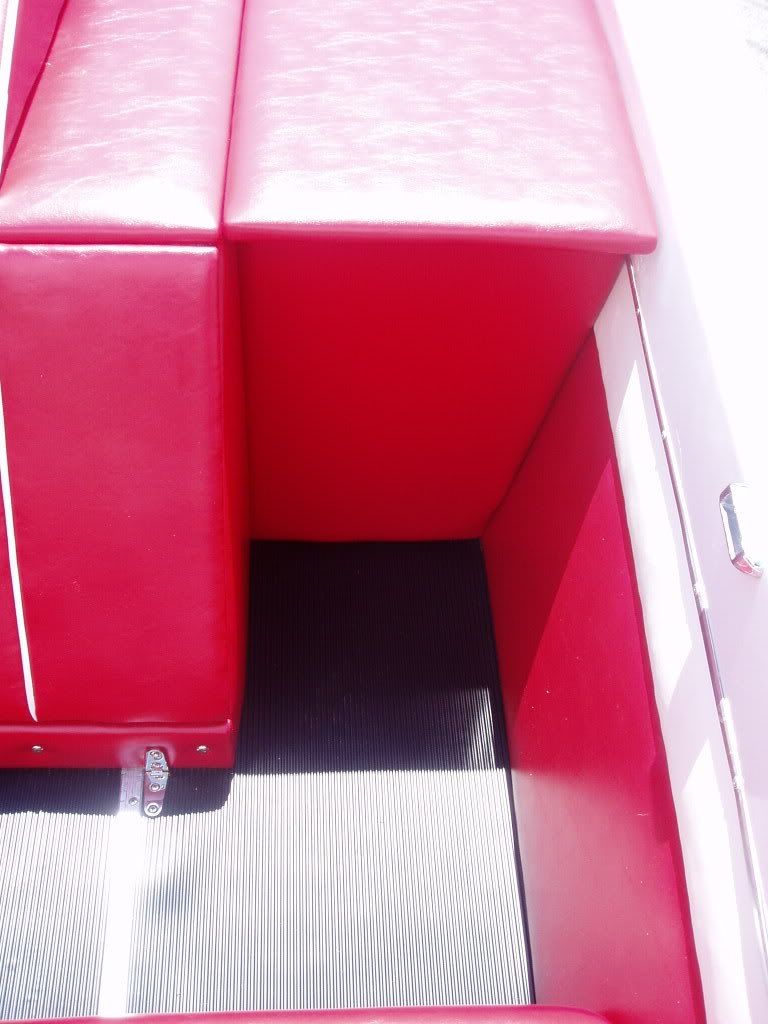
The vertical panel is removable so if we need to bring skis along is isn't a problem. 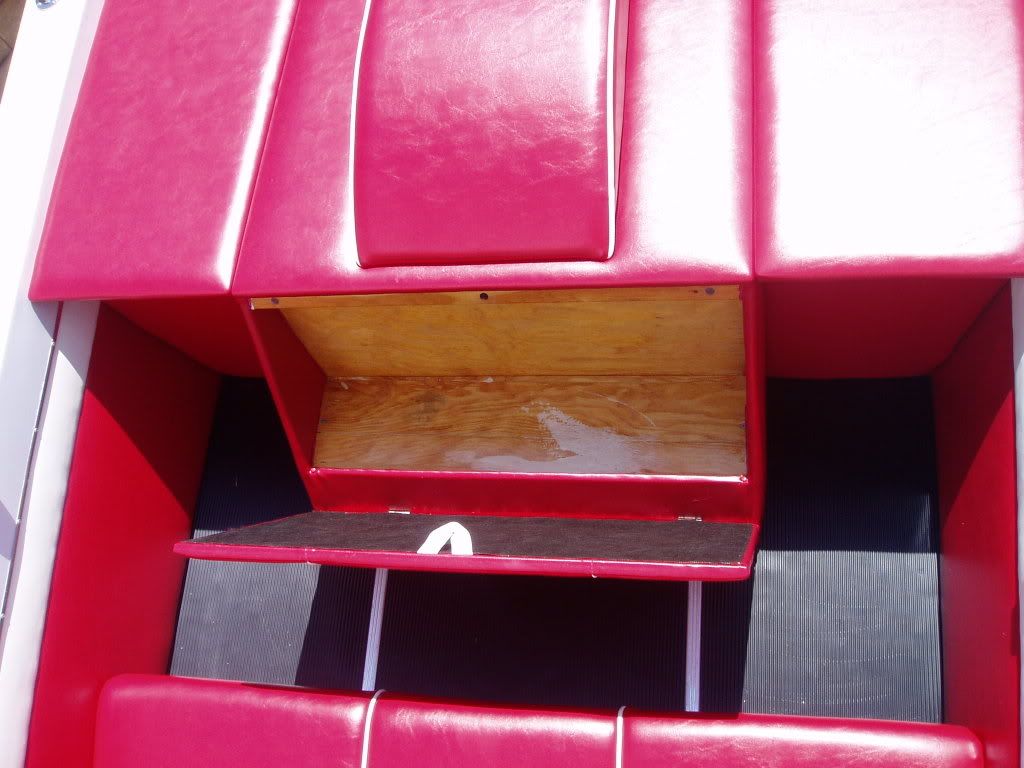
Rear hatch. Very handy for small items: wallets, suntan lotion, GPS, etc. 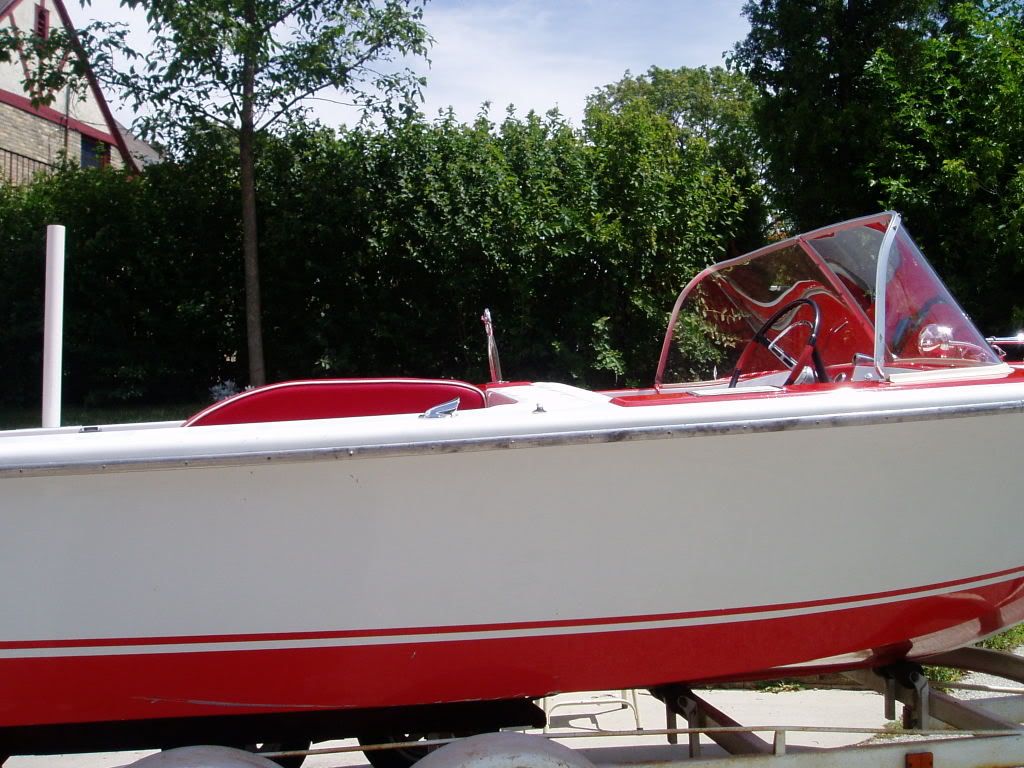
Side profile. Only the speed hump shows. The seats and hump were piped in white to break up the red and to accentuate the line created by the raised portion of the deck. We added the white accent strip on the side panels and seat backs at the last minute to break up the red and accentuate the red and white theme of the Classic. The only downside is she gained a few pounds, maybe 150 or so. It dropped my top speed by 2 mph and 200 rpm. We used 1/2" marine grade ply and 1X clear fir for the structural wood. She still tops out at 40 MPG-GPS @ 4200 rpm. Not bad for the old girl with the original mill. I'm spinning a 12x13 4 blade OJ. Might get it reworked as soon as I'm done messing with the motor. The whole project came in around $2300 and took about 3-1/2 weeks of all my free time. I had a blast doing it and really enjoy the boat. I had the Furniture Hospital in Menomonee Falls, WI do the skins. Tom is great and he is a fellow boater so I felt comfortable in handing the job over to him. No regrets there. Still have a few details to finish up, but the interior is about 95% done. Next, re-chrome hardware, find wind wings, fix tach, find original speedo. Maybe a repaint and motor rebuild in fall of 2008-2009. Then, I might be able to give Paul's super cool red Classic a little competition at the reunions! -Steve |
|
 |
|
quinner 
Grand Poobah 

Joined: October-12-2005 Location: Unknown Status: Offline Points: 5828 |
 Post Options Post Options
 Thanks(0) Thanks(0)
 Quote Quote  Reply Reply
 Posted: August-01-2007 at 3:18am Posted: August-01-2007 at 3:18am |
|
Steve,
What an awesome job you did, adding function within the limited space of an older boat while keeping what I think is a classic look, very cool!! Like the CC Classic of that era more and more every time I see one. |
|
 |
|
62 wood 
Grand Poobah 

Joined: February-19-2005 Location: NW IL Status: Offline Points: 4527 |
 Post Options Post Options
 Thanks(0) Thanks(0)
 Quote Quote  Reply Reply
 Posted: August-01-2007 at 3:21am Posted: August-01-2007 at 3:21am |
|
Steve ,
Nice to see the "in-progress pics"... Nice additional storage ideas! Your boat turned out great! |
|
 |
|
JMurph 
Gold Member 
Joined: January-06-2006 Location: Maryland/NC Status: Offline Points: 738 |
 Post Options Post Options
 Thanks(0) Thanks(0)
 Quote Quote  Reply Reply
 Posted: August-01-2007 at 9:07am Posted: August-01-2007 at 9:07am |
|
Wow. Nice job. I love the way you thought out the extra storage and the attention to detail. The magnets are a good example of the detail. You are going to create a demand for these old boats. After what you and Paul have accomplished, I'll bet we see more people on this site going after an older CC to do the same. I think those Classics are so cool and would serve as a great cruising boat. Yours is beautiful. I'm sorry I didn't take the chance and look at it in more detail at the reunion.
-JMurph |
|
 |
|
8122pbrainard 
Grand Poobah 

Joined: September-14-2006 Location: Three Lakes Wi. Status: Offline Points: 41045 |
 Post Options Post Options
 Thanks(0) Thanks(0)
 Quote Quote  Reply Reply
 Posted: August-01-2007 at 9:36am Posted: August-01-2007 at 9:36am |
|
Steve, Since I wasn't able to see the boat up close at GL, I'm glad you posted the pictures. Looks like a very nice job and you do have some great ideas for the extra storage.
|
|
 |
|
The Lake 
Platinum Member 

Joined: May-13-2005 Location: Lk Winnebago MO Status: Offline Points: 1157 |
 Post Options Post Options
 Thanks(0) Thanks(0)
 Quote Quote  Reply Reply
 Posted: August-01-2007 at 11:57am Posted: August-01-2007 at 11:57am |
|
Fantastic! Thanks for the pics.
Chuck |
|
 |
|
Munday 
Gold Member 
Joined: August-17-2004 Location: United States Status: Offline Points: 538 |
 Post Options Post Options
 Thanks(0) Thanks(0)
 Quote Quote  Reply Reply
 Posted: August-01-2007 at 12:14pm Posted: August-01-2007 at 12:14pm |
|
Great job,better than original with a classic look.
Munday |
|
 |
|
nates78ski 
Platinum Member 

Joined: January-24-2005 Location: United States Status: Offline Points: 1041 |
 Post Options Post Options
 Thanks(0) Thanks(0)
 Quote Quote  Reply Reply
 Posted: August-01-2007 at 1:35pm Posted: August-01-2007 at 1:35pm |
|
wow! I love that, love the little magnets, that's the kinda stuff that goes unnoticed to most...except for us on here. AWESOME!!
Nate |
|
 |
|
Hollywood 
Moderator Group 

Joined: February-04-2004 Location: Twin Lakes, WI Status: Offline Points: 13517 |
 Post Options Post Options
 Thanks(0) Thanks(0)
 Quote Quote  Reply Reply
 Posted: August-01-2007 at 1:46pm Posted: August-01-2007 at 1:46pm |
|
Looks great, but have you properly broken her in yet?

Don't need the details, incase you're as slow as TPK. |
|
 |
|
66Skylark 
Senior Member 

Joined: September-01-2004 Location: United States Status: Offline Points: 195 |
 Post Options Post Options
 Thanks(0) Thanks(0)
 Quote Quote  Reply Reply
 Posted: August-01-2007 at 1:48pm Posted: August-01-2007 at 1:48pm |
|
The boat looks fantastic! Love the storage areas around the motor.
Great job Steve! Kyle |
|
 |
|
75 Tique 
Grand Poobah 

Joined: August-12-2004 Location: Seven Lakes, NC Status: Offline Points: 6130 |
 Post Options Post Options
 Thanks(0) Thanks(0)
 Quote Quote  Reply Reply
 Posted: August-01-2007 at 2:28pm Posted: August-01-2007 at 2:28pm |
|
Another fantastic project by a CCFan member. You guys are a constant inspiration.
|
|
|
_____________
“So, how was your weekend?” “Well, let me see…sun burn, stiff neck, screwed up back, assorted aches and pains….yup, my weekend was great, thanks for asking.” |
|
 |
|
jon4pres 
Senior Member 

Joined: September-19-2005 Location: United States Status: Offline Points: 275 |
 Post Options Post Options
 Thanks(0) Thanks(0)
 Quote Quote  Reply Reply
 Posted: August-01-2007 at 5:24pm Posted: August-01-2007 at 5:24pm |
|
Looks great.
A few quetions: Is that the throttle that is behind the steering wheel, if not where is it and what is that lever? What are you doing with those shoes on that brand new beautiful vynal? Very cool boat. I think those 60s boats are some of the best looking boats CC has ever made. |
|
 |
|
RainDog 
Platinum Member 

Joined: February-21-2007 Location: Mke/Grn Lake WI Status: Offline Points: 1387 |
 Post Options Post Options
 Thanks(0) Thanks(0)
 Quote Quote  Reply Reply
 Posted: August-01-2007 at 5:57pm Posted: August-01-2007 at 5:57pm |
|
Thank you everyone for the kind words.
Jon, that is F-N-R shifter lever on the dash. The throttle is the foot pedal. It is visible in some of the pics. Many early 60's CC (and others) had this configuration. I think Pete told me that it was a way to attract new boaters. Marketing could claim the boat as easy to drive as a car. I was going to replace it with a hand unit, but it actually was pretty easy to get used to. Oh, and as far as the shoes....busted! I should have photoshopped them out. |
|
 |
|
Post Reply 
|
|
|
Tweet
|
| Forum Jump | Forum Permissions  You cannot post new topics in this forum You cannot reply to topics in this forum You cannot delete your posts in this forum You cannot edit your posts in this forum You cannot create polls in this forum You cannot vote in polls in this forum |