 Boats For Sale:


85 2001 LVL Stringer Project |
Post Reply 
|
Page <1 10111213> |
| Author | |
TRBenj 
Grand Poobah 

Joined: June-29-2005 Location: NWCT Status: Offline Points: 21107 |
 Post Options Post Options
") Thanks(0) Thanks(0)
 Quote Reply Quote Reply
 Posted: July-18-2012 at 2:43pm Posted: July-18-2012 at 2:43pm |
|
Arent you a pretty big guy? Dont tell me youre trying to look over the windshield!
The driver's seat does sit a bit low in the 2001's compared to the 2nd gen SN... but Ive never had a problem seeing through the windshield. Does your new floor height match the old height exactly? Or did you end up a touch taller with the rebuild? Something to think about. |
|
 |
|
|
Big Pappa
Senior Member 

Joined: March-08-2006 Location: United States Status: Offline Points: 322 |
Post Options
Thanks(0)
Quote Reply
Posted: July-18-2012 at 4:39pm |
I am just under 6' and look through the windshield most of the time. When docking or putting the boat on the trailer I do like to get up a little higher and look over the windshield though. A flip up bolster would be awesome!! I drove a SN 211 4th of July and the bolster was nice to have. Exactly I am not sure, but it is pretty close to stock height. I would guess to say it is + or - 1/4" from stock. I am going to test fit all the seats tonight and make sure everything fits before I go through and glue the parts together and paint. Just in case I need to make any adjustments. |
|
|
|
|
Big Pappa
Senior Member
Joined: March-08-2006 Location: United States Status: Offline Points: 322 |
Post Options
Thanks(0)
Quote Reply
Posted: July-19-2012 at 2:46pm |
|
Here is how the seat slides and seat are mounted now and how mine was when I took it apart with the old hardware.
 I put my seats on the frames last night and test fit them into the boat. I need to adjust the seat backs a little so they are a perfect fit when I install them for good. This was just to make sure everything fit and the frames were going to work in the boat. I think they are going to work.    I now have my new trailer jack and safety chains on the trailer. My old chain was just a 3' piece of a chain with a quick link on it. I wanted something a little bit better so this is what I came up up with. It is a 72" chain for a trailer. The box says it is rated for 5000#. I connected the ends to the trailer with a 1/2" Grade 8 bolt and washers. I am going to cut the chain so I have 2 equal lengths then have a screw quick link on each so there is no way it can fall off. Does this look OK to you guys? 
|
|
|
|
|
AussieNorts
Groupie 

Joined: March-10-2007 Location: Australia Status: Offline Points: 82 |
Post Options
Thanks(0)
Quote Reply
Posted: July-20-2012 at 11:54pm |
|
Kris,
Thanks for those pics, sorry for the delayed response. That is exactly how mine were in a 1997 Sport when I pulled apart but could not remember the configuration. You do not get the same amount of washers in the new seat slide kits. I will have to use old ones as I can not source those washers here in Australia. Once again thanks Kris for clarifying this for me. A little off topic but I am watching the new this morning (Saturday morning in Oz) and there is a crazy news story about the shooting in Colorado, my thoughts go out to the victims families, the world does not need this madness. sorry just my 2 cents. |
|
|
Correct craft.....is there any other boat?
|
|
|
|
|
Big Pappa
Senior Member
Joined: March-08-2006 Location: United States Status: Offline Points: 322 |
Post Options
Thanks(0)
Quote Reply
Posted: July-23-2012 at 2:00pm |
No problem glad to help. Yea, that whole situation in Colorado is sad!! I agree with you 100%, Madness!! |
|
|
|
|
Big Pappa
Senior Member
Joined: March-08-2006 Location: United States Status: Offline Points: 322 |
Post Options
Thanks(0)
Quote Reply
Posted: July-23-2012 at 2:27pm |
|
Happy Monday all.
I had a pretty productive weekend on the boat this weekend. I started out on Friday by pulling apart all of the seat bases and running my router over all the edges with a 1/4" round over bit to soften the edges and hopefully lessen the likeliness of getting splinters from the bases down the road. I then sanded down all the pieces and glued and screwed them all back together. Saturday I started off by making a 3 piece gas tank cover. I did not have this when I bought the boat so I am just going off a few pictures I have seen and then just making some templates out of cardboard for the side pieces. I wanted it to be in 3 pieces because the side pieces are what I am going to mount the side seats to. From the factory the seats are mounted to the floor and every one of my seats had rot at the bottom from sitting in wet carpet. I want to be able to easily remove the rear seats and I do not what to have any more holes in the floor than I have to. I am not sure exactly how I am going to mount them yet but they will not be screwed to the floor. Next I moved to building covers for the air box. The old ones were in good shape but they did not fit any longer because the airbox is not exactly the same as stock. So again I made cardboard templates and then cut them out of wood. Finally I cut out a new set of wood for the crash pads. I ran over all these with the router to smooth over the edges and hit them with the sander. I hit everything with a coat of CPES and let it sit to dry. 
|
|
|
|
|
Big Pappa
Senior Member
Joined: March-08-2006 Location: United States Status: Offline Points: 322 |
Post Options
Thanks(0)
Quote Reply
Posted: July-23-2012 at 2:42pm |
|
Next up I pulled the bolts for the receiver because I bought a handle to go on there to make handling the trailer a little easier. While I had the bolts out I pulled everything apart and saw some rust between the receiver and the trailer tube so I cleaned it all up and put on some rust neutralizing/ preventing paint and put it all back together with new grade 8 hardware.
 The rest of the day Saturday and then again on Sunday it was time to get to work on building a winch mount. I have looked over the web at different designs, looked at different trailers at the boat ramp and played around with different ideas on the trailer there at the house. In the end this is what I have came up with. The material is 4" square tube with 1/4" wall. I still have braces that are going to run up to the crash pad to tie everything together and a few other odds and ends to take care of. I figured I would show what I have so far though. The Center Line of the winch is about 1/2" higher than the bow eye. That makes the strap about 1 1/2" higher with the boat all the way on the trailer.  
|
|
|
|
|
Big Pappa
Senior Member
Joined: March-08-2006 Location: United States Status: Offline Points: 322 |
Post Options
Thanks(0)
Quote Reply
Posted: July-23-2012 at 2:48pm |
|
Sunday I also finished up everything on the back of the boat. I got the new Pitots installed on the boat, the tube ran to them and where the tube goes into the boat sealed and the cover put on. I put on the exhaust flaps, re installed the rudder/ prop guard and installed the boat buckle transom straps.
 I need to clean up the swim deck and install it and the back of the boat will be complete. (Minus trailer wiring) |
|
|
|
|
baitkiller
Platinum Member 

Joined: October-11-2011 Location: SW Florida Status: Offline Points: 1693 |
Post Options
Thanks(0)
Quote Reply
Posted: July-23-2012 at 2:57pm |
|
Looks great Papa. One little thing that bugs me on almost every trailer is that the jack handle is mounted on the passenger side. So when you have no help and you back down to hitch up the trailer you wind up doing laps around the boat or truck or smashing you shins on the trailer frame. I have since moved all of my trailer jacks to the driver side. Nothing interferes and my shins are much happier. The boat looks fantastic though.
|
|
|
Jesus was a bare-footer.............
|
|
|
|
|
Big Pappa
Senior Member
Joined: March-08-2006 Location: United States Status: Offline Points: 322 |
Post Options
Thanks(0)
Quote Reply
Posted: July-23-2012 at 3:02pm |
Yep, I back to my trailers alone quite a bit and know what you are talking about. Unfortunately, if i were to move my jack to the drivers side it would interfere with my winch handle. So it is a compromise that I have to make in this instance. 
|
|
|
|
|
newguy1986
Senior Member

Joined: April-08-2011 Location: Houston Status: Offline Points: 226 |
Post Options
Thanks(0)
Quote Reply
Posted: July-23-2012 at 3:29pm |
|
I like that trailer winch mount! you got any detailed drawings / dimensions?
|
|
|
1986sn 2001
|
|
|
|
|
Big Pappa
Senior Member
Joined: March-08-2006 Location: United States Status: Offline Points: 322 |
Post Options
Thanks(0)
Quote Reply
Posted: July-24-2012 at 12:01am |
I do not have detailed drawings but I will take measurements once I have it finished up and thing are a little more solid. |
|
|
|
|
Kristof
Grand Poobah

Joined: October-08-2007 Location: Bree, Belgium Status: Offline Points: 3390 |
Post Options
Thanks(0)
Quote Reply
Posted: July-24-2012 at 6:46am |
|
It all starts coming together nicely Kris... How's the tension on getting her back on the water for the first time...??
|
|
|
- Gun control means: using BOTH hands!
- Money doesn't make one happy, but when it rains cats and dogs, it's still better to cry in a Porsche than on a bicycle... |
|
|
|
|
Big Pappa
Senior Member
Joined: March-08-2006 Location: United States Status: Offline Points: 322 |
Post Options
Thanks(0)
Quote Reply
Posted: July-24-2012 at 1:59pm |
Not much tension, I just want to get it done so I can have a life again. All I have been doing is going to work then coming home and working on the boat.  I am hoping for a water test this weekend!! I am hoping for a water test this weekend!! 
|
|
|
|
|
Big Pappa
Senior Member
Joined: March-08-2006 Location: United States Status: Offline Points: 322 |
Post Options
Thanks(0)
Quote Reply
Posted: July-30-2012 at 6:01pm |
|
Guys I had a fantastic weekend working on the boat. Friday I did some new wiring and cleaned up and organized the wiring and tubing in the bilge while watching the opening ceremonies.
Saturday I finished building my winch mount. I do not have a picture of that though, I will take pictures soon to post. I also finished up my guide on posts. I saw something on the net a while back that I wanted to try for this. Basically you take a heat source and heat up a piece of schedule 40 PVC and heat it up so it is pliable then bend it to the shape that you want. I wanted it to go over the guide poles. I started by trying to use a 1100 degree heat gun. It would heat a small section but I could not get the whole thing up to temp. Then I tried a hand held propane torch. Still did not work good enough. Then out came the big guns. I pulled out my Inferno weed burning torch. See the torch here This did the trick and had a 5' piece of PVC like butter in about a minute. (Insert best Tim Allen Grunt Here!!) So I heated up the PVC slid it over the guide posts and held it where I wanted and helped the bend stay somewhat round until it cooled. If you try this wear welding gloves!!! Once it cooled I threw on a coat of paint. |
|
|
|
|
Big Pappa
Senior Member
Joined: March-08-2006 Location: United States Status: Offline Points: 322 |
Post Options
Thanks(0)
Quote Reply
Posted: July-30-2012 at 6:10pm |
|
Sunday was the big day. Lake test day!!!
I got up put the Guide pole covers on and installed the poles on the boat.  I then loaded up all my required Boat saftey equipment and every tool I thought I could possibly might need. And off to the lake I went. The boat is not 100% but I wanted to have a lake test before I started buttoning everything up and calling it finished. For more go check out the video. 85 SN 2001 LVL Project Water Test The boat handled awesome. The boat is much stiffer than before and handled the chop much better. The lake was pretty rough at times and she handled like a champ. It sits a little higher out of the water than before. Granted I do not have all the seats and everything installed. I did have more than the average amount of tools on board though. I am so pumped right now guys, I can not even tell you!! I am hoping to finish everything up this week and take it out for a day of fun this coming weekend. |
|
|
|
|
Bri892001
Grand Poobah

Joined: September-27-2008 Location: Boston MA Status: Offline Points: 4945 |
Post Options
Thanks(0)
Quote Reply
Posted: July-30-2012 at 6:27pm |
|
That's awesome. Sounds like it's really running nice.
Right between seconds 30-40 on the video, there's a little spray of water that appears then immediately disappears, right behind the engine. Is that the shaft packing? |
|
|
|
|
Big Pappa
Senior Member
Joined: March-08-2006 Location: United States Status: Offline Points: 322 |
Post Options
Thanks(0)
Quote Reply
Posted: July-30-2012 at 6:35pm |
Thanks. First time I have ever ran it on the water without the engine cover on. You hear a lot more noises from the engine and trans that makes you wonder if things are right or not. Everything worked perfectly though!!That was water in the bilge from the dripping shaft packing. It would shift from the front to the back when I took off and hitting the drive shaft made it splash like that. |
|
|
|
|
Big Pappa
Senior Member
Joined: March-08-2006 Location: United States Status: Offline Points: 322 |
Post Options
Thanks(0)
Quote Reply
Posted: August-01-2012 at 4:01pm |
|
Here are a couple of shots of my trailer winch mount. I am going to pull it back off clean up all the welds and shoot some paint on it sometime this week then put it back on the boat all prettied up.
I wanted to give it a try taking the boat to the lake once first to make sure everything would work fine. It did.    I will be ditching the chain soon as well in favor of using a turn buckle on the front. After that I will feel much safer trailering the boat having it held on by a winch and turn buckle on the front and transom straps on the back. I am finishing things up this week and hope to have the boat 100% complete on the inside this weekend. Then I want to give the outside of the boat a good buff and wax to bring the shine back out and put on my new Ski Nautique letters on the side. After that I have some new projects that I want to dive off into like Tinting the windshield, adding a stereo, interior LED lighting, adding a tower, fun stuff like that. First things first I have got to finish the boat!!
|
|
|
|
|
mark c
Gold Member
Joined: May-09-2012 Location: Massachusetts Status: Offline Points: 534 |
Post Options
Thanks(0)
Quote Reply
Posted: August-12-2012 at 5:37pm |
Did you ever get a chance to measure the front observer seat bases? I need to start making a new set for my BFN from scratch and need some general dimensions, heigh width depth, etc. so I can start to build up a set. Thanks, |
|
|
|
|
Big Pappa
Senior Member
Joined: March-08-2006 Location: United States Status: Offline Points: 322 |
Post Options
Thanks(0)
Quote Reply
Posted: August-15-2012 at 2:49pm |
I have not but I will get some together and post them up soon. |
|
|
|
|
Big Pappa
Senior Member
Joined: March-08-2006 Location: United States Status: Offline Points: 322 |
Post Options
Thanks(0)
Quote Reply
Posted: August-15-2012 at 3:32pm |
|
I have not had a whole lot of time to work on the boat the past couple of weeks but I still have gotten a little bit done here and there.
I do not have a picture of it but, I ran my new 8AWG power and ground wires up to the dash. I ran an 8AWG ground wire to the rear of the boat so I have good power and ground now. I wired up the anchor light and the bilge fan as well. So all the wiring in the boat is completed. I still have a little tidying up to do under the engine but everything is hooked up and working. My Depth finder is installed. I have not mounted the transducer just yet I want to get it on the water and try things out first before epoxying it down. I went with the Humming bird because I wanted to be able to see readings when the water was shallower than 3 feet. To me that is the most important time!!  I finished up my battery box lid. I am using a flip up handle vs the hole in the top like they did from the factory. Hopefully it will not rattle. If it does then I will figure something out.  I painted the underside of the rear floor and put the carpet and trim on the rear removable floor. I also have some rubber on top of the stringers. I did not want the have the painted surfaces just sitting together rubbing on each other so this should work well.  I painted and carpeted my gas tank covers. I never did take a picture of all 3 pieces in by themselves. I still have to add some finger tabs to them so that I can get them back out easier so I will take a picture when I do that.  Here are the seat bases all painted and carpeted waiting to go in the boat patiently.  Here is the rear seat mocked into place getting the tops of the side seats adjusted to match the top of the boat. 
|
|
|
|
|
Big Pappa
Senior Member
Joined: March-08-2006 Location: United States Status: Offline Points: 322 |
Post Options
Thanks(0)
Quote Reply
Posted: August-15-2012 at 3:43pm |
|
I think I may have found the source of my oil leak. It looks like it is coming from this on the fuel pump. It is like a plug or something. Is this something that can be tightened up or does the fuel pump need replacing?

|
|
|
|
|
Donald80SN
Grand Poobah
Joined: January-12-2009 Location: Denver, NC Status: Offline Points: 3887 |
Post Options
Thanks(0)
Quote Reply
Posted: September-09-2012 at 4:30am |
|
Nice work.
|
|
|
|
|
Big Pappa
Senior Member
Joined: March-08-2006 Location: United States Status: Offline Points: 322 |
Post Options
Thanks(0)
Quote Reply
Posted: September-17-2012 at 2:33pm |
Thanks!!!
|
|
|
|
|
Big Pappa
Senior Member
Joined: March-08-2006 Location: United States Status: Offline Points: 322 |
Post Options
Thanks(0)
Quote Reply
Posted: September-17-2012 at 2:54pm |
|
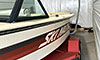
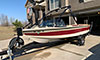
Hey everyone it has been a few weeks since I last posted. Mainly because life with school, kid activities, work, yadda, yadda, yadda. Anyway the boat is for the most part complete.
I say for the most part because I still have a few things to do like, popup cleats, bigger cup holders, clean and buff the whole boat, scrub the seats and get them back to like new clean, etc... Besides are these boats ever complete? Down the road I see a stereo, interior lights, tower... It is completely operational now though. Let me show you all what I have completed. Here is the tongue of the trailer. There are several new things here. - New Crash pad wood and carpet. - Winch mount painted and holes drilled for the safety chains to hang on while not hooked to my truck. - Ditched the Chain and installed a turn buckle  Here is the inside of the front of the boat with all the interior completed.  And the back of the boat interior all done.  The small side seats in the back and the one in the front are not mounted to anything at all. I found that the friction of the other seats in there was enough to hold them in no problem. I wanted to be able to pull these out easily after being in rain or during the winter so that it would be easy to let things dry out. These are pictures of the new lights. I completely rewired the trailer and replaced all the lights with LED. All connections were crimped soldered then covered with weather proofing heat shrink. The lights on top of the guide on poles are awesome when backing the boat in the dark!!!    This is what makes all the work worth it, bringing my family out and having fun together!!  This is just a cool shot from while we were on the water yesterday. 
|
|
|
|
|
Bri892001
Grand Poobah
Joined: September-27-2008 Location: Boston MA Status: Offline Points: 4945 |
Post Options
Thanks(0)
Quote Reply
Posted: September-17-2012 at 3:04pm |
|
Wow, very nice. Looks awesome.
|
|
|
|
|
Big Pappa
Senior Member
Joined: March-08-2006 Location: United States Status: Offline Points: 322 |
Post Options
Thanks(0)
Quote Reply
Posted: September-17-2012 at 6:01pm |
Thanks!!
|
|
|
|
|
MattB
Senior Member

Joined: September-30-2011 Location: Nottingham UK Status: Offline Points: 376 |
Post Options
Thanks(0)
Quote Reply
Posted: September-18-2012 at 8:40am |
|
Kris, just wanted to add my congrats and thanks for putting this all out there on the site, it might be a long thread dated back to Jan 2008 but you have finished with a boat you can and should be very very proud of. Great pictures and descriptions.
I think Brian said everything in a lot less words than me "WOW" I look forward to your next 4 year thread |
|
|
|
|
Kristof
Grand Poobah
Joined: October-08-2007 Location: Bree, Belgium Status: Offline Points: 3390 |
Post Options
Thanks(0)
Quote Reply
Posted: September-18-2012 at 12:14pm |
|
Very nice work. She looks great!!
 |
|
|
- Gun control means: using BOTH hands!
- Money doesn't make one happy, but when it rains cats and dogs, it's still better to cry in a Porsche than on a bicycle... |
|
|
|
|
Post Reply
|
Page <1 10111213> |
 Tweet
Tweet
|
| Forum Jump | Forum Permissions You cannot post new topics in this forum You cannot reply to topics in this forum You cannot delete your posts in this forum You cannot edit your posts in this forum You cannot create polls in this forum You cannot vote in polls in this forum |


 Topic Options
 TRBenj wrote:
