 Boats For Sale:


Hellroaring Battery Isolator / Combiners |
Post Reply 
|
Page <12 |
| Author | |
akabulla 
Gold Member 

Joined: November-15-2008 Location: United States Status: Offline Points: 649 |
 Post Options Post Options
") Thanks(0) Thanks(0)
 Quote Reply Quote Reply
 Posted: February-10-2009 at 1:54pm Posted: February-10-2009 at 1:54pm |
|
Perfect! Thanks again for the info!
|
|
 |
|
|
akabulla
Gold Member
Joined: November-15-2008 Location: United States Status: Offline Points: 649 |
Post Options
Thanks(0)
Quote Reply
Posted: February-16-2009 at 12:28am |
|
I checked out Sam's and they have SC34DM Blue Tops for $99 bucks! It seems TOO Cheap. Is that the same as the D34m-950s? I assume so, right?
|
|
|
|
|
MorganB
Groupie 
Joined: February-02-2009 Location: New Zealand Status: Offline Points: 61 |
Post Options
Thanks(0)
Quote Reply
Posted: February-16-2009 at 10:49pm |
|
No that it looks like this system does not work i think it looks a bit more complex than needed, all you need is a VSR (voltage Sensing Relay) the ones we use will connect the 2 batteries together at 13.6V(off the top of my head) Normal battery voltage when Being charged, as soon as the Motor battery drops below about 13v it will disconnect, it will also Disconnect during engine cranking saving your Electronics on your house battery from getting a spike during starting (very Common)
The main advantage of this is the simplicity to hook up. you leave the normal system as it is, run a positive batt cable from the Start battery to the new battery with the VSR in the Middle, Ground the battery connect your Electronics to the new Batt and your done. this does not give you the Emergency connect function but that is as simple as one battery switch bi-passing the VSR |
|
|
|
|
Randy_in_Ohio
Platinum Member

Joined: September-13-2006 Location: N. Canton, OH. Status: Offline Points: 1891 |
Post Options
Thanks(0)
Quote Reply
Posted: February-17-2009 at 11:26pm |
|
Morgan
The system works! Not sure where you got that from... I considered using a VSR setup, but after doing much research, decided that the isolator/combiner was a better choice. From what I gathered, relays can be a bad choice due to the high internal resistance and voltage drop problems and they have moving parts that can become corroded or welded. Isolator/ combiner does not have these problems. I know it cost a bit more, but I have always been one to do it once and do it right the first time. 
I have tested this system thoroughly. IT WORKS GREAT! and not too complex either... |
|
|
|
|
akabulla
Gold Member
Joined: November-15-2008 Location: United States Status: Offline Points: 649 |
Post Options
Thanks(0)
Quote Reply
Posted: April-11-2009 at 5:33pm |
|
Hey Randy, not to keep beating a dead horse but did you mount the isolator on the cradle like you showed in your original post? What size cables are you using? I assume you stuck with your stock alternator?
Finally got the floor done so I am working the details out on the electrical system. Thanks! |
|
|
|
|
Randy_in_Ohio
Platinum Member
Joined: September-13-2006 Location: N. Canton, OH. Status: Offline Points: 1891 |
Post Options
Thanks(0)
Quote Reply
Posted: April-11-2009 at 7:09pm |
|
Yes, I mounted it in the cradle below the RWP as shown in the picture. I used the original alternator. I think I used 6 AWG wire from the distributor. You need to make sure you have enough resistance in the wire from the alternator. you may need to use a smaller gauge wire than I did from the alternator depending on how far the alternator is from the battery. I would suggest giving Mike a call at Hellroaring and tell him what you are doing and how far your run is from the alternator. He was very helpful when I set mine up.You should be able to get a hold of him today or just leave him a message and he'll call you back. I would run everything by him first, just to make sure you have it right before you start.
Don't cheap out on your cables or connectors! Remember, the system is only as reliable as the connections. I used the highest quality cables I could find and soldered all the terminals to the wires and used shrink tube. |
|
|
|
|
mndanielsncsu
Senior Member 

Joined: March-27-2008 Location: Huntersville NC Status: Offline Points: 115 |
Post Options
Thanks(0)
Quote Reply
Posted: April-18-2009 at 11:50pm |
|
Randy - I've been considering putting in a 2nd battery. Where did you put your 2nd battery? I'm assuming you left one in the original location, under the middle of the back seat?
|
|
|
|
|
Randy_in_Ohio
Platinum Member
Joined: September-13-2006 Location: N. Canton, OH. Status: Offline Points: 1891 |
Post Options
Thanks(0)
Quote Reply
Posted: April-19-2009 at 6:02am |
|
I put the second battery under the helm behind the kick panel. I have the battery, 5 channel amp, XM receiver, Ipod controller, and a couple breaker switches under there. If you want, I will post some pics, I have it apart right now installing the XM receiver I mentioned. I had an old XM Roady, one of the original XM radio's, that I canceled five years ago but continued to work for free up until this spring.

|
|
|
|
|
mndanielsncsu
Senior Member
Joined: March-27-2008 Location: Huntersville NC Status: Offline Points: 115 |
Post Options
Thanks(0)
Quote Reply
Posted: April-19-2009 at 8:41pm |
|
Yeah, if you don't mind snapping a pic, that'd be great. I'm not sure I'll have room there because I built a custom subwoofer enclosure that takes up some of that space. I had a sub box under the passenger seat, but hated losing the space, so I built this enclosure and rebuilt the kickplate.
I may have to look into it though. I'm running 2 amps that are mounted on the sides of my rear seat and always stress that I'll drain my battery when anchored and listening to music. I have a Optima D34M. |
|
|
|
|
Randy_in_Ohio
Platinum Member
Joined: September-13-2006 Location: N. Canton, OH. Status: Offline Points: 1891 |
Post Options
Thanks(0)
Quote Reply
Posted: April-20-2009 at 12:23am |
|
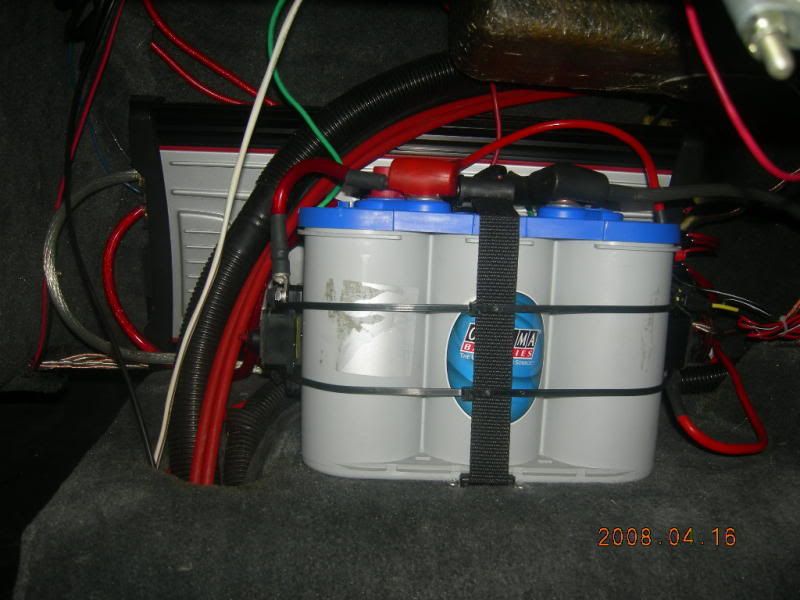
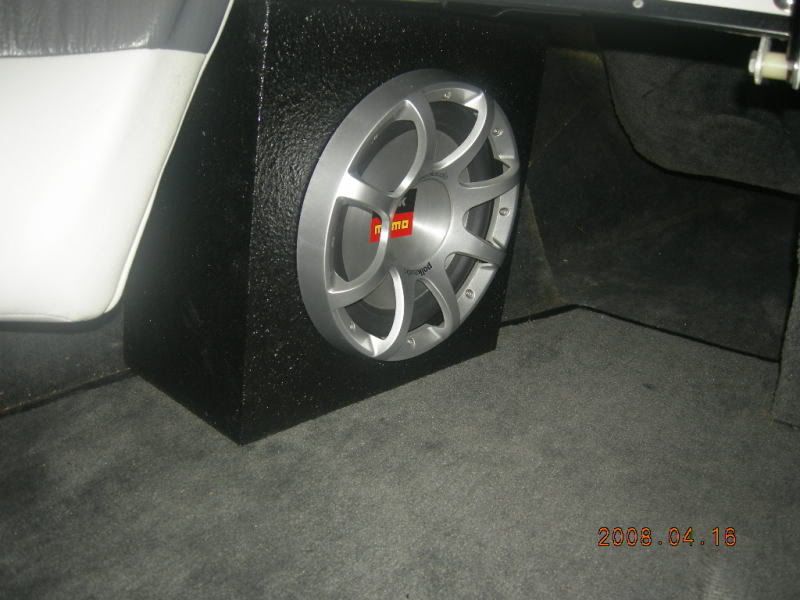
here's some pics from when I did it.
I built a sub box to fit under the passengers seat. I wish I could have found a better place to put it, but I knew I needed the room under the helm for the battery and amp I figured they would be better off up there since there is no activity back there and it stays nice and dry. The sub doesn't get in the way too bad here, I can still access under the bow seating. 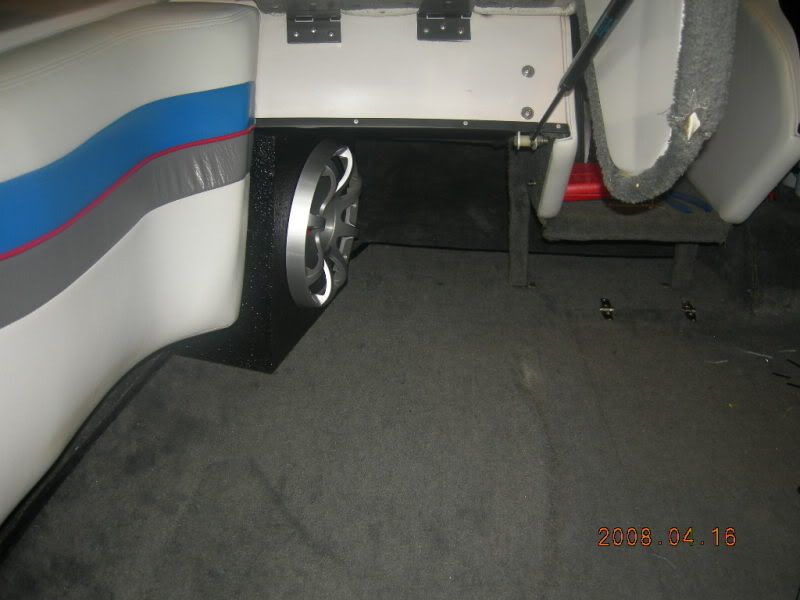
While were at it, here is one of the 6.5 polk db's 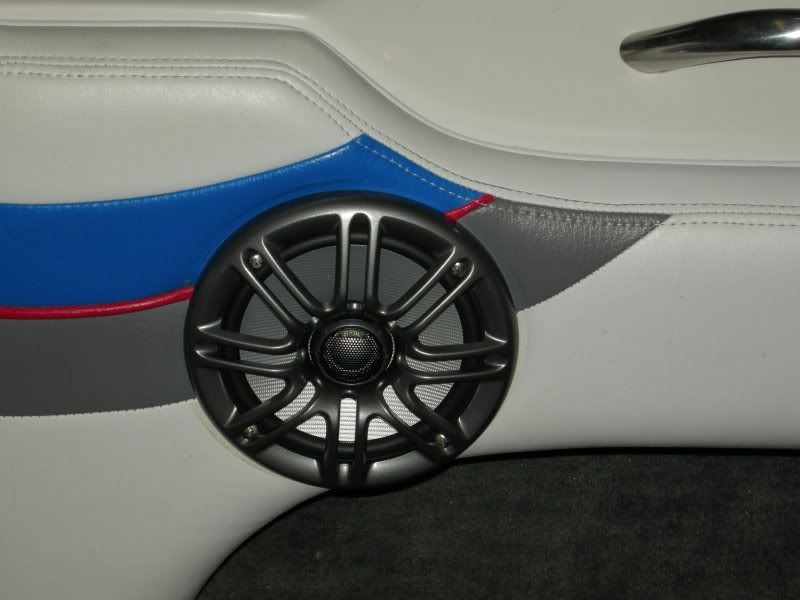
and the Hellroaring unit... 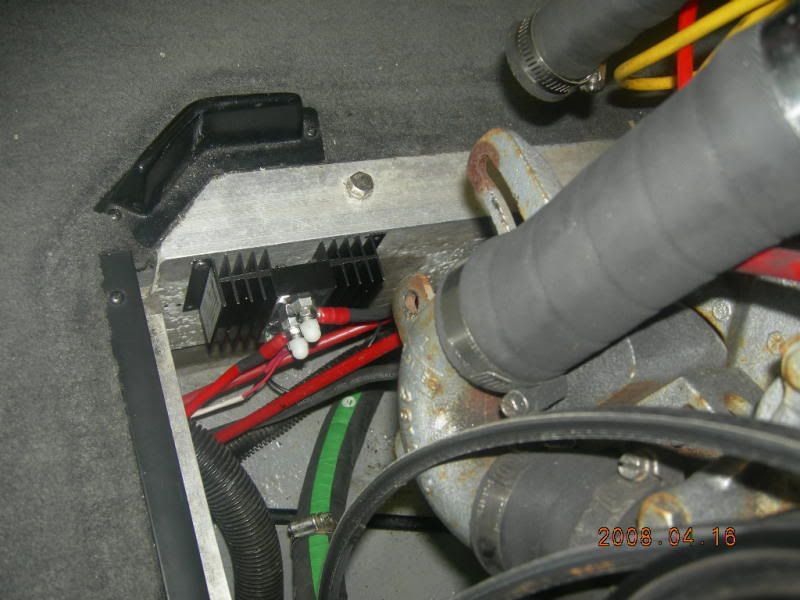
And, a close up of my knob. Just because I know everyone here likes to look at my knob! 
|
|
|
|
|
akabulla
Gold Member
Joined: November-15-2008 Location: United States Status: Offline Points: 649 |
Post Options
Thanks(0)
Quote Reply
Posted: April-20-2009 at 3:05am |
|
Hey Randy that is a nice looking install!
I see you ran what looks to be like 8 gauge wire from the hellroaring isolator to the secondary battery? That is what I was told to do from HellRoaring. But then you have a 0/1 Gauge wire running off the battery to the amps? So even if the second battery is getting a charge then the least amount of resistance for the amp would be to draw off the battery and not the alternator correct? So would there ever be a possibility of the smaller 8 gauge wire getting hot from the amp possibly drawing down that line back to the isolator? Hope that made sense! I am about 2 weeks out from wiring my entire boat and my plan is to do pretty much exactly like you show in your pics. Later! |
|
|
|
|
Randy_in_Ohio
Platinum Member
Joined: September-13-2006 Location: N. Canton, OH. Status: Offline Points: 1891 |
Post Options
Thanks(0)
Quote Reply
Posted: April-20-2009 at 3:51am |
|
akabulla,
Thanks, Just finished adding the XM and iPod adapter for the head unit today. Now I can control everything from the head unit. I can't remember all the details of the install but everything works perfect. I used it a lot last year, no trouble. Checked all the cables for excessive heat, all is good. The amp is wired directly to the aux. battery. I don't see how it could draw off of the alternator. Like I said before, I gave Mike from Hellroring a call before I started and ran through all my plans, I did a drawing of everything and scanned it then emailed it to him and he gave me feedback and I adjusted the plans as he recommended. I have a pretty good understanding of electrical circuits, but Mike deals with this everyday, so he knows what he's talking about. I would really recommend giving him a call before you start. I have a pdf of the instructions that came with it, if you want, send me an email and I'll send them to you. you definitely want to have a solid plan before you start. Take you time and do it right. Good luck |
|
|
|
|
mndanielsncsu
Senior Member
Joined: March-27-2008 Location: Huntersville NC Status: Offline Points: 115 |
Post Options
Thanks(0)
Quote Reply
Posted: April-20-2009 at 10:49am |
|
Thanks for the pics Randy. The install looks good.
I'm going to have to check and see if I can squeeze a battery behind my custom sub box, because I like the idea of having it concealed like you do. I actually had my sub box in the exact location that you currently do. I bought a Q-logic box for my 10" sub, but didn't like how it hit, so I decided to get a new sub and build the box to their specs. Pretty happy with the outcome. I'd like to see the Hellroaring PDF, so I'll shoot you an email. |
|
|
|
|
Randy_in_Ohio
Platinum Member
Joined: September-13-2006 Location: N. Canton, OH. Status: Offline Points: 1891 |
Post Options
Thanks(0)
Quote Reply
Posted: April-20-2009 at 10:55pm |
|
Matt, check your email...
|
|
|
|
|
Randy_in_Ohio
Platinum Member
Joined: September-13-2006 Location: N. Canton, OH. Status: Offline Points: 1891 |
Post Options
Thanks(0)
Quote Reply
Posted: April-20-2009 at 11:30pm |
|
Here are some zip files of the pdf and the drawing that I sent Matt for anyone else who may come across this and need them.
BIC_9150B_Install_Diagram.zip Hellroaring_BIC-95150B_instructions_rev_B.zip |
|
|
|
|
mndanielsncsu
Senior Member
Joined: March-27-2008 Location: Huntersville NC Status: Offline Points: 115 |
Post Options
Thanks(0)
Quote Reply
Posted: April-21-2009 at 2:00am |
|
Thanks again Randy. Greatly appreciated. I'll keep you guys posted if/when I decide to take this on.
|
|
|
|
|
akabulla
Gold Member
Joined: November-15-2008 Location: United States Status: Offline Points: 649 |
Post Options
Thanks(0)
Quote Reply
Posted: April-21-2009 at 2:12am |
|
This is really good info and not to confuse you to much I am pretty much doing my entire electrical system from scratch for my rebuild and this is what Mike helped me put together. Anything that can run when the boat is off, lights, bilge, blower, etc... will be on the secondary battery!
You can ignore the relay stuff at the top. I am trying to design it so when the engine is on the voltmeter in the dash will show the main voltage and when the key is off I can monitor the secondary battery voltage. 
Later! |
|
|
|
|
Post Reply
|
Page <12 |
 Tweet
Tweet
|
| Forum Jump | Forum Permissions You cannot post new topics in this forum You cannot reply to topics in this forum You cannot delete your posts in this forum You cannot edit your posts in this forum You cannot create polls in this forum You cannot vote in polls in this forum |


 Topic Options