 Boats For Sale:


97 Ski Nautique Winter Maintenance |
Post Reply 
|
Page <12 |
| Author | |
scorban2 
Newbie 
Joined: September-15-2017 Location: IL Status: Offline Points: 24 |
 Post Options Post Options
") Thanks(0) Thanks(0)
 Quote Reply Quote Reply
 Posted: March-28-2018 at 2:53pm Posted: March-28-2018 at 2:53pm |
|
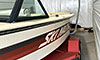
You guys got me thinking a little about the shaft log alignment, so I went out and took some pictures. Its definitely off center in the log, and when looking forward you can tell that it's not perfect centered with the boat. If you sit at the back, and look forward from the center of the strut, you can't see any of the shaft, nor the tracking fins, but you see the shaft sooner when you lean to the left vs. leaning to the right.
When I took the old shaft out (with the engine more centered), there didn't seem to be any binding indicating that the alignment was poor. The shaft, however, was bent, and when I was spinning the coupling to press the shaft out, there were points where it was hard to turn due to binding with the packing nut. I did have quite a time getting the front bearing out of the strut - any chance that my pounding with a hammer and a punch/chisel could have bent the strut? Is it worth trying to bend it back? The shaft does spin very freely, but it's not pointed perfectly straight forward.   
|
|
 |
|
|
MrMcD
Grand Poobah 

Joined: January-28-2014 Location: Folsom, CA Status: Offline Points: 3590 |
Post Options
Thanks(0)
Quote Reply
Posted: March-28-2018 at 4:04pm |
|
Minor tweaks of your strut can be done using your old/bad prop shaft.
Put it in the strut and you have a 4' bar to tweak the strut the direction you want. I would not get carried away doing this. But if you need to move it slightly this may do it. If you need more movement the right way is to remove the bolts and re bed the strut so it is aligned better to your needs. Maybe there is a specification telling us how close the shaft has to be to center and straight for proper use of your boat. |
|
|
|
|
scorban2
Newbie
Joined: September-15-2017 Location: IL Status: Offline Points: 24 |
Post Options
Thanks(0)
Quote Reply
Posted: March-29-2018 at 9:42am |
|
Agree, I'd be interested in seeing what the specification or commonly accepted amount of misalignment of the shaft is. As much as I dont want to tear it apart and realign things, I also want it done right. At least I have the ARE shaft, so disassembly is easy!
|
|
|
|
|
scorban2
Newbie
Joined: September-15-2017 Location: IL Status: Offline Points: 24 |
Post Options
Thanks(0)
Quote Reply
Posted: April-01-2018 at 3:13pm |
|
Do you using the old shaft to tweak the strut would cause damage to the new cutlass bearing? Is it worth trying to remove it before using the old shaft to adjust the strut?
Stephen |
|
|
|
|
MrMcD
Grand Poobah
Joined: January-28-2014 Location: Folsom, CA Status: Offline Points: 3590 |
Post Options
Thanks(0)
Quote Reply
Posted: April-01-2018 at 10:36pm |
|
Good question, I do not think it would cause damage to the cutlass bearing but that is my opinion only. No concrete facts to back it up.
There is nothing written stating it is OK to tweak the strut using the old shaft but I know it has been done. If your strut is way off this is not the way to fix it. If you need a 1/8 inch or less side to side at the shaft to tranny connection I think that would be achievable. For up and down movment you will need to remove the strut and rebed it. Might need to add a couple washers in the rear between the hull and the strut to get your angle correct. Mine was way off about 2 inches if my memory is correct. The previous owner must have taken a hard hit. I had to sand the strut bottom and create a little angle from the front to the rear to raise my prop shaft up. I used a 4" belt sander for this to make it a little thinner in the front and thicker in the rear but still flat. My old 4" belt sander has a large flat hard plate on the bottom that worked well to adjust the strut.. The belt sander cut the brass strut face quickly so have a plan, have it marked and take it slow. I limited the sanding because I was afraid to make the strut weak. Additionally I had to add two washers in the rear to get the up and down angle correct. My side to side angle was not an issue. I bought about 15 stainless washers at the local hardward store all the same diameter and same bolt size but I found they varied in thickness, I measured eash one and wrote the size on it with a felt pen. When I was getting close I could add and subtract angle by using the different sized washers till I had it right. The prop shaft location at the tranny can be moved quite a bit by adding washers to the correct strut bolt mount hole. The shaft will move a fair amount just by adding a washer as needed. I chose to bed mine once straight with the 5200 because I wanted it to stay put and because I had to use those washers which I assumed would weaken my strut attachment to the bottom of the boat. With 5200 I think the strut is very strong and I do not worry about it. Make really clear marks on the hull and the strut once you find where you want it to be once bedded. I used a sharpie on the brass and hull bottom. Make the lines a little wide because the 5200 will squease out and a close mark may get covered leaving you blind to proper location right as you are trying to tighten the bolts. The sharpie marks wipe right off with laquer thinner once you are done. |
|
|
|
|
gt40KS
Gold Member 

Joined: August-05-2017 Location: Wichita Kansas Status: Offline Points: 943 |
Post Options
Thanks(0)
Quote Reply
Posted: April-01-2018 at 11:28pm |
|
I'm thinking the operative word here is "minor". Try to give it a good torque or actually try to straighten a bent strut and I'd think you could damage the bearing or the strut.
|
|
|
JCCI
1995 Ski Nautique GT40 |
|
|
|
|
KENO
Grand Poobah
Joined: June-06-2004 Location: United States Status: Offline Points: 10641 |
Post Options
Thanks(0)
Quote Reply
Posted: April-02-2018 at 1:30am |
|
You don't even know that you have a bent strut. It could be a "not so good" installation job from the factory.
Why would you want to use brute force when you can take the strut off and get it aligned right?. You probably have enough wiggle room just with the holes in the hull that the strut is bolted through to get the shaft centered in the log since you're looking for side to side movement and not up and down Or you open up the holes a little to give the wiggle room and whatever sealant you use will prevent any leaks . Or fill in the holes that need to be changed a little and redrill. |
|
|
|
|
scorban2
Newbie
Joined: September-15-2017 Location: IL Status: Offline Points: 24 |
Post Options
Thanks(0)
Quote Reply
Posted: April-11-2018 at 3:13pm |
|
Well, I've decided to keep the strut/shaft as is (good alignment trans/shaft, but not centered in the log) after talking to the folks at Skidim and a trusted inboard mechanic I've known a while. Worst case, I don't like the way it drives, and I move it.
Which means, onto other projects! 2 new questions. 1) I pulled the rudder early this winter as I wanted to repack it (plus it would be in the way for the shaft work), and pulled 4 wraps of packing out. Measured width wise, the wraps were all 1/4" wide, and I confirmed that I needed 1/4" by confirming that the nut was 1.75" ID and the rudder shaft was 1.25" OD, After ordering new packing (used 1/4" for both the prop shaft and rudder), I noticed that the original packing was definitely 3/16". The total height of the 4 wraps of the old packing was ~0.65", which is very similar to 2 wraps of the new 1/4" packing. I tried to get 3 wraps of the 1/4" in there, but I couldn't get the nut down enough to clamp the tiller arm to the top of it. Any issue running (to start) with just the 2 wraps? I figure if it leaks, and I get it clamped down too far so that the rudder is hanging too low, I could add another wrap back in. On a similar topic, what's the spec for how low the rudder can hang? It's about 1./8" out right now.  2) Last year, I was constantly having to raise the engine cover to tighten the knob on the front of the PP motor due to not getting any response from the throttle until well after it went into gear. Tightening the knob takes care of things, but sitting in the shop, the cable would pull out in relation to the sheath after cycling the handle from neutral to full forward just a few times. Is there any easy fix for this, or is this an issue with the PP motor? Per the previous owner, the system (PP classic with the single line, standalone display) was installed when the boat was new (950 hrs on it).  |
|
|
|
|
KENO
Grand Poobah
Joined: June-06-2004 Location: United States Status: Offline Points: 10641 |
Post Options
Thanks(0)
Quote Reply
Posted: April-11-2018 at 3:38pm |
|
Speaking of projects, how are the 5 1/2 inch exhaust manifold bolts treating you from the manifold project?
Also, nothing wrong with 1/8 inch on your rudder |
|
|
|
|
scorban2
Newbie
Joined: September-15-2017 Location: IL Status: Offline Points: 24 |
Post Options
Thanks(0)
Quote Reply
Posted: April-11-2018 at 3:44pm |
|
I haven't put them in yet. Based on measurements with the depth gauge on the caliper, I should be right there on length, with enough thread, but it will be close. Figure I'll chase the threads in the manifold with a tap, and if it pulls too hard before I get good clamping, I'll cut them down a bit.
|
|
|
|
|
Post Reply
|
Page <12 |
 Tweet
Tweet
|
| Forum Jump | Forum Permissions You cannot post new topics in this forum You cannot reply to topics in this forum You cannot delete your posts in this forum You cannot edit your posts in this forum You cannot create polls in this forum You cannot vote in polls in this forum |


 Topic Options