water behind a stringer
Printed From: CorrectCraftFan.com
Category: Repairs and Maintenance
Forum Name: Boat Maintenance
Forum Discription: Discuss maintenance of your Correct Craft
URL: http://www.CorrectCraftFan.com/forum/forum_posts.asp?TID=12301
Printed Date: May-04-2024 at 11:05pm
Topic: water behind a stringer
Posted By: WakeSlayer
Subject: water behind a stringer
Date Posted: November-03-2008 at 6:41pm
|
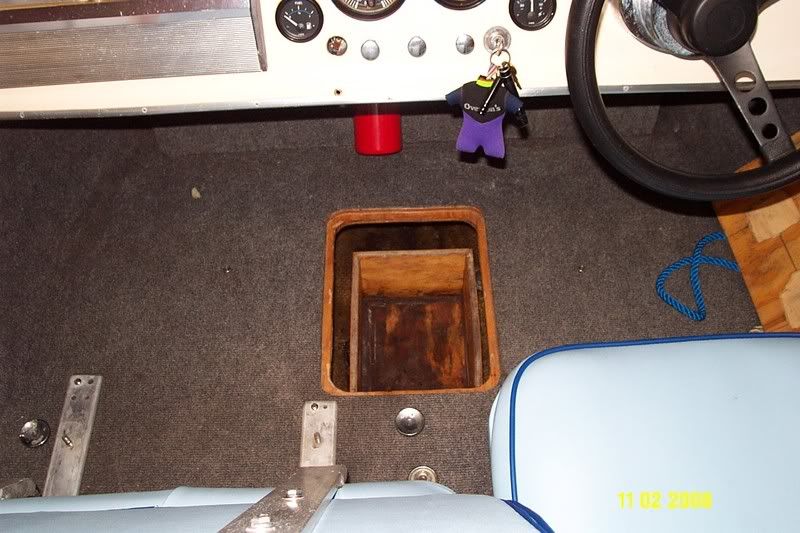
I have been working on the Mustang the last couple weeks. Steering cable, rudder packing, some wiring, cleaning up the bilge area.
I noticed a teeny puddle a couple of times near the pylon mount. Knowing I had wiped this out more than once, I cracked a beer and watched, and waited... About halfway through my beer, I see a little dribble coming from behind the primary starboard stringer approximately where the back of the drivers seat is. <sigh> <expletive NOT deleted> While the floor panels were up I had poked around a little and had found one little damp spot on the starboard side below the gas tank, but that has since dried. I knew at some point i should probably pull the actual floor up and really look. Apparently the when part has been decided for me... I have a large heated shop and most, if not all the tools I will need. And the time, with 5+ months til the lake is ready again. My lovely wife thinks i always need a project going, and since I have recently finished renovating her horse barn, I may as well make her boat the next one. I am starting the process of searching the forums, reading the Great Pumpkin story, etc. I am going to need some help, ideas, and encouragement from the dudes here. I would like to start getting after the floor tonight. I had read the circular saw method and the sawzall method. If by some reason my stringers are still good, I would like to have a reference point from the old floor, so I think I want to leave a couple inches around and go with the circular saw set very shallow, 1/4 - 3/8". Any initial comments, moral support ? We'll be talking a lot over the winter !! thanks in advance. Mike ------------- Mike N 1968 Mustang |
Replies:
Posted By: JoeinNY
Date Posted: November-03-2008 at 6:58pm
|
Sawzall method is relatively safe quick, cicular saw a little scary and does leave that floor attached on the outside, if you ever need to take that off you could at least then see what the sawsall blade is duing under there. Fastest for almost everything cut is a good grinder with a diamond wheel. Sounds like a good winter time a comin.. good luck. ------------- http://www.correctcraftfan.com/diaries/details.asp?ID=1477 - 1983 Ski Nautique 2001 1967 Mustang 302 "Decoy" http://www.youtube.com/watch?v=cO5MkcBXBBs - Holeshot Video |
Posted By: TRBenj
Date Posted: November-03-2008 at 7:00pm
|
Are you sure the water isnt coming from the battery box? My Skier's box has a drain into the bilge through the primary stringer in that location. ------------- |
Posted By: storm34
Date Posted: November-03-2008 at 8:19pm
|
WakeSlayer- I know the feeling, my dad and I are now planning on doing a complete floor/stringer job this winter on my 88SN. I'm just glad we have these guys on the site to help along the way!
I tore into our floor just a few days ago, haven't had that much fun in a long time! ------------- |
Posted By: WakeSlayer
Date Posted: November-03-2008 at 9:06pm
|
Positive on the battery box. Mine is raised up, and I have never seen water in it. The battery does not even go all the way into the floor under the drivers seat. I will take a pic of the suspicious hole, however, no two ways about it, I have water in there. ------------- Mike N 1968 Mustang |
Posted By: WakeSlayer
Date Posted: November-04-2008 at 2:37am
|
Into the fire with both feet.
I cut off the top of the floor on the entire starboard side from the battery box back this evening. The foam is nice and dry on the top half, and then soggy to sopping from there downward. The wood that I have exposed so far is wet on all sides. I have not found any rot yet. The water has got in between the foam and the glass, and once you get down that far, separates from the hull pretty easily. I was able to get about 4 feet worth of foam on the one side removed tonight. This is going to take a couple weeks just to get the foam out. I do not think that the gouge in the gelcoat caused this as I thought earlier. Perhaps just wishful thinking. I suspect that the motor mounts have been modified at some point to raise them up. I will post a pic later, I forgot my camera in my shop. One of my two lags holding the front starboard mount to the stringer had missed it entirely and was just sticking into the foam. I will be pulling the motor next weekend. I am in for the long haul. I had really not planned on this this winter. More to come. ------------- Mike N 1968 Mustang |
Posted By: JoeinNY
Date Posted: November-04-2008 at 2:47am
|
Take a pitchfork to that foam it will be gone on the double quick and come out cleanly and in big chunks. ------------- http://www.correctcraftfan.com/diaries/details.asp?ID=1477 - 1983 Ski Nautique 2001 1967 Mustang 302 "Decoy" http://www.youtube.com/watch?v=cO5MkcBXBBs - Holeshot Video |
Posted By: WakeSlayer
Date Posted: November-04-2008 at 3:33pm
|
A pitchfork? Wow. I can see that in the bigger open parts, I am just in the small sections next to the motor at the moment. No way to get one in there. I am starting to get over my fear of prying and such against the hull, and I am only using a putty knife at the moment. ------------- Mike N 1968 Mustang |
Posted By: TRBenj
Date Posted: November-04-2008 at 7:46pm
Holy hell. Before you know it you'll be swinging a flat bar like a hammer and prying the foam out in big chunks. In larger areas, the pitchfork sounds like a good idea. The hull is thick, no need to be gentle! ------------- |
 WakeSlayer wrote:
Posted By: WakeSlayer
Date Posted: November-04-2008 at 8:14pm
HA! s l o w l y figuring that out. Will graduate to the flat bar next. I was just getting a feel for it, and really pretty limited on room at first. I cut the that whole side's floor out and have more room. Of course, I only cut out a 12in square at first, because I had the only 40 year old dry boat in the world, except for that one little spot...  ------------- Mike N 1968 Mustang |
Posted By: Gary S
Date Posted: November-05-2008 at 12:35am
Tim I've got the picture in my head of The History Channel digging up dinosaur bones with a tooth brush 
Hang in there Mike,I used a prybar and my favorite, a garden trowel ------------- http://www.correctcraftfan.com/diaries/details.asp?ID=1711&sort=&pagenum=1&yrstart=1966&yrend=1970" rel="nofollow - 69 Mustang HM SS 95 Nautique Super Sport |
Posted By: BuffaloBFN
Date Posted: November-05-2008 at 10:50am
|
I used a trowel and a sharp shooter shovel. By the time you finish, I bet you'll be surprised at the meathods you're using from start to end...I was! ------------- http://correctcraftfan.com/diaries/details.asp?ID=2331&sort=&pagenum=12&yrstart=1986&yrend=1990" rel="nofollow - 1988 BFN-sold "It's a Livin' Thing...What a Terrible Thing to Lose" ELO |
Posted By: JoeinNY
Date Posted: November-05-2008 at 1:02pm
|
I used a gasket scraper on the mustang eventually moved to a flat bar, started with a flat bar on the 83 did maybe an eight of the foam the night I cut out the floor, next day I saw BKH suggest a pitch fork, half hour later all my foam was gone. Best part was that when it comes out in big chunks you dont have to scrape thin layers off the fiberglass as you can lose a lot of time there.
Similar story with the sawzall, it can be a big time saver, on the 2001 hulls the only place to use extra care with the sawzall is the pockets in the sides in the back two feet of the hull, they are only about an inch under the floor and if you follow the hull back with your blade too far back there you will not be happy. ------------- http://www.correctcraftfan.com/diaries/details.asp?ID=1477 - 1983 Ski Nautique 2001 1967 Mustang 302 "Decoy" http://www.youtube.com/watch?v=cO5MkcBXBBs - Holeshot Video |
Posted By: WakeSlayer
Date Posted: November-05-2008 at 1:58pm
|
I took a couple chunks out with the flat bar last night. that is way way better. The foam is coming off the fiberglass really easily. I will get a lot more done this evening, was pretty engrossed in the election coverage last night.
Man, I cannot believe how wet it is in there... ------------- Mike N 1968 Mustang |
Posted By: eric lavine
Date Posted: November-05-2008 at 5:52pm
|
once everything is cut out I will use a comercial de-humidifier to pull the rest of the water out until it is completely dry, with the cover on.
you could also substitute a dehumidifier with a window air conditioner and use the cover as a barrier to close things up. this process really speeds up the drying out process ------------- "the things you own will start to own you" |
Posted By: WakeSlayer
Date Posted: November-05-2008 at 8:19pm
|
That is exactly what I was going to do. Still nervous about what I will find on the wood, but so far so good. As far as appearance goes anyway... ------------- Mike N 1968 Mustang |
Posted By: WakeSlayer
Date Posted: November-06-2008 at 1:33am
|
I got some more foam ripped out tonight. The flat bar is way, way better. I am moving into pitchfork territory tomorrow night.
I have made a couple observations. Someone has clearly messed with this boat before as the motor mounts are goofy, non-matching, and have me a little concerned. I also think there has been a little work on the area around where the exhaust goes through the floor. I found a 1975 penny in the area under the floor behind the exhaust. Clearly, that is not original... I feel like the wood looks really good considering the amount of water I have found. Still cautiously optimistic there. The only piece that I have found that is soft is a small flat piece of plywood, mounted perpendicluar, separating the chamber that the exhaust goes though from the frontmost part of that channel. ------------- Mike N 1968 Mustang |
Posted By: kevin719
Date Posted: November-06-2008 at 8:14pm
|
I used a estwing claw hammer on my foam and it worked pretty good as well.Swung and buried the claw in the foam and pried up big chunks of that nasty crap. ------------- kevinindy |
Posted By: WakeSlayer
Date Posted: November-08-2008 at 11:30am
I made really good progress the last couple nights. Have a another garbage can and 8 bags out. I am sticking with the flatbar as it works great. I have the wrong pitchfork for doing this... You would have to have the one with the fat tines on it. The bow was totally dry. The starboard side of bow was soaked, but the port side was perfect and looks new under the foam. I also found what I believe to be the culprit. There is a 5-6 inch patchjob in front of the drivers seat. This had to have been patched from the outside, and could well be the reason the boat was painted, too. Will get the rest of the foam out today. Motor out tomorrow, then start drying for a few days. I am still really confident about the wood. Only a couple small cross supports appear to be suspect.

 ------------- Mike N 1968 Mustang |
Posted By: 8122pbrainard
Date Posted: November-08-2008 at 11:59am
|
Mike,
Do drill some exploratory holes into the wood. A hole saw works great for removing a section of glass so you can take a close look at the wood. Check the wood shavings that come out from the pilot drill on the hole saw too. I'd hate for you to have problems after all the work you're about to do. ------------- /diaries/details.asp?ID=1622" rel="nofollow - 54 Atom /diaries/details.asp?ID=2179" rel="nofollow - 77 Tique 64 X55 Dunphy Keep it original, Pete < |
Posted By: SNobsessed
Date Posted: November-08-2008 at 12:05pm
|
Pete - You forgot to mention that WakeSl should use epoxy resin to patch the inspection holes. ------------- “Beer is proof that God loves us and wants us to be happy.” Ben Franklin |
Posted By: WakeSlayer
Date Posted: November-08-2008 at 12:22pm
|
Hey guys
I will most definitely be doing some digging. I am not doing this just mostly right. I want to be 100% of the wood, if I am not, I am replacing it. The mains seem to to be holding the glass well except in one spot near the front starboard motor mount. SNob, I will have a lot to fill with former screw holes and the like. I may buy stock in the epoxy mfg I use. Pete, I believe you have said use a 1" holesaw? If I am exposed like in the one area, can I just use a smaller spade bit? Or do I more want to see the actual core, and that being the reason for the holesaw? Wherebaouts in the stringer? lower? middle? thanks Mike ------------- Mike N 1968 Mustang |
Posted By: 8122pbrainard
Date Posted: November-08-2008 at 1:24pm
|
Mike, The holes saw just cuts cleaner and neater than the spade bit and yes, you'll get some decent shavings out from the pilot bit. I don't think you'll get much life out of the spade bit cutting the glass ether. You're just removing the glass on the wood and not a "core".
With the stringers exposed, you'll be able to go "exploring" pretty much anyplace. Aft bottom corners, bottoms of low spots (near the bilge drain), close to the 1x3 let in strapping and near the battery box are good spots to go looking. ------------- /diaries/details.asp?ID=1622" rel="nofollow - 54 Atom /diaries/details.asp?ID=2179" rel="nofollow - 77 Tique 64 X55 Dunphy Keep it original, Pete < |
Posted By: BuffaloBFN
Date Posted: November-08-2008 at 1:54pm
|
I think it's great to see an older boat with the dry side. The repair implies that it would be all dry otherwise. I was thinking of how that repair would have to be done without going in through the floor, and it would be near impossible to get it dry.
Best of luck on the stringer condition, and I think the picture will be in better focus after the engine is out. ------------- http://correctcraftfan.com/diaries/details.asp?ID=2331&sort=&pagenum=12&yrstart=1986&yrend=1990" rel="nofollow - 1988 BFN-sold "It's a Livin' Thing...What a Terrible Thing to Lose" ELO |
Posted By: WakeSlayer
Date Posted: November-10-2008 at 12:16am
|
I finished removing all the foam today, and pulled the motor and fuel tank.
The port side looked way better as far as water in the foam and overall appearance underneath. I feel the very first foam I removed was by far the worst. We used my tractor to lift the motor out and set on the dolly. Fuel tank was simple, and is really good shape other than the gastket for the gauge sending unit. Exhaust hoses were simple, but need replacing. I think I had very slight leaks at the outlets. There was a small amount of rust at a couple connections. I removed the steering cable I just installed. I have some cleanup to do and just little bits of foam left in the nooks and crannys. I will remove the wire harness, stereo wiring, battery cables, shaft, and starboard exhaust hose tomorrow, and let her sit and dry a bit with the dehumidifier. 


Mike ------------- Mike N 1968 Mustang |
Posted By: JoeinNY
Date Posted: November-10-2008 at 12:27am
|
I have definitely seen worse, keep you might get a few years out of those stringers yet. No crazy stunts though it it might be rotten, replace it. ------------- http://www.correctcraftfan.com/diaries/details.asp?ID=1477 - 1983 Ski Nautique 2001 1967 Mustang 302 "Decoy" http://www.youtube.com/watch?v=cO5MkcBXBBs - Holeshot Video |
Posted By: WakeSlayer
Date Posted: November-14-2008 at 2:29am
|
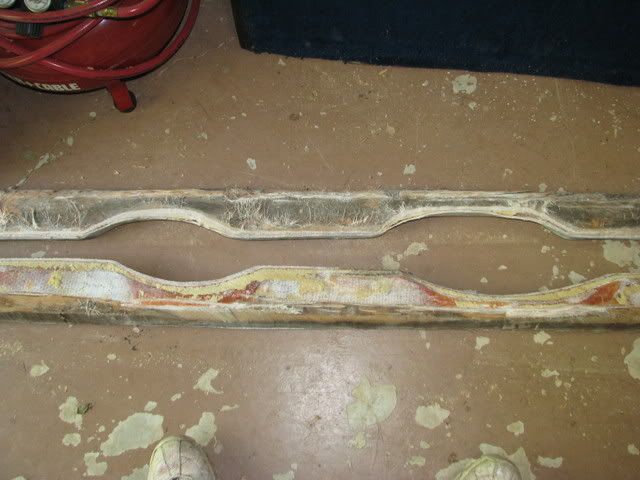
I have some delamination on the main stringers, and am in the middle of trying to cut it off with the dremel wheel and an air driven cutoff tool. This is a total PITA. The wood is damp underneath, but no glaring signs of rot. I have been up an down both stringers with a hammer and they sound solid. They are, however, somewhat discolored in spots. The parts that have been exposed for a couple days look noticeably better than when initially opened up. I feel like I should just roll it outside and get out the grinder to get all the glass off. Should I use a grinding wheel or 36grit or rougher sandng wheel? Seems like the wheel would rip through it better. I really would prefer to do this on a nice breezy day like Saturday is supposed to be, than in my shop.
Have suit, respirator, and goggles ready. I hate the itchy stuff. ------------- Mike N 1968 Mustang |
Posted By: JoeinNY
Date Posted: November-14-2008 at 2:42am
|
ok. Ignore this advice at your own peril you need a diamond cutoff wheel for your grinder it is way better than a air or dremal cutoff for this work the difference is night and day ------------- http://www.correctcraftfan.com/diaries/details.asp?ID=1477 - 1983 Ski Nautique 2001 1967 Mustang 302 "Decoy" http://www.youtube.com/watch?v=cO5MkcBXBBs - Holeshot Video |
Posted By: WakeSlayer
Date Posted: November-14-2008 at 2:56am
|
Noted. I was just testing the waters with the others, trying to keep the dust down, etc. Pretty sure that I have them in the grinder case. Thanks Joe
Mike ------------- Mike N 1968 Mustang |
Posted By: JoeinNY
Date Posted: November-14-2008 at 3:19am
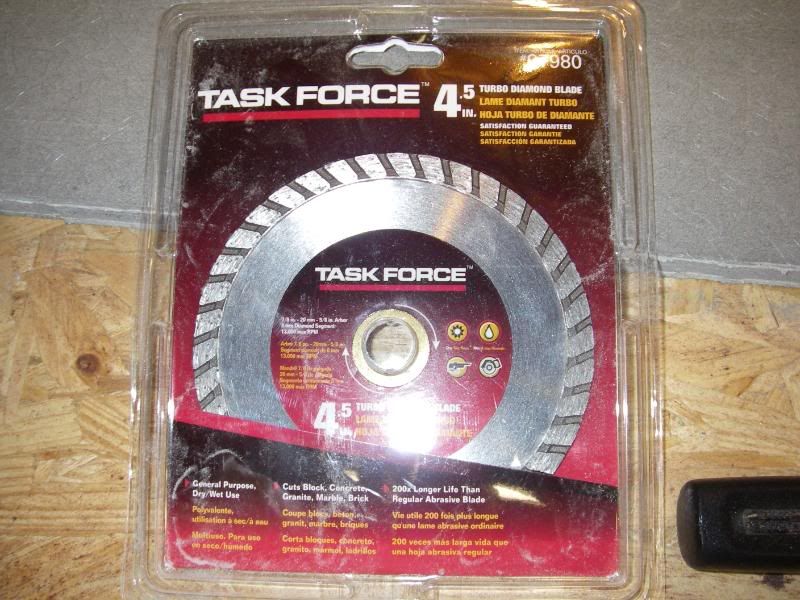
was on the iphone earlier so I couldnt link the pic, but this is what I am talking about. Its fast, least amount of dust possible, (grinding wheel will make 3 times as much) best thing is it dissolves fiberglass but wood or metal takes a lot of effort, so taking just the glass of the stringer is trivial. After trying everything I am a huge believer in the diamond wheel for cutting out and then the flap disk for grinding and smoothing, dremal with a sanding drum for small work. ------------- http://www.correctcraftfan.com/diaries/details.asp?ID=1477 - 1983 Ski Nautique 2001 1967 Mustang 302 "Decoy" http://www.youtube.com/watch?v=cO5MkcBXBBs - Holeshot Video |
Posted By: 8122pbrainard
Date Posted: November-14-2008 at 8:34am
Mike, Don't take the chance. They are wet, discolored and the spores/fungus are just waiting to be sealed up creating the perfect environment to start up. ------------- /diaries/details.asp?ID=1622" rel="nofollow - 54 Atom /diaries/details.asp?ID=2179" rel="nofollow - 77 Tique 64 X55 Dunphy Keep it original, Pete < |
Posted By: WakeSlayer
Date Posted: November-14-2008 at 3:51pm
|
Pete,
I do get what you are saying, but they are just solid front to back. Does soaking down with CPES not prevent this from escalating to some high degree? There are even portions that are not discolored. I read posts that guys sister stuff up when partially rotted, partially replace sections, etc. And, where the stringers are simply mush, or gone. That is not the case on mine. Not saying I won't replace, but I am most definitely resisting hard. I am replacing my secondaries, as they split horizontally a little from prying on them, and my longitudinals, which are in ok shape, but easy to do. ------------- Mike N 1968 Mustang |
Posted By: 8122pbrainard
Date Posted: November-14-2008 at 4:15pm
|
Mike,
All I'm really saying is I wouldn't take the chance. Yes, the CPES would seal them (must be compleatly dry plus a coat of regular epoxy) but in order to do that, they must be removed from the boat. By the time you do that, you may as well put in new wood. Removal is needed to get all the edges. A example that comes to mind using the CPES in only one area is to reinforce engine mount lag bolts. I've seen the results of pouring CPES down the holes. Works for a couple years only to find the surrounding wood where the epoxy didn't saturate the wood nothing but rot. Remember water can be sealed into the wood too. Fiberglassing the bottom of a wood boat is also a good example. Works for awhile too but accelerates rot from the inside out. You would be saving the time to cut and fit the wood only. Yes, there are some man hours there! If you do save the old, borrow or buy a decent moisture meter. You want a max. of 8%. Sistering or scabbing on wood is not my idea of boat repair. ------------- /diaries/details.asp?ID=1622" rel="nofollow - 54 Atom /diaries/details.asp?ID=2179" rel="nofollow - 77 Tique 64 X55 Dunphy Keep it original, Pete < |
Posted By: BuffaloBFN
Date Posted: November-14-2008 at 4:28pm
 ------------- http://correctcraftfan.com/diaries/details.asp?ID=2331&sort=&pagenum=12&yrstart=1986&yrend=1990" rel="nofollow - 1988 BFN-sold "It's a Livin' Thing...What a Terrible Thing to Lose" ELO |
Posted By: WakeSlayer
Date Posted: November-14-2008 at 7:13pm
|
No question I appreciate all the knowledge and advice. I had just expected far worse before I opened up.
I am not sure which direction I will go here. I have a few factors weighting what I will do. I still have some work to do before I make that decision. ------------- Mike N 1968 Mustang |
Posted By: WakeSlayer
Date Posted: November-16-2008 at 1:45am
|
I spent a few hours on the Ponyboat today. Got all the old glass out that was at all loose. I left some up in the bow, but it is all tight. Took the grinder with a diamond cutoff wheel and got it done is about 1/4 the time I expected. No kiddin Joe, that was amazing. Cleaned a lot of stuff up with the flap disk after that. It was sunny and windy out today, so I could be outside and not have all the nasty dust in my shop. Whew.
After some cleanup, I removed the shaft and rudder, as I had a little trouble with enough space to do the socket trick on the coupling last weekend. My prop was a bit of a pain to remove, I think the PO had the key jammed way up the propshaft. I had to crank it all the way off. I feel my stingers look great. I will post pics later, my wife has the camera away for a chicky weekend. I need to stop here as I have to take my cutoff wheel out for a couple glasses of wine and a nice dinner. She deserves it. More later. ------------- Mike N 1968 Mustang |
Posted By: eric lavine
Date Posted: November-16-2008 at 12:34pm
|
another good tool for glassing operations is a portable hand planer, I use it alot when doing a transom job and it works great for skimming the wood down to the gel, if you need a good flat surface it will also cut through glass.
on certain stringer jobs i will skin the top layer of glass and remove the wood or whats left of it, then simply slip my new wood in making sure that there is resin to hold it, then re-glass over the existing and also building on the old glass with new. trying to keep the "factory seal". On the drains its a good idea to use 4" or 5" pieces of PVC pipe for drains. if you use corner holes they have a tendency to clog ------------- "the things you own will start to own you" |
Posted By: WakeSlayer
Date Posted: November-17-2008 at 7:44pm
|
When you are saying 4" or 5" pieces you mean in stringer drains? or just front to back? I would like small drains from the outer chambers to the bilge. Any suggestions if that wasn't one?
I am not sure I am putting a battery drain in because I am moving my battery to the center as far forward to the kickboard as I can. It will be raised off the hull sitting on a glassed in block. I am going to use PVC with a 22.5* angle for my steering cable and wire harness. The glass air tube is still intact from the vent. It is in perfect shape except for the one little hole on the top from having a go with the pitchfork. Totally stupid, but no big deal. It will be interesting replacing the board that that and the new PVC will go through at the front of the bilge. I have a just a little more grinding to do this weekend as I am out of town the rest of the week on biz. I will have a fan on the boat for a few days while gone. ------------- Mike N 1968 Mustang |
Posted By: BuffaloBFN
Date Posted: November-18-2008 at 7:33am
Will there be anybody around to look in on the fan? A friend of mine burned his house down when the fan he was drying his camper with tipped over. ------------- http://correctcraftfan.com/diaries/details.asp?ID=2331&sort=&pagenum=12&yrstart=1986&yrend=1990" rel="nofollow - 1988 BFN-sold "It's a Livin' Thing...What a Terrible Thing to Lose" ELO |
Posted By: Riley
Date Posted: November-18-2008 at 8:59am
|
Is there any reason to use pvc or flexable hose conduit for the wiring harness and cables if you're not going to refoam? The new boats have their cables laying in the bildge and the wiring attached to the stringer. ------------- |
Posted By: 8122pbrainard
Date Posted: November-18-2008 at 9:13am
Bruce, No reason to use the PVC without the foam. ------------- /diaries/details.asp?ID=1622" rel="nofollow - 54 Atom /diaries/details.asp?ID=2179" rel="nofollow - 77 Tique 64 X55 Dunphy Keep it original, Pete < |
Posted By: Riley
Date Posted: November-18-2008 at 9:44am
|
Pete, that's what I thought. Mine is still intact, but I've been thinking about cuttting it out when I detail the bilge. ------------- |
Posted By: WakeSlayer
Date Posted: November-18-2008 at 3:31pm
|
my son will be monitoring the fan. He is going to turn up the heat and turn on a halogen while he works out, then turn off. I will also be calling and reminding him. For that exact reason.
Hmm. I thought it was a good idea to just run the stuff thru a tube like before. Perhaps I won't. Thought i was all smart for using pvc. My previous one was shot. full of gunk and partly shredded. It would make it a bit easier I guess. ------------- Mike N 1968 Mustang |
Posted By: eric lavine
Date Posted: November-22-2008 at 1:29pm
|
4' or 5' inch pieces in the corner with small holes drilled around the circumfrence in case the ends clog the water still has a route to exit. same concept as drainage pipe that you use in the back yard ------------- "the things you own will start to own you" |
Posted By: WakeSlayer
Date Posted: November-22-2008 at 2:30pm
|
I like that idea, Eric. Forgive me if this is a stupid question, but are you referring front to back? or from the outer chambers to the bilge. Ot both? I would like to see a pic of the drain any of you guys have done. Pete, I know you have talked about this, too. ------------- Mike N 1968 Mustang |
Posted By: eric lavine
Date Posted: November-22-2008 at 2:38pm
|
anywhere you think water will damn up ------------- "the things you own will start to own you" |
Posted By: WakeSlayer
Date Posted: December-03-2008 at 2:08pm
|
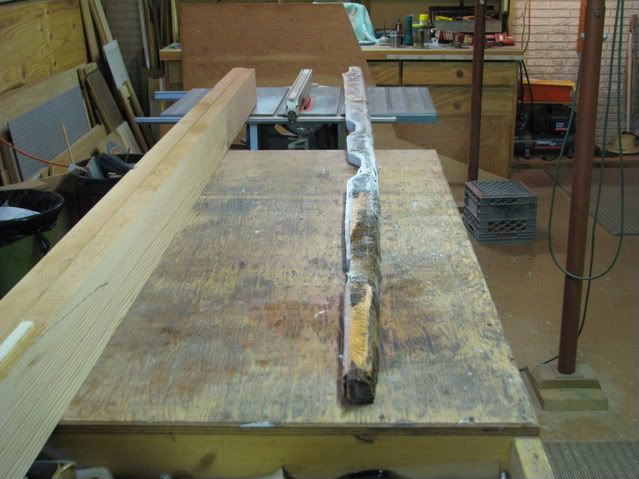
I have been working on the secondary stringers, longitudinal boards, bulkhead, and pylon support. Got them all cut out and epoxied last weekend. Dry fit everything last night, and all seems to fit good. I will be cleaning up the inside, sanding the points of the hull where the new glass will tab to this week, and hopefully installing the new secondaries, etc this weekend.
I have elected to leave the primaries, as they are solid with only minimum damage at the motor mount holes. I have filled these in while hot with epoxy and will re-drill for my new motor mounts in different places anyway. They will be bolted in from the top down, and form the inside out. I am really happy with the project so far, and it is going better than I expected. Having never worked with epoxy before, I must say I love West System's stuff. Pretty much makes it bulletproof. The metering pumps are a must have. I only made one hot batch, and that was the first one where I made a bit too much. Holy crap does that get hot all of a sudden. I would still like to see a pic or two of how the drain holes are run through the stringers if anyone has them handy. Mike ------------- Mike N 1968 Mustang |
Posted By: 8122pbrainard
Date Posted: December-03-2008 at 6:54pm
|
Mike,
This is the only picture I have of my Tique. You can see the bottom notches in the bulkheads pretty well and a couple in the stringers. Just like Eric mentioned, you need to take a look finding the lowest point in any cavity and locate the drain there. Keep in mine that when the boat sits level on the lift, trailer or hanging from the eyes, the bilge drain will be the lowest point. Don't forget to epoxy/glass any cutouts you do!  ------------- /diaries/details.asp?ID=1622" rel="nofollow - 54 Atom /diaries/details.asp?ID=2179" rel="nofollow - 77 Tique 64 X55 Dunphy Keep it original, Pete < |
Posted By: WakeSlayer
Date Posted: December-03-2008 at 8:05pm
|
Cool. Thank you. Just wanted to get a visual.
I noticed you left the foam in the bow. I kind of wish I had done that too. In the end it was all dry anyway. I am also going to use little glassed on blocks just like that for under my longitudinal boards as I am not refoaming and am putting a ply floor in. I cut them longer than the originals and beveled them to follow the hull. thanks again Pete. ------------- Mike N 1968 Mustang |
Posted By: WakeSlayer
Date Posted: December-07-2008 at 5:47pm
|
I put in my secondaries yesterday. It went pretty well. I did both at once, and that was a mistake. Being the first time I have done this, I had a couple issues. Qty of epoxy I made up was one, and timing was the other. Towards finishing it was going off and I was not quite done smoothing the glue to the stringers.
In the future I would do the seperately. I also removed the hose over the shaft log. This was a bit of a pita as it was glassed in pretty good from the factory. I will be laying up the main stringers next weekend. I had my welder neighbor over and he is making me trunnions for my trans mounts, and mounting plates to put the actual trans mounts on. ------------- Mike N 1968 Mustang |
Posted By: 8122pbrainard
Date Posted: December-07-2008 at 6:43pm
|
Mike,
I don't know if you have caught this before but it has been mentioned. With large quantities of epoxy, pour the mixed batch into a roller pan. It spreads it out dissipating the heat and will increase the pot life. Use one of the plastic pans and the next day when curred, the epoxy will "pop" off the pan. Also, mix smaller batches. With the pumps, it's so easy to just make more. ------------- /diaries/details.asp?ID=1622" rel="nofollow - 54 Atom /diaries/details.asp?ID=2179" rel="nofollow - 77 Tique 64 X55 Dunphy Keep it original, Pete < |
Posted By: WakeSlayer
Date Posted: December-07-2008 at 7:37pm
|
Yeah, I have read that. I was mixing up peanut butter, and being unsure of the amount i would need, I mixed up a batch of about what would be 12-14 oz in a plastic cup. Then I filled the empty caulking tubes that West sells.
It probably has more to do with not having any experience doing this, and trying to do too much at once. Lesson learned. As far as making small batches, I have been doing that the whole time coating boards, filling holes, etc. Super easy to make more. ------------- Mike N 1968 Mustang |
Posted By: WakeSlayer
Date Posted: December-23-2008 at 1:09pm
|
I finished laying up my stringers last night. Was not that bad of a job. Some parts sucked, but went mostly smooth.
Next up: drain holes in stringers, move steering cable block, make battery box, fair out bilge and paint. ------------- Mike N 1968 Mustang |
Posted By: 79nautique
Date Posted: December-23-2008 at 1:15pm
|
why are you relocating the clamp block? ------------- http://www.correctcraftfan.com/diaries/details.asp?ID=756&sort=&pagenum=1&yrstart=1979&yrend=1979 - 79 nautique |
Posted By: WakeSlayer
Date Posted: December-23-2008 at 1:23pm
|
I have a new steering cable that I got from CC last spring. Prior to starting this project, I had installed it and my rudder did not have equal throw and return as what I believe to be the original cable. The support tube was set all the way aft and I could not get the cable far enough out to make an even swing. The way I figure it, the support tube needs to go about 1.5 inches further to the rear to compensate for this. I spoke to CC about this and they also suggested moving the block back. Seems stupid but I cannot figure another way to do this. If I move it back about 2.5 inches, this will give me the room to move the support tube either direction to adjust my rudder for even turning ability both directions. Now is the time to move it since I do not yet have a floor made. ------------- Mike N 1968 Mustang |
Posted By: Riley
Date Posted: December-23-2008 at 1:24pm
|
Anyone order a new steering cable for a 60's Mustang lately. My son called a reputable CC dealer hoping to get me one for Christmas and was told he would also need a new clamp block and the price would be about $400.
Does that seem right? ------------- |
Posted By: WakeSlayer
Date Posted: December-23-2008 at 1:40pm
|
I ordered mine from Bruce at the former MWCC.
I have a receipt somewhere. As I recall the cable was pretty brutal. Then, after fishing it through, it became obvious that I had to order a support tube, as well. I do not get why you would need a new clamp block. ------------- Mike N 1968 Mustang |
Posted By: 79nautique
Date Posted: December-23-2008 at 2:03pm
|
thought you reused the support tube from the old cable. don't see why you would need a new clamp block unless the OD of the cable changed. ------------- http://www.correctcraftfan.com/diaries/details.asp?ID=756&sort=&pagenum=1&yrstart=1979&yrend=1979 - 79 nautique |
Posted By: WakeSlayer
Date Posted: December-23-2008 at 2:18pm
|
The support tube is part of the old cable, it does not come off. ------------- Mike N 1968 Mustang |
Posted By: SNobsessed
Date Posted: December-23-2008 at 11:39pm
The support tube came off on mine. But if you throw it away with the old cable before you realize you needed to reuse it, they cost $18.  ------------- “Beer is proof that God loves us and wants us to be happy.” Ben Franklin |
Posted By: WakeSlayer
Date Posted: December-23-2008 at 11:50pm
|
My new cable has the nut on the end to thread on to the support tube. The old one I pulled from the boat has nothing of the sort. I can go look again, but when I looked a couple months ago there was no removing it. ------------- Mike N 1968 Mustang |
Posted By: TRBenj
Date Posted: December-24-2008 at 1:04pm
|
Bruce, Mike, I posted the steering cable info on here a while back- if you havent ordered yet, DONT!
The pre-1982 (2001 hull) steering cables are NOT CC-specific. The older boats dont use the oddball length or longer throw versions that the newer CC's do. I confirmed this with 2 different CC dealers. Its a generic Teleflex cable- I believe I used a 16' or 17' for my Tique (I posted the info on here somewhere). The cable cost me about $95 from Go2marine.com. You'll probably need the clevis kit to attach to the rudder as well- which go2marine also stocks for ~$25. If you dont have one, Im sure they carry the clamp tube too. ------------- |
Posted By: WakeSlayer
Date Posted: December-24-2008 at 2:12pm
|
I did get the Teleflex generic cable from CC, and the clevis kit. I ordered way back last Spring when I first got the boat. Just never put it in til this Fall.
I probably paid too much for it, but too late now. I will try to find the receipt to see how bad it was. ------------- Mike N 1968 Mustang |
Posted By: Riley
Date Posted: December-24-2008 at 2:54pm
|
Great info Tim, thanks. I saved the old cable, so I'll measure it and check them out. ------------- |
Posted By: WakeSlayer
Date Posted: December-26-2008 at 11:47pm
|
Got my cable block hole drilled today. Got ddrain holes drilled out, and the wood inside where I drilled was perfect. Planned out the battery placement, and got started on the wood for that. Got the first 40% of the bilge faired out and I am nearly out of epoxy... Will get more in the AM, and keep on it.
Hope to start fitting the motor back in next weekend. We'll see... ------------- Mike N 1968 Mustang |
Posted By: WakeSlayer
Date Posted: December-29-2008 at 1:40pm
|
Over the weekend, I finished fairing out the bilge. Which I totally sucked at doing. Got the battery mount figured out, and mostly installed. Sanded out the bilge, and laid one coat of BilgeKote down. I will get a couple pics taken this week. ------------- Mike N 1968 Mustang |
Posted By: Riley
Date Posted: December-29-2008 at 2:02pm
|
Post some pics. My next step on the Mustang is the bilge. I was just going to paint it wth bilge coat, but there are a few areas where I layed down some new cloth, so perhaps I should be doing some fairing to? ------------- |
Posted By: WakeSlayer
Date Posted: December-29-2008 at 2:20pm
|
I probably could have just ground down a rough spots and painted it. I chose to fair, which, now that I get what to and not to do, I would do a better job. The first third I mixed properly and it laid out nicely. But I was suddenly out of epoxy. I did the next part all at once, and that was my downfall. I made too much and it was starting to go off by the time I was 3/4 done. Then, to fill the edges I simply thickened with the 410, and attempted to "paint" it in the corners. Well, this does not sand out nearly as well as the properly mixed peanut butter consistency. Then add to it that I am a bit more of a rough in guy than a finish work guy, and it definitely could have turned out better. Live and learn, I guess. Most of it sanded out, and will be fine now that I painted it. I have one more coat to do and it will look great. ------------- Mike N 1968 Mustang |
Posted By: eric lavine
Date Posted: December-29-2008 at 6:29pm
|
some are rough carpenters some are finish ------------- "the things you own will start to own you" |
Posted By: WakeSlayer
Date Posted: December-29-2008 at 7:48pm
|
For the most part, I would be the former.
Practice makes perfect, I guess. I will have learned a ton on this boat. I am having a lot of fun, too. I am helping do a 65 Sportsman 17 next winter, and the winter after considering a total redo on my 68 Nautique. ------------- Mike N 1968 Mustang |
Posted By: WakeSlayer
Date Posted: December-30-2008 at 12:01am
Here are a couple pics. First one is the bilge with one coat on it, second is my new battery box placement and the pylon mount that was just installed tonight.


The bilge will look better after a second coat. Amazingly, everything fit and the pylon stands straight. ------------- Mike N 1968 Mustang |
Posted By: Riley
Date Posted: December-30-2008 at 12:23am
|
The bilge looks great.
On your battery box placement, do you think you'll be able to remove the battery without removing the seats? I'm going to locate forward of the seats. I've got to figure out how to frame it. ------------- |
Posted By: WakeSlayer
Date Posted: December-30-2008 at 1:22am
|
Postive. i epoxied a 3.5 (ish) inch wide board down in the keel. I will screw down the battery box. The top edge of the box is exactly level with the top edge of the longitudinal stringer. I am going to slit the box on the sides and have the strap run thru it to hold the battery firm. The posts will still be about an inch under the top edge. I will then make a cut out top, carpet it and trim the hole. Just going to use a feinger pullring to lift it when I need to. I just need to cut it a tiny bit larger then the battery box edge, and it can just sit there and will be perfectly flush with the rest of the floor. This was pure, dumb luck, and an easy solution. ------------- Mike N 1968 Mustang |
Posted By: Gary S
Date Posted: December-30-2008 at 11:15pm
Mike, here is how I did my battery box cover. Just drill a hole big enough to let a 1/4"x 2" carriage bolt slide thru and put a washer and locking nut on. Use your fingernails to pull the bolt out to grab on to so you can remove cover.
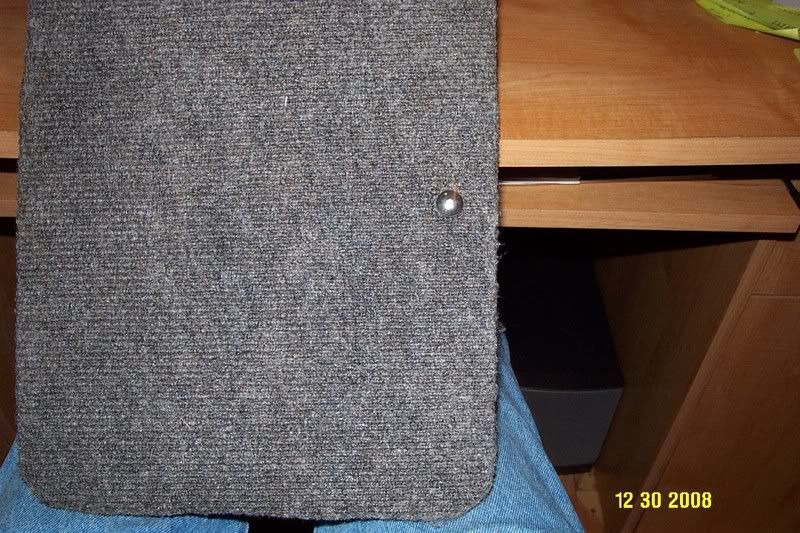
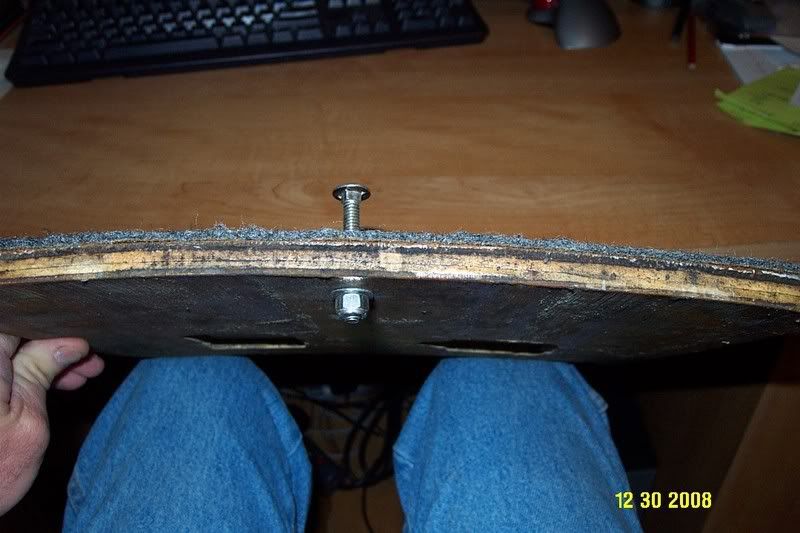
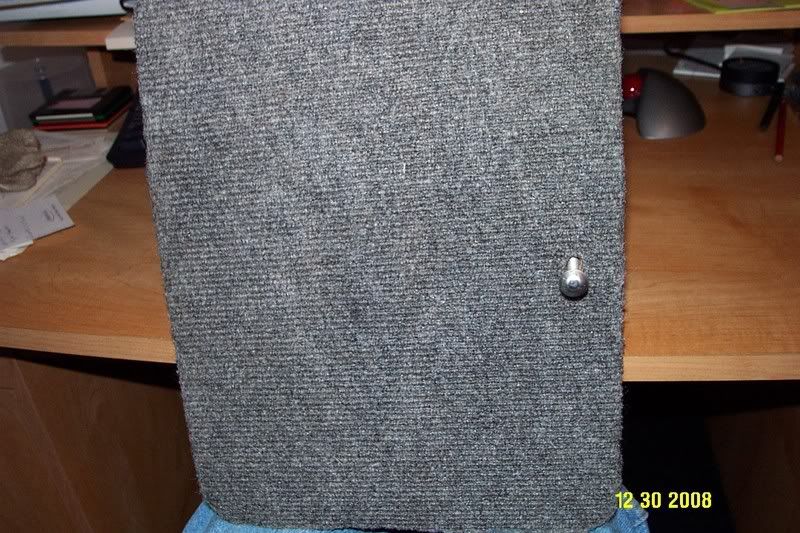
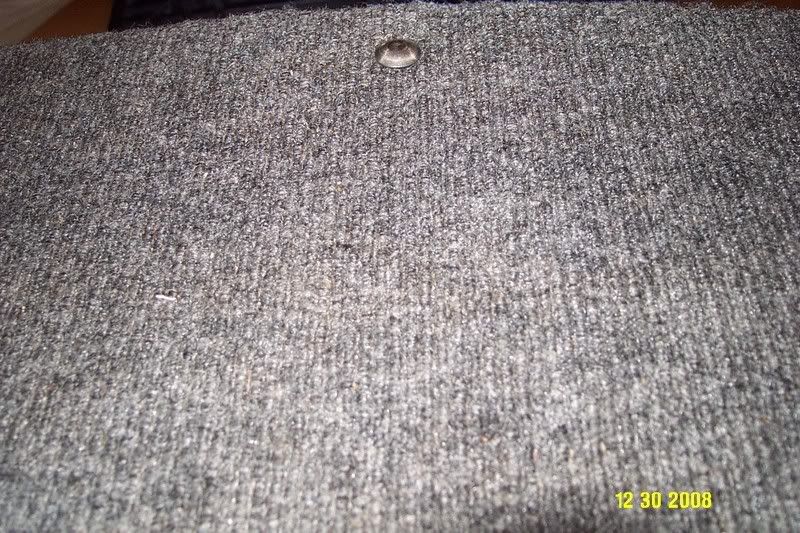 ------------- http://www.correctcraftfan.com/diaries/details.asp?ID=1711&sort=&pagenum=1&yrstart=1966&yrend=1970" rel="nofollow - 69 Mustang HM SS 95 Nautique Super Sport |
Posted By: WakeSlayer
Date Posted: December-31-2008 at 12:35am
|
Awesome. Same basic idea I have, though I plan on making it a bit smaller. Just big enough to pass a battery through.
Where did you locate yours? ------------- Mike N 1968 Mustang |
Posted By: Riley
Date Posted: December-31-2008 at 1:19am
|
Good idea Gary. I like the looks of that. ------------- |
Posted By: Gary S
Date Posted: December-31-2008 at 1:47am
|
Wasn't my idea Bruce,somewhere my Dad came up with that,must have had that on one of his many boats.
Mike here are two pic's where mine is,easier than explaining- 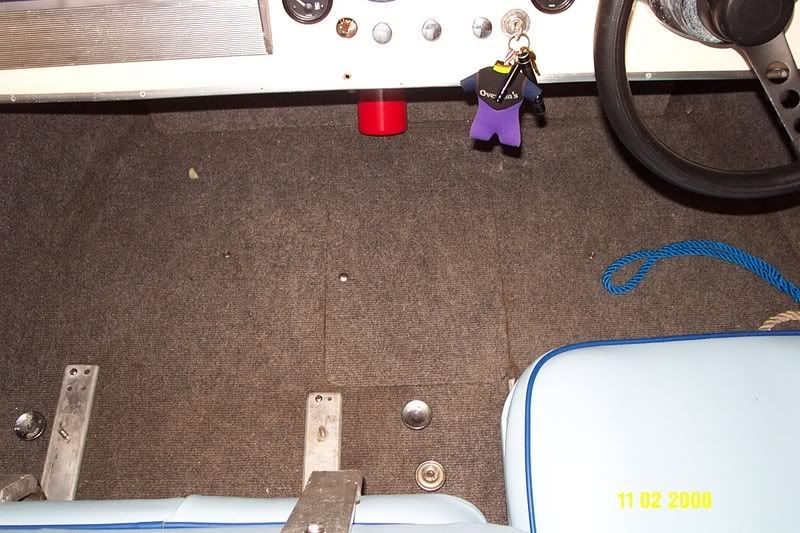
 ------------- http://www.correctcraftfan.com/diaries/details.asp?ID=1711&sort=&pagenum=1&yrstart=1966&yrend=1970" rel="nofollow - 69 Mustang HM SS 95 Nautique Super Sport |
Posted By: Riley
Date Posted: December-31-2008 at 3:06am
|
Mike, does your boat have the floor pan? Had your floor been replaced before? There's old resin on the sides of the hull. You did a better job than I did with your cuts on the longitudinal stringers. Nice fit.
Gary, What happened to the SS part of your boat? Did you ever get a floor pan? ------------- |
Posted By: WakeSlayer
Date Posted: December-31-2008 at 12:59pm
|
Hey Bruce,
I do/did have a floor pan. That is not going back in the boat. This is the boats first floor replacement. I cut the glass floor out about 2 inches from the sides, and then went back and cut off flush with a sawzall. Thank you on the cuts compliment. I was shocked when everything fit exactly as it should have, and the pylon stands true, as every piece of wood was repalced except the primary stringers. I still want to put little blocks under the outer ends. I am doing a 3/4 inch ply floor over the top. Gary, you have a bench seat, I take it? When I said I was positive I can remove mine where it is with the seats in, now I think I need to measure. Nearly positve. Will be postive about it this afternoon. I gave my bilge a second coat last night, and that needs to finish drying. That BilgeKote stuff is nasty... ------------- Mike N 1968 Mustang |
Posted By: WakeSlayer
Date Posted: December-31-2008 at 6:59pm
|
I got my angle iron trans mount plates this afternoon from my welder buddy. They are approx 6 inches long, 5 inches high, and 3.5 inches deep. They are in a sort of "L" shape and made of steel. They will be mounted on the inside of the stringers with the bottom of the "L" perpendicular to the stinger and I will bolt my trunion mounts to them along that bottom piece. I have a couple questions about prepping them for installation:
What should I prime them with, and secondly paint them with? I am going to either lag them to the stinger or, possibly thru-bolt them. (I have not decided) I plan to also eopxy the backs of them to the stinger with the peanut butter. Should I leave the back clean, or sand, or primer that as well? Seems I should leave it raw steel, but I do not know. I want the best adhesion possible, obviously. Any help would be appreciated. thanks Mike ------------- Mike N 1968 Mustang |
Posted By: SNobsessed
Date Posted: December-31-2008 at 8:23pm
|
Wake - I would have them powdercoated. If you leave one side bare steel, it will bleed rust down your shiney bilge. If you want to through bolt them (good idea)I would put in a flanged nut plate on the back side. This should be stainless. Make it substantial so it doesn't strip out. Extra time spent on this now will save you from having to repair it again later! ------------- “Beer is proof that God loves us and wants us to be happy.” Ben Franklin |
Posted By: JoeinNY
Date Posted: December-31-2008 at 9:02pm
|
paint or coat then attach with 3m 5200. epoxy and bare metal won't play well together forever I fear. ------------- http://www.correctcraftfan.com/diaries/details.asp?ID=1477 - 1983 Ski Nautique 2001 1967 Mustang 302 "Decoy" http://www.youtube.com/watch?v=cO5MkcBXBBs - Holeshot Video |
Posted By: WakeSlayer
Date Posted: December-31-2008 at 9:11pm
|
I was curious about the epoxy on there too. I had acutally asked him to make them out of aluminum, but he evidently had some concerns regarding strength. Guessing he did not have stainless stock. He is doing me a favor, so I don't want to squawk, really.
I do like the idea of coating them, too. ------------- Mike N 1968 Mustang |
Posted By: Gary S
Date Posted: December-31-2008 at 10:34pm
|
When I got the boat 20 yrs ago Bruce,it was in real bad shape as you can see in my profile.The center consol was gone and there was a big gaping hole in the floor pan where it went. A morse control installed very poorly and an all black interior rounded out the package. Correct Craft sent me a copy of the brochure like below- http://www.correctcraftfan.com/reference/1968_brochure/index.asp?page=05 - http://www.correctcraftfan.com/reference/1968_brochure/index.asp?page=05
The problem with that was,my gauges were mounted in the dash and not the consol and they looked to be well done,not butchered like every thing else. Later found out my boat was built in 12-68 so was more or less like a 69,like this- http://www.correctcraftfan.com/diaries/details.asp?ID=193&sort=&pagenum=6&yrstart=1966&yrend=1970 - http://www.correctcraftfan.com/diaries/details.asp?ID=193&sort=&pagenum=6&yrstart=1966&yrend=1970 Still working on a floor pan,I've got my eye on a boat here that would be good for parts,but they want way too much for it,it's at a broker so I don't know if they want to deal yet.I'm thinking of going down sometime this winter with cash in hand and see what happens. Don't know if you saw what I found out from the Godfather but in their records it's not listed as a SS. All records are hand written and they must have left off the ss part. The serial tag in the boat says MSS 2567, their records have it listed M 2567. Mike, my passenger seat was in bad shape so I made the bench and had uprights welded onto the bottom frame for the seat back.If I had to do it again I would have repaired it instead since now days no one likes to sit backwards. Yours is looking nice Mike,you seem to be making great progress. I wonder why each boat is different, yours has one thru hull for the water intake, mine has two. ------------- http://www.correctcraftfan.com/diaries/details.asp?ID=1711&sort=&pagenum=1&yrstart=1966&yrend=1970" rel="nofollow - 69 Mustang HM SS 95 Nautique Super Sport |
Posted By: Riley
Date Posted: January-01-2009 at 1:10am
|
Mike, my floor is solid without the blocks. I still may run some fiberglass tape along the seam for added strength though. I used 5/8 plywood.
Gary, as I told you before, you can have my floor pan. You just got to figure out a way to get it from Maine to IL? I'd check with Peter1234 as he gave it to me, but I doubt he'd care so long as it was going to good use. ------------- |
Posted By: WakeSlayer
Date Posted: January-01-2009 at 1:26am
|
I am planning on using 3/4 so maybe I do not need the blocks, only one of them even moves now anyway.
Gary, what motor? My Mustang has a 289 Interceptor w/ a single inlet, however the 68 Nautique I just picked up has a Chrysler 318 with two water intakes, and I am assuming, two impellers and they connect together after that. ------------- Mike N 1968 Mustang |
Posted By: Gary S
Date Posted: January-01-2009 at 2:02pm
|
Bruce,I haven't forgot and I appreciate it,just haven't figured how to get it here yet. The boat I want to look at here has the floor, sidepanels and glass windshield. I'd kick myself if I didn't at least go look at it.
Mike I have a Holman Moody 289 thats been changed to a 302 block.It runs a single crank driven pump ------------- http://www.correctcraftfan.com/diaries/details.asp?ID=1711&sort=&pagenum=1&yrstart=1966&yrend=1970" rel="nofollow - 69 Mustang HM SS 95 Nautique Super Sport |
Posted By: WakeSlayer
Date Posted: January-01-2009 at 10:50pm
|
Today I worked on my trans mount brackets, I had to drill holes to mount to the inside of the stringer, and to mount the trunion assemblies. I am, in fact, going to get them powdercoated, thanks for the suggestion, guys!
I replaced my shaft hose, reinstalled my shaft, replaced the packing, and put the collar on. For some reason, SkiDIM sent me 1.5" fuel hose when I ordered the replacement hose, and it was an absolute biatch to get on there. Being stubborn and a holiday, I just used it, instead of waiting and getting something a little more workable. There is room for two clamps on each side, so I am good, I believe. I put the clamp block in. And epoxied my drain holes in the stringers. 
I decided I was not so pleased with where I was going to put my battery box after seeing where Gary's is, and I am going to move it forward to that spot. I just need to fix in a little frame, and that will be done. 
I put a PVC tube for the cables. Despite what some said about not bothering, I like the idea of the tube for ease of running the cables and such through there. 
My pylon is a little right leaning so I will need to ream the mounting hole a little on the left side. I musta had some BilgeKote fumes in the head when I looked the first time. Will be an easy fix. Here is the hoist Zman borrowed me to re-install my motor, cause opening the door and using my tractor this time of year is way, WAY too cold. 
Hope everyone had a great New Years !!! Mike ------------- Mike N 1968 Mustang |
Posted By: Riley
Date Posted: January-01-2009 at 11:31pm
|
Looks good.
On your packing hose, what kind of shape was the old one in? I'm thinking I'm going to skip that step as it is fiberglassed to the hull and I don't want to dig into it. How did you figure your drain holes. Measure from the outside and drill straight from the inside? ------------- |
Posted By: WakeSlayer
Date Posted: January-02-2009 at 1:01am
|
Old hose was in terrible shape, and I suspect was leaking a little. It was starting to come apart in layers. Mine was glassed in a bit too, but it wasn't that bad to get out. I cleaned the glass up a bit around it afterwards.
On the drains, I winged it. I looked for what appeared to be the lowest point still in the bilge and accessible for the front. Just eyeballed the rearward ones. I figured if an exhaust pipe ever cuts loose on me that would be a good point to drain water from. Drilled from the inside slightly angling upwards with a 15/16" spade bit. The wood that I went through was like new. ------------- Mike N 1968 Mustang |
Posted By: WakeSlayer
Date Posted: January-04-2009 at 6:53pm
This weekend I got the new battery box figured out, built, and installed.

I will be drilling a hole in the side of the tube to run the battery cables to the engine. 
I also installed my coupler, the fuel tank supports, and the back half of the exhaust. 
The pylon will now sit straight but is not mounted yet. I enlarged my bilge output hole as the new thru hull I got is a bit bigger than the one that was in there. I made and drilled out backing plates for the trans mounts. The plates and trunions are going in to be powder coated tomorrow. I will be getting my plywood this week and get that fit and epoxied. My list is getting shorter and shorter. i am hoping to be done by the first week of Feb so I can go on vaca and not come back to it. Mike ------------- Mike N 1968 Mustang |
Posted By: eric lavine
Date Posted: January-04-2009 at 7:54pm
|
one bit of advice if needed, put a little positive in the floor boards so the water drains into the engine compartment, everyone hates puddles......an accommendation should be awarded when you are done for the nice clean work ------------- "the things you own will start to own you" |
Posted By: eric lavine
Date Posted: January-04-2009 at 7:59pm
|
one more thing worth noting that most dont know, PVC for the cables so they dont short, which you are aware of I see ------------- "the things you own will start to own you" |
Posted By: eric lavine
Date Posted: January-04-2009 at 8:03pm
|
Mike if you wonder if im following you, im not, the kids have been playing guitar hero since 10:00 am and im in view with the TV, its cold and wet out and a good day to babble ------------- "the things you own will start to own you" |
Posted By: WakeSlayer
Date Posted: January-04-2009 at 8:44pm
|
OK, so I am not paranoid after all.
I had attempted to have the secondaries slightly higher so it would drain to the bilge. I am level, not raised after fixing them in. How would you give the lift on the outboard part of the floor at this point? I did not know about the electrical part of the PVC. I really just did it for ease of running stuff through there. Zman was over today for a progress check, and plans to announce to my wife that I should install a heater in there for her. Whilst not original, nor period correct, I think it is a really good idea. If for no other reason, it would be at least as convincing as a bottle of wine for those midnight "rides" in the Ponyboat. 
Which Guitar Hero ? I have #1 in my shop for when I need a break from the eopxy and whatnot. I do find that my game goes downhill as my beer count goes up. I love that game! M ------------- Mike N 1968 Mustang |
Posted By: WakeSlayer
Date Posted: January-04-2009 at 8:47pm
|
And thank you for the compliment. I appreciate that a lot !! Sometimes I am not so sure of what I am doing. I cannot wait to do my 68 SN. ------------- Mike N 1968 Mustang |
Posted By: Riley
Date Posted: January-04-2009 at 9:56pm
|
What's that white stuff running along where the outers meets the floor? I epoxied mine in, then put matting down along the seam, but it's not as smooth as yours.
How far back are you going to run the floor. I have a 2"x"2 that supports the rear seat and ran mine back to that like original, but am now wondering if I should have ran it back further. ------------- |
Posted By: WakeSlayer
Date Posted: January-05-2009 at 1:50am
|
I glued the secondaries with peanut butter into the old channels that I left in place. The I ran a fat fillet of the peanut butter down the length on both sides.
I am running the floor back to the base of the raised parts of the stringers. I do not have a framed in back seat. I just have a thick pad that sits on the floor. Then the seat back snaps to the top of the rear deck. ------------- Mike N 1968 Mustang |
Posted By: eric lavine
Date Posted: January-05-2009 at 10:35am
|
thats funny with the guitar hero, after 4 or 5 beers yesterday i tried it.....forget it,I was almost to the second level BB, (before beers)
the cops should carry one to test for DUI's ------------- "the things you own will start to own you" |
Posted By: nautiless
Date Posted: January-05-2009 at 12:47pm
|
Nice work wake. I can certainly lear on keeping a tidy outfit. I tend to be more liberial with materials and plane, grind etc to the shape i need. Duly impressed and motivated to bring my 2001 project to this level. ------------- 1982 SN 2001 RIP (Resto in Progress) http://www.correctcraftfan.com/diaries/details.asp?ID=4400 - Don's Diary |