Plan B: Rust Mitigation on Ram-Lin
Printed From: CorrectCraftFan.com
Category: General Correct Craft Discussion
Forum Name: General Discussion
Forum Discription: Anything Correct Craft
URL: http://www.CorrectCraftFan.com/forum/forum_posts.asp?TID=17857
Printed Date: May-14-2024 at 10:30pm
Topic: Plan B: Rust Mitigation on Ram-Lin
Posted By: M3Fan
Subject: Plan B: Rust Mitigation on Ram-Lin
Date Posted: June-02-2010 at 2:00pm
|
So, now that the boat is on a lift and the trailer is in my driveway, I'm finally going to do some rust mitigation. What I'm doing is buying time, not doing a full resto. I just spent a LOT of money on a boat lift so I'd like to go the cheap route on the trailer for now. I figure if I can get the major rust chunks off the trailer (after removing the bunks and side steps) I can get those spots down to bare metal somehow, then prime and paint with rattle can paint. Yes it's the easy way out. Yes, it's cheap and half-assed, but the trailer needs some intervention/help before it goes too far. This is a temporary fix to hold off major repairs or a new trailer purchase a few years down the road. It took 10 years to get this bad, so I figure I can buy 5 years easily.
Questions: 1. What tool is used to get down to bare metal? Wire brush on a drill? I have no air tools/compressor. 2. Can I roughly get it down to bare metal, then use a rust converter, then prime and paint? I'm guessing the rusty metal surface has "scalloped" or divoted a bit (golf ball surface comes to mind) such that major metal removal would have to occur to get it rust-free and level. Not sure here. 3. How do I re-attach the bunks on this closed-box frame? Wider self tappers? 
I'm going to have to get new fenders from Ram-Lin since mine are completely perished. ------------- 2000 SN GT40 w/99 Graphics/Gel 2016 SN 200 OB 5.3L DI https://forum.fifteenoff.com |
Replies:
Posted By: MartyMabe
Date Posted: June-02-2010 at 2:05pm
|
Electric grinder with some 80 grit paper. Cheap fix, put some POR-15 on it. Could take it to a welding shop, let them grind it and then put some metal on top and bottom. But do get the POR-15, that stuff is the bomb.Go on the POR-15 website and read up on it. ------------- 66 Skylark http://www.correctcraftfan.com/diaries/details.asp?ID=5041" rel="nofollow - 93 SN If you're not living in NC, you're just camping out! |
Posted By: GottaSki
Date Posted: June-02-2010 at 2:09pm
|
Suggest an angle grinder with a wire cup brush vs the drill.
If your down to bare metal a rustoleum primer should be all you need first coat. I think the rust converter can inhibut adhesion when you have bare metal. ------------- "There is nothing, absolutely nothing, half so much worthwhile as messing around with boats...simply messing." River Rat to Mole |
Posted By: behindpropeller
Date Posted: June-02-2010 at 2:12pm
|
Phosphoric acid after you hit it with the grinder.
Tim ------------- |
Posted By: 8122pbrainard
Date Posted: June-02-2010 at 2:27pm
|
Joel,
The above are all good ideas. Ether the por-15 or the Rust-Oleum (for rusty metal) would be my choice. No on the so called "rust converters". Yes, adhesion is a problem unless you use a latex paint!! Inside the box tubing, I'd put a sponge on a long stick, pour oil on it and swab it back and forth. On the self tappers, they are just a poor excuse for fastening bunks!! I'd drill all the way through the tubing and use some plates the same width of the tubing on the bottom. Sorry I missed you this last weekend. Things got busy especially since my wife had "signed me up" for several social engagements!! I had to leave my truck up at Eagle River Service. Still the same problem of intermittent stopping/dieing. New injector pump and ECM 15K ago. New lift pump 4 weeks ago. New fuel supply and return line 1 week ago. What did you end up with for a lift? Where did you find it? ------------- /diaries/details.asp?ID=1622" rel="nofollow - 54 Atom /diaries/details.asp?ID=2179" rel="nofollow - 77 Tique 64 X55 Dunphy Keep it original, Pete < |
Posted By: Hollywood
Date Posted: June-02-2010 at 3:16pm
Now you have 2 rusty holes and comprimised strength. You're not missing any hold down strength of the bunk with a screw. ------------- |
 8122pbrainard wrote:
Posted By: M3Fan
Date Posted: June-02-2010 at 3:55pm
|
I don't have an angle grinder either. Harbor Freight time!
Pete, yes, got the lift- see my old docks and lifts thread for an update. Shoot me your email address (I keep losing it) and I'll send you some pics! The SN hovering 4 feet above the water under a matching beige canopy is a beautiful sight. HW, I thought the same thing regarding drilling straight through. ------------- 2000 SN GT40 w/99 Graphics/Gel 2016 SN 200 OB 5.3L DI https://forum.fifteenoff.com |
Posted By: PLBC
Date Posted: June-03-2010 at 2:36am
|
Joel, I have an angle grinder you can borrow. I'll even drop it off on my way to work. Just let me know. ------------- http://www.correctcraftfan.com/diaries/details.asp?ID=5164&sort=&pagenum=1" rel="nofollow - 99 |
Posted By: M3Fan
Date Posted: June-03-2010 at 3:01am
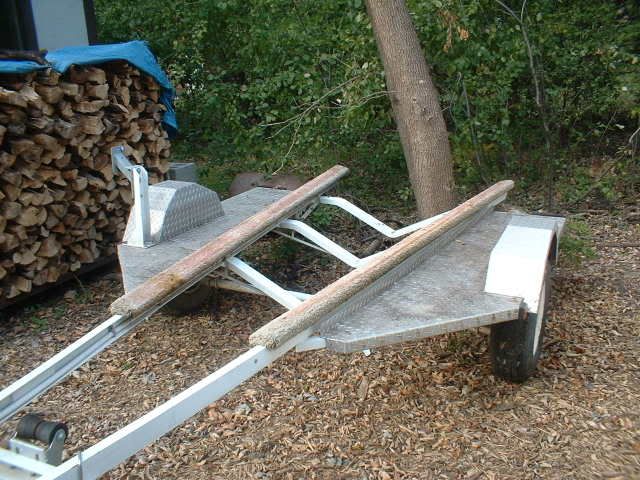
Kurt, I'll take it ASAP! Stripped down one side of the trailer. Looks like I did this just in time, and I'm very glad that my tetanus shots are up to date. This thing looks like it went down with the Titanic. Lots of good news though: 1) almost all of the bunk bolts were very tight and still had plenty of metal to bite into, 2) the bunk boards themselves are in terrific shape, practically brand new looking, 3) the trailer has not been structurally compromised at this point. Had I let this go even a couple more years, this trailer would have been junk. However, at this point I just have a lot of very nasty surface rust. I have definitely fixed things that weren't broken before but I think even the people that know me best would say that this was necessary intervention. The worst part of the project has been pulling the staples out of the bunks, of which there are approximately 100 billion. Hopefully this is a quick turnaround project. Also, I will have to order new fenders, which are 130.00 each. Lil' expensive, but I don't really have much of a choice. Fender: 
Looks worse than it is, but you can see that it was time: 
Amazingly this is all still solid metal 

Note all the rust on the floor 
Solid structure, nice torsion axle  ------------- 2000 SN GT40 w/99 Graphics/Gel 2016 SN 200 OB 5.3L DI https://forum.fifteenoff.com |
Posted By: 8122pbrainard
Date Posted: June-03-2010 at 9:05am
|
Joel,
pbrainard@wistool.com ------------- /diaries/details.asp?ID=1622" rel="nofollow - 54 Atom /diaries/details.asp?ID=2179" rel="nofollow - 77 Tique 64 X55 Dunphy Keep it original, Pete < |
Posted By: 81nautique
Date Posted: June-03-2010 at 9:09am
|
If you need to borrow my welder for a weekend let me know. 110v ------------- You can’t change the wind but you can adjust your sails |
Posted By: M3Fan
Date Posted: June-03-2010 at 10:53am
I don't know how to weld but if I did, that would be awesome! I might be OK for now but I'll keep it in mind. ------------- 2000 SN GT40 w/99 Graphics/Gel 2016 SN 200 OB 5.3L DI https://forum.fifteenoff.com |
Posted By: MartyMabe
Date Posted: June-03-2010 at 11:13am
|
M3Fan, Joel ,
Do a search on e-bay for your fenders. Got mine for $20 for the pair,FREE Shipping from Florida to NC!! You gonna put diamond plate or metal for the side steps, instead of putting wood back down? E-mail me mtmabe@northstate.net ------------- 66 Skylark http://www.correctcraftfan.com/diaries/details.asp?ID=5041" rel="nofollow - 93 SN If you're not living in NC, you're just camping out! |
Posted By: Gary S
Date Posted: June-03-2010 at 11:24am
|
Not too impressed with Ram lin trailers by the looks of Joels and others I've seen on here.Sad state of affairs when the stuff they pass off for wood these days is in better shape than the steel.I wonder how bad their rusting inside the box sections. Won't be finding these in a field and fixing them up,right Pete? ------------- http://www.correctcraftfan.com/diaries/details.asp?ID=1711&sort=&pagenum=1&yrstart=1966&yrend=1970" rel="nofollow - 69 Mustang HM SS 95 Nautique Super Sport |
Posted By: M3Fan
Date Posted: June-03-2010 at 12:24pm
You know, I used to think that but in disassembling this trailer I have to say that it is really well built. The metal is surprisingly thick and the welds are really nice. Structurally this thing is a beast. The paint is super-thick. All the bolts holding the non-structural things on are stainless. I would say that in just about every way they are over-built. Heck, the metal holding the carpet steps on is probably 50% rusted away and there is still plenty of meat on those bones. The only killer is the carpet. We also launch our boat at least once a week so the trailer never dries out during the entire summer. ------------- 2000 SN GT40 w/99 Graphics/Gel 2016 SN 200 OB 5.3L DI https://forum.fifteenoff.com |
Posted By: Gary S
Date Posted: June-03-2010 at 1:39pm
|
Maybe then they just didn't spend the money on good corrosion resistant primer and top coats then. The last new boat I bought, I paid extra for a galvanized trailer just so I would not have to deal with this problem. You should be out having fun at the new place instead of working on a rusty trailer in Illinois anyway! ------------- http://www.correctcraftfan.com/diaries/details.asp?ID=1711&sort=&pagenum=1&yrstart=1966&yrend=1970" rel="nofollow - 69 Mustang HM SS 95 Nautique Super Sport |
Posted By: horkn
Date Posted: June-03-2010 at 2:11pm
|
I second the POR-15 for the rusty bits that are not rotted away and are solid. That stuff works very well. I've used it on rusty jeep frames and it works very well.
------------- 78 martinique- refloored, reinforced, stringers re glassed, re engineered interior GT40P heads Edelbrock Performer intake acme 4 blade http://img.photobucket.com/albums/v64/horkn/fish/nautique.jpg |
Posted By: M3Fan
Date Posted: June-03-2010 at 2:45pm
Called my local paint supply place and they have POR-15. I'm familiar with the name since the guys on the old BMW forums I frequent also love it. Definitely the right tool for this job! ------------- 2000 SN GT40 w/99 Graphics/Gel 2016 SN 200 OB 5.3L DI https://forum.fifteenoff.com |
Posted By: 8122pbrainard
Date Posted: June-03-2010 at 2:47pm
Powder coated!!!! The EPA did the job on us!  ------------- /diaries/details.asp?ID=1622" rel="nofollow - 54 Atom /diaries/details.asp?ID=2179" rel="nofollow - 77 Tique 64 X55 Dunphy Keep it original, Pete < |
Posted By: behindpropeller
Date Posted: June-03-2010 at 3:22pm
|
Probably used an inexpensive powder coat process.
------------- |
Posted By: anthonylizardi
Date Posted: June-03-2010 at 4:40pm
| I used POR 5 years ago on my motorcycle has tank. POR is still rock solid. Awesome stuff |
Posted By: 8122pbrainard
Date Posted: June-03-2010 at 5:06pm
Tim, What's the expensive process that would overcome the rusting problem? ------------- /diaries/details.asp?ID=1622" rel="nofollow - 54 Atom /diaries/details.asp?ID=2179" rel="nofollow - 77 Tique 64 X55 Dunphy Keep it original, Pete < |
Posted By: behindpropeller
Date Posted: June-03-2010 at 5:14pm
When they Pcoated trailers 5-10 years ago they probably got done welding and then shot the Pcoat on them and threw them in the oven. A quick way to make it look good. Today a top notch powder coater will wash down the item, then wash it again with a phosphoric acid wash to nuetralize rust. Once that is done a Pcoat primer rich in zinc will go on the part and it gets half baked. After the primer comes the topcoat at a higher temp bake. An inexpensive PCoat process will let corrosion run underneath the powdercoat. Without a rust converter such as phosphoric acid, you really are just painting over rust. My guess is that POR15 has some kind of phosphoric acid (or similar) in it to convert the rust as you paint. Tim ------------- |
Posted By: 8122pbrainard
Date Posted: June-03-2010 at 9:34pm
Tim, This was sort of a trick question.  I was curious how much you knew about powder coating. We make lots of parts that get set out for the process and there was even a time when I was handling the engineering to put in our own line. I was curious how much you knew about powder coating. We make lots of parts that get set out for the process and there was even a time when I was handling the engineering to put in our own line.
You are absolutely correct that a phosphate treatment will improve the coating but sandblasting plus the phosphate would even be better. However, we sure know trailer manufacturers don't go to that extent! The bottom line is the powder coat process has poor adhesion no matter what you do. I see our powder coater usually every week and he always makes the analogy of a plastic grip on pliers - it doesn't stick and it comes off!! ANY place the coating doesn't cover like corners or crevices and cracking in high flex areas will allow water to get under the powder. Then it starts!! Wet paint primers are said to be a chemical bond and by far superior but then we get into the VOC issue with the EPA!! ------------- /diaries/details.asp?ID=1622" rel="nofollow - 54 Atom /diaries/details.asp?ID=2179" rel="nofollow - 77 Tique 64 X55 Dunphy Keep it original, Pete < |
Posted By: M3Fan
Date Posted: June-07-2010 at 3:13pm
|
Quick update- did about 6 hours on the trailer this weekend. Stripped all the rust down (on the side fairings it came off in sheets) with hand tools for the bigger chunks and then with Kurt's angle grinder/wire wheel combo. The angle grinder/ wire wheel is basically a tool straight from hell and it does a great job. I'm glad I still have my sight, hearing and all 10 fingers after using that thing with a full face shield and hearing protection.
Picked up a quart of POR-15 and laid it down. This stuff is really the key to the whole project. It dries to a ROCK HARD glossy finish, and prefers rusty surfaces for adhesion. Reminds me of a powdercoated finish. I then put down a coat of rattle-can Rustoleum over that since POR-15 is not UV tolerant and I only used it on the rusty areas. The trailer is clearly NOT going to be a looker after this hasty rust-eration but it should hold up for another 10 years of use, easily. I did some very shoddy masking on the trailer so it's like half factory finish, half Rust-oleum finish, but I'm working on a tight sked here. I'm also holding off on the 260.00 fender replacement for now. Those can be bolted on later. I'll put up some pics when I finish. Pete, Alan, et. al will have to avert their eyes from the pictures to prevent retinal burning. ------------- 2000 SN GT40 w/99 Graphics/Gel 2016 SN 200 OB 5.3L DI https://forum.fifteenoff.com |
Posted By: MartyMabe
Date Posted: June-07-2010 at 3:20pm
|
http://cgi.ebay.com/ebaymotors/9-x32-16-Guage-Round-Trailer-Fender-_W0QQcmdZViewItemQQhashZitem27b1243d6aQQitemZ170475666794QQptZMotorsQ5fRVQ5fTrailerQ5fCamperQ5fPartsQ5fAccessories - Fenders on e-bay.
Surf it dude!! It's worth it!!! This is the http://cgi.ebay.com/ebaymotors/QTY-2-Trailer-Fenders-w-back-9X32X15-Utility-Boat-Steel-_W0QQcmdZViewItemQQhashZitem2c533bf50eQQitemZ190374999310QQptZMotorsQ5fRVQ5fTrailerQ5fCamperQ5fPartsQ5fAccessories - store on e-bay that mine came from. The only difference were mine were scratch-n-dent sale. But the dents were on the backing plate and the scratches were minor! Then a little bit of measuring for new weld on brackets to the trailer and you're all set!!! ------------- 66 Skylark http://www.correctcraftfan.com/diaries/details.asp?ID=5041" rel="nofollow - 93 SN If you're not living in NC, you're just camping out! |
Posted By: M3Fan
Date Posted: June-07-2010 at 3:32pm
|
Ah, my mistake- I was searching for Ram-Lin, which netted zero results. ------------- 2000 SN GT40 w/99 Graphics/Gel 2016 SN 200 OB 5.3L DI https://forum.fifteenoff.com |
Posted By: 81nautique
Date Posted: June-07-2010 at 4:04pm
LMAO.. yes it can have a pretty mean bite and can throw those little wires about 20 feet!!! Safety gear for sure and a nice set of leather gloves. Protect everything, nothing is sacred for that little bugger. ------------- You can’t change the wind but you can adjust your sails |
Posted By: M3Fan
Date Posted: June-07-2010 at 5:34pm
I'll add that POR-15 is also basically liquid evil. It doesn't come off of anything, and is immune to all solvents. It's thick, nasty, liquid death, basically. I felt like I was playing that old board game "Operation" as I painted various parts of the trailer. At one point I bumped my head on a wet portion of the frame- that was a mad scramble for acetone and rags before it tried in my hair. I tried pouring some of it in a 16oz Solo cup and it melted the cup. Very serious ***************. One hell of a finish, though. ------------- 2000 SN GT40 w/99 Graphics/Gel 2016 SN 200 OB 5.3L DI https://forum.fifteenoff.com |
Posted By: Andy
Date Posted: June-08-2010 at 1:03am
|
Be sure to get some type of topcoat for the trailer. The POR has little to no UV screener and will chalk out. Also, I bought a pair of trailer fenders from Farm and Fleet I think they were $15 ea. If you want I'll measure them up. ------------- http://correctcraftfan.com/diaries/details.asp?ID=3721&sort=&pagenum=6&yrstart=1982&yrend=1982" rel="nofollow - My Blue 82 SOLD! |
Posted By: C-Bass
Date Posted: June-08-2010 at 11:41am
I think he might have addressed this ..
 ------------- Craig 67 SN 73 SN http://www.correctcraftfan.com/diaries/details.asp?ID=6103" rel="nofollow - 99 Sport 85SN |
Posted By: emccallum
Date Posted: June-08-2010 at 12:58pm
|
I am coming in late on this thread. I redid my trailer last year. It wasnt as bad as yours. The wet carpet is what is killing the trailer. I went back with Al on mine. I cleaned up the rust just as you did, and used a Rustoleum paint. Several coats using a brush. Not as pretty as a spray can. I kept the carpet on the inside of the fenders as the boat can hit these.
I used a trailer light rubber grommet where the guide pole goes thru the Al. 
|
Posted By: M3Fan
Date Posted: June-08-2010 at 2:05pm
|
How'd you get those aluminum steps cut like that? Cost? I was going to throw the sh*tty carpet ones back on, at least temporarily. ------------- 2000 SN GT40 w/99 Graphics/Gel 2016 SN 200 OB 5.3L DI https://forum.fifteenoff.com |
Posted By: MartyMabe
Date Posted: June-08-2010 at 2:18pm
|
Don't forget you have to get a 5 x 10 sheet of metal.
Wherever you get the metal from they'll cut it. Mine was $175 for the aluminum diamond plate 5' x 10'- and they cut it with a plasma cutter. They did a bad job, I complained and he took $25 off. I then put the black trim loc on the edges. ------------- 66 Skylark http://www.correctcraftfan.com/diaries/details.asp?ID=5041" rel="nofollow - 93 SN If you're not living in NC, you're just camping out! |
Posted By: MartyMabe
Date Posted: June-08-2010 at 2:31pm
|
http://www.correctcraftfan.com/forum/forum_posts.asp?TID=17015&PID=206626 - 93 SN Rebunk ------------- 66 Skylark http://www.correctcraftfan.com/diaries/details.asp?ID=5041" rel="nofollow - 93 SN If you're not living in NC, you're just camping out! |
Posted By: emccallum
Date Posted: June-08-2010 at 2:39pm
| I had a friend cut them for me. Pretty tedious to get it right. Mine looks good, not perfect. The edge is sanded and rounded. I like Marty's idea of the Trim Loc. |
Posted By: weitekampt
Date Posted: June-08-2010 at 2:40pm
|
Good call on the POR. I used that stuff on the oil pan on my diesel truck. It was rusting and starting to seep. It took a week to prep, but worth it DEFINITELY! If the POR wasn't good enough, I used some epoxy putty over some areas. Then for added insurance, I scuffed the POR and sprayed 1/2 a can of rustoleum in several coats. Working on your trailer would be a piece of cake, imagine doing all that around your steering linkage, wiring harnesses, axle, etc!!! That POR basically welded that pan onto the block!
I am glad you addressed your trailer early like you did. Now you will have some pretty good protection for many years. I know of guys that sprayed POR out of a air gun and got beautiful results with car like finishes. You can always bulletproof your paintjob like that in 5 years! Nice work! ------------- 1993 SkiNautique ProTec 2009 Boatmate trailer. 1240 hours on meter. http://www.correctcraftfan.com/diaries/details.asp?ID=1559&sort=&pagenum=2&yrstart=1991&yrend=1995 - 1993 Ski Nautique |
Posted By: M3Fan
Date Posted: June-08-2010 at 2:49pm
|
One feature that I think helps kill these trailers are/is the staples on the underside of the bunks holding the carpet on. Imagine a 2500lb boat bouncing around on the bunks for 10 years, sandwiching the bunk underside and staple heads directly into the painted frame. Over time, the staples probably wear away the paint and presto- the carpet is right there to hold in the moisture and start the conversion to Fe2o3 on the frame rails. That's why the outer edge of the frame was in worse shape than the inner frame, I'd bet. However, I think that not hiding those staples under the bunks and cutting the carpet rather than wrapping it under on the outside of the bunks will look terrible. Thoughts/solutions? ------------- 2000 SN GT40 w/99 Graphics/Gel 2016 SN 200 OB 5.3L DI https://forum.fifteenoff.com |
Posted By: 8122pbrainard
Date Posted: June-08-2010 at 3:12pm
|
A hand held "Skill" saw with a carbide tipped blade works wonders on diamond plate. Just use a straight edge for a guide and wear safety glasses. ------------- /diaries/details.asp?ID=1622" rel="nofollow - 54 Atom /diaries/details.asp?ID=2179" rel="nofollow - 77 Tique 64 X55 Dunphy Keep it original, Pete < |
Posted By: 8122pbrainard
Date Posted: June-08-2010 at 3:58pm
I did these running boards and fenders with the "Skill" saw and a hand break. (and a TIG) No need for edge trim because all the edges are turned down. Plus, you'll always be catching it with feet/shoes pulling it off! Edge trim also doesn't like to go over the "diamonds". If you get it sized for the diamonds then it's too loose in between. If sized for the base thickness then it wants to come off at the diamonds.
 ------------- /diaries/details.asp?ID=1622" rel="nofollow - 54 Atom /diaries/details.asp?ID=2179" rel="nofollow - 77 Tique 64 X55 Dunphy Keep it original, Pete < |
Posted By: MartyMabe
Date Posted: June-08-2010 at 4:54pm
|
Silicone the trim loc to the edges! But I didn't do that. Mine's staying on pretty well for now.
As for the carpet, I stapled mine on the inside of the bunk, wrapped it under the bunk, lag bolted the bunk to the trailer, continued the carpet over the top of the bunk,back to the inside of the boards, then stapled again. All staples are then on the inside of the bunks,and can't be seen, with the boat on the trailer or off the trailer. Somebody says I shouldn't have went under the bunk, because the water holding in the carpet, but I'll see in another 20 years or so. It's not like your using the trailer to ski around the lake all day, it's out drying in the parking lot, or some only see the water at the beginning of the season and then the end of it. But hey, we live and learn. So we can decipher this mess in another 20 years. ------------- 66 Skylark http://www.correctcraftfan.com/diaries/details.asp?ID=5041" rel="nofollow - 93 SN If you're not living in NC, you're just camping out! |
Posted By: 8122pbrainard
Date Posted: June-08-2010 at 5:00pm
|
Marty,
You really want me to get going on the silicone subject??? Since you've missed why I dislike the stuff, it doesn't stick!! At least go with a polyurethane like 5200 or 4200. It's adhesion is by far superior.------------- /diaries/details.asp?ID=1622" rel="nofollow - 54 Atom /diaries/details.asp?ID=2179" rel="nofollow - 77 Tique 64 X55 Dunphy Keep it original, Pete < |
Posted By: M3Fan
Date Posted: June-08-2010 at 7:34pm
This makes sense. I like this idea better than staple heads directly contacting trailer frame. ------------- 2000 SN GT40 w/99 Graphics/Gel 2016 SN 200 OB 5.3L DI https://forum.fifteenoff.com |
Posted By: M3Fan
Date Posted: June-11-2010 at 12:11pm
|
How time flies when you are "in the zone" on a project. I started on the bunk re-carpeting at about 9PM. When I finished I walked back in the house and it was 12:30AM. Very surprising/shocking, especially when my alarm went off at 5:20 AM.
Bunks look outstanding. Went with the factory staple-under-then-flap-over technique. I even added the strip of "padding" carpet atop the bunks before flapping the main carpet over, giving the bunks that rounded factory look. Here is how strong POR-15 is: I wanted to use a little bit to dip each screw in so that the holes would be that much less prone to future rust. The lid of the POR-15 was SO FUSED to the can that the inner lip of the can actually completely pulled inside out and deformed before the top popped off. Incredible. Basically, the container must be destroyed to re-open the can! ------------- 2000 SN GT40 w/99 Graphics/Gel 2016 SN 200 OB 5.3L DI https://forum.fifteenoff.com |
Posted By: MartyMabe
Date Posted: June-11-2010 at 1:16pm
|
Oh, I forgot to mention, I used a Dewalt air stapler.
The POR-15----yes upon opening you must use it all or the way I did it was to take a plastic baggie, make sure no POR-15 is dripped where the lid goes, put the plastic baggie, then hammered the top on. Mine held up for 7 months. I was lucky. So yes, you only buy what you need on this and no extra. ------------- 66 Skylark http://www.correctcraftfan.com/diaries/details.asp?ID=5041" rel="nofollow - 93 SN If you're not living in NC, you're just camping out! |
Posted By: dmiracle
Date Posted: June-14-2010 at 6:46pm
|
Thanks to Marty and others for the valuable information in this thread, I'm now thinking I'm ready to tackle my own trailer restoration.
I have a 1993 single axle that's in decent shape and looks identical to MartyMabe's with very little rust. I'm thinking it's a Ramlin? I'll try and post some pictures. I do however have some preliminary questions: Rust - very minor on the "tabs" that the wood side steps bolt to and some appears to be existent under the bunks but I have not removed these yet. I'm thinking I can probably brush off with a wire brush or power tool. How are the bunk boards attached to the frame? Fenders - Mine appear to be bolted on via square "tabs" on the front and back side of the wheel. Marty - The fenders you showed on ebay don't seem to have these. How did you connect your new fenders? Actuator - It would appear that replacing my actuator would be fairly straight forward however I'm wondering about the brakes. Once you install the replacement and connnect the brake line, is there a process for bleeding the brakes? Turnbuckle - My trailer did not have one but rather, the previous owner had attached a chain. If the nose of the boat isn't snug into the bow stop, it will porpoise somewhat over bumps which makes me nervous. I've heard negative things about the original turnbuckles. Comments? Thanks for your help guys. Doug Miracle |
Posted By: MartyMabe
Date Posted: June-14-2010 at 9:47pm
|
Go at the rust places with a hand-held grinder with 80 grit paper if possible. Get POR-15 or some kind of rust-inhibitor paint and you'll be fine.
There are lag screws under the carpet on the bunks, about 10 or 12 of them. You might have to replace some or all of these. As for the fenders, yes you have to get some more 'tabs' cut to weld to the fenders to mount. I had to make mine about an inch longer(wider), because my fenders were more rounded than elongated. Because of the limited space on this site to post pics, e-mail me and I'll be happy to send you all the pics you want to look at before you get started!  ------------- 66 Skylark http://www.correctcraftfan.com/diaries/details.asp?ID=5041" rel="nofollow - 93 SN If you're not living in NC, you're just camping out! |
Posted By: kapla
Date Posted: June-15-2010 at 12:44am
hey Marty what about using photobucket? ------------- <a href="">1992 ski nautique |
Posted By: dmiracle
Date Posted: June-16-2010 at 11:39am
|
Marty - sent you a pm with my e-mail address. Thanks for the offer of pictures. ------------- Doug |
Posted By: dmiracle
Date Posted: June-16-2010 at 5:24pm
|
For whatever it's worth, I contacted Ramlin to get prices from them on 1993 trailer parts. Was referred to Orlando CC. Here's the pricing:
Fenders (painted black, galvanized, or raw steel)- $100 each Turnbuckle - $64 Actuator - $342 (Whoa!!) Bunk Carpet - $26 per roll, 12,14,16 inch widths/19 - 23 feet lengths LED light replacements - $44 light bar, $15 side lights, $26 tail lights They also sent me the attached measurement template for the fenders...  ------------- Doug |
Posted By: MartyMabe
Date Posted: June-16-2010 at 5:45pm
|
Fenders----E-bay $20 for the pair
Bunk Carpet-E-bay, but was too short, so Lowe's 2' x 25' $20 LED lights--E-bay rear ovals 2 red markers 4 yellow markers $35 for the whole set E-bay POR-15 Rep gave me a pint FREE! Diamond plate $150 local dealer Trim-Loc ---E-bay 75' roll $20 $245-$250 total ------------- 66 Skylark http://www.correctcraftfan.com/diaries/details.asp?ID=5041" rel="nofollow - 93 SN If you're not living in NC, you're just camping out! |
Posted By: MartyMabe
Date Posted: June-16-2010 at 5:50pm
Doug, try e-mail address mtmabe@northstate.net pm seems to not work at times ------------- 66 Skylark http://www.correctcraftfan.com/diaries/details.asp?ID=5041" rel="nofollow - 93 SN If you're not living in NC, you're just camping out! |
Posted By: dmiracle
Date Posted: June-16-2010 at 6:16pm
|
Haha!
Thought my post would make you feel good Marty. You forgot to add "Money left in my pocket - PRICELESS" my email - dougmiracle@gmail.com  ------------- Doug |
Posted By: MartyMabe
Date Posted: June-16-2010 at 6:22pm
|
http://www.southwestwheel.com/store/p-179-a882543.aspx - actuator
Oh! I forgot to mention. Didn't know the extent on my brakes,wheel cylinders so I began bidding on the pair of bolt-on backing plates,wheel cylinders, brake shoes, etc, everything included, just bolt in on,, and I won it! $25 FREE SHIPPING from Wisconsin No one else bid on it, so I've got it for future use I guess! ------------- 66 Skylark http://www.correctcraftfan.com/diaries/details.asp?ID=5041" rel="nofollow - 93 SN If you're not living in NC, you're just camping out! |
Posted By: dmiracle
Date Posted: July-21-2010 at 7:28pm
|
I'm not as good as Marty is when it comes to huntin' the bargains but I thought I'd share what I felt was a pretty good source for the OEM (Peterson Manufacturing)lights on my 93" CC trailer.
Below is the list of all new replacement parts with prices that I've ordered today from www.foxtaillights.com/  ------------- Doug |
Posted By: dmiracle
Date Posted: July-21-2010 at 7:30pm
|
BTW....
I know I have a lashing coming from Pete regarding the clips. I'm ready to take it like a man but hey......they're original, I get points for that don't I? ------------- Doug |
Posted By: 8122pbrainard
Date Posted: July-21-2010 at 8:10pm
Doug, You're cool! I just never liked the clips. Yes, very original but practicality is involved when it comes down to wiring up a trailer. I've just seen too many problems with them and yes, as mentioned they gouge into the paint. Chris's idea with the electric tape is a good one. Seems he's on the same page as I am plus, just as anal!!  ------------- /diaries/details.asp?ID=1622" rel="nofollow - 54 Atom /diaries/details.asp?ID=2179" rel="nofollow - 77 Tique 64 X55 Dunphy Keep it original, Pete < |
Posted By: dmiracle
Date Posted: July-22-2010 at 4:30pm
|
Can anyone tell me what size brake/backing plates to purchase for the 1993 Trailer?
Thanks. ------------- Doug |
Posted By: dmiracle
Date Posted: July-23-2010 at 5:54pm
|
Bumping this question up in hopes of the correct size backing plates for my 1993 trailer.
Thanks guys. ------------- Doug |
Posted By: MartyMabe
Date Posted: July-24-2010 at 1:57am
|
http://www.etrailer.com/dept-pg-Trailer_Brakes.aspx - brakes
I'll check Saturday. I think it's the 12". You can measure your drum. Inside diameter and that will give you the needed info. Still check e-bay!! ------------- 66 Skylark http://www.correctcraftfan.com/diaries/details.asp?ID=5041" rel="nofollow - 93 SN If you're not living in NC, you're just camping out! |
Posted By: dmiracle
Date Posted: July-26-2010 at 1:14pm
|
Thanks Marty! ------------- Doug |
Posted By: NAUTIQUEjunky
Date Posted: July-26-2010 at 4:06pm
| M3fan, If you havent redone the carpet on your the sides of your trailer, try 3/4 plywood with Rino Coat applied to them. It looks nice and wont hold water like the carpet does.. Most auto part stores carry the Herculiner which is bascily the same thing.. |
Posted By: M3Fan
Date Posted: July-26-2010 at 7:10pm
I've made the carpeted step and fender replacement a "Phase 2" project- thanks for the tip. ------------- 2000 SN GT40 w/99 Graphics/Gel 2016 SN 200 OB 5.3L DI https://forum.fifteenoff.com |
Posted By: jhiestand
Date Posted: August-10-2010 at 11:18pm
|
You guys spurred me into tackling the rust on my Ramlin. Altho, I guess I'm doing it backwards as I did the carpeted steps last summer.
The big issue was getting the boat off the trailer. I sucked it up and propped it up on blocks. Might try and rub out where it contacts the bunks. Anyway, ordered some POR 15 from the recommendations on this thread. Now that I've gotten the bunks off and taken an initial whack at grinding off the rust I'm pretty certain the PINT of POR 15 isn't going to be near enough! Will another pint get me there, or am I going to need a quart? The wood was actually in better condition than I thought it would be, even though I already have 14' pieces of yellow pine waiting for me at the lumber yard. I'll probably replace the wood anyway, for good measure. A couple of the lag bolts broke loose and will need new holes drilled. I figure I'll replace the whole lot of them. My other concern is how to attach the bunk carpet. I know I'd like the appearance of the "factory staple-under-then-flap-over technique" but I don't think mine actually came that way, plus it seems I end up replacing the carpet every other year and that would be a pain. Any opinions on this? 

|
Posted By: MartyMabe
Date Posted: August-11-2010 at 1:01am
|
That POR-15 goes a long way. Did you get black or the red POR-15? If Red, you could do the other pint, scuff the whole trailer and use it. If ya got black, a pint should be plenty.Just mainly doing the top rails anyway,right?
Some guys here say I shouldn't have 'wrapped' the carpet under.They said,lag bolt bunks down then staple both sides, but I layed the carpet down, then lag-bolted,then pulled the carpet over tight and only stapled to the inside of the bunks. Take a heat gun or hair dryer to your Nautique Decals, get a razor blade under it and pull them off and take 'em to your local Fast Signs or other place and get ya some made. ------------- 66 Skylark http://www.correctcraftfan.com/diaries/details.asp?ID=5041" rel="nofollow - 93 SN If you're not living in NC, you're just camping out! |
Posted By: M3Fan
Date Posted: August-11-2010 at 1:02am
|
That certainly looks familiar. I bought a quart of POR-15 (50.00!) and hardly used any of it, relatively. I only put it on the rusted areas of the frame and side fairings, etc., basically wherever there was rust. The rest of the trailer got plain ol' spray paint. I'd say my trailer was worse than yours, so you'll probably be fine with a pint of POR-15. The stuff is THICK and coats very well. ------------- 2000 SN GT40 w/99 Graphics/Gel 2016 SN 200 OB 5.3L DI https://forum.fifteenoff.com |
Posted By: jhiestand
Date Posted: August-11-2010 at 9:34am
Actually I got the gray POR, as I intend to paint red over it. I guess I'll see how far the pint gets me. I'm still undecided about the carpet, but that's a few days off so I can still mull it around. 
|
Posted By: seacamper
Date Posted: August-14-2010 at 9:33pm
|
Update with pics? ------------- 1980 Ski Nautique Boat Bar 1988 Mastercraft Tristar Open Bow 1988 Mastercraft Tristar Closed Bow 1969 Seacamper Houseboat 1986 Harris Pontoon 2004 Seadoo GTX SC + Flydive Xboard 1999 Adventurecraft |
Posted By: jhiestand
Date Posted: August-25-2010 at 11:28pm
|
This project took me WAAY longer than I anticipated, especially getting the new bunk wood secured. Not only was the wood stubborn (had to soak it overnight) but I had to drill quite a few new holes. If I ever have to do this again I'm afraid I'll have to resort to the bolt-thru method.
Also made the mistake of pulling the carpeted insides off the fenders. TONS of rust there, so more grinding, POR15 and paint. It's now all complete, and spruced it all up with LED lights all around. Hopefully this'll get me along for quite a while! 
Not a great shot of the finished product, but general idea. The prop guard still isn't on, but otherwise everything's intact. 
|
Posted By: seacamper
Date Posted: August-26-2010 at 12:31am
|
Looks great! ------------- 1980 Ski Nautique Boat Bar 1988 Mastercraft Tristar Open Bow 1988 Mastercraft Tristar Closed Bow 1969 Seacamper Houseboat 1986 Harris Pontoon 2004 Seadoo GTX SC + Flydive Xboard 1999 Adventurecraft |
Posted By: dmiracle
Date Posted: August-26-2010 at 12:37am
|
jhiestand,
I fully understand. Ironically, just wrapped up the full restoration of mine this evening as well. Pictures to follow tomorrow evening. I'm beat and celebrating with a cold one (or three). ------------- Doug |
Posted By: MartyMabe
Date Posted: August-26-2010 at 2:31am
|
Hey guys, I'm waiting to hear back from Ramlin about a 'NEW' NMMA Spec decal with all info weights, and VIN #. I've been corresponding with Heather Hutchins and she's seeing what she can do about making me another one.
She said my CC Trailer was made by CC and they (Ramlin) didn't start taking them over until late 1995, early 1996.  ------------- 66 Skylark http://www.correctcraftfan.com/diaries/details.asp?ID=5041" rel="nofollow - 93 SN If you're not living in NC, you're just camping out! |
Posted By: dmiracle
Date Posted: August-26-2010 at 12:06pm
|
That would be cool Marty.
They told me the same thing about my trailer (1993 also). My experience with the folks at Ram-Lin was top notch. Where is the VIN # located on these trailers? Hopefully I didn't grind it off.  ------------- Doug |
Posted By: MartyMabe
Date Posted: August-26-2010 at 5:11pm
|
Port side inside rail on the tongue. Silver Foil decal, that had the VIN # typed into or printed on. So it faded within 2 years probably, but with a flourescent light in hand, held at a certain angle ,your #'s, or at least mine, just popped right out. Luckily ,my bill of sale had the VIN # on it.
My decal had Correct Craft stamped on it. I couldn't make out if that yellom NMMA part was on it. I hope she can figure it out, and get me another one. EDIT: # was at the bottom of that decal, towards the middle ------------- 66 Skylark http://www.correctcraftfan.com/diaries/details.asp?ID=5041" rel="nofollow - 93 SN If you're not living in NC, you're just camping out! |
Posted By: dmiracle
Date Posted: August-26-2010 at 5:56pm
|
Thanks brutha. ------------- Doug |
Posted By: dmiracle
Date Posted: September-12-2010 at 12:52am
|
These pictures are long overdue. In short, I ripped everything down to the frame, ground away all rust and re-primed and paointed, then replaced everything on this 1993 trailer with all OEM parts.
Lights, wiring, tires, fenders (re-fabricated by Ram-Lin), carpet, brakes, repacked hubs with new bearings and races, actuator, turnbuckle, fabricated new wooden steps sides from 3/4 doug fir with 5 coats spar varnish. Could not have done this without this site and all the fantastic info and support. Apologies for not getting many shots of the "before" condition however the other pictures in this thread pretty much sum it up. I'm very pleased with how this tunred out and can now sleep good at night knowing my mint condition 92SN has a worthy cradle for her winter's nap.                ------------- Doug |
Posted By: MartyMabe
Date Posted: September-12-2010 at 1:23am
|
Do you have the 'fender 'decals to put back? The lug nut decals for the wheels? The Ski Nautique decal on the side, close up pic, or where did it come from?
Still a great job!!!!  ------------- 66 Skylark http://www.correctcraftfan.com/diaries/details.asp?ID=5041" rel="nofollow - 93 SN If you're not living in NC, you're just camping out! |
Posted By: Donald80SN
Date Posted: September-12-2010 at 1:28am
| Very Nice Job. |
Posted By: dmiracle
Date Posted: September-12-2010 at 2:05am
|
Marty,
Thanks for your comments. Here is a close up of the SN sticker on the side. I purchased them here: http://www.decalmax.com/full.php?decal_id=693 Very expensive @ $30 each side but I searched everywhere for these to no avail. They are very good quality vinyl stickers. I do not have the other stickers you reference.  ------------- Doug |
Posted By: 8122pbrainard
Date Posted: September-12-2010 at 9:28am
|
Doug,
Fantastic job! ------------- /diaries/details.asp?ID=1622" rel="nofollow - 54 Atom /diaries/details.asp?ID=2179" rel="nofollow - 77 Tique 64 X55 Dunphy Keep it original, Pete < |
Posted By: TRBenj
Date Posted: September-12-2010 at 10:44am
Those dont look half bad! Im not sure if '93 were different, but I have the file to recreate the 89-92 trailer decal if youre interested. Have a few of those made up and add some pinstripes, and your trailer will look better than it did from the factory! ------------- |
Posted By: dmiracle
Date Posted: September-12-2010 at 6:02pm
|
Guys, really appreciate the positive comments, especially from such talented craftsmen as yourselves.
You guys should know that I lurk here alot and your skills, knowledge, and most importantly, steadfast commitment to original restoration had an impact on me throughout this project. In a very strange way, I found myself feeling obligated to do this the right way, knowing I had to answer to the experts here. I gotta believe others feel held to some higher standard as well because of this group. Keep it up guys, it's really an invaluable source of research. Tim - My trailer never had pin stripes. My boat's a 92' and the original owner upgraded to the 93' trailer for some reason. Not sure if other 93's came without stripes or if mine is unique in that regard. I prefer it without though. ------------- Doug |
Posted By: seacamper
Date Posted: September-12-2010 at 7:55pm
|
Are you going to hide that beauty by putting a boat on it? Can you just put the boat on blocks so you can look at the trailer all winter? Thats a real nice job!
Tom ------------- 1980 Ski Nautique Boat Bar 1988 Mastercraft Tristar Open Bow 1988 Mastercraft Tristar Closed Bow 1969 Seacamper Houseboat 1986 Harris Pontoon 2004 Seadoo GTX SC + Flydive Xboard 1999 Adventurecraft |
Posted By: dmiracle
Date Posted: September-13-2010 at 12:17pm
|
When I purchased my boat from the previous owner, it came with very meticulous/detailed notes regarding every maintenance item ever performed. Below are the notes I wrote for the file regarding the trailer restoration. Perhaps this might help someone else considering a similar project.
1993 Correct Craft / Ski Nautique Trailer Restoration Project- Summer 2010 Step 1 – Tear Down •*Original wooden step sides and carpet had already been removed by P.O.. •Removed and discarded original carpet from bunk boards. •Removed original bunk boards, inspected for rot, removed all old staples. Boards in great condition. •Removed and discarded all original trailer lights. •Removed and discarded all original wiring and clips. •Removed and discarded original plastic trailer guides/sleeves. •Removed steel trailer guides. •Removed and discarded original fenders. •Removed and discarded original actuator and damaged front hydraulic brake line. Step 2 – Rust Mitigation / Re-Paint •Ground off all rusty spots on trailer which was primarily existent under the bunk boards at lag bolt attachment spots, and the framework support underneath the carpeted step sides. Some rust areas at tongue as well. •Re-painted all ground areas by priming and painting with Rustoleum primer and paint. •Primed and painted new actuator. •Primed and painted bow stop frame. •Removed all old bumper stickers using heat/torch approach and removed glue residue with “Goof Off”. •Waxed entire trailer with McGuires automotive wax. •Applied new “Ski Nautique” decals to side of trailer as existed on original trailer of this year. Step 3 – Bunk Boards •Drilled 2 new holes into trailer channel frame for lag bolt connections of bunk boards. These were the two single front holes for each bunk board which were rusted beyond use. •Drilled and countersunk new holes into bunk boards to line up with new holes. •Reattached bunk boards. •Re-carpeted bunk boards with new, OEM black carpet from Ram-Lin. Installed using original method of attaching double layer of carpet strip on top of boards to give extra protection and “rounded” look. Step 4 – Fenders •Removed wheels. •Installed new OEM custom order fenders from Ram-Lin. •Attached new carpeted fender side protectors. •Applied new anti-slip tread material to top of fenders. Step 5 – Brake Assembly •Installed new Dico 60 actuator. •Installed new front hydraulic brake line (connects to actuator). •Replaced entire drum brake system with brand new, TITAN PREMIER™ Marine Brake assembly featuring the Galphorite™ corrosion-resistant finish. •Adjusted brakes by tightening adjustment wheel until drum would not turn, then backed off wheel 11 clicks. •Added new brake fluid, bled hydraulic braking system. •Hydraulic brakes tested and functioning properly. Step 6 – Lights / Wiring •Installed all new OEM lights from Peterson Mfg. (4 amber side markers, 2 red side markers, 2 red tail lights, 1 3-light center marker, license plate frame and light). •Rewired trailer with new, 25 foot 4-way split harness. All connections soldered together and double wrapped with electrical tape and properly ground. •All wiring re-connected to trailer with OEM clips and zip ties at fenders. •All lights tested and functioning properly. Step 7 – Carpeted Step Sides •Measured and fabricated, 2 new side step panels using ¾” marine grade Douglas Fir. •Sanded all edges and corners, aligned and drilled attachment holes. •Applied 4 coats of Rustoleum marine spar varnish to wood step sides panels for waterproof protection. •Attached new OEM black carpet to step panels from Ram-Lin. •Attached step side panels to trailer frame. Step 8 – Trailer Guides •Created 2 new plastic trailer guide covers from 2” PVC piping and caps. •Installed new trailer guide pads. •Re-attached trailer guides to trailer frame. Step 9 – Hub Assembly / Bearings •Removed and inspected hubs and bearings. Right side seal was blown and had leaked grease into hub and drum brakes. •Cleaned both hubs. •Replaced all bearings, races, and seals. •Repacked bearings with Lucas brand X-tra heavy duty grease. •Reinstalled hubs. Cranked down daisy nut while rotating hub to seat bearings, then backed off until hair amount of play in hub. Locked daisy nut. Step 10 - Tires •Installed new Goodyear Marathon tires – 225 X 75 R15 •Cleaned out rust from rims and reinstalled wheels to trailer ------------- Doug |
Posted By: Sephmu
Date Posted: October-02-2010 at 4:43pm
|
Doug, Looks great buddy,
Couple of quick questions, 1) How on Earth did you get the fenders to look so good?! 2) Just bought new Galvanized fenders, and am ordering some POR-15, Is the "metal ready" product necessary on the new metal fenders to make the Por-15 stick?? |
Posted By: dmiracle
Date Posted: October-03-2010 at 5:08pm
|
Sean,
Thanks for the compliment. I had the fenders custom made from Ram-Lin. The came already painted and with new carpet covered interior wood sides. I did not have to use any POR-15 and and therefore not familiar with the product. Many others on here have though and I'm sure will chime in with an answer. Good luck with your project! ------------- Doug |
Posted By: Tide
Date Posted: July-27-2011 at 6:58pm
| I'm looking at doing the diamond plate on my 95 trailer. Yours looks great. What thickness did you use on the diamond plate. I was looking at using 3/16 but I'm not sure if that's overkill. I was quoted $361.00 for a 4 x 10 sheet. |
Posted By: dmiracle
Date Posted: July-28-2011 at 12:29pm
|
deleted. ------------- Doug |
Posted By: Tide
Date Posted: July-28-2011 at 1:35pm
| The plywood and carpeted section on my 95 Ramlin trailer is a little over 9ft. Long and less than 2ft. Wide so unless I'm missing something a 4 x 10 sheet will be enough unless I mess up on my cuts. Maybe the step on your Ramlin is a different length. The guy in the earlier post said he used 1/8 thick so that is what I'm going with. |
Posted By: dmiracle
Date Posted: July-28-2011 at 5:16pm
|
Sorry man, brain cramp.
I was thinking the normal plywood size was 8x10 instead of the standard 4x8. You are correct, the area is just over 9ft long. Sorry for the confusion. I'm removing my earlier post to get rid of bad info on the site. ------------- Doug |
Posted By: Tide
Date Posted: July-28-2011 at 7:55pm
| No problem! The job you did on your trailer is incredible. |