Prop key way is sheered
Printed From: CorrectCraftFan.com
Category: Repairs and Maintenance
Forum Name: Boat Maintenance
Forum Discription: Discuss maintenance of your Correct Craft
URL: http://www.CorrectCraftFan.com/forum/forum_posts.asp?TID=38536
Printed Date: May-08-2024 at 12:07am
Topic: Prop key way is sheered
Posted By: BaccoBouncer
Subject: Prop key way is sheered
Date Posted: May-01-2016 at 11:52am
|
I am trying to remove the prop on my 97 nautique. I acme prop puller snapped in two. So I took a look at the back of the prop and I can see the two key ways (shaft and prop key way) are not aligned. So the brass key sheered when the prop got hit and I'm sure the bronze key (pieces) are what has the prop jammed. What is the best path? Cut the prop along the keyway (carefully) or use an oxy acet torch and heat the prop while the puller is keeping tension on it? I'm experienced with a torch and controlling heat. I was planning on heating two opposing areas on the prop base very quickly while keeping some water on the cutlas bearing so heat doesn't travel up the shaft. The tension from the puller will let me know when it's done (pop) and I can cool everything quickly. So what are the votes? cut or cook? Thanks, Adam |
Replies:
Posted By: jimsport93
Date Posted: May-01-2016 at 12:08pm
|
Adam, some of the other guys will chime in too. Pretty fair chance your shaft is bent also. How about the strut? How does it look? ------------- http://www.correctcraftfan.com/diaries/details.asp?ID=2798 - 93 Sport Nautique |
Posted By: BaccoBouncer
Date Posted: May-01-2016 at 12:31pm
|
I checked runout on the shaft and it looks fine. i was told anything under .035" is good. i didn't measure it with a mic but put a piece of wood between the shaft and hull and turned the shaft. I could not see any runout with the naked eye at several points. It will be a matter of vibration feel once in the water. Fingers crossed. New boat so yeah for new purchases. Ughh. |
Posted By: Duane in Indy
Date Posted: May-01-2016 at 12:38pm
 Prop Puller: These are set up for 1" and 1 1/8" shafts in 3 or 4 blade configuration. I am willing to offer these to the members for $115. +shpg. Also shown is the Brass Nylock 3/4-10 castellated nut, brass key and s/s cotter pin,...$20.00 + shpg ------------- Keep it as original as YOU want it 1978 Mustang (modified) |
Posted By: jimsport93
Date Posted: May-01-2016 at 12:39pm
|
Bummer, especially with the new boat. Sorry, not much help from me. Have not had the opportunity to deal with a prop and sheered/jammed key. Hang on. Some of the experts will be here to help you out. They are typically a little slow to respond during boating season! ------------- http://www.correctcraftfan.com/diaries/details.asp?ID=2798 - 93 Sport Nautique |
Posted By: SNobsessed
Date Posted: May-01-2016 at 2:04pm
|
Shaft runout best at under ..010 inch. I had a very tight prop, used a propane torch on prop hub while puller was tensioned. Apply heat to each of the 3 hub areas between blades evenly. Have nut on shaft, when hub expands enough it will pop suddenly. ------------- “Beer is proof that God loves us and wants us to be happy.” Ben Franklin |
Posted By: TRBenj
Date Posted: May-01-2016 at 2:59pm
|
Could have sworn max allowable shaft runout was .003, Pete will know for sure. A hard enough prop hit to shear the key and you think the shaft is ok? I have my doubts. I think its time to break out the sawzall (and your wallet). |
Posted By: BaccoBouncer
Date Posted: May-01-2016 at 3:05pm
| Just so I can brace myself. If the shaft is bent what am I ballpark looking at for replacement? $2k $5k or fifty cents for a bullet? |
Posted By: BaccoBouncer
Date Posted: May-01-2016 at 3:06pm
|
Duane- I have a four blade so the three bolt configuration puller won't work? Adam |
Posted By: BaccoBouncer
Date Posted: May-01-2016 at 3:07pm
|
So can anyone verify the runout on the shaft and location to measure it? Thanks |
Posted By: Jonny Quest
Date Posted: May-01-2016 at 3:19pm
|
As Tim mentioned, you may need to get your sawzall and perform shaft surgery. If you hit your prop hard enough to shear the key, I'm betting that you have other issues. If you do cut the old shaft, you may want to consider http://www.skidim.com/ARE-SHAFT-SYSTEM-1-X-4-COUPLER/productinfo/WS-2000/" rel="nofollow - A.R.E. shaft replacement as it will make your life easier in the future. (about $400 with discount) I would give Vince a call at www.skidim.com and get his input. At a minimum, the drive-shaft needs to be removed and accurately measured (I would go to a local machine shop). The strut may also be bent. Good time to do a shaft alignment. JQ ------------- Current 2003 Ski Nautique 206 Limited Previous 2001 Ski Nautique Open Bow 1994 Ski Nautique Open Bow Aqua skiing, ergo sum |
Posted By: Jonny Quest
Date Posted: May-01-2016 at 3:31pm
Tim: Quoting from the website of Elbert's of Oregon (A.R.E. shaft manufacturers): "System drive shafts are made of the finest shaft materials and are individually inspected to ensure the tapers have less than .003” T.I.R. runout and the coupling face runout is within .002” T.I.R. The shafts are straightened to less than .002” on 42” centers, producing a complete assembly far exceeding industry standards." JQ ------------- Current 2003 Ski Nautique 206 Limited Previous 2001 Ski Nautique Open Bow 1994 Ski Nautique Open Bow Aqua skiing, ergo sum |
 TRBenj wrote:
Posted By: gun-driver
Date Posted: May-01-2016 at 3:32pm
Below the pic it states will work with 3 or 4 blade. I always use heat to remove my props. Follow instructions in above post and do make sure to have the nut on a thread or two, when they pop it scares the crap out of ya the first couple times. Tension lots of heat and a hammer (since prop is junk) you may get lucky and not have to cut the shaft. As Tim said a hard hit like that is likely to have bent the shaft. Check run-out on the end to insure it's not bent after the strut which is most likely where it would be bent. |
Posted By: Duane in Indy
Date Posted: May-01-2016 at 3:34pm
Pulls 3 or 4 blade props. The picture just show 3 pulling bolts BUT it comes with 4 bolts ------------- Keep it as original as YOU want it 1978 Mustang (modified) |
Posted By: 8122pbrainard
Date Posted: May-01-2016 at 5:01pm
I confirm that the .003" is an ideal not to exceed. Adam, Unless I missed it, I didn't read what caused the damage. Off hand, you must have hit something shearing the key because the prop wasn't lapped to the prop shaft? If so and considering the run out you see by eye, I too would say the shat is gone. As mentioned, the ARE shaft system is the way to go. As Tim mentioned, it may be time for the Sawsall!  Do check your strut as well. BTW, you would never get the prop off in that condition with a "C" clamp type puller. Do check your strut as well. BTW, you would never get the prop off in that condition with a "C" clamp type puller.http://www.correctcraftfan.com/forum/forum_posts.asp?TID=10725&KW=puller" rel="nofollow - Here's the $10 prop puller that Duane copied.  ------------- /diaries/details.asp?ID=1622" rel="nofollow - 54 Atom /diaries/details.asp?ID=2179" rel="nofollow - 77 Tique 64 X55 Dunphy Keep it original, Pete < |
Posted By: Duane in Indy
Date Posted: May-01-2016 at 5:43pm
|
Is that a double tapered shaft?? If not then I see a "cherry picker" in use shortly. Might be a good time to change over to a double taper. ------------- Keep it as original as YOU want it 1978 Mustang (modified) |
Posted By: baitkiller
Date Posted: May-01-2016 at 6:54pm
|
Get a small punch or drift and tap the key stock back and get it to move, then apply puller pressure to the prop. Keep tapping it back as you pull it off. I saved a buddies shaft on Master Craft last year doing exactly this. ------------- Jesus was a bare-footer............. |
Posted By: 8122pbrainard
Date Posted: May-01-2016 at 7:38pm
|
Adam, I see you did hit something. I also see you used the piece of wood between the shaft and the hull. I assume you did this between the log and strut and not at the aft end of the shaft. Just aft of the strut is where the shafts typically bend from a prop strike. At least clamp a dial indicator up to the strut and get a decent measurement. Dump the wood and whoever told you the ..035" idea!!! ------------- /diaries/details.asp?ID=1622" rel="nofollow - 54 Atom /diaries/details.asp?ID=2179" rel="nofollow - 77 Tique 64 X55 Dunphy Keep it original, Pete < |
Posted By: baitkiller
Date Posted: May-01-2016 at 9:23pm
|
Drop the rudder and pull the whole thing out in one piece. Drop it off at the prop shop with wink and say "fix it". Those guys have man size tools and know how to use them. Your gonna have to wrestle the coupling sooner or later, might as well try to save the shaft and prop. ------------- Jesus was a bare-footer............. |
Posted By: DrCC
Date Posted: May-01-2016 at 10:38pm
|
Yep !!! ^^^ baitkiller ^^^ Heat = last resort, then never use that prop again. |
Posted By: MrMcD
Date Posted: May-05-2016 at 4:22am
|
If tapping the key out does not work I have had luck by tensioning the prop puller as tight as I thought was safe and then taking a open end wrench just large enough to go over the prop shaft with no drag. 1 1/16 over the 1" shaft worked for me. With the wrench up tight against the prop, prop puller attached I hit it hard on the wrench from the engine side with a 2lb ball pen hammer. One good hit popped it for me. As mentioned it is a good idea to have a nut on the shaft as you do this. I had parts fly. Not good for trailer paint but it came off and the prop was already bad. If it is really stuck bad I think I would use my sawsall and cut the prop in two places opposite sides of the shaft. Cut down as close to the shaft as is safe. Bronze will cut easy while the stainless shaft will cut hard. With the prop cut nearly through it will lose tension. If your shaft is close to good you may get a machine shop to straighten it for you. I used to know a guy that could get them back to perfect. With that said when I needed to change mine I stepped up as advised and bought the ARE shaft they are really nice and easy to work with. |
Posted By: 8122pbrainard
Date Posted: May-05-2016 at 7:08am
Mark, I question your thought about the cutting ease of the Nibral since it's some pretty tough stuff. Years ago after fighting cutting a prop, I was curious about the hardness. I had the opportunity to actually test the Rockwell and not just go by the charts. So, I took both the SS shaft and the prop I was working on into work one day and then stuck both in the Rockwell tester. Sure enough, both came out right on to what the books said. The SS Rockwell was just at B85 and the Nickle aluminum bronze was just at B95. ------------- /diaries/details.asp?ID=1622" rel="nofollow - 54 Atom /diaries/details.asp?ID=2179" rel="nofollow - 77 Tique 64 X55 Dunphy Keep it original, Pete < |
Posted By: tryathlete
Date Posted: May-05-2016 at 8:47am
| Cutting both is a lot easier on a machine tool with coated carbide. They're both nasty and if you let them get hot they'll work harden and stare back at you laughing at your puny hacksaw blade. |
Posted By: DayTony
Date Posted: May-05-2016 at 11:14am
|
forgive me if this isnt asked but is the prop fixable? in the case where you know the shaft is bad than take the portaband to it and cut the shaft. then press the broken piece out. A reputable prop shop can re cut the taper and broach a new keyway. whether or not its worth the price is another question. If both the shaft and wheel are a write off I say cut it off at the coupler, pull it out in one piece and get yourself a lampshade and turn it up on end turn it into a conversational piece for the camp. 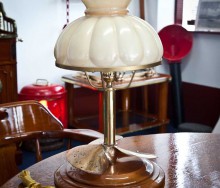 ------------- 1988 Barefoot nautique-454 |
Posted By: Hollywood
Date Posted: May-05-2016 at 12:01pm
|
I've never seen a sheered key. That would take some serious energy, enough to wipe out the prop and rudder. If you can't cut the shaft push it out of the coupler. Start fresh in the boat and make that lamp. |
Posted By: MrMcD
Date Posted: May-05-2016 at 1:28pm
|
Pete your expertise never fails to amaze. In my wildest dreams I never imagined bronze could be harder than stainless. I have cut stainless and I know that is no fun. I have 3 old prop shafts in my house. I have ground the ends sharp and use them for breaking rocks, In Folsom where I live the town is built on a Clay and Rock foundation. If you need to plant something you are digging up rocks, if you need to put in a fence post you are digging and breaking rocks or your hole will end up 3 feet around before you are deep enough for a post. The stainless works very well for this job! One positive for wrecking 3 good props in 30 years.! |
Posted By: 8122pbrainard
Date Posted: May-05-2016 at 5:07pm
I'd have to say the chances are high that the prop wasn't lapped on the shaft and not firmly attached so it was being driven by the key only. ------------- /diaries/details.asp?ID=1622" rel="nofollow - 54 Atom /diaries/details.asp?ID=2179" rel="nofollow - 77 Tique 64 X55 Dunphy Keep it original, Pete < |
Posted By: DayTony
Date Posted: May-06-2016 at 1:43am
|
I would def say the nut may have been loose or there was not a proper lap as well. hard to say without being there and seeing everything that happened though. But i agree. your in there, you've suffered enough already, just replace the shaft, wheel, etc. I have always considered stainless to be a soft metal. All depending on which grade you are talking about too, but typically speaking 304 and 316. They all machine very well when using the correct feed and speed. Things go sour very fast if you do not abide by these laws though. Think about how easy it is to strip a stainless bolt or burr the end of a stainless screw head. ------------- 1988 Barefoot nautique-454 |
Posted By: 8122pbrainard
Date Posted: May-06-2016 at 8:05am
I've seen boats come in with the nut missing and the prop still on. Sure is evidence that a properly fit prop on the shaft works. The nut's purpose is to seat the prop on it's taper. ------------- /diaries/details.asp?ID=1622" rel="nofollow - 54 Atom /diaries/details.asp?ID=2179" rel="nofollow - 77 Tique 64 X55 Dunphy Keep it original, Pete < |
Posted By: BaccoBouncer
Date Posted: May-06-2016 at 9:58pm
| I was able to pop the prop off with two small wood sticks. Must have been looser than I thought. One of the sticks scratched the prop up a bit. I bet a good shop can fix it. |
Posted By: 8122pbrainard
Date Posted: May-06-2016 at 10:16pm
|
Adam, How about some pictures of the prop? I'm trying to understand how you broke the Acme puller trying to get it off but then were able to remove it with wood sticks??  Have you checked the shaft again as recommended? Have you checked the shaft again as recommended? ------------- /diaries/details.asp?ID=1622" rel="nofollow - 54 Atom /diaries/details.asp?ID=2179" rel="nofollow - 77 Tique 64 X55 Dunphy Keep it original, Pete < |
Posted By: BaccoBouncer
Date Posted: May-06-2016 at 11:23pm
One of the sticks must have been a hardwood.
|
Posted By: BaccoBouncer
Date Posted: May-06-2016 at 11:25pm
| Well the good news is that the shaft has only 50 thou of runout. The bad new is well actually the good new is all I can handle. |
Posted By: BaccoBouncer
Date Posted: May-06-2016 at 11:28pm
| That's the sheered key to the right. it actually was a perfect cut. i kept the deep of the cut right along the keyway and had no danger of touching the shaft. The grotesqueness is because it was really awkward down there and I wanted to remove large material so I could be a bit more finesse when closer to the keyway. So anybody have any tips/guides on removing shafts? I imagine that a 50 thou runout is pretty fixable at an experienced shop. |
Posted By: BaccoBouncer
Date Posted: May-06-2016 at 11:31pm
| By "Sticks" I meant 4 1/2" cutting wheel. That stuff may look like brass but you were right, it felt as hard to grind/cut as any metal out there. |
Posted By: Blamey
Date Posted: May-06-2016 at 11:44pm
------------- 96 Super Sport Previously: 95 Sport Nautique, 1980 Ski Supreme |
Posted By: BaccoBouncer
Date Posted: May-06-2016 at 11:47pm
| What is the big plus with the A.R.E. shafts? |
Posted By: Gary S
Date Posted: May-07-2016 at 12:39am
|
Easier to R&R, If you need a new shaft anyway it would be worth it. Just to replace it to replace it would be questionable but not having to heat the coupling to install it sure would help http://www.elberts.com/system.htm" rel="nofollow - link- ------------- http://www.correctcraftfan.com/diaries/details.asp?ID=1711&sort=&pagenum=1&yrstart=1966&yrend=1970" rel="nofollow - 69 Mustang HM SS 95 Nautique Super Sport |
Posted By: MrMcD
Date Posted: May-07-2016 at 5:57am
|
Your a pretty funny guy, Glad you got it off. A grinder can get it done quick. .50 thou shaft movement is no good. The ARE set up does work very easy. |
Posted By: 8122pbrainard
Date Posted: May-07-2016 at 7:12am
|
Adam, Thanks for the picture. Yup, that prop will be a challenge for the prop shop to repair! I too suggest the ARE shaft. Get a new blade and continue with sawing out the .050" out bad shaft.BTW, do lap in your new prop to the new shaft. I also recommend lapping the taper at the forward end (trans coupling) of the ARE shaft. ------------- /diaries/details.asp?ID=1622" rel="nofollow - 54 Atom /diaries/details.asp?ID=2179" rel="nofollow - 77 Tique 64 X55 Dunphy Keep it original, Pete < |
Posted By: BaccoBouncer
Date Posted: May-07-2016 at 10:09am
|
8122, Yes I heeded your advise early and got lapping compound and some prussian blue. So I'm ready for some councel on the shaft swap. Why would I saw out the od shaft? The bend is after the cutlass bearing. What else should I purchase in advance? seals for rudder and drive shaft for install? Cutlass bearing? Any special tools? I obviously have to make some ground clearance to get the shaft out. Is that one of the ARE? If I cut the old one out the ARE does not need as much clearance to go in? |
Posted By: DayTony
Date Posted: May-07-2016 at 11:05am
 The best and probably only positive thing about absolutely destroying props or finding them on the bottom of a river is the repurpose of them after you replace them. I still would have sacrificed the shaft way before doing that the the prop. from the looks of the damage to the prop before the wizard wheel got to it; it looked fixable. shafts don't usually ever straighten out perfectly. ------------- 1988 Barefoot nautique-454 |
Posted By: BaccoBouncer
Date Posted: May-07-2016 at 11:21am
|
I saved the prop and made a cool lamp just like DayTony suggested. It's now a classy piece of home decor. 
|
Posted By: BaccoBouncer
Date Posted: May-07-2016 at 11:26am
|
Holy cow!!!!! DayTony, You're in Salem MA! I lived on Essex st in Salem until I moved 20 minutes down the road to Essex (town of) to be on Chebacco lake a few months ago. Totally unrelated: Do you want to buy a lamp? Real cheap and free delivery. |
Posted By: DayTony
Date Posted: May-07-2016 at 12:19pm
|
lol it would def go with the decor of my basement bar. good job on the lamp i like it. check PMs ------------- 1988 Barefoot nautique-454 |
Posted By: MrMcD
Date Posted: May-07-2016 at 2:47pm
|
The engine side of your shaft bolts to the coupler on your tranny. The shaft coupler is a very tight fit with a couple set screws holding it tight but just like your prop the coupler will need to be pressed off of the shaft. It can be done but presents another battle when you re install the shaft into it., Much easier is the ARE System, take a read on this website on how to remove and install the front coupler. You will start liking the ARE shaft better. |
Posted By: 8122pbrainard
Date Posted: May-07-2016 at 2:49pm
|
Adam, Sawing the old shaft just aft of the trans coupling will save you the time needed to remove the coupling half from the shaft. It's a heat shrink fit and they can be difficult to remove. This of course is if the coupling and shaft hasn't fretted wearing out the heat shrink fit. Fretting is caused by bad alignment between the engine and prop shaft. As long as you have the shaft out, it's not a bad idea to install a new cutlass. Shaft and rudder packing is also a good idea. No special tools will be needed. Removing your old shaft and installing the new will be the same for clearance aft of the boat. Just lower your jack stand if needed. ------------- /diaries/details.asp?ID=1622" rel="nofollow - 54 Atom /diaries/details.asp?ID=2179" rel="nofollow - 77 Tique 64 X55 Dunphy Keep it original, Pete < |
Posted By: BaccoBouncer
Date Posted: May-07-2016 at 3:28pm
|
Ok Team! here's a visual to help with this next part. I will use the ARE system. So what do I want to do with these parts. I put letters on them since I don't know the names of the parts. Questions: Do I want to cut up here or under the boat between the hull and cutlass bearing? What am I taking apart and what am I leaving in? Do I need a puller to separate the press fit if I am using the ARE system? If a man and a woman love each other very much and want to express it with more than hugging and kissing is there a way?  ------------- '97 21' Sport Nautique |
Posted By: BaccoBouncer
Date Posted: May-07-2016 at 3:29pm
|
Whoops. That last question was for a different forum. ------------- '97 21' Sport Nautique |
Posted By: 8122pbrainard
Date Posted: May-07-2016 at 4:35pm
A and the old prop shaft are scrap. C and B will be used again. B is the safety collar and prevents the shaft from sliding aft in case the shaft breaks aft of the coupling A. C is the packing nut Inside is where the shaft packing goes to prevent water entering the boat. ------------- /diaries/details.asp?ID=1622" rel="nofollow - 54 Atom /diaries/details.asp?ID=2179" rel="nofollow - 77 Tique 64 X55 Dunphy Keep it original, Pete < |
Posted By: BaccoBouncer
Date Posted: May-07-2016 at 10:31pm
I'm not sure what the trans coupling is. Im guessing it's "A" Remove these four bolts and don't bother with the two safety wired clamp bolts? ------------- '97 21' Sport Nautique |
Posted By: BaccoBouncer
Date Posted: May-07-2016 at 10:36pm
I've also started the journey to get to the rudder. It seems like removing this floor board should do it but I can't figure out how it's supposed to come out. in this picture I have it all the way up and back and it still doesn't clear the front clips. I removed the carpeted back wall. It's against the gas tank in back.. Am I missing something? ------------- '97 21' Sport Nautique |
Posted By: SNobsessed
Date Posted: May-07-2016 at 11:22pm
|
Remove the 4 bolts in 'A'. The cut shaft will slide out the brass fitting with safety wire. You will want to 're-pack' the brass fitting (called gland) before you reinstall the new shaft (it is easy). The rear floor panel just pulls up & forward. Just give it some brute force. ------------- “Beer is proof that God loves us and wants us to be happy.” Ben Franklin |
Posted By: BaccoBouncer
Date Posted: May-07-2016 at 11:41pm
|
Ok will do. Thanks ------------- '97 21' Sport Nautique |
Posted By: DrCC
Date Posted: May-08-2016 at 12:52am
| So, how did you attach the lamp to the lamp base ? |
Posted By: 8122pbrainard
Date Posted: May-08-2016 at 6:57am
Adam, Slight change in the procedure: You want to repack the gland after the new shaft is installed You need the shaft in place to wrap the packing segments around and then push them into the gland. http://gfopacking.com/" rel="nofollow - Here's a link to the GFO site that has a video on the stuffing procedure. Many including myself have found the GFO "almost dripless" packing to be the product to use. ------------- /diaries/details.asp?ID=1622" rel="nofollow - 54 Atom /diaries/details.asp?ID=2179" rel="nofollow - 77 Tique 64 X55 Dunphy Keep it original, Pete < |
Posted By: SNobsessed
Date Posted: May-08-2016 at 9:38am
|
Thanks Pete for the correction. It's been almost 10 yrs since I did this, thanks to the gore-tex packing! ------------- “Beer is proof that God loves us and wants us to be happy.” Ben Franklin |
Posted By: 8122pbrainard
Date Posted: May-08-2016 at 9:47am
Chris, No problem! There are many times when I need help too especially when my ADD kicks in! A good example is Larry having to correct me this morning. Hopefully the Alzheimer's holds off for a few more years. ------------- /diaries/details.asp?ID=1622" rel="nofollow - 54 Atom /diaries/details.asp?ID=2179" rel="nofollow - 77 Tique 64 X55 Dunphy Keep it original, Pete < |
Posted By: BaccoBouncer
Date Posted: May-08-2016 at 11:08am
You must be asking DayTony. Mine is a clamp light and it's sitting on a wood box that was kicking around. ------------- '97 21' Sport Nautique |
Posted By: BaccoBouncer
Date Posted: May-09-2016 at 4:38pm
|
Update: Ready to order the ARE system but wanted to confirm shaft length first. Can't drop rudder because of protective plate on trailer. I don't have a way to slide the boat back on the trailer. Is there a safe way to lift the boat to get enough clearance? Can you jack under the back of the hull dead center safely? Thanks, Adam ------------- '97 21' Sport Nautique |
Posted By: DayTony
Date Posted: May-09-2016 at 4:41pm
|
that protective plate should unbolt pretty easily. if i remember i only unbolted one side of mine and it gave me enough clearance but you might have to unbolt both sides. they are like 5/8 bolts. lower the tongue and should slip out easily. as for shaft length i don't know but a good number to write down is if you take a tape and go through the hole to the mounting flange surface on the gear(transmission) and to the aft end of the strut. you want it to be a hair longer than that, maybe 1/2" between prop fitment and strut. Some of the guys who have done this i'm sure will pipe in about best shaft size for your application. since its not a cut to length deal. ------------- 1988 Barefoot nautique-454 |
Posted By: DayTony
Date Posted: May-09-2016 at 4:47pm
|
nows a good time to asses condition of your cutlass and replace if needed. Not sure if your a brand new boat owner but you'll quickly find out. Once you own a boat everything else starts seeming more and more rea$onable. ------------- 1988 Barefoot nautique-454 |
Posted By: BaccoBouncer
Date Posted: May-09-2016 at 5:15pm
The protective plate is a welded part of the trailer. How wise/unwise is it to lift at this point on the hull with a hydraulic jack and a piece of wood as a pad? Will I crack the gel coat? ------------- '97 21' Sport Nautique |
Posted By: TRBenj
Date Posted: May-09-2016 at 5:18pm
| All good, lift away! |
Posted By: DayTony
Date Posted: May-09-2016 at 6:19pm
|
oh my bad, my trailer that frame is removable, i suspect just for that reason. ------------- 1988 Barefoot nautique-454 |
Posted By: BaccoBouncer
Date Posted: May-09-2016 at 11:45pm
I wanted to share this moment of victory with you guys. Prop in one hand, drive shaft in the other. ------------- '97 21' Sport Nautique |
Posted By: DayTony
Date Posted: May-10-2016 at 2:14am
|
Congrats. Spray down your motor mount adjusters with penetrating oil, try not to overspray everywhere. and order up a fresh shaft and wheel. If you need a hand with setup some afternoon I'm sure I can donate a little time. So, Did you sheer the pin on chebacco or was it somewhere else? there are some real shallow areas in that lake you have to be careful of. I have hit bottom in that lake more times than i like to admit in the BFN but i draw at least a foot more than you do in the sport. ------------- 1988 Barefoot nautique-454 |
Posted By: BaccoBouncer
Date Posted: May-11-2016 at 1:00am
|
Tony, The A.R.E. shaft is on it's way. Thanks for the offer to help. I purchased the boat with the bent prop. It came from Lee Mass and was used on some of the small lakes out there. ------------- '97 21' Sport Nautique |
Posted By: BaccoBouncer
Date Posted: May-19-2016 at 11:55am
|
So I have my ARE shaft and will be installing it soon. What's my best resource for motor alignment procedure and any other steps to ensure a good install of the shaft? Even thoguh I may have some local help I would like to read up on it as much as possible in advance. Thanks Again, Adam ------------- '97 21' Sport Nautique |
Posted By: MrMcD
Date Posted: May-19-2016 at 3:59pm
|
Mine was a little more involved as my strut got bent and needed to be fixed plus I replaced strut cutlass bushings at the same time. I included the link to my prop shaft replacement. There should be tips in this that will help. There is a very good video on aligning the prop shaft that should be watched also. The very good advisors here helped get mine in correctly. Not that hard to do right but critical to avoid vibrations in your boat and short life on the parts you are putting in. http://www.correctcraftfan.com/forum/forum_posts.asp?TID=32813&title=prop-strut-installation |
Posted By: MrMcD
Date Posted: May-19-2016 at 4:01pm
|
Prop Shaft video good Basics for set up https://www.youtube.com/watch?v=3_w0LvD6gEc |
Posted By: BaccoBouncer
Date Posted: May-21-2016 at 7:02pm
|
Anyone know where I can find the A.R.E. install manual online? I didn't see a link through DIM or in a google search. Too much comes up for ARE ------------- '97 21' Sport Nautique |
Posted By: 8122pbrainard
Date Posted: May-21-2016 at 8:48pm
Adam, There should have been some basic instructions with the shaft system. Not much in them since the install is like other shaft installs with the exception on tightening down the forward coupling on the taper. ------------- /diaries/details.asp?ID=1622" rel="nofollow - 54 Atom /diaries/details.asp?ID=2179" rel="nofollow - 77 Tique 64 X55 Dunphy Keep it original, Pete < |
Posted By: KENO
Date Posted: May-21-2016 at 10:49pm
|
Hi Adam Go to .elberts.com They're the ones who made your shaft. Cllick on the "product instructions" section on their homepage |
Posted By: BaccoBouncer
Date Posted: May-22-2016 at 11:08am
|
Perfect thanks! It has the torque for the nut which was the main thing I was looking for. ------------- '97 21' Sport Nautique |
Posted By: BaccoBouncer
Date Posted: May-22-2016 at 9:21pm
|
Ok Status Update and question. The A.R.E. shaft/coupling are in. I'm running about .007" of misalignment so I have to do some adjustments. But first this question. As I brought the shaft coupling up to the gear box coupling they didn't line up. I had to pull the shaft a bit to one side to get the two to come together. is this normal? ok? ok alignment. As you can see I put a picture below. So I can clearly see how to adjust up down I imagine it is break nut "B" so "C" can move freely then turn "A" to raise it up and down then lock in place with "B". But how does starboard/port? It looks lik emaybe you loosen the nut "D" and maybe the shaft coming off of "C" will then slide in and out of block "E". ????  ------------- '97 21' Sport Nautique |
Posted By: BaccoBouncer
Date Posted: May-22-2016 at 9:27pm
|
From MrmCD's post I see that I may have an issue if the shaft isn't center with the log. ( Is the log the hole in the bottom of the hull for the shaft to enter. it was clearly to one side. So this with the fact that the couplings did not line up probably means I need to align the strut. looks like from his post I should be able to shim with SS washers but keep it under 0.100". ------------- '97 21' Sport Nautique |
Posted By: 8122pbrainard
Date Posted: May-22-2016 at 9:59pm
Adam, I suggest you watch https://www.youtube.com/watch?v=3_w0LvD6gEc" rel="nofollow - shaft alignment 101 again keeping in mind alignment starts at the strut. The shaft should go through the log (yes, the hole in the bottom) centered when the shaft turns freely (is "happy") in the cutlass bearing in the strut. Don't loosen the strut until you determine it's not aligned. It also may be bent from the prop strike. ------------- /diaries/details.asp?ID=1622" rel="nofollow - 54 Atom /diaries/details.asp?ID=2179" rel="nofollow - 77 Tique 64 X55 Dunphy Keep it original, Pete < |
Posted By: BaccoBouncer
Date Posted: May-22-2016 at 10:37pm
|
How do I determine the strut is bent from the prop strike? What do I do it if it is? ------------- '97 21' Sport Nautique |
Posted By: 8122pbrainard
Date Posted: May-22-2016 at 10:46pm
Adam, A bent or twister strut will show up if the shaft doesn't center in the log and binds in the cutlass bearing.. ------------- /diaries/details.asp?ID=1622" rel="nofollow - 54 Atom /diaries/details.asp?ID=2179" rel="nofollow - 77 Tique 64 X55 Dunphy Keep it original, Pete < |
Posted By: BaccoBouncer
Date Posted: May-22-2016 at 10:48pm
|
oh ok. I thought you were saying I have to do something else if it is bent vs just misaligned. If I'm not centered on the log then start aligning the strut. Is it true what he said in the video that the cutlass bearing should have zero play? ------------- '97 21' Sport Nautique |
Posted By: 8122pbrainard
Date Posted: May-22-2016 at 10:53pm
|
Adam, A new cutlass should have close to zero play depending on both the shaft OD and the cutlass ID tolerances. Are you watching the alignment 101 video I linked? I only ask since you may be confused on who did the video., ------------- /diaries/details.asp?ID=1622" rel="nofollow - 54 Atom /diaries/details.asp?ID=2179" rel="nofollow - 77 Tique 64 X55 Dunphy Keep it original, Pete < |
Posted By: MrMcD
Date Posted: May-22-2016 at 11:14pm
|
Mine was bent by the owner I bought the boat from. The prop had been repaired but the boat had a strong vibration. This is two years ago and memory is not perfect but I will try and share. That was my first issue with a bent strut and this forum helped get it perfect again. They had run mine enough while vibrating to ruin the coupler at the tranny. I took my rudder out, this gave me extra room and I wanted to make sure the packing was good. I made a small tower out of a 2x4 about 6" tall and cut a v shape in the top. I used this to keep the prop shaft from sagging from its own weight and supported the front of the shaft a few inches back from the tranny with this block while I played with the strut alignment. The shaft will sag a little when sitting loose in your strut and log. Find the spot where your prop shaft spins with zero drag or the very least amount of drag while in the strut. This is the happy spot. Hopefully your shaft while in this happy spot is very close to perfect alignment with your tranny. Again I only used the 2x4 to keep the front of the shaft on the engine side from sagging. If you slide it too far to the log and lift the shaft is will add drag, Too far to the front by the tranny and it allows sag and adds drag. My installed shaft was not pointing at my tranny so I had to bend the strut a little and then had to work on the vertical alignment to get it right. I was adjusting the verticle alignment when I added shims and sanded the strut. I hope yours is very close and you don't need to do any of this. Slip your shaft into the strut and log, move it forward till it is close to your tranny. Spin it by hand. There should be nearly zero drag. I did use the newer plastic cutlass bearings which offer very low drag. Lubricate your strut before install to make sure you have low drag. It will help find the happy spot. While it is spinning freely and in the happy spot slip it to the tranny and see if it aligns so you can slip it right up and connect it. If you need to move it right or left or up or down you are not aligned. Your picture shows bolt D and mount E. Loosen D and you can move C in and out of E. If you need this adjustment you need to loosen both sides of the engine. Doing one side will not. I use a large pry bar and a couple short 2x4 blocks to pry against so I don't damage the fiberglass. Lubricate your adjusting mounts to ease the work. Before you start adjusting think about what needs to happen to move your engine to perfect alignment for your happy shaft. Then start adjusting the 4 mounts to get there. If your engine mounts can't get you in alignment you will need to adjust the strut. Take your time and get this adjustment as close to perfect as you can. After install mine would turn freely with one finger pushing the prop while fully bolted to the tranny. It has been vibration free since. |
Posted By: MrMcD
Date Posted: May-22-2016 at 11:24pm
| Unless your log is rubbing on the shaft you can pretty much ignore the log alignment the flexible hose hook up will adjust for that. The important alignment is the strut facing the engine and tranny, that needs to be perfect. Watch the video's they will give you to tools you need to get this right the first time. |
Posted By: BaccoBouncer
Date Posted: May-23-2016 at 12:07am
Oh that is you in the video. Fantastic instructional. I have to say usually people that are so good technically aren't so good looking. ------------- '97 21' Sport Nautique |
Posted By: BaccoBouncer
Date Posted: May-23-2016 at 12:10am
|
When you say "straighten the strut" what are we talking about here? Ratcheting straps tied to a truck next to the boat? Taking it off and putting it on a vise on a bench and pulling on it? ------------- '97 21' Sport Nautique |
Posted By: Gary S
Date Posted: May-23-2016 at 12:48am
|
If it's actually bent sending it out is best. Most prop shops can do it but you need to ask. If you know it's bent and are sending it in might as well as have them put a new cutlass in there too. ------------- http://www.correctcraftfan.com/diaries/details.asp?ID=1711&sort=&pagenum=1&yrstart=1966&yrend=1970" rel="nofollow - 69 Mustang HM SS 95 Nautique Super Sport |
Posted By: BaccoBouncer
Date Posted: May-23-2016 at 1:26am
|
So the washer shimming is only for up and down? This would mean that you would always be symmetrical with the washers, what you do on starboard is what you do on port? ------------- '97 21' Sport Nautique |
Posted By: 8122pbrainard
Date Posted: May-23-2016 at 6:16am
Adam, The washers can be used for up and down and was even used at the factory before they went to more accurate methods of log and strut location. Washers can also be used for the port to starboard adjustment too if the strut isn't bent too much. Slightly elongating the holes in the hull can also be used to remove some twist. Get the shaft in part way almost to the log hole. Find the "happy" spot by lifting the front of the shaft removing the weight from the front and see how close to center of the hole you're at. If close, push the shaft through the log and check for that "happy" spot again. Resting the front of the shaft on a block of wood with a V in it as Mark describes is a good method so you don't need to struggle with the weight while checking for that happy spot. Hopefully your strut will be fine but as Gary mentions, a prop shop can straighten it. A machine shop is another option. Several of our members have straightened them themselves. You need a hydraulic arbor press and some fixturing like a L block. Report back to what you find. The strut alignment is the most difficult part of alignment. ------------- /diaries/details.asp?ID=1622" rel="nofollow - 54 Atom /diaries/details.asp?ID=2179" rel="nofollow - 77 Tique 64 X55 Dunphy Keep it original, Pete < |
Posted By: BaccoBouncer
Date Posted: May-23-2016 at 3:54pm
|
Thanks Pete. As usual life saving advice. I was wondering if it is possible to fix the coupling axis alignment with the motor mounts instead of the strut shim. Since all four corners of the motor are adjustable in both axis couldn't you walk the motor x or y before aligning the angle of the couplings? Feels safer than shimming the strut for a newbie. ------------- '97 21' Sport Nautique |
Posted By: 8122pbrainard
Date Posted: May-23-2016 at 4:31pm
Adam, I try to stress making a point that alignment starts at the strut. Many feel an alignment only entails the engine. Once the strut/shaft is aligned to the log, THEN the engine is aligned to it. ------------- /diaries/details.asp?ID=1622" rel="nofollow - 54 Atom /diaries/details.asp?ID=2179" rel="nofollow - 77 Tique 64 X55 Dunphy Keep it original, Pete < |
Posted By: BaccoBouncer
Date Posted: May-23-2016 at 4:44pm
|
ok thanks ------------- '97 21' Sport Nautique |
Posted By: MrMcD
Date Posted: May-24-2016 at 1:29am
|
Maybe we should also ask how far off is he with his prop shaft as is? If it comes close as is maybe he just needs the engine adjusted. If his is way off like mine was you have no choice but to work on the strut. I thought I had read that some Nautiques had far less than perfect alignment of the Log to the proper strut position? It has been two years since I had to do this so my memory could be off. Mine was so far off the prop would not rotate by hand if assembled, It bound up the shaft in the cutlass bearing. It did turn out perfect only due to great advice on this forum. Be patient do it right and you will be very happy with the results. |
Posted By: 8122pbrainard
Date Posted: May-24-2016 at 6:32am
------------- /diaries/details.asp?ID=1622" rel="nofollow - 54 Atom /diaries/details.asp?ID=2179" rel="nofollow - 77 Tique 64 X55 Dunphy Keep it original, Pete < |
Posted By: BaccoBouncer
Date Posted: May-27-2016 at 1:13pm
|
Ok I got my new cutlass bearing. Questions: I am concerned that when I cut out the old one with a hacksaw blade that I may scrape the strut. Does this matter? ANy tips for pressing the new ones or is it straight forward with a threaded rod/nuts as you said? Don't lube or prep surface etc? If I adjust strut. Do the screws go into a threaded nut plate that is fiberglassed in or are there nuts somewhere on the backside that I have to get hold of? Do I cut the epoxy out around the strut before adjusting? What was the "hot wire" thing I heard about or can I do it with a blade. Is putting the epoxy back in something I put on the bottom of the strut or do more of a "bathroom caulk" style after it is in? Thanks for the help. i'm getting close and it's getting warm out so the pressure is on to get thsi done. ------------- '97 21' Sport Nautique |
Posted By: Hollywood
Date Posted: May-27-2016 at 1:31pm
|
You should do some searching here to get the basics figured out. google "strut install site:correctcraftfan.com/forum" |
Posted By: BaccoBouncer
Date Posted: May-27-2016 at 3:26pm
|
I believe I have in a way sufficient to not drop me in the bucket of "Annoying new guy who is too lazy do a basic search" I know those guys and I agree they are not being necessarily considerate. Here is the specific context for my questions. In Pete's 101 video he instruct to remove the cutlas bearing by cutting it with a hack saw blade and the folding it in on itself. If I was in there I would have asked about how much caution I should take to not gouge the strut. It may not matter at all or maybe I should take great care to not cut through the bearing and try to pry it to split or something. This might add an hour to the job if I do and even going and buying a shim for the other side of the blade getting a new sharp blade etc. Just looking to minimize my newbie lessons learned mistakes. He described the strut adjustment and I also went through some other threads on adjusting etc. I learned that the 4200 epoxy is softer than the 5200. No one described exactly how to put it on. Do I put some where the screws go into the hull and under the strut or is that a huge mistake because I just made the strut unstable? I saw someone say "hot wire cut" is done with the 5200 and not the 4200. I can't find out what that is. and won't even do a search" I'll do more searching but I found everyone to be so helpful here and am eager to get the project done that I continued with the inquiry. I'll also on a personal note that It has been a great help to find a community to help me with this. It has taken it from a very frustrating new boat owner experience to a fun project with a big victory just around the corner. So thank you everyone for that. ------------- '97 21' Sport Nautique |
Posted By: Hollywood
Date Posted: May-27-2016 at 3:53pm
|
Haha, ok. I appreciate your concern. The reason for the hot wire cut is because 5200 is harder to remove. Basically you're making a home made "hot knife through butter" kind of thing. 5200 is stickier than 4200, therefore I prefer the latter. I'm not sure the hardness is much different, if at all, or of any concern really. In either case rings around the mounting BOLT holes is sufficent and then a fillet around the base/hull edge would finish it off nicely. You might want to tape the tips of the threads so they don't get pooped up on the way through (if you happen to be generous with the adhesive). If some squeezes through while you tighten up the strut that is good sign. Too much though and the strut will be further off the hull, changing the alignment from before/after installation. There's plenty of meat on the strut don't worry about nicking it. I would cut towards the "web" where the most material is anyway. |
Posted By: JoeinNY
Date Posted: May-27-2016 at 4:00pm
|
And yes there are nuts on the back side of the bolts holding on the strut.. you should be able to reach them up under the gas tank .. definitely more fun of a job with a friend in the boat ------------- http://www.correctcraftfan.com/diaries/details.asp?ID=1477 - 1983 Ski Nautique 2001 1967 Mustang 302 "Decoy" http://www.youtube.com/watch?v=cO5MkcBXBBs - Holeshot Video |
Posted By: mbshaw88
Date Posted: May-27-2016 at 4:05pm
|
I had those exact same questions the first time I did my alignment. Hollywood is right, I have a bookmarked https://www.google.com/search?q=site%3Acorrectcraftfan.com&ie=utf-8&oe=utf-8#q=strut+install+site:correctcraftfan.com" rel="nofollow - Google search for this site only, I am in the middle of an engine rebuild so I say I enter a search like this 20-30 times a day. It is invaluable when it comes to working on these boats. |