 Boats For Sale:


Build Your Own Prop Puller |
Post Reply 
|
Page 12> |
| Author | |
SNobsessed 
Grand Poobah 
Joined: October-21-2007 Location: IA Status: Offline Points: 7102 |
 Post Options Post Options
") Thanks(0) Thanks(0)
 Quote Reply Quote Reply
 Topic: Build Your Own Prop Puller Topic: Build Your Own Prop PullerPosted: February-23-2009 at 9:16pm |
|
MI-nick - You might want some more weld on that nut, looks like the weakest link.
Otherwise it looks like it should pull hard! |
|
|
“Beer is proof that God loves us and wants us to be happy.”
Ben Franklin |
|
 |
|
|
MI-nick
Gold Member 

Joined: January-12-2009 Location: Ypsilanti, MI Status: Offline Points: 810 |
Post Options
Thanks(0)
Quote Reply
Posted: February-23-2009 at 3:16pm |
|
I made my puller last weekend. I made two changes from Bill's design.
1) puller "claw" from 2 piece to 1 piece. I think it's a little stronger this way. 2) increased width of the puller body from 1" -> 2" (increased resistance to bending). I also made a jig to keep the claw and the nut in alignment during welding. I drilled the center of the bolt, but still need to add a steel rod to keep the bolt centered on the prop shaft. I wanted to add some more weld/reinforcement to the nut area (i think this is the weak link) but ran out of sheilding gas and the welding supply store was closed. I think it came out pretty good. Thanks Bill for how-to!! Puller Body 
Jig with claw tacked on 
Tacking jig to puller body 
Welding claw and nut 
Finished Product 

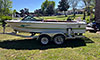
What my backyard looked like that day 
|
|
|
As far as I can tell, I'm not quite sure...
|
|
|
|
|
MI-nick
Gold Member
Joined: January-12-2009 Location: Ypsilanti, MI Status: Offline Points: 810 |
Post Options
Thanks(0)
Quote Reply
Posted: February-19-2009 at 3:37pm |
|
Pete,
I like your puller. I agree it probably puts a more uniform load on the prop hub. But, Bill's puller fit's my needs better (mainly from a manufacturing standpoint...i don't have the resources to easily build one like your's the way it should be built). I think if Bill's style is aligned correctly and the puller body is as rigid as possible, the uneven load on the prob hub (and bending of the puller) can be minimized. Many of this style have been used successfully and this is also the style the major prop manufactures sell...so it must be at least adequate... I though about calculating the max bending moment on the puller using the stripping torque for a 3/4-10 grade 8 nut and designing for min deflection...but, I think "seat of the pants" engineering is Ok for this job. I may increase the thickness from 1/4" to 5/16" or even 3/8" and i'll definitely add gussets where possible. I'll let you guys know how it works out. |
|
|
As far as I can tell, I'm not quite sure...
|
|
|
|
|
eric lavine
Grand Poobah
Joined: August-13-2006 Location: United States Status: Offline Points: 13413 |
Post Options
Thanks(0)
Quote Reply
Posted: February-17-2009 at 10:18am |
|
I use to be the first to jump at projects, then i find myself pulling in at 10:00 at night, you know my friend left me this car and it really is one of a kind but it needs some work and Im committing 2 hours a night to it...somehow, someway he is looking down with a smerk, it really is the last thing i need to be doing, Im hoping to have it done by July for a road trip North to Kringle land
|
|
|
"the things you own will start to own you"
|
|
|
|
|
8122pbrainard
Grand Poobah

Joined: September-14-2006 Location: Three Lakes Wi. Status: Offline Points: 41045 |
Post Options
Thanks(0)
Quote Reply
Posted: February-17-2009 at 10:06am |
No Eric, I don't have that luxury. I wish I did because it sure would help on all the projects I get into!! Nick, I'd like to add that welding on a forged "C" clamp and a grade 8 nut will draw the temper out. If you do make your own, it should be heat treated after welding otherwise it will stretch easily. |
|
|
|
|
eric lavine
Grand Poobah
Joined: August-13-2006 Location: United States Status: Offline Points: 13413 |
Post Options
Thanks(0)
Quote Reply
Posted: February-16-2009 at 11:31pm |
|
BTW, pete, one of your guys build that puller on the clock?
|
|
|
"the things you own will start to own you"
|
|
|
|
|
eric lavine
Grand Poobah
Joined: August-13-2006 Location: United States Status: Offline Points: 13413 |
Post Options
Thanks(0)
Quote Reply
Posted: February-16-2009 at 11:26pm |
|
Pete, im built for speed, slowin up a little but still running circles around the shop pups, one positive thing i could add is when pulling any prop leave the nut on....you'll figure out why if you get a real tight one
have to edit cause i know someone is scratching thier noggin, loosen the nut first and back it off a few threads |
|
|
"the things you own will start to own you"
|
|
|
|
|
8122pbrainard
Grand Poobah
Joined: September-14-2006 Location: Three Lakes Wi. Status: Offline Points: 41045 |
Post Options
Thanks(0)
Quote Reply
Posted: February-16-2009 at 10:41pm |
|
Nick,
I haven't commented on Bill's (skibum) thread because I admire him going to the trouble of building his puller and didn't want to insult him in anyway. Your profile states you're a engineer so you may appreciate what it sometimes takes to pull a prop off it's taper. (especially if Eric has put it on with his impact wrench!!) I have never been a fan of "C" clamp type pullers. They really pull from one side and put unequal pressure on the hub. This is especially true after you've used them a couple times and they are stretched out. I'm sure you have a few regular C clamps that have been overloaded!! If you are going to the trouble of making your own puller, take a look at the one I made. I posted it before I believe you became a CCfan'r. You'll notice it's drilled for ether 3 or 4 bolts so it can be used for ether a 3 or 4 blade prop. The "C" puller is however very convenient to use - with mine, you do have to fiddle around with the bolts and the plates. 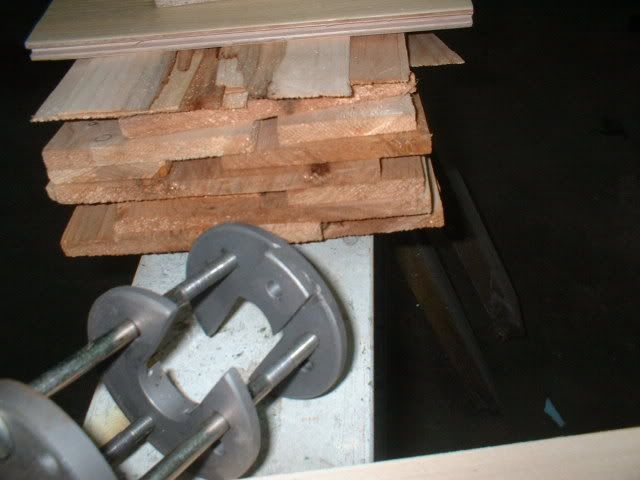

|
|
|
|
|
MI-nick
Gold Member
Joined: January-12-2009 Location: Ypsilanti, MI Status: Offline Points: 810 |
Post Options
Thanks(0)
Quote Reply
Posted: February-16-2009 at 4:04pm |
|
Bill,
How did you line up the nut before welding?? Some type of jig or just eyeball it?? I plan to build one this weekend. Thanks |
|
|
As far as I can tell, I'm not quite sure...
|
|
|
|
|
SkiBum
Gold Member

Joined: November-17-2006 Location: United States Status: Offline Points: 587 |
Post Options
Thanks(0)
Quote Reply
Posted: December-16-2008 at 11:10am |
|
Thanks.
I have been talking with the Doc. My house in KY still has not sold. Looks like I'll be heading out there by myself. |
|
|
|
|
bradtm16
Groupie 
Joined: March-11-2007 Location: United States Status: Offline Points: 62 |
Post Options
Thanks(0)
Quote Reply
Posted: December-11-2008 at 1:22pm |
|
Bill, I'm about an hour from Fort Polk and the Boat Dr. is about 2 hr from Fort Polk. Shoot me an email if you need help finding anything around here. Bradtm16@yahoo.com
|
|
|
|
|
SkiBum
Gold Member
Joined: November-17-2006 Location: United States Status: Offline Points: 587 |
Post Options
Thanks(0)
Quote Reply
Posted: November-12-2008 at 11:58am |
|
Thanks to all.
Bill |
|
|
|
|
8122pbrainard
Grand Poobah
Joined: September-14-2006 Location: Three Lakes Wi. Status: Offline Points: 41045 |
Post Options
Thanks(0)
Quote Reply
Posted: November-11-2008 at 7:55am |
|
Bill,
Your choice of boat doesn't exclude you from the CCfan family. You need to visit us more!! |
|
|
|
|
jbear
Grand Poobah

Joined: January-21-2005 Location: Lake Wales FL. Status: Offline Points: 8193 |
Post Options
Thanks(0)
Quote Reply
Posted: November-11-2008 at 3:58am |
|
Well the boat dr is around there somewhere.
Of course you know you are always welcome and respected here Bill....regardless of present boat choice. Your thread is the book many follow for stringer replacement. Veterans Day...thanks Skibum! john |
|
|
"Loud pipes save lives"
AdamT sez "I'm Canadian and a beaver lover myself"... |
|
|
|
|
SkiBum
Gold Member
Joined: November-17-2006 Location: United States Status: Offline Points: 587 |
Post Options
Thanks(0)
Quote Reply
Posted: November-10-2008 at 9:47pm |
|
It is unfortunate that my old boat is sitting at a shop, again. My family and I really liked that boat. It was just not the slalom tow boat that I wanted. After I sold it, I tried to find a nice Ski Nautique, with the upgraded hull and fuel injection, that I could afford.
I ended up with a '95 Prostar 190, fuel injected. So I have been a bit leary of saying much over here. I know how some folks feel about MC. Anyhow, over time I have corresponded with a few fans who looked me up through my diaries. Nice to be able to help somebody out once in a while. Good to, in effect, see some old friends. You are the best. I am being reassigned to Ft. Polk, LA. Anybody from them parts? |
|
|
|
|
SkiBum
Gold Member
Joined: November-17-2006 Location: United States Status: Offline Points: 587 |
Post Options
Thanks(0)
Quote Reply
Posted: November-10-2008 at 9:36pm |
|
This is the finished product. Well, still needs to be painted or finished somehow.
I welded additional support along the length of the 1/4" weld steel to help reduce twisting. Anyhow, the cost of materials was well under $20 and it is a quality prop puller. Like Jetski180 said, you can do this with a C-clamp as well. That is how I made the first ones. 
|
|
|
|
|
SkiBum
Gold Member
Joined: November-17-2006 Location: United States Status: Offline Points: 587 |
Post Options
Thanks(0)
Quote Reply
Posted: November-10-2008 at 9:32pm |
|
I bought a different 3/4" dia grade 8 bolt. This one is 2-1/2" long and threaded all of the way to the head.
I first located the center, then punched it. I drilled a hole about 3/8" deep in the center of the bolt. I hammered in a stainless steel screw. Then I cut off the head of the screw and filed it into a cone shape. This should fit into the hole on the back of the driveshaft and keep the puller aligned. 
|
|
|
|
|
Jetski180
Groupie

Joined: June-09-2008 Location: United States Status: Offline Points: 60 |
Post Options
Thanks(0)
Quote Reply
Posted: November-10-2008 at 1:23pm |
|
That is a great post on how to make a Prop Puller. I also made a prop puller about a year ago. I found that if you purchase a C-Clamp and put a U-Shaped piece of steel like SkiBum did it works just as well. This will cost a little more than the above Prop Puller but will save you some time too. If you have a Harbor Freight near by you can get a C-Clamp for under $10.00. I will try and post a picture of it shortly.
|
|
|
|
|
The Lake
Platinum Member

Joined: May-13-2005 Location: Lk Winnebago MO Status: Offline Points: 1157 |
Post Options
Thanks(0)
Quote Reply
Posted: November-10-2008 at 10:16am |
|
Bill,
Good to see a post from you again. Hope things are well with you. Sons, 16, and wrecks . . . they go together like birds of a feather. Glad all are OK. Chuck |
|
|
|
|
jbear
Grand Poobah
Joined: January-21-2005 Location: Lake Wales FL. Status: Offline Points: 8193 |
Post Options
Thanks(0)
Quote Reply
Posted: November-10-2008 at 12:08am |
|
I happen to have one of these pullers and it works great. Thanks again Bill.
Haven't seen you on much. Where are you now and doing what...if you don't mind me asking. Any boat plans in the works? Had a 16 year old once...what a time in life. Glad the wreck wasn't worse. Take care! john |
|
|
"Loud pipes save lives"
AdamT sez "I'm Canadian and a beaver lover myself"... |
|
|
|
|
shawnmc
Senior Member 

Joined: March-17-2007 Location: United States Status: Offline Points: 282 |
Post Options
Thanks(0)
Quote Reply
Posted: November-09-2008 at 11:51pm |
|
bill,
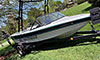
good to see ready your post again. I saw your old boat at a boat shop in Lebanon, TN 3 months ago. As soon as I saw it, I remembered it from this site. |
|
|
|
|
SkiBum
Gold Member
Joined: November-17-2006 Location: United States Status: Offline Points: 587 |
Post Options
Thanks(0)
Quote Reply
Posted: November-09-2008 at 7:38pm |
|
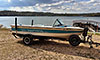
Good news is that nobody was injured. Here's a pic.

|
|
|
|
|
SNobsessed
Grand Poobah
Joined: October-21-2007 Location: IA Status: Offline Points: 7102 |
Post Options
Thanks(0)
Quote Reply
Posted: November-09-2008 at 12:14pm |
|
Great post Bill, I might habve to build one of these just to fill the wintertime hobby void.
I hope your son is OK, cars can be replaced. |
|
|
“Beer is proof that God loves us and wants us to be happy.”
Ben Franklin |
|
|
|
|
bkhallpass
Grand Poobah

Joined: March-29-2005 Location: United States Status: Offline Points: 4723 |
Post Options
Thanks(0)
Quote Reply
Posted: November-09-2008 at 12:14am |
|
I always enjoy your work Bill. Seem to be pretty calm about the whole car thing. Perhaps I will be able to maintain my calm by the time my daughter reaches 16.
BKH |
|
|
Livin' the Dream
|
|
|
|
|
SkiBum
Gold Member
Joined: November-17-2006 Location: United States Status: Offline Points: 587 |
Post Options
Thanks(0)
Quote Reply
Posted: November-08-2008 at 11:24pm |
|
The puller is not actually finished. When I got to this point, I got a phone call. Seems that my 16 year old son wrecked one of our cars. But, that is another issue.
Anyhow, what is needed is to put something on the end of the bolt to keep it on the end of the prop shaft while tightening. In the past I have used another nut. I ground away all of the exposed grooves after welding it to the end of the bolt. Also, I have just enough room on my boat for this to fit. But, the 3/4" by 3" grade 8 bolt may be too long. It would be best to use a 2" long bolt with all threads. When I get over the problem of my son destroying my car, I'll get back to work on this. But that should be enough for you to get started. A quality prop puller for less than $20.00. |
|
|
|
|
SkiBum
Gold Member
Joined: November-17-2006 Location: United States Status: Offline Points: 587 |
Post Options
Thanks(0)
Quote Reply
Posted: November-08-2008 at 11:19pm |
|
9 of 9

|
|
|
|
|
SkiBum
Gold Member
Joined: November-17-2006 Location: United States Status: Offline Points: 587 |
Post Options
Thanks(0)
Quote Reply
Posted: November-08-2008 at 11:17pm |
|
8 of 9
NOTE: I traced a two inch diameter circle onto the steel. In the center, I traced a one inch diameter circle. At one end I marked the thickness of the steel. Then I cut the circle in half in one direction. I then cut out the one inch diameter circles from each half. Again, I beveled the edges of the pieces before welding them into place. In the other picture, I found a socket with an outside diameter of 1.027 inches. I used it a a jig to trim the halves before welding them into place. 
|
|
|
|
|
SkiBum
Gold Member
Joined: November-17-2006 Location: United States Status: Offline Points: 587 |
Post Options
Thanks(0)
Quote Reply
Posted: November-08-2008 at 11:12pm |
|
7 of 9

|
|
|
|
|
SkiBum
Gold Member
Joined: November-17-2006 Location: United States Status: Offline Points: 587 |
Post Options
Thanks(0)
Quote Reply
Posted: November-08-2008 at 11:09pm |
|
6 of 9 NOTE: Be sure to bevel the edge of the steel before welding. And, weld the nut on edge, not one of the flat surfaces. This will give a much better weld.

|
|
|
|
|
SkiBum
Gold Member
Joined: November-17-2006 Location: United States Status: Offline Points: 587 |
Post Options
Thanks(0)
Quote Reply
Posted: November-08-2008 at 11:05pm |
|
5 of 9

|
|
|
|
|
Post Reply
|
Page 12> |
 Tweet
Tweet
|
| Forum Jump | Forum Permissions You cannot post new topics in this forum You cannot reply to topics in this forum You cannot delete your posts in this forum You cannot edit your posts in this forum You cannot create polls in this forum You cannot vote in polls in this forum |


 Topic Options
 eric lavine wrote: