 Boats For Sale:


1950 CC Junior Utility Restoration |
Post Reply 
|
Page <1 678910 11> |
| Author | |
juniorwoody 
Gold Member 
Joined: August-09-2011 Location: Oak Hill, Fl Status: Offline Points: 937 |
 Post Options Post Options
") Thanks(0) Thanks(0)
 Quote Reply Quote Reply
 Posted: May-01-2012 at 11:29am Posted: May-01-2012 at 11:29am |
|
Quick question, what does everyone think...should I pull the keel, which is solid and firmly attached, only to rebond it back with the 5200 ? I mean where does it end?
|
|
 |
|
|
81nautique
Grand Poobah 

Joined: September-03-2005 Location: Big Rock, Il Status: Offline Points: 5778 |
Post Options
Thanks(0)
Quote Reply
Posted: May-01-2012 at 11:51am |
Exactly Jack, Where does it end, might as well pull the chines too right? I did not pull and refasten the keel on the Hurricane (I did however replace a few frame members so I guess it was partially refastened) but I did replace all the knee braces and secured them with plenty of 5200. I think you're fine leaving it if you really feel it's in good shape. Don't forget you'll be using 5200 to fasten the new bottom, I can't imagine the keel will be going anywhere. |
|
|
You can’t change the wind but you can adjust your sails
|
|
|
|
|
1morecase
Newbie 
Joined: September-30-2010 Location: SF Bay Area Status: Offline Points: 19 |
Post Options
Thanks(0)
Quote Reply
Posted: May-01-2012 at 11:13pm |
|
Nice progress... Looking good, Jack. You should get a copy of Don Danenberg's Wooden Runabout Restoration Guide --- I found it to be very helpful. Even though it mainly covers restoring Chris Crafts, there is a lot of relevant information that can apply to restoring old Correct Craft woodies. One of his main approaches is the idea of doing a "seaworthy restoration" where he points out that 50 to 60 year old wood may have only 25% of its original strength. The natural oils in the wood are long gone and the wood is brittle. Now that you have the skin off, I would seriously consider replacing main structural components like frames and chines with new wood. I think if you retain 60% of the original wood, you would still be a bonified restoration, if you wanted to show your boat. Keep up the great work! Ed
|
|
|
|
|
8122pbrainard
Grand Poobah

Joined: September-14-2006 Location: Three Lakes Wi. Status: Offline Points: 41045 |
Post Options
Thanks(0)
Quote Reply
Posted: May-01-2012 at 11:22pm |
Ed, I don't know where you came up with the 60%. To my knowledge, current ACBS rules state only one original main structural component is needed to maintain originality. The rule is a very "heated" topic and in need of change. |
|
|
|
|
1morecase
Newbie
Joined: September-30-2010 Location: SF Bay Area Status: Offline Points: 19 |
Post Options
Thanks(0)
Quote Reply
Posted: May-01-2012 at 11:44pm |
|
Hi, honestly I can't remember which site... It was about eight months ago, thought it was the Lake Tahoe ACBS, but I just looked and couldn't find the source... I remember finding that number and it led me to believe I was undertaking a "reconstruction" as opposed to a restoration because of the need to replace more than 60%. To everyone: my bad if that is incorrect information, my apologies... Ed
|
|
|
|
|
juniorwoody
Gold Member
Joined: August-09-2011 Location: Oak Hill, Fl Status: Offline Points: 937 |
Post Options
Thanks(0)
Quote Reply
Posted: May-02-2012 at 12:40pm |
|
I thank Allen, Pete and Ed for their input. I guess one must weigh the desire to do a complete job versus the inherent and intrinsic value that exists in original members that have withstood the test of time and also preserve some of the flavor and history of the vessel. To be complete it is imperative that all deteriorated parts must be repaired or replaced. That accomplished I feel compelled to leave as much original and untouched as possible. To that end, I will try and repair the hull plywood above the chines. Scarph joints already exsist from the original construction so adding a couple more should not be a problem. The bottom material has been patched and also has a couple dimples hard set from sitting on the bunks in the wrong position. Because of these problems and it's location I have decided to replace. I will follow the advice from Allen and R &R all knee braces. As a woodworker I have contemplated the possibility of making a new boat from scratch using patterns from an old, but it just wouldn't be the same would it. These old hulls have a spirit that just can't be fabricated.
|
|
|
|
|
boat dr
Grand Poobah

Joined: June-27-2004 Location: United States Status: Offline Points: 4245 |
Post Options
Thanks(0)
Quote Reply
Posted: May-02-2012 at 3:46pm |
 I have followed and watched your progress , often reflecting on my efforts to save a many from the termites as possible. I have to applaude you on abilty to walk the narrow line between "user correct" and " she's better than new". Karen and I use all our Woody's , some more than others, but they do get used and not left on the trailer as "yard art". The joy of the first ride will be worth all the grief suffered 
|
|
|
|
|
juniorwoody
Gold Member
Joined: August-09-2011 Location: Oak Hill, Fl Status: Offline Points: 937 |
Post Options
Thanks(0)
Quote Reply
Posted: May-04-2012 at 12:29am |
These kind words of encouragement along with others I have received from a few seasoned veterans who have been confronted with similar issues on their project, are so important to the novice. Woodworker I am, boat restorer is a title I lay no claim to at this point so a good dose of humility is in order. The strips of mahogany in the following represent a turning of the tide on this project. I have decided to tackle the stem first and these are to be steam bent for that purpose. They still need to be sized up a little. 
|
|
|
|
|
8122pbrainard
Grand Poobah
Joined: September-14-2006 Location: Three Lakes Wi. Status: Offline Points: 41045 |
Post Options
Thanks(0)
Quote Reply
Posted: May-04-2012 at 8:51am |
|
Jack,
I forgot to mention that I too needed to R&R the knee braces on the Atom. The ply they used was in pretty bad shape. Even though I had temporarily X braced the frames, I did one side at a time to make sure I didn't loose the hull profile. |
|
|
|
|
8122pbrainard
Grand Poobah
Joined: September-14-2006 Location: Three Lakes Wi. Status: Offline Points: 41045 |
Post Options
Thanks(0)
Quote Reply
Posted: May-04-2012 at 10:21am |
|
Jack,
The picture below was copied from another site where the poster was having issues with scarfing. It shows what you do NOT what to do - end up with epoxy on the finished surface. It will not take a stain where the epoxy soaked in. It's the reason I've mentioned the only way to do the scarf with todays 1/64" face veneers (no sanding room) is to pre fill/stain and then a couple coats of varnish before making the scarf. Any epoxy that comes out of the scarf can then be wiped off with a solvent/rag. 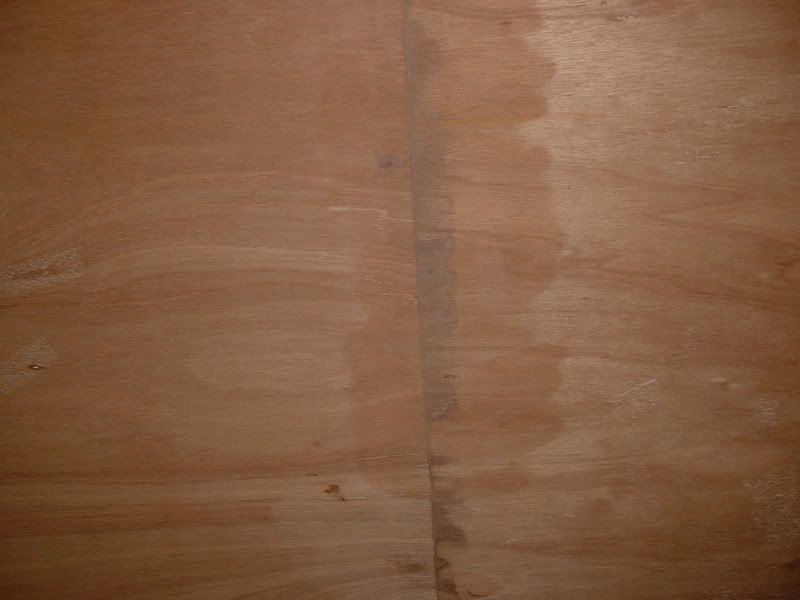 I needed to steam bend some small pieces one day so I ended up making a "quick and dirty" steamer! 4" EMT with a plug welded on the end and then just stuck in the BBQ.  BTW, the person with the scarf problems posted again about the stain issue but didn't post a picture!  The thread went dead from that point! The thread went dead from that point!
|
|
|
|
|
SNobsessed
Grand Poobah
Joined: October-21-2007 Location: IA Status: Offline Points: 7102 |
Post Options
Thanks(0)
Quote Reply
Posted: May-04-2012 at 10:44am |
|
Pete, did you order that from the Brunstucky equipment company?
|
|
|
“Beer is proof that God loves us and wants us to be happy.”
Ben Franklin |
|
|
|
|
8122pbrainard
Grand Poobah
Joined: September-14-2006 Location: Three Lakes Wi. Status: Offline Points: 41045 |
Post Options
Thanks(0)
Quote Reply
Posted: May-04-2012 at 11:02am |
Actually, Eric had it out back at FFM and then when Vince took over, he wanted it junked so I was able to get it! It was still Eric's so he was nice enough to sell it to me for $500. 
|
|
|
|
|
81nautique
Grand Poobah
Joined: September-03-2005 Location: Big Rock, Il Status: Offline Points: 5778 |
Post Options
Thanks(0)
Quote Reply
Posted: May-04-2012 at 11:34am |
|
Yeah some of the guys on the wood boat sites make such a big deal out of building fancy steam units with 4000 watts of power and debate if that's enough to get the job done. I used a 1200 watt clothing steamer for everything I bent on the Hurricane and had fine results. The real key is the insulating the chamber so you can minimize the heat loss. An added plus to Pete's unit is you can cook some burgers while your waiting for the steam to build.
Jack, I can smell the fresh cut wood from here. You also sound like a typical humble woodworker which is good, going into this with that mindset will force you to do your best work. To me the difference in a woodworker and a boatwright is just the level of creativeness and ingenuity that it can take to accomplish an otherwise simple task. The woodworking is the same but there is so much forethought as to technique, methods, materials, sequence and fixturing that I think the challenge is half of the allure to building a boat. Can't wait to see this thread through as I have no doubt the final result will be spectacular. |
|
|
You can’t change the wind but you can adjust your sails
|
|
|
|
|
juniorwoody
Gold Member
Joined: August-09-2011 Location: Oak Hill, Fl Status: Offline Points: 937 |
Post Options
Thanks(0)
Quote Reply
Posted: May-04-2012 at 12:31pm |
|
Several years back I spent extensive amounts of time making Shaker furniture reproductions. Amongst these the chairs being the hardest. This required a few skills I had yet to develop. At first the steaming presented the greatest challenge until I read up on it a little. I ended with an electric hotplate and a clean old red gas can that holds about 2 gals. I can easily stuff a metal pipe of any kind in the pour spout and direct the steam upwards into the box. In the past work I have used a section of roof gutter as a box but think I will use a piece of PVC drain pipe I have for this project. pete's barbecue steamer looks a bit sketchy but heh even Rube Goldberg's designs had merit and function.
|
|
|
|
|
juniorwoody
Gold Member
Joined: August-09-2011 Location: Oak Hill, Fl Status: Offline Points: 937 |
Post Options
Thanks(0)
Quote Reply
Posted: May-04-2012 at 12:49pm |
|
|
|
|
|
8122pbrainard
Grand Poobah
Joined: September-14-2006 Location: Three Lakes Wi. Status: Offline Points: 41045 |
Post Options
Thanks(0)
Quote Reply
Posted: May-04-2012 at 1:32pm |
Back in the late 60's, I was at Watercraft Sales (still a Correct Craft dealer). Back then winters were pretty slow so they took on antique car restorations to fill in the boat work/sales. My very first steam bending project was working there. We were restoring a 1929 Auburn Phaeton convertable. All we had to start with was a rusted out body and no top. They gave me the project of making and steam bending the white Oak bows for the convertable top. No old bows to go by so everything was an educated guess. I used the same principle as the BBQ steamer - a piece of pipe capped at the end and the low end heated with the oxy acetylene torch. They came out fantastic. I made two sets - one for the Auburn we were restoring and the other set went down to Harrah's auto museum for the one they were restoring. |
|
|
|
|
juniorwoody
Gold Member
Joined: August-09-2011 Location: Oak Hill, Fl Status: Offline Points: 937 |
Post Options
Thanks(0)
Quote Reply
Posted: May-04-2012 at 1:55pm |
|
The proof is in the pudding. Nice going Pete. When a cave man cooked a piece of wooly mammoth meat on a stick over an open flame and the green stick bent, steam bending was invented. All other methods have been variations of this first great experiment.
|
|
|
|
|
juniorwoody
Gold Member
Joined: August-09-2011 Location: Oak Hill, Fl Status: Offline Points: 937 |
Post Options
Thanks(0)
Quote Reply
Posted: May-09-2012 at 1:36pm |
|
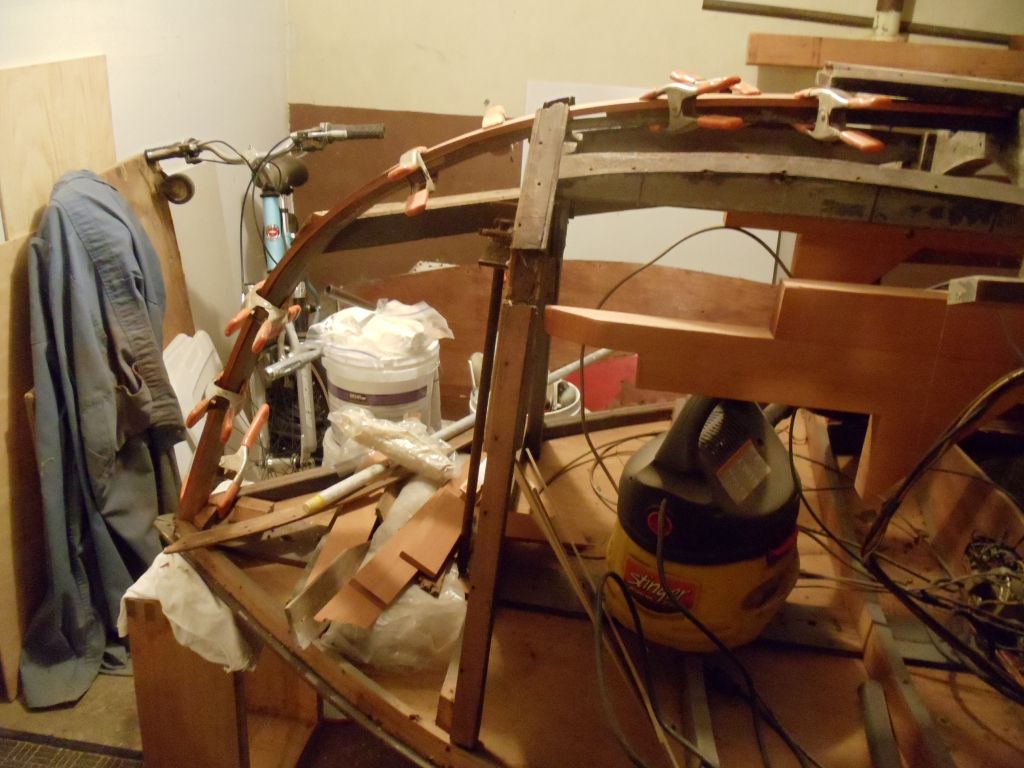
Quick and dirty steam bending operation. Another Rube Goldberg....
     
|
|
|
|
|
8122pbrainard
Grand Poobah
Joined: September-14-2006 Location: Three Lakes Wi. Status: Offline Points: 41045 |
Post Options
Thanks(0)
Quote Reply
Posted: May-09-2012 at 1:45pm |
|
Jack,
The "Rube" sure will work! I seen some pretty crude boxes and your's isn't one of them.
|
|
|
|
|
juniorwoody
Gold Member
Joined: August-09-2011 Location: Oak Hill, Fl Status: Offline Points: 937 |
Post Options
Thanks(0)
Quote Reply
Posted: May-09-2012 at 5:55pm |
I just got lucky on this one Pete. Looked around and assembled stuff which was right at hand. As you know is's not always that easy. One for the gipper. |
|
|
|
|
8122pbrainard
Grand Poobah
Joined: September-14-2006 Location: Three Lakes Wi. Status: Offline Points: 41045 |
Post Options
Thanks(0)
Quote Reply
Posted: May-09-2012 at 6:59pm |
|
Jack,
You post made me look through the "bone yard" at work today. Wanting to get away from my BBQ steamer and make something substantial and larger, I went on the search. I remembered a nice steam generator we had left over from a restaurant steam tables project we built/fabricated. Damn, I saw it less than a couple weeks ago and now I can't find it! I'll bet someone was cleaning up an through it out.  It was a real nice stainless steel 240 volt too! I'll be needing a box to handle 12" widths and about 10' long. It was a real nice stainless steel 240 volt too! I'll be needing a box to handle 12" widths and about 10' long.
|
|
|
|
|
juniorwoody
Gold Member
Joined: August-09-2011 Location: Oak Hill, Fl Status: Offline Points: 937 |
Post Options
Thanks(0)
Quote Reply
Posted: May-09-2012 at 7:10pm |
|
You might be able to piece together something from the HVAC guys. I think the duct work is wide enough to accomodate 12in. Hope the plank isn't very thick, you'll need a Mack truck to bend it.
|
|
|
|
|
8122pbrainard
Grand Poobah
Joined: September-14-2006 Location: Three Lakes Wi. Status: Offline Points: 41045 |
Post Options
Thanks(0)
Quote Reply
Posted: May-09-2012 at 7:45pm |
|
Jack,
The board is white oak for the cockpit coaming for the launch I'm restoring. The widest point is at the forward deck and about 10" and tapers down to about 6" towards the aft. The thickness is 1/2". I'm really not worried at all. The HVAC duct has crossed my mind and thanks for the idea. |
|
|
|
|
juniorwoody
Gold Member
Joined: August-09-2011 Location: Oak Hill, Fl Status: Offline Points: 937 |
Post Options
Thanks(0)
Quote Reply
Posted: May-17-2012 at 5:37pm |
|
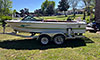
The birth of our new grandson Parker has taken us to the west coast. While here I have made plans to look at another woody. Can't get enough you say, well possibly so. Should it turn out to be as the pictures present we just may be hauling another boat home. Big Whitey, my Sprinter van loves to take a ride, but may not know what I have in mind crossing the states to fetch a boat. Could it be boat fever has replaced common sense? Time will tell. Promised the wife this is the last one LOL.
Waiting for me when I return in two weeks will be these...  Though I would use them now if needed, a time to season in the sprung form will do them good. |
|
|
|
|
juniorwoody
Gold Member
Joined: August-09-2011 Location: Oak Hill, Fl Status: Offline Points: 937 |
Post Options
Thanks(0)
Quote Reply
Posted: July-29-2012 at 12:17pm |
|
Splitting my time between vacations and the two wood boats oh yea and family. Yesterday it rained to I found time to dry fit my first piece on the stem. May be a while before I get back to it, or never know may be soon.
|
|
|
The value of money spent on new adventure far exceeds the value of money saved for the future
|
|
|
|
|
turningpoint84
Platinum Member

Joined: September-11-2008 Location: Cincinnati, OH Status: Offline Points: 1467 |
Post Options
Thanks(0)
Quote Reply
Posted: July-30-2012 at 2:34pm |
|
Looking good Junior, quite impressed with your patience.
|
|
|
Proud 1968 mustang owner and now
1970 Mustang |
|
|
|
|
juniorwoody
Gold Member
Joined: August-09-2011 Location: Oak Hill, Fl Status: Offline Points: 937 |
Post Options
Thanks(0)
Quote Reply
Posted: October-03-2012 at 12:34am |
|
I have been busy scraping and painting the bottom of the newest acquisition "Nomad" our 1960 Atom Skier fin boat. Meanwhile when the rain comes my good fortune is that I have out sweet little utility here in the garage to take up the slack. Today I brainstormed and did some hands on to try and push the stem reconstruction along a little. Takes some time when you stop and start like I do on a project.
A little teaser on the progress...     |
|
|
The value of money spent on new adventure far exceeds the value of money saved for the future
|
|
|
|
|
8122pbrainard
Grand Poobah
Joined: September-14-2006 Location: Three Lakes Wi. Status: Offline Points: 41045 |
Post Options
Thanks(0)
Quote Reply
Posted: October-03-2012 at 7:36am |
|
Jack,
The issue of where to stop is always a hard decision to make but now is the time to do it. I'd open it up. You may even find some rot between the inner and outer keels. All of the ply gussets on the frames too. Mine were completely dry and loose just like every other joint and lamination due to the use of that bedding compound CC used. |
|
|
|
|
juniorwoody
Gold Member
Joined: August-09-2011 Location: Oak Hill, Fl Status: Offline Points: 937 |
Post Options
Thanks(0)
Quote Reply
Posted: October-04-2012 at 10:45am |
|
The keel will remain in place Pete though I did remove the outer keel. I do plan to r&r most if not all of the knee braces one side at a time. At the moment the challenge is to get this stem back together and it wouldn't take much for it to be an improvement over the way it left the factory. I think they just layered the strips no glue back in those days. Now we worry is the glue strong enough or the right type and the original lasted 50 years. Sometimes I wonder if the wheel really needs to be reinvented LOL.
|
|
|
The value of money spent on new adventure far exceeds the value of money saved for the future
|
|
|
|
|
81nautique
Grand Poobah
Joined: September-03-2005 Location: Big Rock, Il Status: Offline Points: 5778 |
Post Options
Thanks(0)
Quote Reply
Posted: October-04-2012 at 11:50am |
|
Jack, The stem on my Hurricane was built much like you are doing. It appears they built it on the boat one layer at a time. It had hundreds of ring shank rails between each layer. No glue other than the bedding compound but that looks as though it was there from installing the bottom not during stem lay up. As long as you get the shape right anything you build with todays adhesives and sealants will be better than original.
|
|
|
You can’t change the wind but you can adjust your sails
|
|
|
|
|
Post Reply
|
Page <1 678910 11> |
 Tweet
Tweet
|
| Forum Jump | Forum Permissions You cannot post new topics in this forum You cannot reply to topics in this forum You cannot delete your posts in this forum You cannot edit your posts in this forum You cannot create polls in this forum You cannot vote in polls in this forum |


 Topic Options
 juniorwoody wrote: