 Boats For Sale:


My new 2001 and my first! |
Post Reply 
|
Page <1 1718192021 23> |
| Author | |
akabulla 
Gold Member 

Joined: November-15-2008 Location: United States Status: Offline Points: 649 |
 Post Options Post Options
") Thanks(0) Thanks(0)
 Quote Reply Quote Reply
 Posted: May-18-2009 at 4:54pm Posted: May-18-2009 at 4:54pm |
|
I was thinking about adding a pre-filter for my fuel system. Skidim has a 3/8" one but I found a transparent one at overtons that has replaceable filter. Anyone ever use one of these?
http://www.overtons.com/modperl/product/details.cgi?i=21689&pdesc=SeaSense_Universal_Fuel_Filter&str=filter&merchID=1008&r=view |
|
 |
|
|
Chris4x4gill2
Senior Member 

Joined: August-25-2008 Location: Smith Lake, AL Status: Offline Points: 358 |
Post Options
Thanks(0)
Quote Reply
Posted: May-18-2009 at 5:12pm |
|
I use one very similair to that on my SB 350 I just built for my truck. I run it inline between the fuel pump and the carb with a larger spin on type fuel filter between the pump and the tank.
So far I have had no issues with it. |
|
|
|
|
8122pbrainard
Grand Poobah 

Joined: September-14-2006 Location: Three Lakes Wi. Status: Offline Points: 41045 |
Post Options
Thanks(0)
Quote Reply
Posted: May-18-2009 at 6:11pm |
I thought I better warn you that that clear filter (same as a Tempo brand) is for suction service on outboards. Some have placed them on the pressure side of the fuel pump going to the carb. I haven't directly heard of any problems but I wouln't take the chance. Go with a fuel filter designed for the job. |
|
|
|
|
akabulla
Gold Member
Joined: November-15-2008 Location: United States Status: Offline Points: 649 |
Post Options
Thanks(0)
Quote Reply
Posted: May-18-2009 at 6:47pm |
|
I was going to put it in between the fuel tank and the low pressure pump. There is no place to put it on the high pressure side. My setup has a low pressure pump from the tank and then it is hard piped right into the fuel cell which has the high pressure pump inside that and then hard piped to the fuel injectors.
There is a pretty good filter inside the fuel cell but I wanted to make sure I was protecting the low pressure pump and make sure I stop any debris before it gets to that pump. |
|
|
|
|
8122pbrainard
Grand Poobah
Joined: September-14-2006 Location: Three Lakes Wi. Status: Offline Points: 41045 |
Post Options
Thanks(0)
Quote Reply
Posted: May-19-2009 at 3:16pm |

"Universal Inline Glass View Fuel Filter With 3/8", 5/16", & 1/4" Barb In Kit Moeller's In-line Disposable fuel filters trap dirt and other metallic particles. The design allows for immediate inspection of your fuel condition with clear vial. Not for use on inboard engines!" moellermarine.com Notice the last statement: "not for use on inboard engines" Don't go cheap when you're dealing with fuel components. It may come back at you. Your boat is worth more. |
|
|
|
|
akabulla
Gold Member
Joined: November-15-2008 Location: United States Status: Offline Points: 649 |
Post Options
Thanks(0)
Quote Reply
Posted: May-19-2009 at 3:49pm |
|
Good catch Pete! Thanks. I ordered a pre-filter from the Nautique Dealer today. Should have it by Friday.
Thanks man! |
|
|
|
|
akabulla
Gold Member
Joined: November-15-2008 Location: United States Status: Offline Points: 649 |
Post Options
Thanks(0)
Quote Reply
Posted: May-25-2009 at 1:56pm |
|
Well it was a good weekend! I got the boat back form the painter and it looks GOOOOOOD.
I will try to get some pictures posted soon. Got the engine in, carpet under the bow and got the aluminum plate all cut out and all the gauges in the dash along with the newer switches. Got most of the electrical done and got the shaft, prop and dripless seal in place. I have one question for the experts!! When the shaft is in it doesn't sit center in the log. I assume this is because the weight of the shaft. With the dripless seal there is a lot of play in it. So do I just raise the shaft to where I think it is centered in the log and then align the engine to that position? I will get some pics up soon! Later |
|
|
|
|
BuffaloBFN
Grand Poobah

Joined: June-24-2007 Location: Gainesville,GA Status: Offline Points: 6094 |
Post Options
Thanks(0)
Quote Reply
Posted: May-25-2009 at 2:28pm |
|
Sounds like the cutlass bearing is worn.
|
|
|
|
|
SNobsessed
Grand Poobah
Joined: October-21-2007 Location: IA Status: Offline Points: 7102 |
Post Options
Thanks(0)
Quote Reply
Posted: May-25-2009 at 9:29pm |
|
I agree with Greg - check you cutlass bushings befroe going any further..
FWIW, my new cutlass bearings had some play, about .0015 inch, which translated to about .5 inch diameter of play at the transmission. These numbers are estimated & not exact, but you get the idea. I mounted the strut so the play of the shaft was centered in the middle of log. (sounds kinky, but I don't know how else to explain it!) |
|
|
“Beer is proof that God loves us and wants us to be happy.”
Ben Franklin |
|
|
|
|
eric lavine
Grand Poobah
Joined: August-13-2006 Location: United States Status: Offline Points: 13413 |
Post Options
Thanks(0)
Quote Reply
Posted: May-25-2009 at 11:43pm |
|
in your case you may want to set the engine, then move the strut accordingly, you did a ton of work and went from a 1:1 to a 1.23 correct? you also have to account for the 1.23 down angle, which yes I know the 1:1 is too at an angle. find the centerline and set engine and this should get your centerline of the strut to follow with it being loose...and with a good srtrut bushing, mark the strut with a sharpy on the hull then mount with 5200, of coarse with your shaft being loose from the trans. then pull the shaft and start you initial adjustments, you should be able to calculate your moves simply by pulling the shaft onto the pilot by hand...get it close then fine tune it
|
|
|
"the things you own will start to own you"
|
|
|
|
|
akabulla
Gold Member
Joined: November-15-2008 Location: United States Status: Offline Points: 649 |
Post Options
Thanks(0)
Quote Reply
Posted: May-26-2009 at 12:41am |
|
Ok, thanks for the advice. When I put the shaft in the strut I tried to move it and there was no play at all. It seemed like the bearing wasn't that worn but after visually inspecting it I can see the bearing from the back closer to the log looks worn on the bottom.
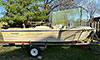
I think what I am going to do is get everything together and ready for the water and then bring it to my Nautique dealer and have them check the strut bearing and alignment and also have them look at my fuel and electrical system and make sure everything looks good to go. I know it will be an added expense but will give me a piece of mind knowing everything is correct. The guys at White Lake have been really helpful and really seem to know their stuff. I got the blowers mounted above the fuel tank today. The only issue I see is that the blowers are mounted just shy of the vent. There is no place to connect a hose to the vents. Do the older model not have a hose connection on the rear vents or am I missing a part? Here is a shot of the blowers: 
Later guys! |
|
|
|
|
Andy
Senior Member

Joined: July-27-2008 Location: M'boro, TN Status: Offline Points: 382 |
Post Options
Thanks(0)
Quote Reply
Posted: May-26-2009 at 4:04am |
|
There's a "plenum" under the vents. Prob easy enough to fab one up if you can't find one.
|
|
|
My Blue 82SOLD!
|
|
|
|
|
Big Pappa
Senior Member

Joined: March-08-2006 Location: United States Status: Offline Points: 322 |
Post Options
Thanks(0)
Quote Reply
Posted: May-27-2009 at 7:47pm |
|
Awesome Job this far AKA!!! I just read all 19 pages the past 2 days. I am just getting back to working on mine. I have been out of commission for over a year. Dang wife and new house!!!
 Anyway lets see that new paint. Anyway lets see that new paint.
Kris |
|
|
|
|
SNobsessed
Grand Poobah
Joined: October-21-2007 Location: IA Status: Offline Points: 7102 |
Post Options
Thanks(0)
Quote Reply
Posted: May-27-2009 at 9:22pm |
|
AKA - How about some pix of the paint job?
You got us cliff hangin' |
|
|
“Beer is proof that God loves us and wants us to be happy.”
Ben Franklin |
|
|
|
|
critter
Platinum Member

Joined: January-11-2008 Location: New Hill, NC Status: Offline Points: 1227 |
Post Options
Thanks(0)
Quote Reply
Posted: May-27-2009 at 11:53pm |
|
Joey, send a note to nautiquefanatic and FlInboards about the Plenum. They may have one for you.
If you need to make one, let me know and I can get mine out for you to make a pattern from. |
|
|
1980 Ski Nautique
1966 Barracuda |
|
|
|
|
athhud
Groupie 
Joined: November-09-2006 Location: United States Status: Offline Points: 80 |
Post Options
Thanks(0)
Quote Reply
Posted: May-28-2009 at 1:08am |
|
The factory plenum looks very similar to this, but with 2 hose inlets.
click here Edit: This one would work, but I just measured mine and it is 15.5" x 2" clicky |
|
|
Andrew
|
|
|
|
|
Luchog
Grand Poobah

Joined: April-17-2007 Location: Argentina Status: Offline Points: 2135 |
Post Options
Thanks(0)
Quote Reply
Posted: May-28-2009 at 1:26am |
|
you can simply glue the hose to the vent inside, or you can glue a pvc piece to the vent and the attach the hose, whatever you prefer... or buy that thing above.
|
|
|
|
|
akabulla
Gold Member
Joined: November-15-2008 Location: United States Status: Offline Points: 649 |
Post Options
Thanks(0)
Quote Reply
Posted: May-29-2009 at 11:33pm |
|
Sorry for the late reply guys! I was out of town. I will get some pictures up this weekend. I plan on having it water ready by the end of Sunday so the pictures will look better with it assembled and carpeted.
I am just going to take two 90 degree elbows and glue them to the vents and run some hose. I think that will be the easiest. If I use a plenum like the ebay one wouldn't it fill up with water and then run down the hoses and threw the blowers? |
|
|
|
|
akabulla
Gold Member
Joined: November-15-2008 Location: United States Status: Offline Points: 649 |
Post Options
Thanks(0)
Quote Reply
Posted: June-03-2009 at 8:37pm |
|
Ok, So here are a few pics. I wanted to wait to get more completed but I will share a few images. I am waiting for a part for the steering wheel.
New Dash. They gauges will eventually get replaced with White face black trim gauges but that will be next year: 
New paint job, bilge hull pass through, and newly painted windshield. I also got the rub rail on which was from another boat so I had to drill 120 new holes. It also comes up about 6 inches short on the back so I need about 6 inches of rub rail to complete it: 
Cables ran under bow: 
Telescoping anchor light. I also have all electrical wires wrapped in cable housing: 

New fuse panel: 
One battery for now. Second to come: 
This was a scary hole to cut in the dash but now I have a glove box and place for the radio. That is just dust on the glove box: 

Dripless system installed: 
Engine in and carpet down. We are laying the side carpet down tonight: 
Fuel tank installed. I also had some heater vents so I made a bracket to hold the end of the hoses instead of just having them hanging behind the tank. I also uses some aluminum angle brackets so I would have side bolts for the support for the tank instead of screws going in through the top of the teak boards. The wires you see are coming from the anchor light before it was hooked up. The blowers are mounted above the tank. 


The engine is rubbing a little on the inside of the dog house so I decided to raise the bottom up by about 2 inches. In the old engine mounting bracket it sat a little lower. It works out good since I added the stud to the ski pole so the pole is up about the same height. 
That's all for now. I will shoot some more when I get it completed and get the tower mounted. I want to have the Nautique dealer check it out before it goes in the water but they are now telling be it might be several weeks before they can look at it. No way am I waiting that long!! Later |
|
|
|
|
akabulla
Gold Member
Joined: November-15-2008 Location: United States Status: Offline Points: 649 |
Post Options
Thanks(0)
Quote Reply
Posted: June-03-2009 at 9:59pm |
|
Maybe you guys can help me out. I noticed that most people's fuel lines run down the port side stringer. I assume this is so the steering cable has a free run but my fuel pump connection is on the starboard side. Is this true for most and if so where does the fuel line run once it gets under the engine?
Thanks! |
|
|
|
|
SNobsessed
Grand Poobah
Joined: October-21-2007 Location: IA Status: Offline Points: 7102 |
Post Options
Thanks(0)
Quote Reply
Posted: June-03-2009 at 10:16pm |
|
Aka - I don't think you need the dealer - it looks like you have a good handle on this refurb project. It looks awesome. I bet you can't wait to clock it!
|
|
|
“Beer is proof that God loves us and wants us to be happy.”
Ben Franklin |
|
|
|
|
Chopper
Gold Member

Joined: June-15-2006 Location: Australia Status: Offline Points: 821 |
Post Options
Thanks(0)
Quote Reply
Posted: June-03-2009 at 11:40pm |
|
Aka,
My 89's fuel line runs along the port stringer to the fuel filter - also mounted to the stringer. From there it connects directly to the mechanical fuel pump on the engine block - port side on the 351W. It doesn't actually run under the engine What about running it around the engine cradle to the starboard side.? |
|
|
|
|
Chopper
Gold Member
Joined: June-15-2006 Location: Australia Status: Offline Points: 821 |
Post Options
Thanks(0)
Quote Reply
Posted: June-03-2009 at 11:47pm |
|
Looking good Aka,
have you considered painting the muffler tubes & changing out the blue carpet with some of your left over grey.? |
|
|
|
|
akabulla
Gold Member
Joined: November-15-2008 Location: United States Status: Offline Points: 649 |
Post Options
Thanks(0)
Quote Reply
Posted: June-04-2009 at 12:36am |
|
Thanks guys! I didn't think about painting the mufflers. Guess I could use some high heat automotive paint? I was going to replace the blue astro turf once we put the side carpet on and had some more scrap. I think the mufflers might be backwards. I sent an email to the dealer asking them if they are directional. The only reason I think they are backwards is because in a few of the pictures the smaller piece of carpet on the tube is towards the stern.
Chopper I think that is what I am going to do. Run them past the engine and then use some self tapping screws into the cradle and back to the engine. Kind of going around your butt to get to your elbow but I don't think there is another way (guess all that tubing means I will hold more gas in the system LOL!!). If anyone has any extra rub rail I could use about a foot of it. Thanks! |
|
|
|
|
storm34
Grand Poobah

Joined: November-03-2008 Location: Dexter Iowa Status: Offline Points: 4492 |
Post Options
Thanks(0)
Quote Reply
Posted: June-04-2009 at 1:18am |
|
Looks awesome aka! Keep the pics coming!
|
|
|
|
|
kapla
Grand Poobah

Joined: March-27-2008 Location: BA, Argentina Status: Offline Points: 6148 |
Post Options
Thanks(0)
Quote Reply
Posted: June-04-2009 at 4:39pm |
|
Just can wait to see the boat on the water...terrific job you are pulling!!!
|
|
|
<a href="">1992 ski nautique
|
|
|
|
|
8122pbrainard
Grand Poobah
Joined: September-14-2006 Location: Three Lakes Wi. Status: Offline Points: 41045 |
Post Options
Thanks(0)
Quote Reply
Posted: June-04-2009 at 5:57pm |
|
Looking GREAT!!!
|
|
|
|
|
Chopper
Gold Member
Joined: June-15-2006 Location: Australia Status: Offline Points: 821 |
Post Options
Thanks(0)
Quote Reply
Posted: June-05-2009 at 2:27am |
See what the other guys on here think, but I just used normal black gloss spray paint when I repaired / repainted the muffler on my 89. My muffler doesn't get hot at all (warm at best) and it's the inverter flow type that connects directly to the back of the risers. It's been painted that way for approx 2 years now, and it's never looked like coming off. |
|
|
|
|
kapla
Grand Poobah
Joined: March-27-2008 Location: BA, Argentina Status: Offline Points: 6148 |
Post Options
Thanks(0)
Quote Reply
Posted: June-05-2009 at 6:51pm |
|
I think the paint will resist the upper section of the manifold were the water jackets are, but the lower section where it connects to the cylinder head work much higher temp.. no water jackets over there, so eventually paint will burn off.
I painted mines with high temp paint (the one for home cast radiators), I will see how it performs once the engine its put toghether 
|
|
|
<a href="">1992 ski nautique
|
|
|
|
|
akabulla
Gold Member
Joined: November-15-2008 Location: United States Status: Offline Points: 649 |
Post Options
Thanks(0)
Quote Reply
Posted: June-07-2009 at 11:34pm |
|
Well critter really helped me out today! Hats off to him. I had problems removing the oil filter and after his help we went out for the first time!!! It was sweet!! Everything ran really smooth. Dripless system, engine, steering! Everything! Thanks again Critter!
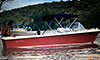
The only thing we noticed was the transmission was making a squealing noise. I saw in this post that the 1:23 always makes a squealing noise. Is this true? http://correctcraftfan.com/forum/forum_posts.asp?TID=5316 Here are a few pics of the first time my 2001 was on the water since the rebuild. A few finishing touches and she will be complete!! The RPMS was matching the speed dead on. 2000 rpms was 20 mph and so on. 


Shot of the new platform on the boat. I will get some better ones! 
|
|
|
|
|
Post Reply
|
Page <1 1718192021 23> |
 Tweet
Tweet
|
| Forum Jump | Forum Permissions You cannot post new topics in this forum You cannot reply to topics in this forum You cannot delete your posts in this forum You cannot edit your posts in this forum You cannot create polls in this forum You cannot vote in polls in this forum |


 Topic Options
 akabulla wrote: