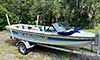
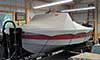
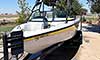
 Boats For Sale:


water behind a stringer |
Post Reply 
|
Page <12345 16> |
| Author | |
WakeSlayer 
Grand Poobah 

Joined: March-15-2006 Location: United States Status: Offline Points: 2138 |
 Post Options Post Options
") Thanks(0) Thanks(0)
 Quote Reply Quote Reply
 Posted: December-23-2008 at 11:50pm Posted: December-23-2008 at 11:50pm |
|
My new cable has the nut on the end to thread on to the support tube. The old one I pulled from the boat has nothing of the sort. I can go look again, but when I looked a couple months ago there was no removing it.
|
|
|
Mike N
1968 Mustang |
|
 |
|
|
TRBenj
Grand Poobah

Joined: June-29-2005 Location: NWCT Status: Offline Points: 21190 |
Post Options
Thanks(0)
Quote Reply
Posted: December-24-2008 at 1:04pm |
|
Bruce, Mike, I posted the steering cable info on here a while back- if you havent ordered yet, DONT!
The pre-1982 (2001 hull) steering cables are NOT CC-specific. The older boats dont use the oddball length or longer throw versions that the newer CC's do. I confirmed this with 2 different CC dealers. Its a generic Teleflex cable- I believe I used a 16' or 17' for my Tique (I posted the info on here somewhere). The cable cost me about $95 from Go2marine.com. You'll probably need the clevis kit to attach to the rudder as well- which go2marine also stocks for ~$25. If you dont have one, Im sure they carry the clamp tube too. |
|
|
|
|
WakeSlayer
Grand Poobah
Joined: March-15-2006 Location: United States Status: Offline Points: 2138 |
Post Options
Thanks(0)
Quote Reply
Posted: December-24-2008 at 2:12pm |
|
I did get the Teleflex generic cable from CC, and the clevis kit. I ordered way back last Spring when I first got the boat. Just never put it in til this Fall.
I probably paid too much for it, but too late now. I will try to find the receipt to see how bad it was. |
|
|
Mike N
1968 Mustang |
|
|
|
|
Riley
Grand Poobah

Joined: January-19-2004 Location: Portland, ME Status: Offline Points: 7954 |
Post Options
Thanks(0)
Quote Reply
Posted: December-24-2008 at 2:54pm |
|
Great info Tim, thanks. I saved the old cable, so I'll measure it and check them out.
|
|
|
|
|
WakeSlayer
Grand Poobah
Joined: March-15-2006 Location: United States Status: Offline Points: 2138 |
Post Options
Thanks(0)
Quote Reply
Posted: December-26-2008 at 11:47pm |
|
Got my cable block hole drilled today. Got ddrain holes drilled out, and the wood inside where I drilled was perfect. Planned out the battery placement, and got started on the wood for that. Got the first 40% of the bilge faired out and I am nearly out of epoxy... Will get more in the AM, and keep on it.
Hope to start fitting the motor back in next weekend. We'll see... |
|
|
Mike N
1968 Mustang |
|
|
|
|
WakeSlayer
Grand Poobah
Joined: March-15-2006 Location: United States Status: Offline Points: 2138 |
Post Options
Thanks(0)
Quote Reply
Posted: December-29-2008 at 1:40pm |
|
Over the weekend, I finished fairing out the bilge. Which I totally sucked at doing. Got the battery mount figured out, and mostly installed. Sanded out the bilge, and laid one coat of BilgeKote down. I will get a couple pics taken this week.
|
|
|
Mike N
1968 Mustang |
|
|
|
|
Riley
Grand Poobah
Joined: January-19-2004 Location: Portland, ME Status: Offline Points: 7954 |
Post Options
Thanks(0)
Quote Reply
Posted: December-29-2008 at 2:02pm |
|
Post some pics. My next step on the Mustang is the bilge. I was just going to paint it wth bilge coat, but there are a few areas where I layed down some new cloth, so perhaps I should be doing some fairing to?
|
|
|
|
|
WakeSlayer
Grand Poobah
Joined: March-15-2006 Location: United States Status: Offline Points: 2138 |
Post Options
Thanks(0)
Quote Reply
Posted: December-29-2008 at 2:20pm |
|
I probably could have just ground down a rough spots and painted it. I chose to fair, which, now that I get what to and not to do, I would do a better job. The first third I mixed properly and it laid out nicely. But I was suddenly out of epoxy. I did the next part all at once, and that was my downfall. I made too much and it was starting to go off by the time I was 3/4 done. Then, to fill the edges I simply thickened with the 410, and attempted to "paint" it in the corners. Well, this does not sand out nearly as well as the properly mixed peanut butter consistency. Then add to it that I am a bit more of a rough in guy than a finish work guy, and it definitely could have turned out better. Live and learn, I guess. Most of it sanded out, and will be fine now that I painted it. I have one more coat to do and it will look great.
|
|
|
Mike N
1968 Mustang |
|
|
|
|
eric lavine
Grand Poobah
Joined: August-13-2006 Location: United States Status: Offline Points: 13413 |
Post Options
Thanks(0)
Quote Reply
Posted: December-29-2008 at 6:29pm |
|
some are rough carpenters some are finish
|
|
|
"the things you own will start to own you"
|
|
|
|
|
WakeSlayer
Grand Poobah
Joined: March-15-2006 Location: United States Status: Offline Points: 2138 |
Post Options
Thanks(0)
Quote Reply
Posted: December-29-2008 at 7:48pm |
|
For the most part, I would be the former.
Practice makes perfect, I guess. I will have learned a ton on this boat. I am having a lot of fun, too. I am helping do a 65 Sportsman 17 next winter, and the winter after considering a total redo on my 68 Nautique. |
|
|
Mike N
1968 Mustang |
|
|
|
|
WakeSlayer
Grand Poobah
Joined: March-15-2006 Location: United States Status: Offline Points: 2138 |
Post Options
Thanks(0)
Quote Reply
Posted: December-30-2008 at 12:01am |
|
Here are a couple pics. First one is the bilge with one coat on it, second is my new battery box placement and the pylon mount that was just installed tonight.


The bilge will look better after a second coat. Amazingly, everything fit and the pylon stands straight. |
|
|
Mike N
1968 Mustang |
|
|
|
|
Riley
Grand Poobah
Joined: January-19-2004 Location: Portland, ME Status: Offline Points: 7954 |
Post Options
Thanks(0)
Quote Reply
Posted: December-30-2008 at 12:23am |
|
The bilge looks great.
On your battery box placement, do you think you'll be able to remove the battery without removing the seats? I'm going to locate forward of the seats. I've got to figure out how to frame it. |
|
|
|
|
WakeSlayer
Grand Poobah
Joined: March-15-2006 Location: United States Status: Offline Points: 2138 |
Post Options
Thanks(0)
Quote Reply
Posted: December-30-2008 at 1:22am |
|
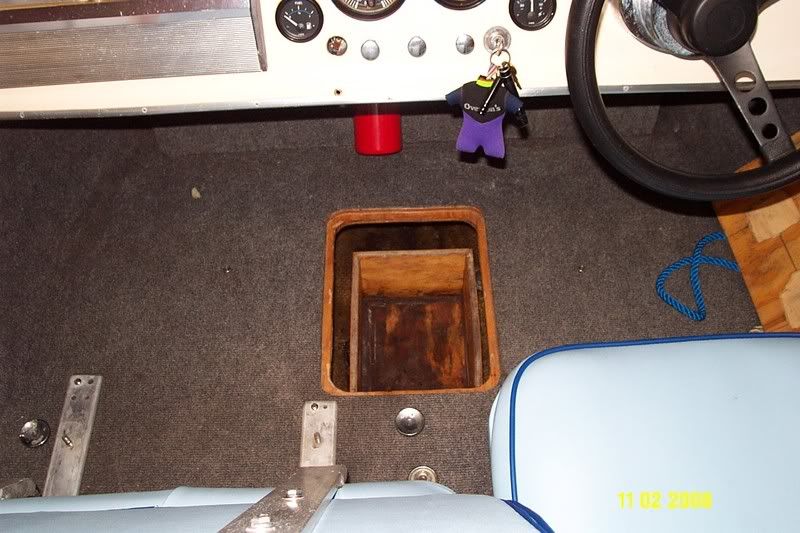
Postive. i epoxied a 3.5 (ish) inch wide board down in the keel. I will screw down the battery box. The top edge of the box is exactly level with the top edge of the longitudinal stringer. I am going to slit the box on the sides and have the strap run thru it to hold the battery firm. The posts will still be about an inch under the top edge. I will then make a cut out top, carpet it and trim the hole. Just going to use a feinger pullring to lift it when I need to. I just need to cut it a tiny bit larger then the battery box edge, and it can just sit there and will be perfectly flush with the rest of the floor. This was pure, dumb luck, and an easy solution.
|
|
|
Mike N
1968 Mustang |
|
|
|
|
Gary S
Grand Poobah

Joined: November-30-2006 Location: Illinois Status: Offline Points: 14096 |
Post Options
Thanks(0)
Quote Reply
Posted: December-30-2008 at 11:15pm |
|
Mike, here is how I did my battery box cover. Just drill a hole big enough to let a 1/4"x 2" carriage bolt slide thru and put a washer and locking nut on. Use your fingernails to pull the bolt out to grab on to so you can remove cover.
|
|
|
|
|
WakeSlayer
Grand Poobah
Joined: March-15-2006 Location: United States Status: Offline Points: 2138 |
Post Options
Thanks(0)
Quote Reply
Posted: December-31-2008 at 12:35am |
|
Awesome. Same basic idea I have, though I plan on making it a bit smaller. Just big enough to pass a battery through.
Where did you locate yours? |
|
|
Mike N
1968 Mustang |
|
|
|
|
Riley
Grand Poobah
Joined: January-19-2004 Location: Portland, ME Status: Offline Points: 7954 |
Post Options
Thanks(0)
Quote Reply
Posted: December-31-2008 at 1:19am |
|
Good idea Gary. I like the looks of that.
|
|
|
|
|
Gary S
Grand Poobah
Joined: November-30-2006 Location: Illinois Status: Offline Points: 14096 |
Post Options
Thanks(0)
Quote Reply
Posted: December-31-2008 at 1:47am |
|
Wasn't my idea Bruce,somewhere my Dad came up with that,must have had that on one of his many boats.
Mike here are two pic's where mine is,easier than explaining- 
|
|
|
|
|
Riley
Grand Poobah
Joined: January-19-2004 Location: Portland, ME Status: Offline Points: 7954 |
Post Options
Thanks(0)
Quote Reply
Posted: December-31-2008 at 3:06am |
|
Mike, does your boat have the floor pan? Had your floor been replaced before? There's old resin on the sides of the hull. You did a better job than I did with your cuts on the longitudinal stringers. Nice fit.
Gary, What happened to the SS part of your boat? Did you ever get a floor pan? |
|
|
|
|
WakeSlayer
Grand Poobah
Joined: March-15-2006 Location: United States Status: Offline Points: 2138 |
Post Options
Thanks(0)
Quote Reply
Posted: December-31-2008 at 12:59pm |
|
Hey Bruce,
I do/did have a floor pan. That is not going back in the boat. This is the boats first floor replacement. I cut the glass floor out about 2 inches from the sides, and then went back and cut off flush with a sawzall. Thank you on the cuts compliment. I was shocked when everything fit exactly as it should have, and the pylon stands true, as every piece of wood was repalced except the primary stringers. I still want to put little blocks under the outer ends. I am doing a 3/4 inch ply floor over the top. Gary, you have a bench seat, I take it? When I said I was positive I can remove mine where it is with the seats in, now I think I need to measure. Nearly positve. Will be postive about it this afternoon. I gave my bilge a second coat last night, and that needs to finish drying. That BilgeKote stuff is nasty... |
|
|
Mike N
1968 Mustang |
|
|
|
|
WakeSlayer
Grand Poobah
Joined: March-15-2006 Location: United States Status: Offline Points: 2138 |
Post Options
Thanks(0)
Quote Reply
Posted: December-31-2008 at 6:59pm |
|
I got my angle iron trans mount plates this afternoon from my welder buddy. They are approx 6 inches long, 5 inches high, and 3.5 inches deep. They are in a sort of "L" shape and made of steel. They will be mounted on the inside of the stringers with the bottom of the "L" perpendicular to the stinger and I will bolt my trunion mounts to them along that bottom piece. I have a couple questions about prepping them for installation:
What should I prime them with, and secondly paint them with? I am going to either lag them to the stinger or, possibly thru-bolt them. (I have not decided) I plan to also eopxy the backs of them to the stinger with the peanut butter. Should I leave the back clean, or sand, or primer that as well? Seems I should leave it raw steel, but I do not know. I want the best adhesion possible, obviously. Any help would be appreciated. thanks Mike |
|
|
Mike N
1968 Mustang |
|
|
|
|
SNobsessed
Grand Poobah
Joined: October-21-2007 Location: IA Status: Offline Points: 7102 |
Post Options
Thanks(0)
Quote Reply
Posted: December-31-2008 at 8:23pm |
|
Wake - I would have them powdercoated. If you leave one side bare steel, it will bleed rust down your shiney bilge. If you want to through bolt them (good idea)I would put in a flanged nut plate on the back side. This should be stainless. Make it substantial so it doesn't strip out. Extra time spent on this now will save you from having to repair it again later!
|
|
|
“Beer is proof that God loves us and wants us to be happy.”
Ben Franklin |
|
|
|
|
JoeinNY
Grand Poobah

Joined: October-19-2005 Location: United States Status: Offline Points: 5698 |
Post Options
Thanks(0)
Quote Reply
Posted: December-31-2008 at 9:02pm |
|
paint or coat then attach with 3m 5200. epoxy and bare metal won't play well together forever I fear.
|
|
|
|
|
WakeSlayer
Grand Poobah
Joined: March-15-2006 Location: United States Status: Offline Points: 2138 |
Post Options
Thanks(0)
Quote Reply
Posted: December-31-2008 at 9:11pm |
|
I was curious about the epoxy on there too. I had acutally asked him to make them out of aluminum, but he evidently had some concerns regarding strength. Guessing he did not have stainless stock. He is doing me a favor, so I don't want to squawk, really.
I do like the idea of coating them, too. |
|
|
Mike N
1968 Mustang |
|
|
|
|
Gary S
Grand Poobah
Joined: November-30-2006 Location: Illinois Status: Offline Points: 14096 |
Post Options
Thanks(0)
Quote Reply
Posted: December-31-2008 at 10:34pm |
|
When I got the boat 20 yrs ago Bruce,it was in real bad shape as you can see in my profile.The center consol was gone and there was a big gaping hole in the floor pan where it went. A morse control installed very poorly and an all black interior rounded out the package. Correct Craft sent me a copy of the brochure like below-http://www.correctcraftfan.com/reference/1968_brochure/index.asp?page=05
The problem with that was,my gauges were mounted in the dash and not the consol and they looked to be well done,not butchered like every thing else. Later found out my boat was built in 12-68 so was more or less like a 69,like this- http://www.correctcraftfan.com/diaries/details.asp?ID=193&sort=&pagenum=6&yrstart=1966&yrend=1970 Still working on a floor pan,I've got my eye on a boat here that would be good for parts,but they want way too much for it,it's at a broker so I don't know if they want to deal yet.I'm thinking of going down sometime this winter with cash in hand and see what happens. Don't know if you saw what I found out from the Godfather but in their records it's not listed as a SS. All records are hand written and they must have left off the ss part. The serial tag in the boat says MSS 2567, their records have it listed M 2567. Mike, my passenger seat was in bad shape so I made the bench and had uprights welded onto the bottom frame for the seat back.If I had to do it again I would have repaired it instead since now days no one likes to sit backwards. Yours is looking nice Mike,you seem to be making great progress. I wonder why each boat is different, yours has one thru hull for the water intake, mine has two. |
|
|
|
|
Riley
Grand Poobah
Joined: January-19-2004 Location: Portland, ME Status: Offline Points: 7954 |
Post Options
Thanks(0)
Quote Reply
Posted: January-01-2009 at 1:10am |
|
Mike, my floor is solid without the blocks. I still may run some fiberglass tape along the seam for added strength though. I used 5/8 plywood.
Gary, as I told you before, you can have my floor pan. You just got to figure out a way to get it from Maine to IL? I'd check with Peter1234 as he gave it to me, but I doubt he'd care so long as it was going to good use. |
|
|
|
|
WakeSlayer
Grand Poobah
Joined: March-15-2006 Location: United States Status: Offline Points: 2138 |
Post Options
Thanks(0)
Quote Reply
Posted: January-01-2009 at 1:26am |
|
I am planning on using 3/4 so maybe I do not need the blocks, only one of them even moves now anyway.
Gary, what motor? My Mustang has a 289 Interceptor w/ a single inlet, however the 68 Nautique I just picked up has a Chrysler 318 with two water intakes, and I am assuming, two impellers and they connect together after that. |
|
|
Mike N
1968 Mustang |
|
|
|
|
Gary S
Grand Poobah
Joined: November-30-2006 Location: Illinois Status: Offline Points: 14096 |
Post Options
Thanks(0)
Quote Reply
Posted: January-01-2009 at 2:02pm |
|
Bruce,I haven't forgot and I appreciate it,just haven't figured how to get it here yet. The boat I want to look at here has the floor, sidepanels and glass windshield. I'd kick myself if I didn't at least go look at it.
Mike I have a Holman Moody 289 thats been changed to a 302 block.It runs a single crank driven pump |
|
|
|
|
WakeSlayer
Grand Poobah
Joined: March-15-2006 Location: United States Status: Offline Points: 2138 |
Post Options
Thanks(0)
Quote Reply
Posted: January-01-2009 at 10:50pm |
|
Today I worked on my trans mount brackets, I had to drill holes to mount to the inside of the stringer, and to mount the trunion assemblies. I am, in fact, going to get them powdercoated, thanks for the suggestion, guys!
I replaced my shaft hose, reinstalled my shaft, replaced the packing, and put the collar on. For some reason, SkiDIM sent me 1.5" fuel hose when I ordered the replacement hose, and it was an absolute biatch to get on there. Being stubborn and a holiday, I just used it, instead of waiting and getting something a little more workable. There is room for two clamps on each side, so I am good, I believe. I put the clamp block in. And epoxied my drain holes in the stringers. 
I decided I was not so pleased with where I was going to put my battery box after seeing where Gary's is, and I am going to move it forward to that spot. I just need to fix in a little frame, and that will be done. 
I put a PVC tube for the cables. Despite what some said about not bothering, I like the idea of the tube for ease of running the cables and such through there. 
My pylon is a little right leaning so I will need to ream the mounting hole a little on the left side. I musta had some BilgeKote fumes in the head when I looked the first time. Will be an easy fix. Here is the hoist Zman borrowed me to re-install my motor, cause opening the door and using my tractor this time of year is way, WAY too cold. 
Hope everyone had a great New Years !!! Mike |
|
|
Mike N
1968 Mustang |
|
|
|
|
Riley
Grand Poobah
Joined: January-19-2004 Location: Portland, ME Status: Offline Points: 7954 |
Post Options
Thanks(0)
Quote Reply
Posted: January-01-2009 at 11:31pm |
|
Looks good.
On your packing hose, what kind of shape was the old one in? I'm thinking I'm going to skip that step as it is fiberglassed to the hull and I don't want to dig into it. How did you figure your drain holes. Measure from the outside and drill straight from the inside? |
|
|
|
|
WakeSlayer
Grand Poobah
Joined: March-15-2006 Location: United States Status: Offline Points: 2138 |
Post Options
Thanks(0)
Quote Reply
Posted: January-02-2009 at 1:01am |
|
Old hose was in terrible shape, and I suspect was leaking a little. It was starting to come apart in layers. Mine was glassed in a bit too, but it wasn't that bad to get out. I cleaned the glass up a bit around it afterwards.
On the drains, I winged it. I looked for what appeared to be the lowest point still in the bilge and accessible for the front. Just eyeballed the rearward ones. I figured if an exhaust pipe ever cuts loose on me that would be a good point to drain water from. Drilled from the inside slightly angling upwards with a 15/16" spade bit. The wood that I went through was like new. |
|
|
Mike N
1968 Mustang |
|
|
|
|
Post Reply
|
Page <12345 16> |
 Tweet
Tweet
|
| Forum Jump | Forum Permissions You cannot post new topics in this forum You cannot reply to topics in this forum You cannot delete your posts in this forum You cannot edit your posts in this forum You cannot create polls in this forum You cannot vote in polls in this forum |


 Topic Options