 Boats For Sale:


1950 CC Junior Utility Restoration |
Post Reply 
|
Page <1 56789 11> |
| Author | ||
8122pbrainard 
Grand Poobah 

Joined: September-14-2006 Location: Three Lakes Wi. Status: Offline Points: 41045 |
 Post Options Post Options
") Thanks(0) Thanks(0)
 Quote Reply Quote Reply
 Posted: March-28-2012 at 4:36pm Posted: March-28-2012 at 4:36pm |
|
Wrong. You need to do some more reading on epoxy. Yes, the resin is the "glue" that creates the bond but the type of filler used gives the joint the strength level needed. |
||
 |
||
|
juniorwoody
Gold Member 
Joined: August-09-2011 Location: Oak Hill, Fl Status: Offline Points: 937 |
Post Options
Thanks(0)
Quote Reply
Posted: March-28-2012 at 4:41pm |
|
I need to get my head around this. Seems like a good mating surface match should not have any areas in need of filler. Not saying your wrong Pete, just saying. |
||
|
||
|
8122pbrainard
Grand Poobah
Joined: September-14-2006 Location: Three Lakes Wi. Status: Offline Points: 41045 |
Post Options
Thanks(0)
Quote Reply
Posted: March-28-2012 at 4:47pm |
|
|
Again:
|
||
|
||
|
juniorwoody
Gold Member
Joined: August-09-2011 Location: Oak Hill, Fl Status: Offline Points: 937 |
Post Options
Thanks(0)
Quote Reply
Posted: March-28-2012 at 4:51pm |
|
Movement or no movement? |
||
|
||
|
81nautique
Grand Poobah

Joined: September-03-2005 Location: Big Rock, Il Status: Offline Points: 5778 |
Post Options
Thanks(0)
Quote Reply
Posted: March-28-2012 at 6:09pm |
|
|
Jack, I had to do some laminations on the Hurricane, I used epoxy with micro fibre or what's being refered to here as milled fibre. I'm sure it is the same product and is just finely chopped glass strands.
For my layup I did cpes everything then applied the lightly thickened epoxy to both surfaces in the layup. I really think the micro fibre allows for less of the epoxy to be squeezed out during clamping and will also fill any voids from uneven surfaces. Here's the lower transom frame made from 4 - 1/4" strips.  edit... And all set into place in a bed of 5200. Good luck with the clean part of the project  . Get yourself a quart of Xylol for 5200 cleanup. . Get yourself a quart of Xylol for 5200 cleanup.
|
||
|
You can’t change the wind but you can adjust your sails
|
||
|
||
|
8122pbrainard
Grand Poobah
Joined: September-14-2006 Location: Three Lakes Wi. Status: Offline Points: 41045 |
Post Options
Thanks(0)
Quote Reply
Posted: March-29-2012 at 9:06am |
|
|
Jack,
I suggest doing some testing on the deck ply to see if you can bring it back. If you are planning on a bright finish (filler/stain and varnish) them you'll need to bleach it. Keep in mind you can'd do much sanding on ply. If sanded to close too the glue line of the next ply, the stain will not "take" - the glue acts as a sealer. When you order the screws, don't forget to get some R&P/Frearson driver bits. Philips will NOT work. |
||
|
||
|
juniorwoody
Gold Member
Joined: August-09-2011 Location: Oak Hill, Fl Status: Offline Points: 937 |
Post Options
Thanks(0)
Quote Reply
Posted: March-29-2012 at 10:38am |
|
Thanks for taking the time to explain the process complete with pictures Alan. I am a visual learner and the light went on when I read your post. It is mostly a question of knowing which adhesive to place in which locations. |
||
|
||
|
juniorwoody
Gold Member
Joined: August-09-2011 Location: Oak Hill, Fl Status: Offline Points: 937 |
Post Options
Thanks(0)
Quote Reply
Posted: March-29-2012 at 10:46am |
|
Deck is going to be just fine Pete. It already passed the sanding test. I believe it had a blue border and bright finish on the inner areas. This all complimented with a white striping where the routings are. The border will need a little filler from a few tearouts but being a painted area should be just fine to repair. Thanks for the heads up on the bits for frearson. Kinda figured the regular ones wouldn't work. By questimation looks like I need to order about 1200 screws. |
||
|
||
|
81nautique
Grand Poobah
Joined: September-03-2005 Location: Big Rock, Il Status: Offline Points: 5778 |
Post Options
Thanks(0)
Quote Reply
Posted: March-29-2012 at 11:40am |
|
Your welcome, I think other than your laminations you will be using 5200. I see you had to replace a section of chine, I had to on one side of the Hurricane as well. Soak all that old framework and plywood with cpes until it just won't take anymore in. |
||
|
You can’t change the wind but you can adjust your sails
|
||
|
||
|
8122pbrainard
Grand Poobah
Joined: September-14-2006 Location: Three Lakes Wi. Status: Offline Points: 41045 |
Post Options
Thanks(0)
Quote Reply
Posted: March-29-2012 at 11:55am |
|
I'm glad to hear you have done some testing. I just wanted to keep you a step ahead of yourself so you didn't end up with a problem later on!
|
||
|
||
|
mountaineerminer
Groupie 
Joined: May-03-2011 Location: Bristol, TN Status: Offline Points: 79 |
Post Options
Thanks(0)
Quote Reply
Posted: March-29-2012 at 4:13pm |
|
The guy in the link below had a good FREE video on this topic 2 months ago when I found his site, but now it appears he is charging for them. It seemed to be a good source for more than just cold laminating, but many wooden boat repair topics. I have no idea how much he wants $$ wise. http://www.townsendboatworks.com/video.html |
||
|
||
|
81nautique
Grand Poobah
Joined: September-03-2005 Location: Big Rock, Il Status: Offline Points: 5778 |
Post Options
Thanks(0)
Quote Reply
Posted: March-29-2012 at 4:32pm |
|
yes I had watched every single video this guy has on youtube before he started charging for them. He documented the restoration of a CC capri and showed steps from frame repair, planking right up to varnishing. Not sure how much he's charging for the series but it would be worth $20-$30. |
||
|
You can’t change the wind but you can adjust your sails
|
||
|
||
|
juniorwoody
Gold Member
Joined: August-09-2011 Location: Oak Hill, Fl Status: Offline Points: 937 |
Post Options
Thanks(0)
Quote Reply
Posted: March-30-2012 at 4:29pm |
|
It seems like all that's needed is a utube act which I have. I browsed the movies and couldn't find the one specific to cold laminating. When my materials get here I'm going for it. The site does offer a wealth of information. |
||
|
||
|
juniorwoody
Gold Member
Joined: August-09-2011 Location: Oak Hill, Fl Status: Offline Points: 937 |
Post Options
Thanks(0)
Quote Reply
Posted: April-18-2012 at 1:55am |
|
|
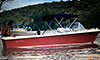
Woody rolled over tonight. What will a close inspection reveal? New skin in order? More frame Repairs? Stay tuned?
 |
||
|
||
|
bwinn
Senior Member 
Joined: July-13-2009 Location: ct Status: Offline Points: 396 |
Post Options
Thanks(0)
Quote Reply
Posted: April-18-2012 at 12:14pm |
|
|
Ouch my back hurts
|
||
|
||
|
juniorwoody
Gold Member
Joined: August-09-2011 Location: Oak Hill, Fl Status: Offline Points: 937 |
Post Options
Thanks(0)
Quote Reply
Posted: April-22-2012 at 12:00am |
|
|
Today, the last part of our screw order arrived. In the interim time has been spent removing putty from hundreds of screw holes and finally flipping the hull to remove the last of the plywood and the putty removal process starting all over again. Just another half days work and there should be a bare skeleton of a frame left. I do expect some repairs but am confident that the deterioration is minimal and we shall soon be on the other side of the curve. I feel like putting things back together will be much more fun. Will be posting up a few photos soon as the last of the plywood is removed. In the mean while I will be working on a scarfing jig for my skill saw. Honing the scarfing skills is a must when working with these old plywood hulls.
|
||
|
||
|
juniorwoody
Gold Member
Joined: August-09-2011 Location: Oak Hill, Fl Status: Offline Points: 937 |
Post Options
Thanks(0)
Quote Reply
Posted: April-24-2012 at 12:23am |
|
|
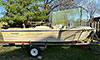
A few pictures to show progress although it does feel like steps backward at times.
  
|
||
|
||
|
81nautique
Grand Poobah
Joined: September-03-2005 Location: Big Rock, Il Status: Offline Points: 5778 |
Post Options
Thanks(0)
Quote Reply
Posted: April-24-2012 at 12:35am |
|
|
What on earth were they thinking with the stem construction on these boats. Every darn one of them is junk. Make a good template before pulling it off there Jack.
|
||
|
You can’t change the wind but you can adjust your sails
|
||
|
||
|
juniorwoody
Gold Member
Joined: August-09-2011 Location: Oak Hill, Fl Status: Offline Points: 937 |
Post Options
Thanks(0)
Quote Reply
Posted: April-24-2012 at 12:46am |
|
No doubt Allen, I was looking back on your thread today about page 7 and saw striking resemblences to your stem. A good template is a must. Gets a bit scary when the old is removed and there is nothing but air between the topside and keel. I have done considerable bending and noticed you soaked the strips first. Don't remember that being necessary. I need to set up for bending real soon. Not much salvageable there. |
||
|
||
|
8122pbrainard
Grand Poobah
Joined: September-14-2006 Location: Three Lakes Wi. Status: Offline Points: 41045 |
Post Options
Thanks(0)
Quote Reply
Posted: April-24-2012 at 8:57am |
|
|
Jack,
The soaking is a suggested practice before steaming. When I laminated up my new stem, the strips were thin enough that I did not need to steam them. |
||
|
||
|
juniorwoody
Gold Member
Joined: August-09-2011 Location: Oak Hill, Fl Status: Offline Points: 937 |
Post Options
Thanks(0)
Quote Reply
Posted: April-26-2012 at 3:18am |
|
As I examine the now exposed stem I begin to see a little method to the madness in the way the original stems were constructed. It seems that they build a somewhat toothpick scaffolding reaching out from the keel that consisted of four to six staves bolted on to the keel. When flexed all together notwithstanding a kerf carefully executed at the optimum location, these staves served to support each other as the shape of the stem was bent. Each individual piece slid a little to allow flex. When secured to the bow and the chine the shape held true. All this accomplished without extensive processes, a factor most important when turning out boats by the hundreds. The application of plywood cinched up the deal and it is amazing how well the toothpick stems have held together for all these years. Where do we go from here as Allen might say. Burn the pieces or salvage and reconstruct. |
||
|
||
|
juniorwoody
Gold Member
Joined: August-09-2011 Location: Oak Hill, Fl Status: Offline Points: 937 |
Post Options
Thanks(0)
Quote Reply
Posted: April-27-2012 at 1:39pm |
|
Just interested to know if you took any pictures of your stem reconstruction Pete? It is always good to see different approaches to a similar repair. Like to see before during and after if you have. We love pictures
|
||
|
||
|
8122pbrainard
Grand Poobah
Joined: September-14-2006 Location: Three Lakes Wi. Status: Offline Points: 41045 |
Post Options
Thanks(0)
Quote Reply
Posted: April-27-2012 at 1:57pm |
|
|
Jack,
Sorry but no pictures. It was a simple form made from an old sheet of ply and some blocking that I clamped all the laminations to. BTW, I notice plenty of oil soaked frames (typical of an old wood hull). If I haven't mentioned it to you before, here's what you need to do. Get some oil dry and grind it finer almost to a powder. I spread it on the floor and used a steel lawn roller to grind it. Mix the fine oil dry into a paste with a strong solvent like Toluene that doesn't evaporate real quick. Pre brush the oil soaked wood with the solvent and the spread the poltice of oil dry/solvent on these areas. It may take a couple treatments but just as oil dry sucks oil out of concrete, it does the same on wood. |
||
|
||
|
juniorwoody
Gold Member
Joined: August-09-2011 Location: Oak Hill, Fl Status: Offline Points: 937 |
Post Options
Thanks(0)
Quote Reply
Posted: April-27-2012 at 2:26pm |
|
|
Very timely information on your part Pete. I knew I read about the Toluene use to clean up the oil soaked hull but had forgotten about the speedy dry. I sure do have some oil soak to deal with and soon.
|
||
|
||
|
BuffaloBFN
Grand Poobah

Joined: June-24-2007 Location: Gainesville,GA Status: Offline Points: 6094 |
Post Options
Thanks(0)
Quote Reply
Posted: April-27-2012 at 8:04pm |
|
Yikes! |
||
|
||
|
8122pbrainard
Grand Poobah
Joined: September-14-2006 Location: Three Lakes Wi. Status: Offline Points: 41045 |
Post Options
Thanks(0)
Quote Reply
Posted: April-27-2012 at 9:09pm |
|
Greg, I don't understand your "Yikes". Fill me in. |
||
|
||
|
BuffaloBFN
Grand Poobah
Joined: June-24-2007 Location: Gainesville,GA Status: Offline Points: 6094 |
Post Options
Thanks(0)
Quote Reply
Posted: April-27-2012 at 9:58pm |
|
|
Sounds like a heckkuva mess!
|
||
|
||
|
8122pbrainard
Grand Poobah
Joined: September-14-2006 Location: Three Lakes Wi. Status: Offline Points: 41045 |
Post Options
Thanks(0)
Quote Reply
Posted: April-27-2012 at 10:09pm |
|
One dry, you just sweep it up like sawdust. The oil dry doesn't get real oily. There really isn't much oil in the wood. Most of it was washed out of the bilge (yes, by opening the garboard drain! )
|
||
|
||
|
BuffaloBFN
Grand Poobah
Joined: June-24-2007 Location: Gainesville,GA Status: Offline Points: 6094 |
Post Options
Thanks(0)
Quote Reply
Posted: April-27-2012 at 10:27pm |
|
|
I ain't never had a garboard I wanted drained?

|
||
|
||
|
juniorwoody
Gold Member
Joined: August-09-2011 Location: Oak Hill, Fl Status: Offline Points: 937 |
Post Options
Thanks(0)
Quote Reply
Posted: May-01-2012 at 12:49am |
|
|
A little good luck. The keel is solid all the way. Finally have reached the end of the deconstruction.
   
|
||
|
||
|
Post Reply
|
Page <1 56789 11> |
 Tweet
Tweet
|
| Forum Jump | Forum Permissions You cannot post new topics in this forum You cannot reply to topics in this forum You cannot delete your posts in this forum You cannot edit your posts in this forum You cannot create polls in this forum You cannot vote in polls in this forum |


 Topic Options
 juniorwoody wrote: