 Boats For Sale:


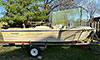


85 2001 LVL Stringer Project |
Post Reply 
|
Page <1 56789 13> |
| Author | |||
Big Pappa 
Senior Member 

Joined: March-08-2006 Location: United States Status: Offline Points: 322 |
 Post Options Post Options
") Thanks(0) Thanks(0)
 Quote Reply Quote Reply
 Posted: May-21-2012 at 1:44pm Posted: May-21-2012 at 1:44pm |
||
Thanks. Yes the project has been going on for a little over 4 years. I have not been working on it consistently that whole time though. I will work on it for a little bit then it will sit for a few months then I will get back on it. My thoughts is to just take my time and make sure things are done right so I do not have to dig back into it for a long time. Plus we bought a new house, moved, had a new baby, I made a change and focused on my health for a while and lost 50 pounds. A lot of people stop doing everything and just focus on working on their boats the entire time while they are doing their project, I have not been working that way though and have just been working when I have some extra time. I am working on it every second I get now though just because I can see a light at the end of the tunnel and want the boat done so I can enjoy it again. 
|
|||
 |
|||
|
Big Pappa
Senior Member
Joined: March-08-2006 Location: United States Status: Offline Points: 322 |
Post Options
Thanks(0)
Quote Reply
Posted: May-28-2012 at 1:59am |
||
|
Well I was out working until 1am this morning on the boat, but the bilge is finally finished being faired/ sanded and is ready for primer and paint!!!
 So I pulled the boat out this morning to give it a good washing inside and out. This is the first wash it has had since before I started this project so needless to say it was quite dirty.  The good news is I will start the painting process tomorrow. The good news is I will start the painting process tomorrow.    
|
|||
|
|||
|
TRBenj
Grand Poobah 

Joined: June-29-2005 Location: NWCT Status: Offline Points: 21169 |
Post Options
Thanks(0)
Quote Reply
Posted: May-29-2012 at 11:45am |
||
|
Thats a beautiful sight!
|
|||
|
|||
|
Big Pappa
Senior Member
Joined: March-08-2006 Location: United States Status: Offline Points: 322 |
Post Options
Thanks(0)
Quote Reply
Posted: May-29-2012 at 1:01pm |
||
Thanks, I feel like a huge weight has been lifted off of me and I am finally making some progress.
|
|||
|
|||
|
Big Pappa
Senior Member
Joined: March-08-2006 Location: United States Status: Offline Points: 322 |
Post Options
Thanks(0)
Quote Reply
Posted: May-30-2012 at 2:43pm |
||
|
I was able to get a ton accomplished last night. I finally feel like I am making progress!!
I started with drilling out the holes for the rudder in the rear, since I wanted to have them drilled before I painted the bilge.  Since I had the drill out I went ahead and drilled a few more holes in the back of the boat for a transom tie down on each side and a ski ring in the back. Nothing like drilling 11 holes in the back of your freshly rebuilt boat to make you sweat!!  Once that was done it was time to lay down some primer in the bilge. I did not get started mixing the primer until 10pm and did not finish until after midnight but I wanted to get the first coat laid down!!   I am pleased with the way it turned out so far. All that work with the fairing is starting to pay off. I have got to go through and sand this down with 220 then put down another coat of primer. After that sand down with 220 again then put down the first coat of paint. Let that dry then sand with 300 then the final coat of paint. I am going to try and sand and put down a coat each afternoon this week so I can hopefully be laying carpet this weekend.
|
|||
|
|||
|
Big Pappa
Senior Member
Joined: March-08-2006 Location: United States Status: Offline Points: 322 |
Post Options
Thanks(0)
Quote Reply
Posted: May-30-2012 at 2:47pm |
||
|
Also I love looking at the plugs I cut out of the boat after they are glassed in and seeing that everything is laid up with no bubbles and it is nice and even. These are the plugs from the front bilge access and the rudder.
The wood has 1 layer on one side and 3 on the other, the smaller piece (I over drilled the hole and filled it with thickened epoxy) has 3 layers on one side and 3 on the other plus fairing compound. 
|
|||
|
|||
|
8122pbrainard
Grand Poobah

Joined: September-14-2006 Location: Three Lakes Wi. Status: Offline Points: 41045 |
Post Options
Thanks(0)
Quote Reply
Posted: May-30-2012 at 3:15pm |
||
|
Kris,
You're going to have one of the best looking bilges of any member! Do you have any CPES still? just to be safe, I'd get some it those freshly drilled holes especially at the rudder port. That plug you drilled out sure looks great. I'm sure glad you took on the LVL project. It shows what can be done when Doug Fir is hard to get. |
|||
|
|||
|
C-Bass
Platinum Member 

Joined: November-18-2008 Location: Columbus, IN Status: Offline Points: 1248 |
Post Options
Thanks(1)
Quote Reply
Posted: May-30-2012 at 4:28pm |
||
|
This project is turning out great. Good work, and thanks for taking the time to document.

|
|||
|
|||
|
Big Pappa
Senior Member
Joined: March-08-2006 Location: United States Status: Offline Points: 322 |
Post Options
Thanks(0)
Quote Reply
Posted: May-30-2012 at 5:29pm |
||
Well I do not know about all that, thanks for the complement though! I just wanted it to be smooth to get the water to the drain or bilge pump as quickly as possible so it is not hanging around waiting to get under the floor or in the stringers again!! I do still have some CPES, I still have a good bit because I am going to cover my rear floor in it once I cut that out and planning on putting it in every hole drilled into the wood on the boat. I was planning on soaking the holes good, I just have to dig out some pipe cleaners so I can get it in there easily. I agree that it is a great option. This boat feels rock solid the way it is now. When I walk around in the back of the boat the nose moves with every step. From front to back, side to side it feels way more solid than it ever has before. My stringers were not mush either most of all 4 were still there. They were wet but the fiberglass was still attached in most places. It is probably just new and better materials and it just being put in, but I would like to think I helped a little as well.
|
|||
|
|||
|
Big Pappa
Senior Member
Joined: March-08-2006 Location: United States Status: Offline Points: 322 |
Post Options
Thanks(0)
Quote Reply
Posted: June-04-2012 at 7:10pm |
||
|
I am still chugging along. I have completed 2 coats of Interlux Epoxy PrimeKoat and a coat of Interlux Perfection and this is how it looks now.
  I tried a method called rolling and tipping where you roll the paint on then lightly go over that with a badger hair brush to get it to lay down smooth. Well It did not go so well with the primekoat, I got brush strokes like crazy!! The perfection laid down much better. If I were to do it again, I would just roll on the promekoat with a foam roller and let it be. Then sand it down good after the 2nd coat then roll and tip the perfection. I am going to have to do probably 2 more coats of the perfection to get rid of all the brush marks and then I will finally be done with this stinkin bilge!!  The perfection was still too soft to sand Sunday morning so I pulled out my cradle and started cleaning it up and getting it ready to be repaired. I have 2 cracks and the welds on top.   I ran over the whole thing with my DA sander to get rid of all the nasty stuff on there and so it will look better once installed. Once I get it back from being welded I will run over it with a sanding block to give it sort of a brushed look.  My plans are to finish the painting this week and be installing carpet next weekend. I have done some calling around and I can only find 1 place that caries Henry 263 and that is a special order item that will take 2 weeks to get here. I may have a place that stocks Roberts adhesives, Would their 6037 work? Roberts 6037 Or is there any other brands of glue that would work as well? |
|||
|
|||
|
C-Bass
Platinum Member
Joined: November-18-2008 Location: Columbus, IN Status: Offline Points: 1248 |
Post Options
Thanks(0)
Quote Reply
Posted: June-04-2012 at 7:15pm |
||
|
Loving the looks of that bilge. Nice work.
|
|||
|
|||
|
Waldo
Senior Member
Joined: July-09-2009 Location: Iowa Status: Offline Points: 262 |
Post Options
Thanks(0)
Quote Reply
Posted: June-04-2012 at 7:55pm |
||
|
I wish I could get my bathtub to clean up that nice.
Waldo |
|||
|
|||
|
8122pbrainard
Grand Poobah
Joined: September-14-2006 Location: Three Lakes Wi. Status: Offline Points: 41045 |
Post Options
Thanks(0)
Quote Reply
Posted: June-04-2012 at 8:26pm |
||
|
Kris,
The roll and tip works best with two people. The sooner you can tip out the rollers marks the better. But, WOW on that bilge! |
|||
|
|||
|
Big Pappa
Senior Member
Joined: March-08-2006 Location: United States Status: Offline Points: 322 |
Post Options
Thanks(0)
Quote Reply
Posted: June-05-2012 at 3:36pm |
||
Thanks!!
Thanks. I am only rolling out about 9" - 12" then tip it. The perfection lays down great, the primer was the pain in the butt!! I think if I would not have tipped that it would have laid flatter and I could have gotten away with only 2 coats of the perfection. What is done is done all I can do now is get it as good as I can in the next 2 coats and move on to the carpet. I am itching to get this boat wet next month!! |
|||
|
|||
|
Big Pappa
Senior Member
Joined: March-08-2006 Location: United States Status: Offline Points: 322 |
Post Options
Thanks(0)
Quote Reply
Posted: June-05-2012 at 3:37pm |
||
|
Anyone have any thoughts on my carpet glue question?
I have done some calling around and I can only find 1 place that caries Henry 263 and that is a special order item that will take 2 weeks to get here. I may have a place that stocks Roberts adhesives, Would their 6037 work? Roberts 6037 Or is there any other brands of glue that would work as well? |
|||
|
|||
|
Big Pappa
Senior Member
Joined: March-08-2006 Location: United States Status: Offline Points: 322 |
Post Options
Thanks(0)
Quote Reply
Posted: June-05-2012 at 5:12pm |
||
|
OK, I just called and the local place has Roberts 6040 What do you all think? It looks to be somewhat simular to the Henry 263.
|
|||
|
|||
|
8122pbrainard
Grand Poobah
Joined: September-14-2006 Location: Three Lakes Wi. Status: Offline Points: 41045 |
Post Options
Thanks(0)
Quote Reply
Posted: June-05-2012 at 5:17pm |
||
|
Kris,
I did google the Roberts. It's waterproof but is a solvent base. So, if you can handle the smell (I'm sure by now you can! ) it looks like it will work. I did read that it's good for "turf" type or rubber backed carpet.
|
|||
|
|||
|
Big Pappa
Senior Member
Joined: March-08-2006 Location: United States Status: Offline Points: 322 |
Post Options
Thanks(0)
Quote Reply
Posted: June-05-2012 at 5:26pm |
||
Henry 263 is solvent based as well isn't it? I have 3 or 4 fans all blowing out of the garage while I am messing with this stuff so it is not to bad. That plus my respirator I do not smell it at all and the smell never makes it upstairs either. |
|||
|
|||
|
sams 85
Senior Member
Joined: September-28-2011 Location: nc Status: Offline Points: 120 |
Post Options
Thanks(0)
Quote Reply
Posted: June-05-2012 at 6:50pm |
||
|
kris, how much of each paint would you say it took you to do the bilge area? it is looking good!!
|
|||
|
|||
|
Big Pappa
Senior Member
Joined: March-08-2006 Location: United States Status: Offline Points: 322 |
Post Options
Thanks(0)
Quote Reply
Posted: June-05-2012 at 7:14pm |
||
The PrimeKoat took right at 20oz total (Base, Hardner, thinner) for each coat. I used an entire Quart of the primekoat for the 2 coats in the bilge. **Side Note** it is not a quart of the base, it is a quart once you add in the hardener to the base. Thankfully I did not add in 16 oz (1/2 quart) of base like I was going to to begin with!! The Perfection went a little farther and I did a full coat on it with about 16oz total(Base, Hardner). I am still planning on 2 more coats of perfection so I will have used somewhere around 48 oz total. I bought a gallon of the perfection because I am also going to use it to paint my seat bases and the underside of the rear floor. I also will have used a quart of the 2333n brushing reducer and a quart of the 202 solvent by the time I am finished. Another side note that 202 will clean up anything, very strong solvent!! 
|
|||
|
|||
|
Big Pappa
Senior Member
Joined: March-08-2006 Location: United States Status: Offline Points: 322 |
Post Options
Thanks(0)
Quote Reply
Posted: June-07-2012 at 5:23pm |
||
|
The last couple of days I sanded my bilge down with 320 until all the brush marks were gone then last night laid on another coat of the Perfection. This time I used a tipping method I read about where you roll the paint on with a foam roller then you take another dry foam roller and roll over it lightly.
Below are the results. I am pleased. If you look closely you can see the reflection of the air tubes in the top pic.   There are still a few places where I do not have full coverage (Can see dark spots where I sanded close to through the primer) so I will have to scuff this lightly and give it one more coat tonight or tomorrow. THen this bilge will be complete, Finally!! 
|
|||
|
|||
|
storm34
Grand Poobah

Joined: November-03-2008 Location: Dexter Iowa Status: Offline Points: 4492 |
Post Options
Thanks(0)
Quote Reply
Posted: June-07-2012 at 5:33pm |
||
|
Very nice work!
|
|||
|
|||
|
C-Bass
Platinum Member
Joined: November-18-2008 Location: Columbus, IN Status: Offline Points: 1248 |
Post Options
Thanks(0)
Quote Reply
Posted: June-07-2012 at 5:40pm |
||
|
Dangit...I wish you'd quit messing with this bilge and start putting this thing back together already. You're making all of us future projects feel infererior before we even get started.
|
|||
|
|||
|
8122pbrainard
Grand Poobah
Joined: September-14-2006 Location: Three Lakes Wi. Status: Offline Points: 41045 |
Post Options
Thanks(0)
Quote Reply
Posted: June-07-2012 at 6:31pm |
||
|
|||
|
|||
|
Big Pappa
Senior Member
Joined: March-08-2006 Location: United States Status: Offline Points: 322 |
Post Options
Thanks(0)
Quote Reply
Posted: June-07-2012 at 6:37pm |
||
Thanks!!
No Worries, one more coat and I am done. I promise you there is no one who wants this boat done more than me. I took these pictures at 1:30 this morning after I finished painting. I have been up that late most every night the past 2 weeks trying to get this thing done this month. Besides since you are a future project you still have time to show me up.
|
|||
|
|||
|
Gary S
Grand Poobah

Joined: November-30-2006 Location: Illinois Status: Offline Points: 14096 |
Post Options
Thanks(0)
Quote Reply
Posted: June-08-2012 at 2:50am |
||
It's going to be a tough act to follow,it's beautiful |
|||
|
|||
|
Big Pappa
Senior Member
Joined: March-08-2006 Location: United States Status: Offline Points: 322 |
Post Options
Thanks(0)
Quote Reply
Posted: June-08-2012 at 2:34pm |
||
Thanks!!!
|
|||
|
|||
|
must_dash
Senior Member
Joined: August-27-2011 Location: Lake Maggiore, Status: Offline Points: 223 |
Post Options
Thanks(0)
Quote Reply
Posted: June-08-2012 at 2:54pm |
||
|
That's a pretty bilge... I hope your engine is as clean and polished?!?!?!?
|
|||
|
1986 Martinique - sold
When we ask for advice, we are usually looking for an accomplice. |
|||
|
|||
|
Big Pappa
Senior Member
Joined: March-08-2006 Location: United States Status: Offline Points: 322 |
Post Options
Thanks(0)
Quote Reply
Posted: June-08-2012 at 3:31pm |
||
It is not right now but I am in the process of sand blasting and painting all the small removable parts. Then cleaning the engine and painting it next as well. |
|||
|
|||
|
Big Pappa
Senior Member
Joined: March-08-2006 Location: United States Status: Offline Points: 322 |
Post Options
Thanks(0)
Quote Reply
Posted: June-10-2012 at 2:30am |
||
|
The bilge is 100% complete, Finally!!
Woo HooHere is the final product, it has a little orange peal but I am totally stoked with the way it turned out.  Today I spent the day building a sand blast/ paint booth so I do not get sand everywhere like I have been when I sand blast and I can control the air around my freshly painted parts a little better when I paint. Then I started tearing into my engine pulling everything off and started cleaning it up getting it ready for paint. No pictures of the engine and paint booth yet but I will post some soon. |
|||
|
|||
|
Post Reply
|
Page <1 56789 13> |
 Tweet
Tweet
|
| Forum Jump | Forum Permissions You cannot post new topics in this forum You cannot reply to topics in this forum You cannot delete your posts in this forum You cannot edit your posts in this forum You cannot create polls in this forum You cannot vote in polls in this forum |


 Topic Options
 baitkiller wrote: