BFN prop clearance improvement
Printed From: CorrectCraftFan.com
Category: General Correct Craft Discussion
Forum Name: General Discussion
Forum Discription: Anything Correct Craft
URL: http://www.CorrectCraftFan.com/forum/forum_posts.asp?TID=15586
Printed Date: November-26-2024 at 3:34pm
Topic: BFN prop clearance improvement
Posted By: hasbeenskier
Subject: BFN prop clearance improvement
Date Posted: October-14-2009 at 9:05pm
|
I would venture no one has ever done this before. The Wizard doing more magic.
bj ------------- hasbeenskier |
Replies:
Posted By: hasbeenskier
Date Posted: October-14-2009 at 9:06pm
 ------------- hasbeenskier |
Posted By: hasbeenskier
Date Posted: October-14-2009 at 9:06pm
 ------------- hasbeenskier |
Posted By: hasbeenskier
Date Posted: October-14-2009 at 9:07pm
 ------------- hasbeenskier |
Posted By: hasbeenskier
Date Posted: October-14-2009 at 9:09pm
 ------------- hasbeenskier |
Posted By: form&function
Date Posted: October-14-2009 at 9:09pm
| Is there a chunk of wood in the rudder port? |
Posted By: hasbeenskier
Date Posted: October-14-2009 at 9:19pm
|
The short answer is no. The rudder table on the inside was glassed over plywood, but it was removed and one inch of various layers of glass was laminated on the inside of the hull to build it up to accomodate the removal of 5/8 " on the bottom. You can see a spot where the grinder hit the new glass ------------- hasbeenskier |
Posted By: hasbeenskier
Date Posted: October-14-2009 at 9:24pm
|
The dark spot at the very back will be repaired. It is an imperfection during the original lay up. It is polyester resin spot with no glass in it.
bj ------------- hasbeenskier |
Posted By: TRBenj
Date Posted: October-14-2009 at 9:43pm
|
BJ, I meant to ask you when we spoke about this- was the main reason for undertaking this project to increase prop to hull clearance? Or do you expect some sort of handling/speed difference? Im very curious what the before/after impressions are. Im wondering if there is speed to be gained from this mod, and how it affects the wake shape!
I know this notch is what allowed the 81+ BFN's to run the 14x14 prop from the factory (79-80 shipped with 13x15's)... and even that 13" Federal was tight on our '79. The Acme's have a bit more aft rake than the older props, so the hull clearance becomes less of an issue, just FYI. We're running a 13x14 Acme now and have plenty of clearance. ------------- |
Posted By: hasbeenskier
Date Posted: October-14-2009 at 10:15pm
|
It may reduce the rooster tail a little but we do not beleive it will change the performance or handling much. Gary, (The Wizard) made the modification just to improve on the gap between the prop and the hull. A larger space between the prop and hull will minimize any vibration. The rule of thumb is: The distance between the prop and hull should be 10% of the diameter of the prop. Having the 79 and the 81 both there for comparison made it a modification easily done in an afternoon
bj ------------- hasbeenskier |
Posted By: TRBenj
Date Posted: January-09-2010 at 8:16pm
|
Bump to the top...
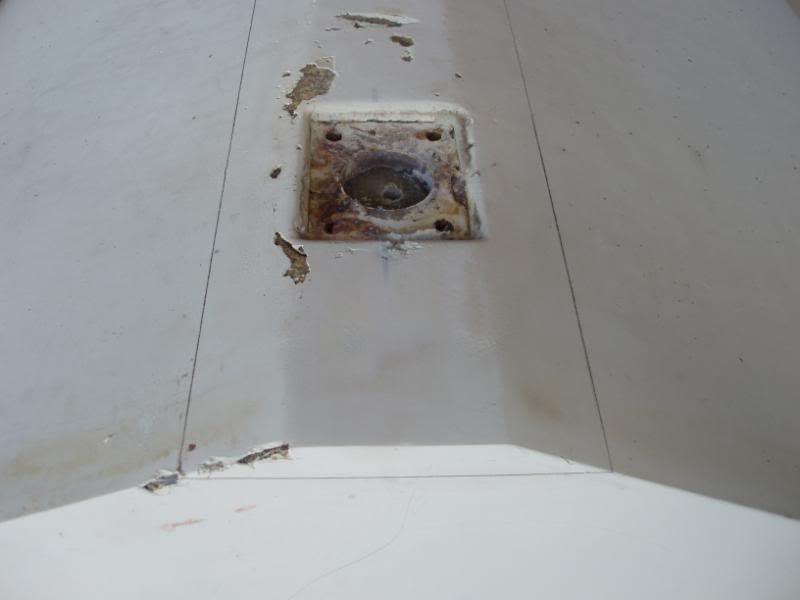
The keel on our '79 BFN aft of the strut is pretty beat up. Not sure if it was the minimal prop clearance (the original 13x15 had about 3/8") or if there had been some strike damage, but the glass is not in good shape. One of the previous owners had attached a thin piece of sheet metal to the keel between the strut and rudder port and through bolted it to the hull. Lots of chipped glass and sealant everywhere. The rudder and rudder port also have some pretty severe pitting... not sure if thats related or not. 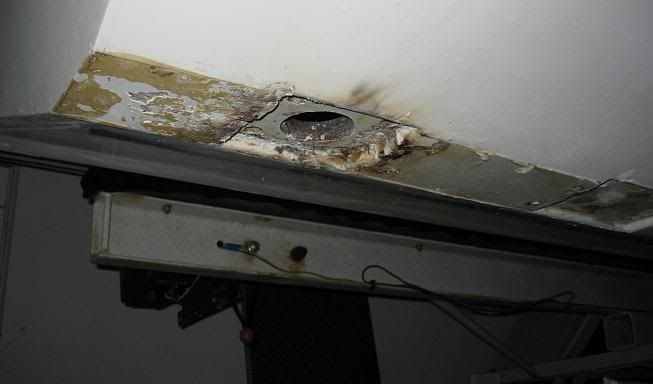
Since the inside of the boat is stripped down to the bare hull anyways, we'll be adding 5/8" worth of glass to the inside from the strut back to give us the option of notching our keel at a later date. I think it would be pretty straightforward to take 5/8" off. The big question is, how will it affect top end speed? Any speculation would be welcome. My intuition tells me that it might be like a smaller version of a stepped hull (a la X-55, etc), so if anything, there might be a small gain. So long as no one thinks the mod will result in a speed loss, I think we will probably undertake it this summer. ------------- |
Posted By: TRBenj
Date Posted: January-24-2016 at 11:03am
|
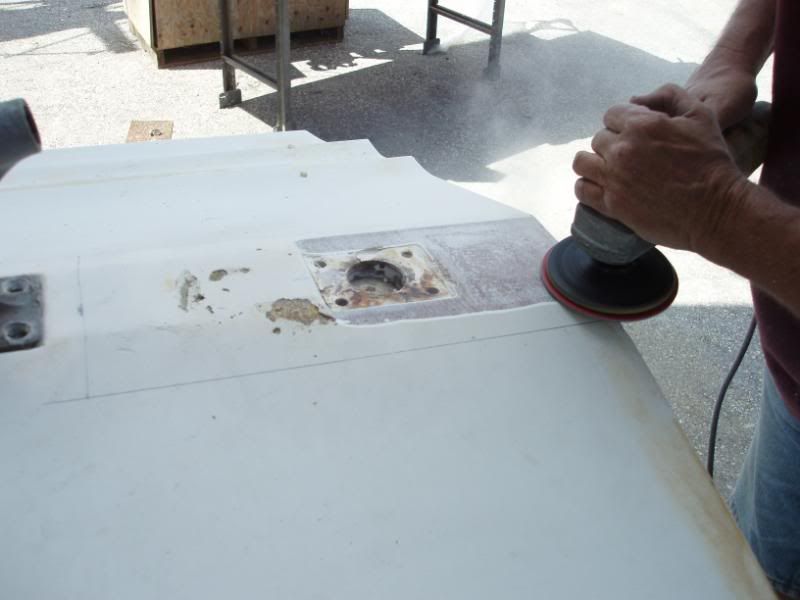
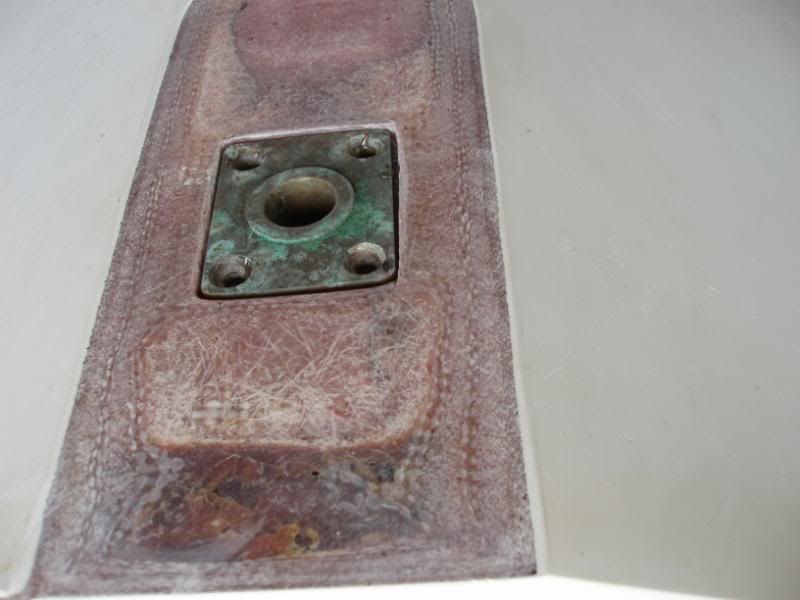
A few years later and I've finally decided to go for it on this "notched keel" mod. Again, all 81-90 direct drive BFN's got notched keels from the factory, as did all of the v-drive excel/bfn's 91-94. I think the primary purpose of the notch was to increase prop clearance. The original 13" diameter Federal was very tight (<1/2" hull clearance) on our '79 (pre-notch) BFN. Later (notched) BFN's ran 14" diameter props. Last "before" shot: 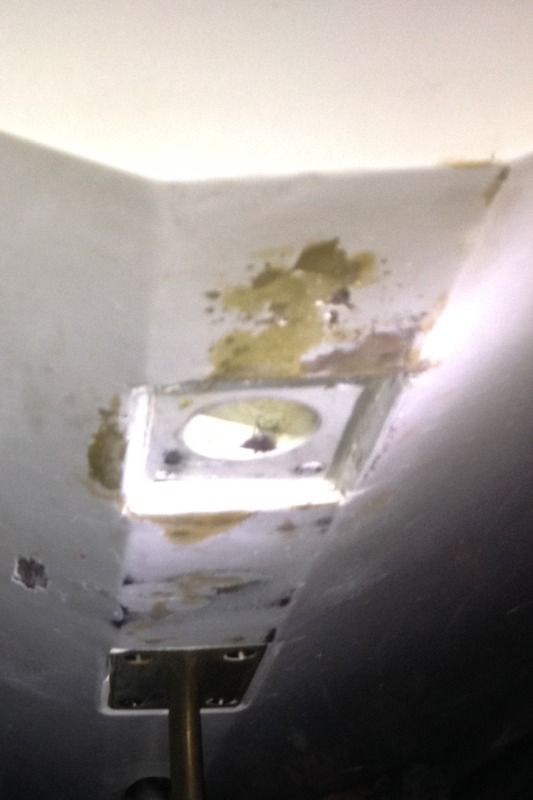 Marked at 1/2": 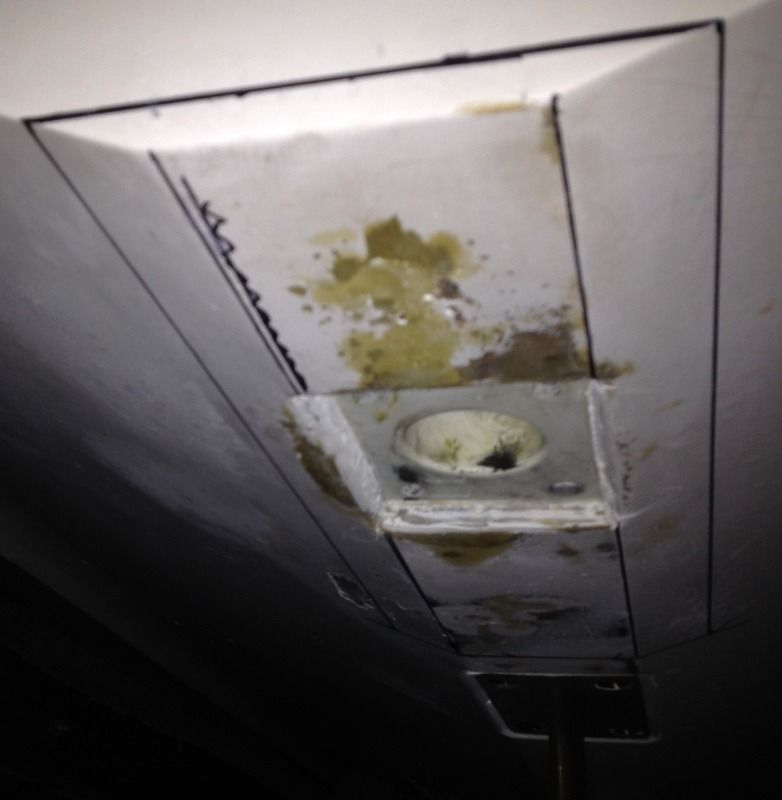 Notched: 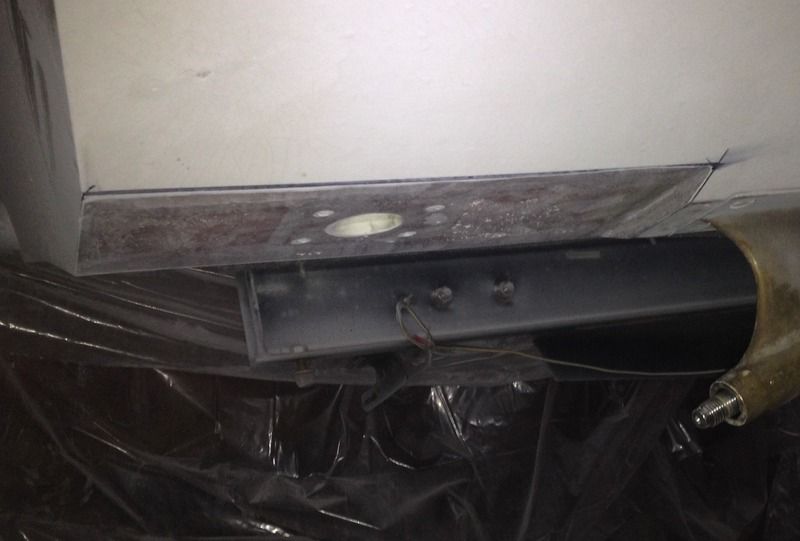 I started out with my HF power planer, but that was a little slow going even set at max depth... Probably due to the abuse its suffered. Then it died, so onto plan B- 40 grit flap discs on my angle grinder. Made a huge mess (dust) but took that 1/2" of thickness off quickly. Still need to smooth with a block and then fill in any remaining low spots... Then it'll be time to cut the recess for the rudder port. I have a good router, but any thoughts on specific bits, or how to make and attach a jig would be appreciated. Otherwise I'll be free handing it and then touching it up with thickened resin afterwards. I am eager to see the differences in the boat's performance afterwards... My main hope is that this improves steering effort at speed. Even after taking all the weight out of our 79, converting to a new "2001" style long-travel steering cable and trying 2 different 11a rudders, it still takes significant effort (sometimes 2 hands) to crank the wheel over at higher speeds- the faster you go, the harder it is to crank over. Pinky finger easy at idle, so there is something else at play. Other early (pre-87) BFN's turn much easier, so I'm hoping that raising the rudder 1/2" or so changes that dynamic. Other wish-list improvements would be a wake improvement (less washy lip) and an improvement (or at least no detriment) to top end speed. We shall see. |
Posted By: TRBenj
Date Posted: January-24-2016 at 11:12am
For reference, here is a stock notch (87 BFN):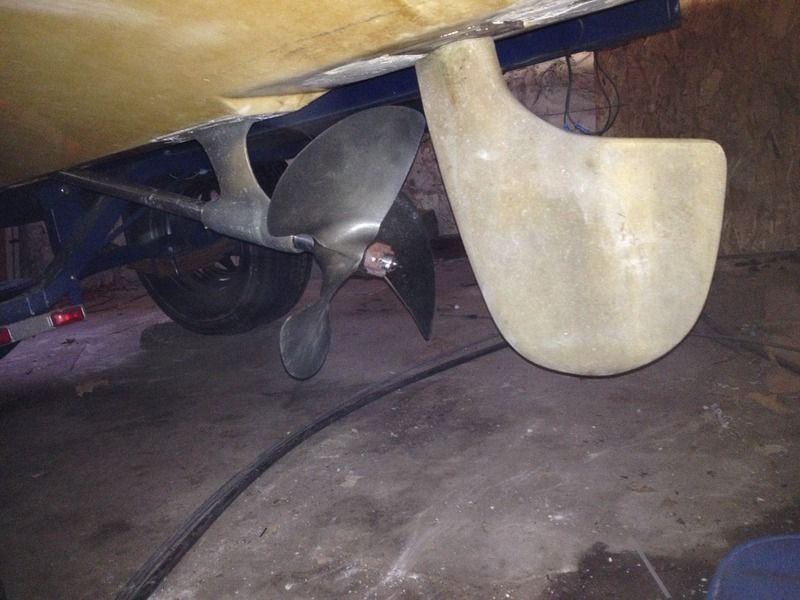
|
Posted By: Riley
Date Posted: January-24-2016 at 11:19am
| I'm having a bit of a hard time understanding this, but by removing the built up section for the rudder port notch, is the rudder port now not recessed? |
Posted By: 8122pbrainard
Date Posted: January-24-2016 at 11:30am
|
Tim, Looking great. For the routing of the rudder port, make a rectangular cut out in a piece of at least 1/2" ply. Size the cut out the size of the port plus the distance from the cutter to the router base. Screw it in position and fill the holes later. A ball end straight cutter would be my choice since it will leave a radius in the bottom of the recess. A plunge base router would be ideal but if your router doesn't have one, just angle the router into the template and cut. ------------- /diaries/details.asp?ID=1622" rel="nofollow - 54 Atom /diaries/details.asp?ID=2179" rel="nofollow - 77 Tique 64 X55 Dunphy Keep it original, Pete < |
Posted By: TRBenj
Date Posted: January-24-2016 at 1:12pm
|
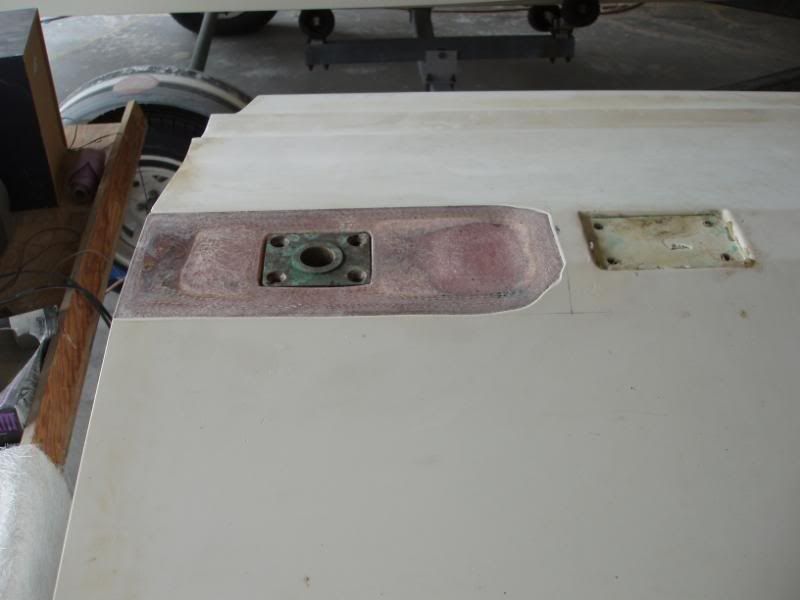
Correct Bruce... I still need to re-cut the recess for the port. Like this Pete? 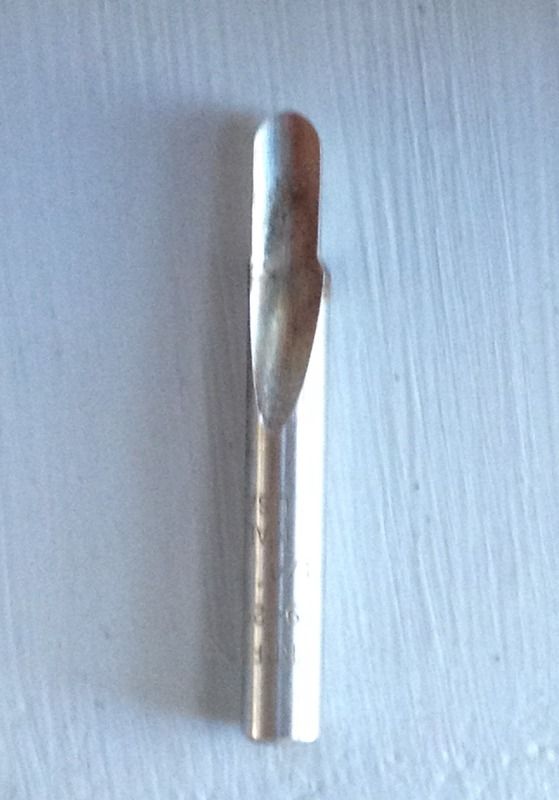
|
Posted By: 8122pbrainard
Date Posted: January-24-2016 at 1:31pm
|
Tim, That will do it although a multi fluted cutter would cut cleaner but then you will be going over the cut with resin so the single flute will work. It will leave ridges in the bottom next to the base of the port. They could be ground down or filled. You could also make a finish cut with a square end straight cutter but that would require another ply template. ------------- /diaries/details.asp?ID=1622" rel="nofollow - 54 Atom /diaries/details.asp?ID=2179" rel="nofollow - 77 Tique 64 X55 Dunphy Keep it original, Pete < |
Posted By: TRBenj
Date Posted: January-24-2016 at 2:37pm
|
Pete, I am not up speed on the terminology you're using... Got a link that explains the basics? Or pics of a "multi flute" cutter? Google image search results aren't consistent. I think I'm getting the gist though... I'll bring the port home, make a jig or 2 and make a few practice cuts with the router once I get it back. I'll probably need new bits so feel free to recommend some, else I'll swing by HD and see what they have. |
Posted By: 8122pbrainard
Date Posted: January-24-2016 at 3:37pm
|
Tim, Here's just a straight square bottom router bit:  This is the one you would use to flatten out the bottom after using the radius bit. Do the radius first. With lots of passes, the bottom may be smooth enough and only need some going over with some rough sand paper. ------------- /diaries/details.asp?ID=1622" rel="nofollow - 54 Atom /diaries/details.asp?ID=2179" rel="nofollow - 77 Tique 64 X55 Dunphy Keep it original, Pete < |
Posted By: 8122pbrainard
Date Posted: January-24-2016 at 3:51pm
|
Tim, I only mentioned a radius in the bottom of the pocket because it's common practice to reduce a stress point from a sharp corner by using a radius. The pocket would need to be oversize so the port base doesn't hit the radius. The gap can then be filled in with bedding compound (4200). ------------- /diaries/details.asp?ID=1622" rel="nofollow - 54 Atom /diaries/details.asp?ID=2179" rel="nofollow - 77 Tique 64 X55 Dunphy Keep it original, Pete < |
Posted By: Duane in Indy
Date Posted: January-24-2016 at 3:52pm
Make life a little easier with one similar to this. ------------- Keep it as original as YOU want it 1978 Mustang (modified) |
Posted By: Gary S
Date Posted: January-24-2016 at 5:14pm
Looking at that picture Tim and wondering if you have the engine or trans out by the looks of that shaft? Sure must be hard with all the dust and the position you have to be in to get this done. Seem to remember you reinforced that area with this in mind when you replaced all the stringers too. Nice winters project. ------------- http://www.correctcraftfan.com/diaries/details.asp?ID=1711&sort=&pagenum=1&yrstart=1966&yrend=1970" rel="nofollow - 69 Mustang HM SS 95 Nautique Super Sport |
 TRBenj wrote:
Posted By: DrCC
Date Posted: January-24-2016 at 5:28pm
|
I like BJ's idea of the gradual or radiused notch behind the strut. Seems like it would be less likely to create an air pocket. edit: Didn't mean to make it sound like I was discrediting Tim's work. In fact all you guys doing these experimental hull mods deserve a huge round of applause. |
Posted By: 8122pbrainard
Date Posted: January-24-2016 at 5:47pm
Tim mentioned the steps in the X55 which are right angled to the bottom as well. They, just like steps on a hydro or the stepped racers back in the 20's and 30's, increase speed by reducing drag on the hull bottom (air). But, there is a drawback at least on the X55. The rudder will cavitate at about 80% throttle making a turn to port. The boat flattens out, heads straight ahead and does not respond to the rudder position. Scary and the only thing to do is chop the power. When our ski club had the stripped down X, we actually have to reverse the show course from counterclockwise to clockwise!! ------------- /diaries/details.asp?ID=1622" rel="nofollow - 54 Atom /diaries/details.asp?ID=2179" rel="nofollow - 77 Tique 64 X55 Dunphy Keep it original, Pete < |
Posted By: storm34
Date Posted: January-24-2016 at 8:07pm
|
Nice work Tim! ------------- |
Posted By: TRBenj
Date Posted: January-24-2016 at 10:33pm
Gary, that's what minimizing strut to prop clearance looks like. Actually, the trans is wintering in the Finger Lakes as it was popping out of gear and slipping under load (again). Still awaiting Dr Joe's diagnosis, but it may be necessary to go to a 10-18 if the 72c can't be saved. Al, I should have reviewed this thread before I made my cut, it looks like BJ stopped his notch well short of the factory version and sloped it more gradually. My intention was to put the hard 90 step in the same place the factory started the slope (in effect, leaving extra material on the hull), thus giving myself the option to soften that feature later. it sounds like cavitation and rudder stall may be the downsides to look out for. Indeed, I had the stepped hull feature on the brain when I decided to go sharp. Seems some hull features are most effective (less sticky) when sharp... Maybe this particular feature is not a good candidate for that line of thinking. We shall see. I have other hull mods in mind and this hull is no show winner anyways... So it won't be getting any finishing touches (ie, gelcoat) anytime soon. Plenty of opportunities to make more changes if need be. I spent some time on my back today with a block and 60 grit paper trying the get the area smoother... I'm still not there. More aggressive paper would be helpful, I may order some. Sanding upside down with dust raining down on you sucks, I'm ready for this project to be over! I did discover a bit of delam on one edge of the notch, so the grinder will have to come back out. One step forward, 2 steps back it seems, ha. |
Posted By: backfoot100
Date Posted: January-25-2016 at 9:30am
|
All I can say is WOW!!!!! Outstanding work but something I don't think I could bring myself to undertake. Very interesting to follow along on this one. ------------- When people run down to the lake to see what's making that noise, you've succeeded. Eddie |
Posted By: 8122pbrainard
Date Posted: January-25-2016 at 9:59am
 Eddie, But you did such a fantastic job on the AS cradle!! ------------- /diaries/details.asp?ID=1622" rel="nofollow - 54 Atom /diaries/details.asp?ID=2179" rel="nofollow - 77 Tique 64 X55 Dunphy Keep it original, Pete < |
Posted By: Hollywood
Date Posted: January-25-2016 at 12:03pm
Instead of a router bit you might want to look for a https://www.forneyind.com/store/detail/713/micro-abrasives_shank_mounted_rasps_rotary_files/5696/rotary_file_12_x_14_ball_shaped_carded/" rel="nofollow - rotary file $4.99. IMO better suited for the application and also much cheaper than router bits.  |
Posted By: 8122pbrainard
Date Posted: January-25-2016 at 12:12pm
|
Tim, I don't like Kevin's idea (sorry Kevin) using the rotary files. They won't take enough off in one pass. You may get about .020" with each cut so it would take many passes to get the roughly 3/8" deep pocket. It's as you know a real PITA working overhead. Holding that router for about 20 passes may get tough! ------------- /diaries/details.asp?ID=1622" rel="nofollow - 54 Atom /diaries/details.asp?ID=2179" rel="nofollow - 77 Tique 64 X55 Dunphy Keep it original, Pete < |
Posted By: TRBenj
Date Posted: January-25-2016 at 12:33pm
|
Seems like the rotary file may be a better fit for the material (it says it works for fiberglass) but not for the tool... 2500rpm max speed must be for a drill? My router's range is 8000-25000rpm. I may have to go with router bits like Pete suggested. Pete, the 5200 I had filling the recess around the edges of the strut and rudder did not hold up well. At least half of it was gone after just a few years. I will add some small radiuses to allow for fitment and stress reduction but I plan to make this recess as tight as I possibly can. Smoothing the flow of water in this area of the hull can only help things, especially at the uncharacteristic speeds this boat is capable of. Oh, and thanks Eddie. I guess the fear of breaking something is significantly reduced when you feel like you can probably fix it afterwards. 
|
Posted By: Hollywood
Date Posted: January-25-2016 at 12:45pm
i keep thinking this is a banana boat 
|
Posted By: TRBenj
Date Posted: February-01-2016 at 4:29am
I finally got the notch reasonably flat, so I commenced grinding out a few small problem areas. I opened up a few voids and tackled an area of disbonded glass on the stbd side. 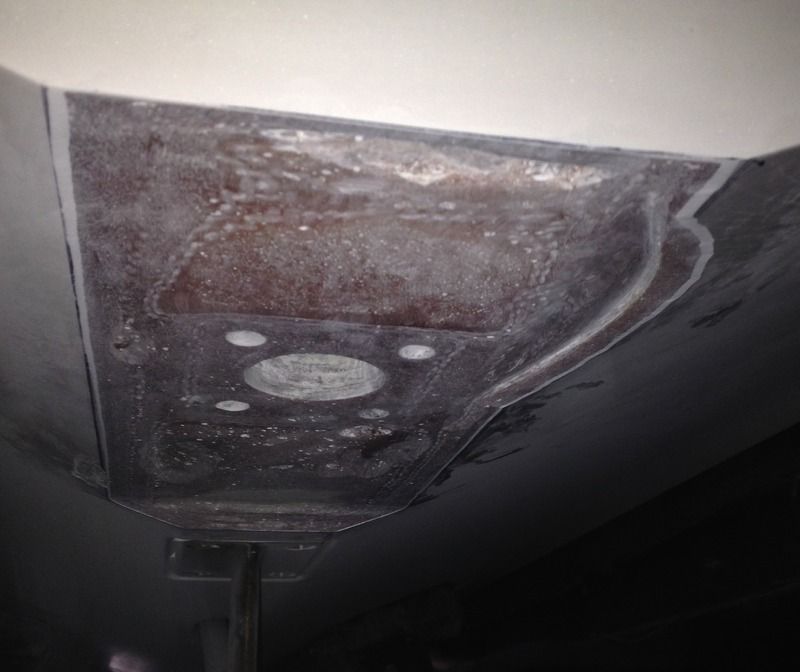 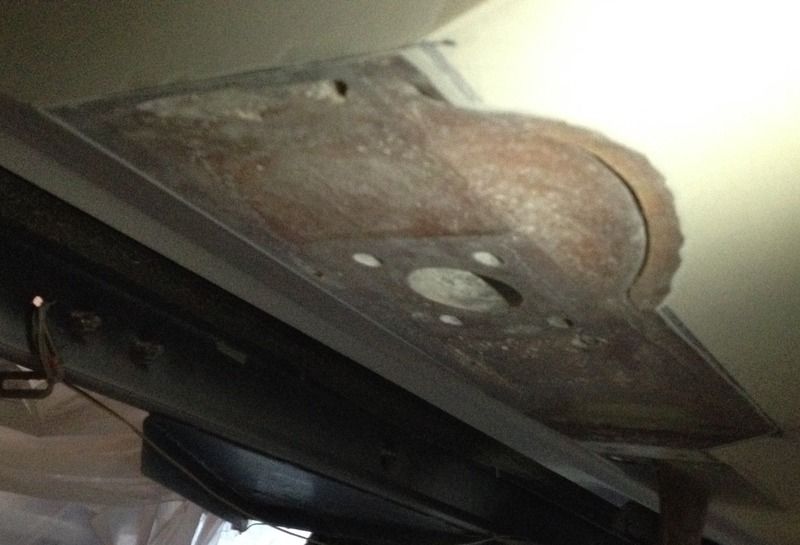 The disbonded layers actually continued further than I was willing to grind- I got it to the point where it felt semi-solid and then cut a groove along the disbonded seam. This groove got filled with thickened resin and then the span was glassed with 3 layers. I filled a little more on top of that. It'll take more filling and shaping (as will a few other voids I filled) but it should be solid now. 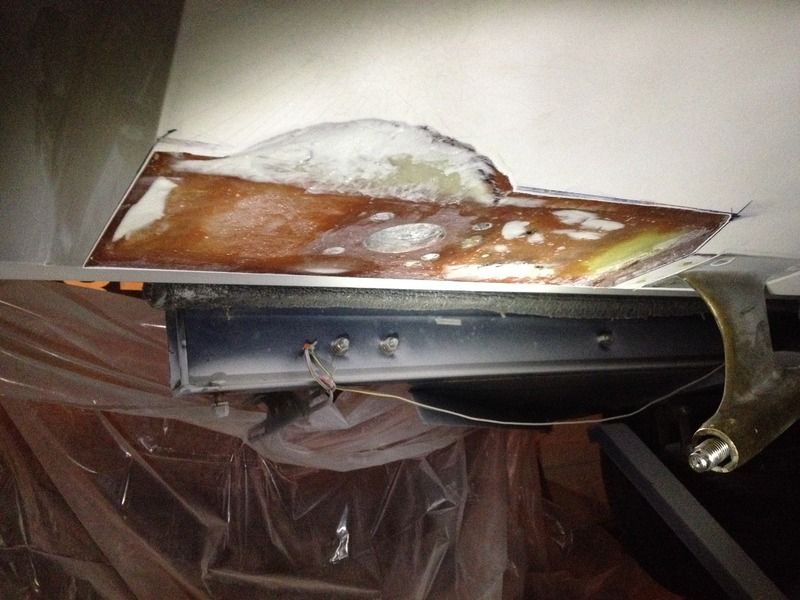 In this pic, you can see towards the front of the notch where the material that was removed extends all the way through the original hull glass and into the new (epoxy based) layers that were added to the inside of the hull. Once I have the hull back in shape and smoothed out, it'll be time to cut the rudder port recess. |
Posted By: TRBenj
Date Posted: February-03-2016 at 2:41pm
I went digging through some old pics and think I found evidence of the delam I encountered on the underside.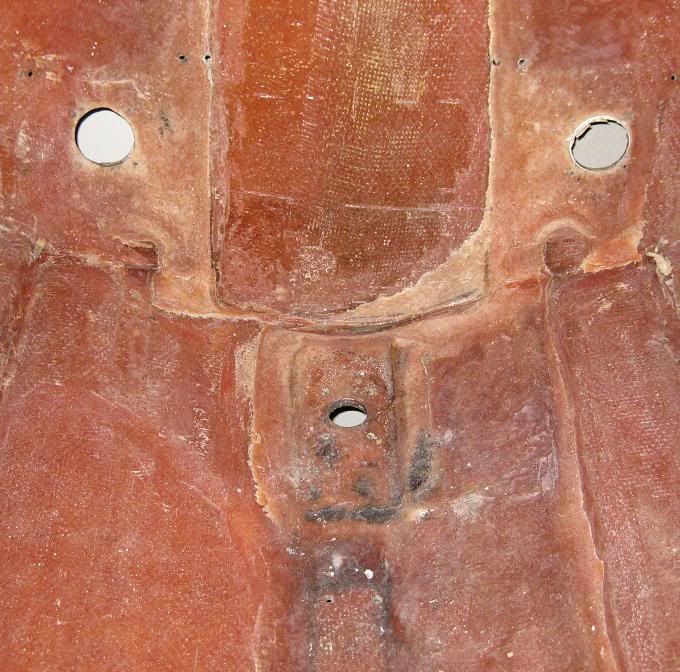 Wish I had dug a little deeper back then! This shows where we built up the inside of the hull to accommodate the notch: 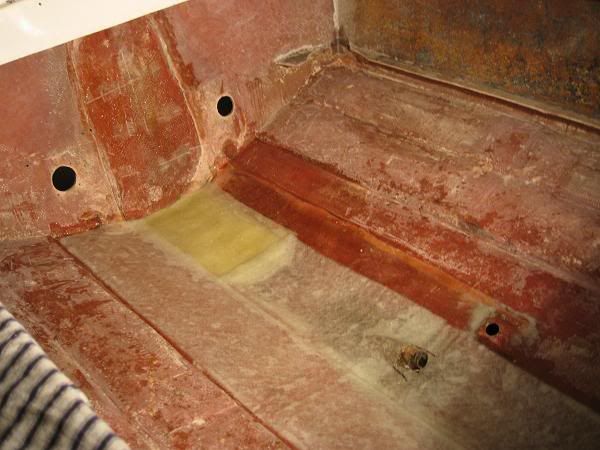
|
Posted By: Hollywood
Date Posted: February-03-2016 at 2:44pm
| Eh, there's delam all over these old boats. If you tried to grind it all out you'd be left with swiss cheese. |
Posted By: TRBenj
Date Posted: February-03-2016 at 2:53pm
| True, you may not be able to address it all... But in this particular area where we knew there was a good chance we'd be grinding on it again, I wish we had done a little more from the top side when we had the chance. The logistics of adressing it from underneath are kinda sucky. |
Posted By: Duane in Indy
Date Posted: February-03-2016 at 3:52pm
|
Nice work Tim, had to be fun grinding over head. Good for building biceps!! Are you planning on spotting in the gel coat or more extensive? ------------- Keep it as original as YOU want it 1978 Mustang (modified) |
Posted By: TRBenj
Date Posted: February-03-2016 at 4:51pm
| Short term (for this coming season), no gel work planned... It'll be run bare for evaluation purposes. That will make any required tweaks easier. I also have a few other hull mods planned, so once I'm happy with the way it runs, I can hit them all with gel at the same time. It might be a while, ha. |
Posted By: Hollywood
Date Posted: February-03-2016 at 5:06pm
| raw dog |
Posted By: lewy2001
Date Posted: February-03-2016 at 7:57pm
"Rat Nautique" ------------- If you're going through hell, keep going http://www.correctcraftfan.com/diaries/details.asp?ID=2999" rel="nofollow - 89 Ski <a href="http://www.correctcraftfan.com/diaries/details.asp?ID=5685" ta |
Posted By: TRBenj
Date Posted: March-25-2016 at 7:37pm
|
Slow but steady progress on this project... Lots of iterative filling and sanding, and epoxy dries slowly in the winter. I finally got to the point where I was happy with the keel shape. 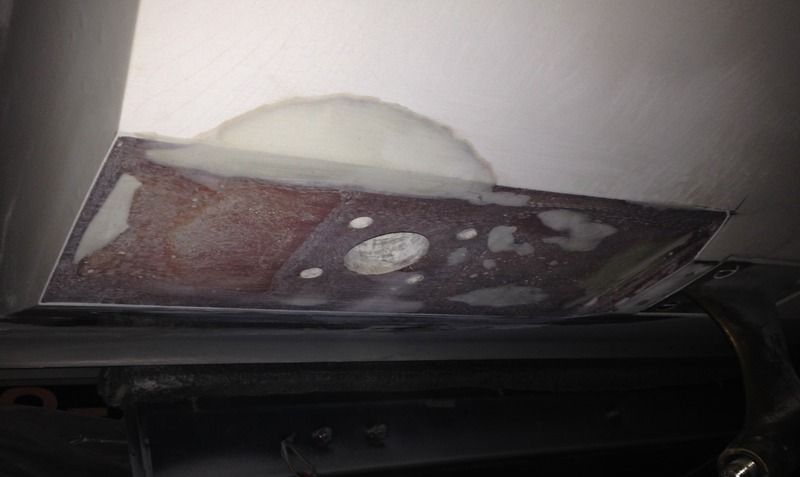 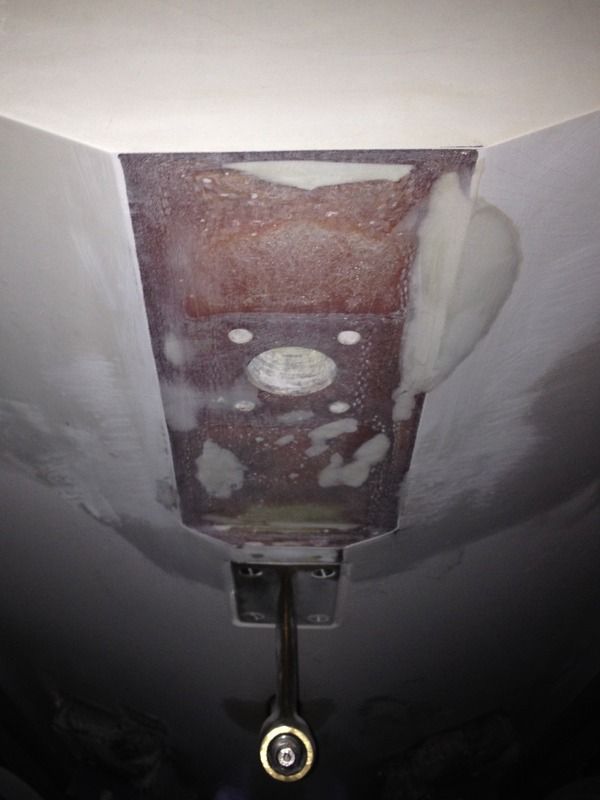 Today I made a jig for the rudder port recess and gave it a test cut. I think it's ready for prime time. 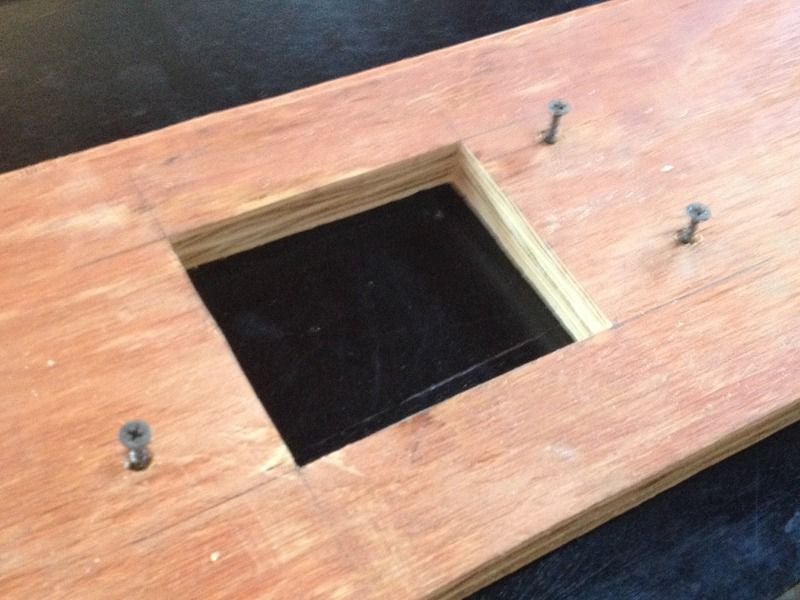 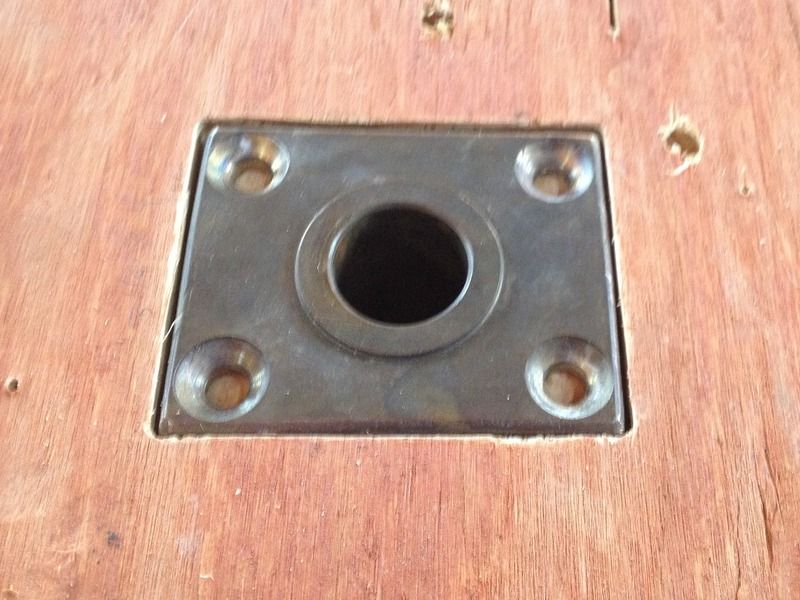 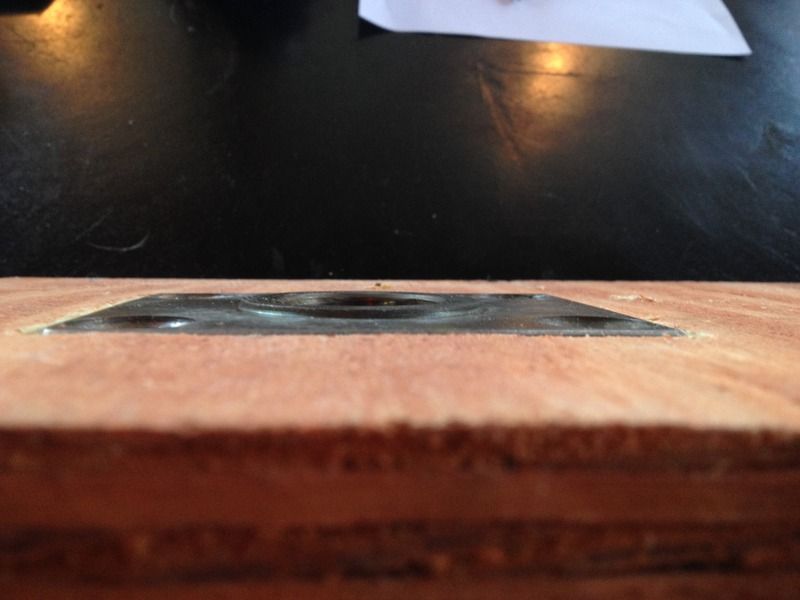 |
Posted By: TRBenj
Date Posted: March-27-2016 at 11:01pm
Apparently dull router bits still cut wood just fine... But they don't cut fiberglass worth for sht. Struggled for a while then sprung for new bits once I broke the first... Night and day difference. New bits made short work of the recess.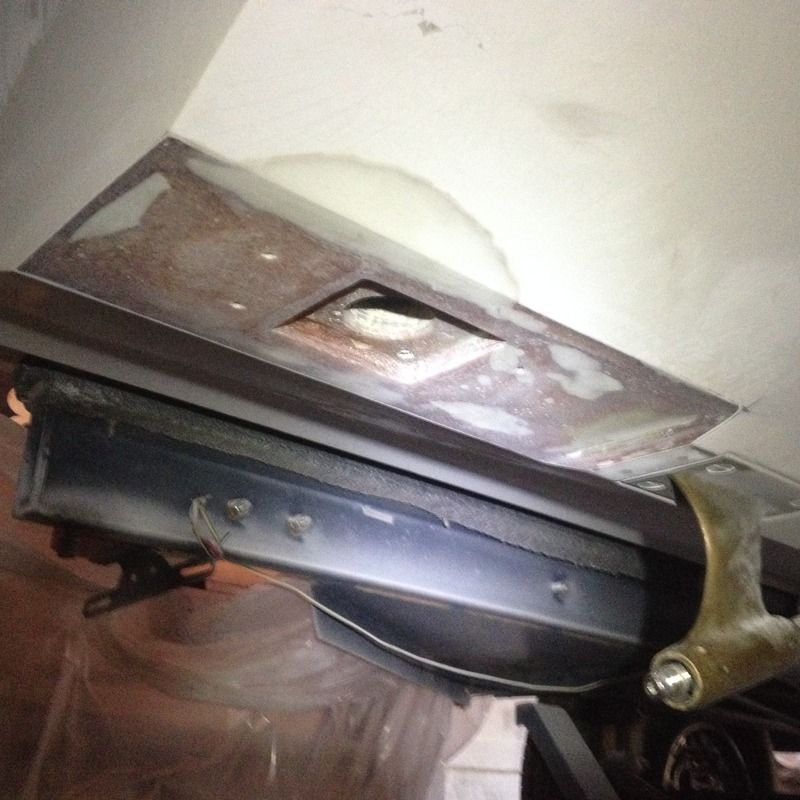 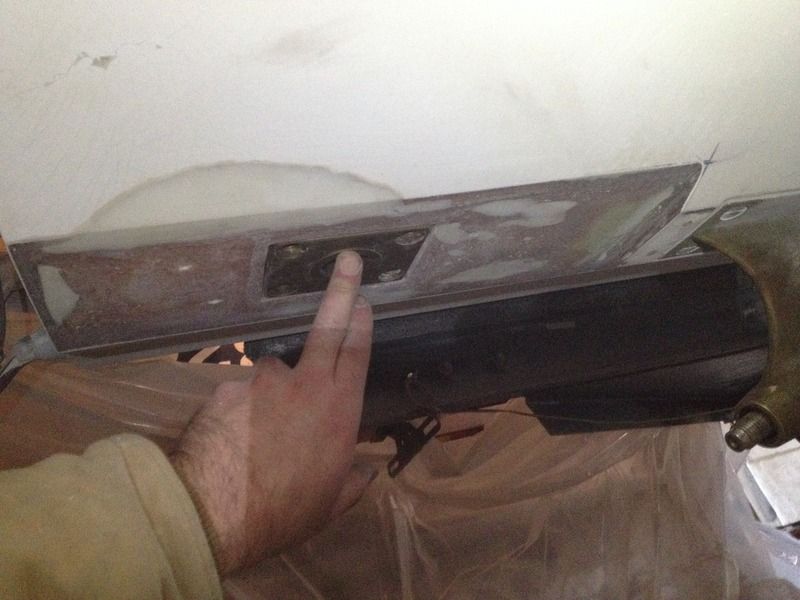 I filled a few voids found after cutting as well as the holes left by the jig... One more finish sanding and I hope to be done. I plan to leave the keel bare (glass) for the summer while I verify performance... But I am debating throwing some gel under the port. Any thoughts/comments on that? |
Posted By: JDD33
Date Posted: March-27-2016 at 11:38pm
|
I think you should gel under and around the port now. Even if you decide to make more modifications to the area later, removing the sealing/bedding compound (4200?) from the raw fiberglass would be a nightmare! Then would the gel stick? At least if you get some smoothish gel in there now cleanup of that bedding compound would be easier and not risking an adhesion problem later. If you decide on more mods. ------------- Old school goin back to school! |
Posted By: Gary S
Date Posted: March-27-2016 at 11:57pm
|
Got any gel? You'd hate to buy some for that small use. Maybe get some from spectrum in that little 2oz container in as close of color as you can get and just brush it on. ------------- http://www.correctcraftfan.com/diaries/details.asp?ID=1711&sort=&pagenum=1&yrstart=1966&yrend=1970" rel="nofollow - 69 Mustang HM SS 95 Nautique Super Sport |
Posted By: TRBenj
Date Posted: March-28-2016 at 12:41am
|
That was my thinking john... I don't plan to buff the gel out or anything though. Not sure if rough-ish gel will be any better or worse than (relatively smooth) bare glass. Definitely only using a sealant this time (4200 or boatlife caulk) and not a strong adhesive (5200, etc). I have some gel in dads basement Gary... It's a few years old but I suspect it's fine based on your experience. Definitely just brushing. |
Posted By: 8122pbrainard
Date Posted: March-28-2016 at 6:42pm
Looking great Tim.  ------------- /diaries/details.asp?ID=1622" rel="nofollow - 54 Atom /diaries/details.asp?ID=2179" rel="nofollow - 77 Tique 64 X55 Dunphy Keep it original, Pete < |
Posted By: TRBenj
Date Posted: April-10-2016 at 10:01am
Another round of filling/smoothing done and I put some gel in the recess. The 2-3 yr old (unopened gel) separated and I couldn't get it reconstituted.... But the 5 yr old stuff that I had tinted for the seat pedestal and stored in a sports water bottle seemed a little better. It had thickened significantly but some thinning with acetone made it workable again. Added more wax (couldn't remember if I had added any when it was mixed), and went for it. We'll see if it sets up.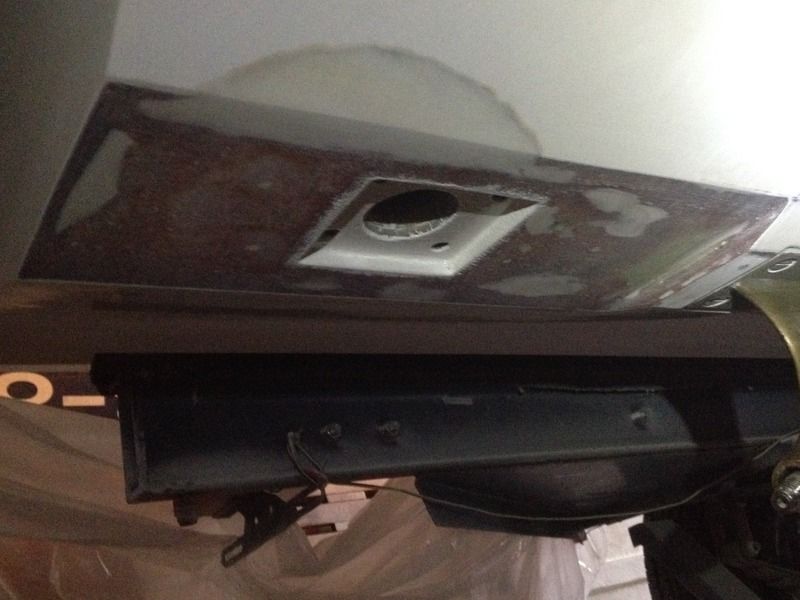
|
Posted By: JDD33
Date Posted: April-10-2016 at 10:41am
|
Looks good Tim! Will it be ready for next weekend? ------------- Old school goin back to school! |
Posted By: TRBenj
Date Posted: April-10-2016 at 10:50am
| Ha, no. This is one of many projects this spring. Aiming for 4th of July. |
Posted By: TRBenj
Date Posted: November-02-2016 at 8:34am
The engine rebuild and other projects derailed the bfn's return to the water this summer but things are still moving forward. The gel got an extended time to cure (jury is still out on the gel integrity) but we buttoned up the port and rudder install a few weeks ago. This project can be checked off the list... For now.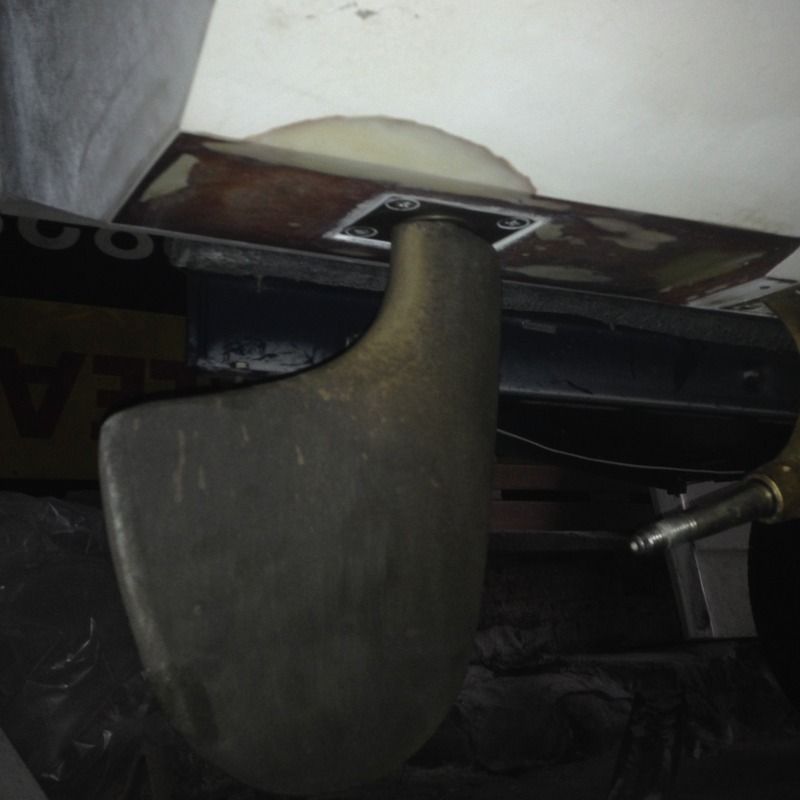 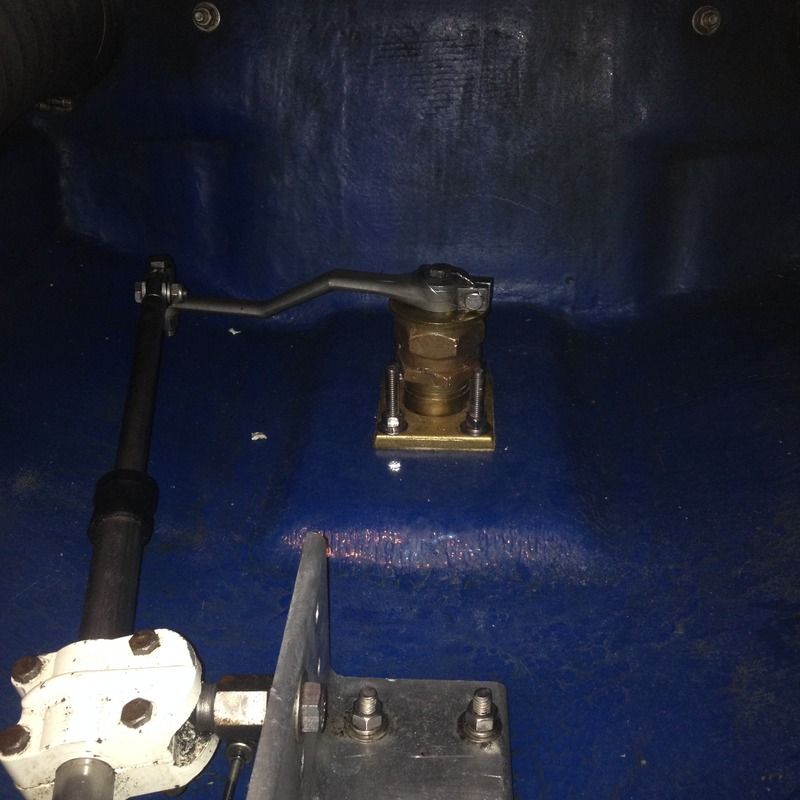
|
Posted By: Riley
Date Posted: November-02-2016 at 8:51am
| Is that clamp support from a Malibu? |
Posted By: TRBenj
Date Posted: November-02-2016 at 8:56am
| Heck no. |
Posted By: Riley
Date Posted: November-02-2016 at 9:03am
| I've not noticed that a BFN is clamped at the strut, but that is how Malibu does it. |
Posted By: 8122pbrainard
Date Posted: November-02-2016 at 9:10am
Bruce, Malibu copied the method from CC! ------------- /diaries/details.asp?ID=1622" rel="nofollow - 54 Atom /diaries/details.asp?ID=2179" rel="nofollow - 77 Tique 64 X55 Dunphy Keep it original, Pete < |
Posted By: Riley
Date Posted: November-02-2016 at 9:16am
| Ha, when did CC start doing it that way? |
Posted By: Hollywood
Date Posted: November-02-2016 at 10:56am
|
1989 You're not crazy though Bruce the [DD] BFN always had it bolted through the stringer like old CCs. |
Posted By: Riley
Date Posted: November-03-2016 at 10:37am
That would be the year they went to single exhaust and they must have put the exhaust in the bilge? That is why Malibu has always done it that way. No room to attach to stringer. |