The Liquid Stringer Project
Printed From: CorrectCraftFan.com
Category: Repairs and Maintenance
Forum Name: Boat Maintenance
Forum Discription: Discuss maintenance of your Correct Craft
URL: http://www.CorrectCraftFan.com/forum/forum_posts.asp?TID=21958
Printed Date: November-19-2024 at 1:35pm
Topic: The Liquid Stringer Project
Posted By: Tim D
Subject: The Liquid Stringer Project
Date Posted: June-04-2011 at 2:14am
|
Well, I told a couple of guys about this technique at the White Lake Mini. A friend of mine wanted me to fix the floor in his Mustang 17. It was cracked under the front seat area and over the drive shaft. After I cut the fiberglass floor out, and got the pylon out, I found that the driver side stringer was rotted out. A previous owner actually sprayed some Great Stuff foam down around the pylon cross member to hide the missing wood where it overlapped the stringer. What caused the rot is the gel and mat was broken off the stringer almost to the bottom of the bilge, I guess when they installed the "higher than the windshield" pylon. The other side was fine, nothing chipped off and the stringer was solid. I told the owner about the discovery and told him there was a expensive way and a cheaper way. He decided to go the cheaper way. I wish I took a pic of stringer before I started digging it out. So I cut the top off in sections and stayed away from the motor and tranny mounts and pulled the wood out. Also, the stringers in this boat are not like my '66 mustang. The mat is only on the bilge side and top. No mat on the foam side, just resin. Also, just in front of the pylon, the outside of the stringer didn't have any resin in a one foot section, I could see the wood grain in the foam.
Here's where the pylon attached to the stringer, missing gel and mat. The foam was bone dry on the back side, you can see where I dug to the bottom. 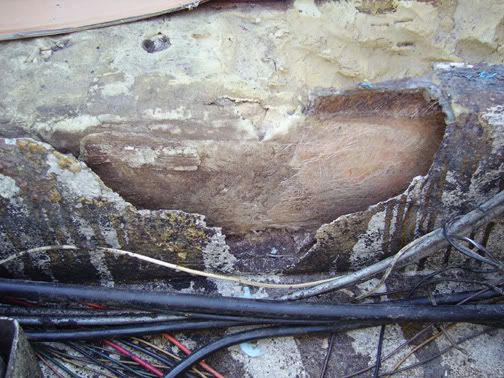
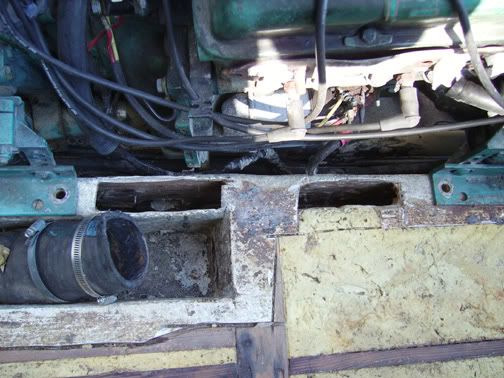
I used Seacast, a five gallon bucket of resign and chopped fiber. I put cardboard against the missing gel area and filled it. It took about 45 minutes before this stuff started getting hot and harden. I tried to peel the cardboard off, but it was really stuck, you can see one clean area. The Seacast has a pink color. This pick was after I grinned it down so the pylon cross member would fit correctly. 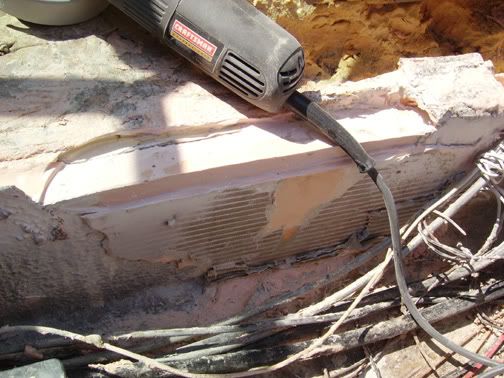 ------------- Tim D |
Replies:
Posted By: Swatkinz
Date Posted: June-04-2011 at 12:02pm
|
i will look forward to seeing how this works out. Perhaps this could be an option to the more invasive total rebuild that has been so well documented here. ------------- Steve 2011 Sport/Air 200 Excalibur 343 2017 Boatmate Tandem Axle Trailer Former CC owner (77, 80, 95, 88, all SNs) Former Malibu owner (07, 09) |
Posted By: Tim D
Date Posted: June-22-2011 at 6:09pm
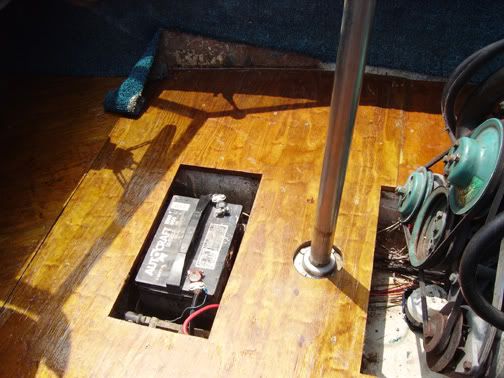
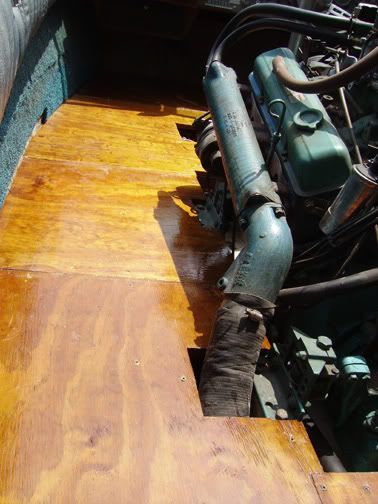
I didn't mention it above, but the 1st and 3rd photos are the same spot, before and after. Got the floor and carpet done.
  ------------- Tim D |
Posted By: john b
Date Posted: November-02-2011 at 12:11am
|
I too have heard good things about Seacast from a few who have used it on another sitei used to frequent, however it doesn't sound any easier or less expensive than installing traditional wood stringers. As I understand it, it is not intended to patch a rotten spot, which would only compromise the structure at the joint between the Seacast and the wood. It is intended to be poured into the springer cavity, after all of the wood is removed and the cavity is cleaned, in one pour to create a monolithic structure. Although I am only going on what others have posted about their experience, it sounds rather difficult to accomplish the task correctly since the stringers on many boats are not flat across the entire length of the top. Coosa or wood on the other hand can be cut and fitted carefully taking time to get it perfect.
Most of the YouTube stuff looks like co. promotions. |