68/69 Mustang Resto
Printed From: CorrectCraftFan.com
Category: General Correct Craft Discussion
Forum Name: General Discussion
Forum Discription: Anything Correct Craft
URL: http://www.CorrectCraftFan.com/forum/forum_posts.asp?TID=23737
Printed Date: November-19-2024 at 2:36pm
Topic: 68/69 Mustang Resto
Posted By: mountaineerminer
Subject: 68/69 Mustang Resto
Date Posted: October-04-2011 at 1:42am
|
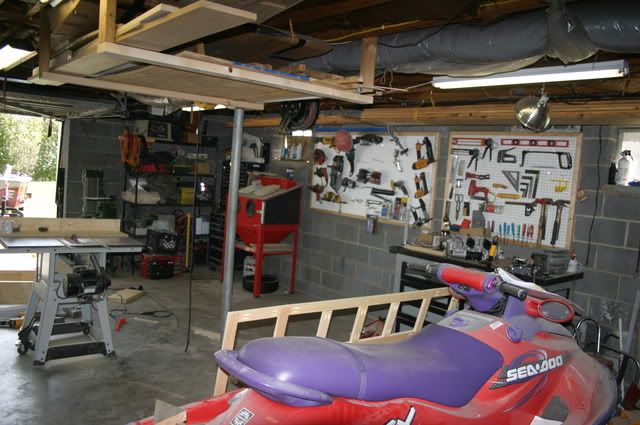
Well, I haven’t made as much progress on the Mustang as I wanted too, but I have been busy getting the garage ready to stuff a boat into it for my winter project.
Here are a couple pics of the garage after 2 weeks of cleaning and finishing projects (massive bolt rack)… 
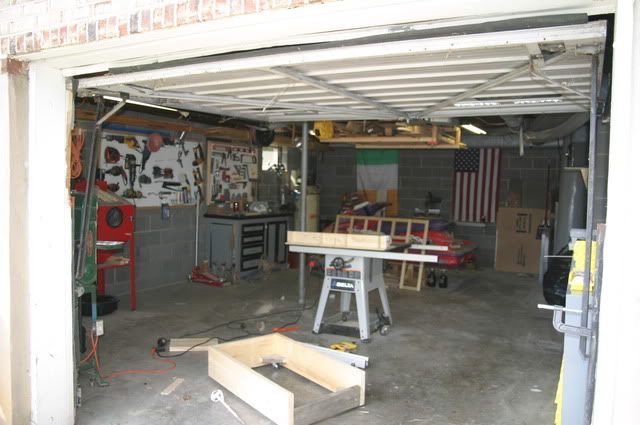
I also managed to build a motor stand and yank the motor out on Sunday… 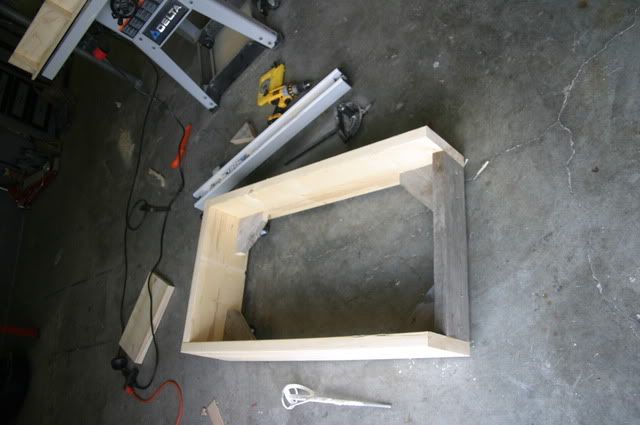
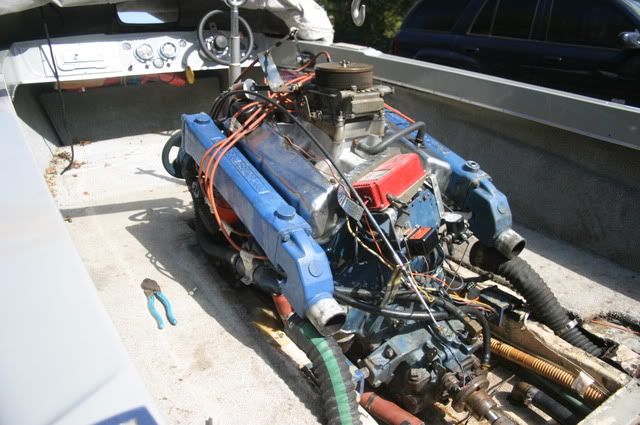
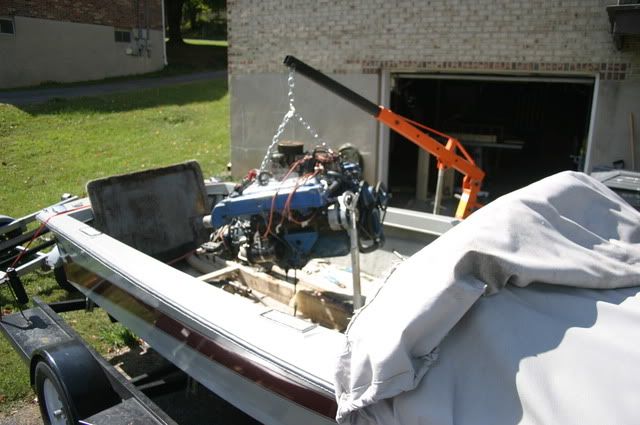
Tonight I pulled up the poorly executed deck replacement; it only took about 30 seconds… 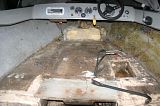
I also started removing the venting and wiring from the hull. I them removed the throttle and trans cables from the Morse controls. Can anyone give me a tip on removing the Morse controls themselves? I took the 3 bolts out, but I assume I need to remove something from the back as well??? I have no idea what is wrong with the first and last pic, I have had problems with this site and photobucket before. Any suggestions? Mike |
Replies:
Posted By: Gary S
Date Posted: October-04-2011 at 1:50am
|
Looks like you got a great place to work in Mike. Go http://www.correctcraftfan.com/Downloads/Morse_MV-2_Owner_Manual.pdf - here on page 9. You have to go to the back side of it and remove the cables and levers and then the rear plate that the cables mount to.Keep track of how and what direction and what cables mount to where. ------------- http://www.correctcraftfan.com/diaries/details.asp?ID=1711&sort=&pagenum=1&yrstart=1966&yrend=1970" rel="nofollow - 69 Mustang HM SS 95 Nautique Super Sport |
Posted By: 8122pbrainard
Date Posted: October-04-2011 at 10:16am
|
Mike,
It looks like you have a slighly older version of the blast cabinet I just picked up off ebay. Your lighting and viewing window is different. Mine leaks all over but, it was cheap!! (except for the shipping) One of these days, I'm going to have to caulk all the seams or, coat the complete inside with truck bed liner. The liner will also protect the rather thin sheet metal as well. Keep us posted on the boat project. ------------- /diaries/details.asp?ID=1622" rel="nofollow - 54 Atom /diaries/details.asp?ID=2179" rel="nofollow - 77 Tique 64 X55 Dunphy Keep it original, Pete < |
Posted By: mountaineerminer
Date Posted: October-04-2011 at 12:31pm
|
Gary,
Thanks for the link, Ill try and get it removed tonight 8122, Ya, that thing works great except for leaking like crazy. I told myself I wouldent use it again until I sealed all the seams. I also want to add a mobile base to it so I can roll it outside to keep what does leak out of the garage. Mike |
Posted By: Gary S
Date Posted: October-04-2011 at 9:25pm
|
Here you go Pete, J on http://www.tptools.com/Product.aspx?display_id=268 - this list. It's 4.95 in my new catalog ------------- http://www.correctcraftfan.com/diaries/details.asp?ID=1711&sort=&pagenum=1&yrstart=1966&yrend=1970" rel="nofollow - 69 Mustang HM SS 95 Nautique Super Sport |
Posted By: 8122pbrainard
Date Posted: October-04-2011 at 10:21pm
Gary, Thanks for the idea but I'm not taking that damn thing apart again!! I say again because I wasn't paying attention and ended up with the top mounted so the window was on the high side. There are HUNDREDS of screws, nuts, and washers and to get the top off, the ends and legs had to be completely removed. I was not happy!! I'm going with the truck bed liner!  ------------- /diaries/details.asp?ID=1622" rel="nofollow - 54 Atom /diaries/details.asp?ID=2179" rel="nofollow - 77 Tique 64 X55 Dunphy Keep it original, Pete < |
Posted By: peter1234
Date Posted: October-04-2011 at 10:34pm
|
cant you weld the seams? ------------- former skylark owner now a formula but I cant let this place go |
Posted By: Gary S
Date Posted: October-04-2011 at 11:13pm
|
Only down side would the darkness of the interior.Do they make lite colored liner colors? My cabinet is lite gray inside which lets the light "bounce" around,it never seems you have too much. Peter that would be overkill and hard to do now and you would still have the screws to contend with,it would be hard to weld them all up ------------- http://www.correctcraftfan.com/diaries/details.asp?ID=1711&sort=&pagenum=1&yrstart=1966&yrend=1970" rel="nofollow - 69 Mustang HM SS 95 Nautique Super Sport |
Posted By: peter1234
Date Posted: October-04-2011 at 11:26pm
|
yeah i get it now its not just the seams its where the screws have worn out too ? ------------- former skylark owner now a formula but I cant let this place go |
Posted By: 8122pbrainard
Date Posted: October-05-2011 at 1:01am
|
Peter,
When was the last time you welded 16 ga. powder coated steel?? Can you say warp-age?   ------------- /diaries/details.asp?ID=1622" rel="nofollow - 54 Atom /diaries/details.asp?ID=2179" rel="nofollow - 77 Tique 64 X55 Dunphy Keep it original, Pete < |
Posted By: mountaineerminer
Date Posted: October-21-2011 at 12:25pm
|
So hopefully this weekedend I will get the chance to lift the boat off its trailer and place it on a dolly. When doing this would you all suggest using a strap under the hull or the lifting rings on the bow and stern?
I am a little hesitant to use the lifting rings on a 43 year old boat. Has anyone had a bad experiance doing so? Also, the engine, deck and foam have been removed. Thanks, Mike |
Posted By: 8122pbrainard
Date Posted: October-21-2011 at 2:25pm
|
Mike,
We have seen some lifting ring mounts in pretty bad shape especially the aft. Take a close look at them. But, with the engine out, the hull really isn't that heavy. ------------- /diaries/details.asp?ID=1622" rel="nofollow - 54 Atom /diaries/details.asp?ID=2179" rel="nofollow - 77 Tique 64 X55 Dunphy Keep it original, Pete < |
Posted By: mountaineerminer
Date Posted: October-30-2011 at 3:08pm
| I havent done an update in quite some time so this will be a long one... |
Posted By: mountaineerminer
Date Posted: October-30-2011 at 3:08pm
I have built an engine cradle, pulled the motor, cut out the floor, dug out the foam, built a boat cradle, lifted the boat off the trailer, made a template of the stringers, and removed the stringers. Below are some pics of my progress.


|
Posted By: mountaineerminer
Date Posted: October-30-2011 at 3:09pm


|
Posted By: critter
Date Posted: October-30-2011 at 3:37pm
|
Looks like a good setup for removing the boat from the trailer.
I have one question though... Looks like you lifted the boat and removed the trailer in the large area of the drive but the boat is sitting on the cradle in what looks to be the smaller driveway ??? I do not see wheels under the cradle. Did you pick it up and slide it over there and that is the reason for the strength picture  ------------- 1980 Ski Nautique 1966 Barracuda |
Posted By: john b
Date Posted: October-30-2011 at 3:40pm
| Looks like you have made a lot of progress. I will be watching this closely, I like the 65-79 Mustangs very much. Looks like you have skills. |
Posted By: mrinboard
Date Posted: October-30-2011 at 6:33pm
|
looking very good ------------- Dont Hate "ACCELERATE!" |
Posted By: mountaineerminer
Date Posted: October-30-2011 at 10:23pm
|
Thanks Jonh B and mrinboard, as far as skills go I get by, I had a test run on a Bayliner type and learned alot.
see here: http://forums.iboats.com/showthread.php?t=381565 That was before I discovered correctcraftfan. Too many experts on iboats for me. Critter, There are casters on the cradle. If you look close in the second to last pic you will see them in the corners. I mounted them as low as to have a low center of gravity and be more stable. Its rock solid. I can easily move it in and out of the garage by myself. Also, the pic of the muscle man was my help; im much better looking, lol. |
Posted By: critter
Date Posted: October-30-2011 at 10:44pm
Outstanding idea. You are thinking ahead..... ------------- 1980 Ski Nautique 1966 Barracuda |
Posted By: wwchevy
Date Posted: October-30-2011 at 11:17pm
That cradle is excellent. I am going to steal the design (unless you have it patented- in that case I am still going to steal it).  Nice job so far. Nice job so far.
Are those upright pieces holding the bunk boards half lapped to the cross pieces (confusing question..huh???) ------------- wwchevy 1989 Barefoot Nautique |
Posted By: mountaineerminer
Date Posted: October-31-2011 at 12:05am
|
Thanks Critter
ww, Yes, i actually had a phone conversation with a freind back in WV about that tonight. I felt that using a rabbet I would gain not only mechanical strength of the bolts and glue, but off the wood itself. The end result was very solid. It did take some time and would not have been possible without a good cross-cut sled on the table saw with a dado blade. |
Posted By: mountaineerminer
Date Posted: October-31-2011 at 12:06am
| no patend |
Posted By: mountaineerminer
Date Posted: November-03-2011 at 2:01am
|
Time for an update....
I left one pic off from this weekend, cutting the stringers out! This was much easier than the last boat I worked on, it took about an hour with an angle grinder and a sawzall. After doing this job once you learn a lot of tricks. 
I forgot to take more pictures, but I have spent about an 2 hours this week grinding down the hull – this is the miserable part of the job. I plan to finish grinding this weekend. The short days are killing my productivity but daylight savings time should help for a little! A lot of guys like to leave the stringer in one piece so a template can be made from it. In this case the center was completely rotted away. This is why I made a good template on cad and plotted it full size. Here you can see the wrinkled one I threw away after making some adjustments too it. I’ll plot out a new set tomorrow. The outer stringers where in good enough shape to use as a template; although a little water-logged. 
I will be making the stringers out of ¾” AC plywood. The outers will be a single width piece and the inners will be two laminated to get to the 1 ½” size used from the factory. To get the required length I have decided to lap the plywood 6” and join the two halves with thickened epoxy. I used fast set epoxy mixed with colloidal silica. 

|
Posted By: john b
Date Posted: November-03-2011 at 9:34am
|
I love the updates.
The steering wheel from my 69 that you were interested in is rusty. I don't know how you could replate it. The plastic is molded onto the metal. BTW, I'm not a nascar fan, but if I ever went to see a race it would be at your hometown track. |
Posted By: mountaineerminer
Date Posted: November-03-2011 at 11:40am
|
Thanks John!
Ive lived in Bristol for about a year now and that was the first time I went to a Bristol race; now I know why everyone loves that track! On the wheel I can be pretty creative! But more so I am interested in your console; especially since I found controls with knobs and cables! |
Posted By: TRBenj
Date Posted: November-03-2011 at 11:43am
Yikes, better keep reading up on proper stringer jobs before buying any material! ------------- |
Posted By: Gary S
Date Posted: November-03-2011 at 11:59am
|
Hey Mike if your console has the factory knobs can you measure them for me? Thanks ------------- http://www.correctcraftfan.com/diaries/details.asp?ID=1711&sort=&pagenum=1&yrstart=1966&yrend=1970" rel="nofollow - 69 Mustang HM SS 95 Nautique Super Sport |
Posted By: john b
Date Posted: November-03-2011 at 1:33pm
I can bring my console by when I come to see your boat if you like. The only knob is the pull for the lid though. |
Posted By: 8122pbrainard
Date Posted: November-03-2011 at 1:35pm
I agree that you should be doing more reading. If you follow through with using the ply, you had better figure on doubling up the glass layup to compensate for the weak ply. Remember, every other layer of veneer in ply is in the vertical. This is not what you want. LVL would have been a better choice since with all of it's veneers, the grain runs the length. Plus, no weak point at the splice. ------------- /diaries/details.asp?ID=1622" rel="nofollow - 54 Atom /diaries/details.asp?ID=2179" rel="nofollow - 77 Tique 64 X55 Dunphy Keep it original, Pete < |
Posted By: mountaineerminer
Date Posted: November-03-2011 at 1:57pm
|
I don’t wish to start the right and wrong argument I am only looking to document my progress.
There are many options out there on material selection and each has its pro’s and con’s. Coosa, Seacast, laminated ply, LVL, white oak, southern pine, cypress, and a host of others have all been used successfully in marine construction. Factors such as price, availability, rot resistance, strength, weight, bond ability, fastening ability, personal preference and more goes into this selection. I encourage anyone looking to tackle a project such as this to perform their own due diligence and make a sound decision based on their particular situation. Below is a link to a discussion held in mid-October regarding material selection. Additionally; searching “stringer” on CCfan or any other boat repair site will present you with a host of options to consider. %20 - http://www.correctcraftfan.com/forum/forum_posts.asp?TID=23871&KW=stringer&PID=300784&title=span-classhighlightstringer-span-wood#300784 |
Posted By: 8122pbrainard
Date Posted: November-03-2011 at 2:12pm
So, how does the flexural modulus of the ply compare to the original Doug Fir? Did you calculate it at the butt splice as well where you will only have one layer of ply? BTW, your link didn't work for me. ------------- /diaries/details.asp?ID=1622" rel="nofollow - 54 Atom /diaries/details.asp?ID=2179" rel="nofollow - 77 Tique 64 X55 Dunphy Keep it original, Pete < |
Posted By: wwchevy
Date Posted: November-03-2011 at 2:48pm
|
Mike,
I am watching your thread pretty closely because I am doing a stringer replacement, but am a few steps (OK a lot of steps) behind you. My concern with the plywood is screwing lag bolts or other fasteners into the vertical plwood and splitting the laminated layers apart. I'm no expert and you have more experience than I do (I used to belong to iBoats and saw your Bayliner project) but when a guy with 17,000 posts asks about "flexural modulus ", I pay attention. 
Good luck, I will be watching and learning. Wes ------------- wwchevy 1989 Barefoot Nautique |
Posted By: 75 Tique
Date Posted: November-03-2011 at 3:03pm
------------- _____________ “So, how was your weekend?” “Well, let me see…sun burn, stiff neck, screwed up back, assorted aches and pains….yup, my weekend was great, thanks for asking.” |
Posted By: Jllogan
Date Posted: November-03-2011 at 3:11pm
This would be an interesting experiment. As finding this info online would be next to impossible. Once you are done with your stringer put it on two blocks at the ends and apply pressure to the center to see how much it flexes. The old three point test. If you had a press with a pressure gauge it would be the most accurate. I think it could hypothetically work but I would worry about possible delamination over time rather than its ability to hand the load. ------------- http://correctcraftfan.com/diaries/details.asp?ID=5792&sort=&pagenum=1" rel="nofollow - 1986 Ski Nautique 2001 |
Posted By: john b
Date Posted: November-03-2011 at 4:16pm
|
This is a really good topic. I can see both sides of the issue. Personally, if I was going to use plywood, I would use marine plywood because it is stronger because it has no voids in the layers of veneer, which can also trap moisture and allow air to accumulate and promote froth of little wood eating gremlins. My guess without the benefit of research is that plywood is at least as resistant to flexing along what would be the vertical axis of a stringers as Douglas Fir. Engineered beams and floor joints are much stronger than similarly sized #2 construction lumber. I realize this is partially due to the I- beam shape, but the center, be it ply or OSB is very resistant to flexing.
One last thought. Most of these 70s boats are running around with stringers made of fungus and organic growth and seem to work reasonably well. The Mustang I rode in in Minnetonka had stringers so rotten that the engine mount had sunk into one 1/4 inch. It did not have any serious stress cracks in it. Time will tell. |
Posted By: john b
Date Posted: November-03-2011 at 4:24pm
| Are you interested in the steering wheel? Let me know, the price is right. |
Posted By: Jllogan
Date Posted: November-03-2011 at 4:58pm
|
you are correct about the fact many boats are rotten and still work fine, however, I think the argument would be if you are going through all that work you should just do it the best way possible because its a pain and you dont wanna do it again. I see both sides. ------------- http://correctcraftfan.com/diaries/details.asp?ID=5792&sort=&pagenum=1" rel="nofollow - 1986 Ski Nautique 2001 |
Posted By: mountaineerminer
Date Posted: November-03-2011 at 10:46pm
|
John B,
Send me an email @ mcurry@alphanr.com |
Posted By: TRBenj
Date Posted: November-04-2011 at 2:31pm
Fair enough, not everyone has the same goals for their projects. That being said, a good rationale behind your material choice should be included in the thread. If viewed as a standalone reference point, one might conclude that your methods were "standard practice", when that is not the case. Having people question things like that is what makes these forums such an invaluable resource.
^^^This is my perspective as well.^^^ Rebuilding a boat is an expensive proposition- certainly in terms of the amount of money you need to invest, but even more so in the amount of TIME you need to dedicate to it. IMHO, the amount of money you save by going with a cheaper (lesser) material is very small in comparison to the amount of time and effort (not to mention money) you would lose if you had to repeat the project a second time. Any boat I plan to keep forever will get the "forever" treatment... which includes top rate materials and the best methods I can conjure up. Of course, if a particular boat is not a "keeper" then maybe it will get a "good enough" rebuild. Maybe thats the case here, but it doesnt hurt to mention that up front. Just my 2 cents!  ------------- |
Posted By: john b
Date Posted: November-04-2011 at 2:47pm
|
TIM,
If only the factory built them with the quality of your workmanship and your attention to detail! |
Posted By: TRBenj
Date Posted: November-04-2011 at 3:02pm
|
Ha, thanks John. Unfortunately, if the factory were to put the same amount of time and effort as many of us have, no one would be able to afford them! Im pretty certain that the only way I could ever make any money doing this kind of work would be if my customers came exclusively from the "cost is no object" camp. I just work too darn slow.
Still, I would hope that any rebuilt boat I keep around would last longer than it did from the factory. I intend to keep several of these around for a long time (50+ years) so I guess time will tell. ------------- |
Posted By: mountaineerminer
Date Posted: November-04-2011 at 8:22pm
|
I wasn’t going to make any reference to the post’s regarding my shoddy workmanship and incompetence only because I wished to keep my thread on topic and not get lost in hostility that is all too popular on most message boards. It is quite apparent that my selection of material goes against the convention of this forum and I will not likely find any supporters within the community. I politely alluded to a two page thread on material selection where this debate could be archived and useful for future reference. This does not mean that I do not appreciate your comments; I fully encourage constructive criticism and helpful suggestions that are delivered in a professional manner.
That being said I chose to use laminated ply to construct my stringers over dimensional lumber for couple of reasons. This was not decided on in haste or to save money. If you consider the cost of the plywood, epoxy, cloth, fillers, and time it is probably a wash if not slightly more expensive than using dimensional lumber. I view the wood of the stringers as the core a composite that works as a system of reinforcement. That system is reliant on all of those pieces working together. The plywood is much less likely to shrink, swell, cup, warp, or split. Additionally, I have had more success in bonding glass to plywood than to dimensional lumber. I am not sure if this is due to moisture content, surface finish, or density. I was a little confused by the statement regarding the flexural modulus of ply vs. douglas fir. I thought this is why engineered joist are considered superior to dimensional lumber, even when made of OSB, as already stated. The moment is applied to the edge, not the face. If properly supported along the face and loaded along the edge it would be hard to argue that dug fur is substantially less resistant to deformation. This proper support is provided to the face by the glass that ties it to the hull and the cross braces to the outer stringers. I plan to use layers of CSM and 1708 biax on both the inner and outer stringers. On top of the stringers will be a ½” plywood deck that is covered both top and bottom with CSM and Glass mat and secured with 5200 and SS screws. As for the strength of the lap joint, the wood itself will fail before the glue joint; in addition those joints will be wrapped in glass. Also, AC ply has 7 layers in a ¾” board, leaving 3 ½ layers on either side of the joint. Yes, marine ply (AA) would be superior, but in using AC for many other projects I have yet came across an voids while cutting rabbits and such. I am not saying it is completely absent of voids, but is much better quality than the BC ply typical used. My problem with marine ply is availability. The closest supplier I have found is in Charlotte NC. The other concern I have in ply as was mentioned is the pull out strength. I know this will not be as great as with white oak or douglas fir but feel it will be more than adequate. Below are pics of the factory installed “clear pine” that was completely delaminated the entire length of the board, significantly cupped, and contained numerous knots. I am not saying that this method is superior to any other method, including the use of douglas fir, but I do not feel that it warrants being considered cost cutting deplorable construction. There is more than one way to skin a cat and if stepping outside of the generally accepted practice is so abhorrent I guess I owe everyone an apology. I feel confident in my construction and have duly noted everyone’s thoughts. Feel free to make additional comments as to how poor my assembly is in the above mentioned thread. I probably just took it the wrong way and everyone was only trying to help. It is sometimes the way things are written that they are interpreted differently. 


Mike |
Posted By: wwchevy
Date Posted: November-04-2011 at 8:40pm
Mike, There is no hostility in this thread, only a healthy discussion of differing opinions on construction methods regarding the boats that we all love. I don't speak for everyone (I can barely speak for myself), but I don't believe the guys on this site think you have shoddy workmanship or think you are incompetent. You laid out your case as others have in this thread and it will probably bring more discussion. I think you are an asset to correctcraftfan.com, keep the photos and info coming, we all enjoy the progress you are making.  ------------- wwchevy 1989 Barefoot Nautique |
Posted By: SNobsessed
Date Posted: November-04-2011 at 9:02pm
|
Mike - Keep posting pictures of your project. You might be changing the paradigm here. ------------- “Beer is proof that God loves us and wants us to be happy.” Ben Franklin |
Posted By: john b
Date Posted: November-04-2011 at 9:36pm
|
Mike,
I'm relatively new here too, I just post a lot. One thing I have learned is that there is a wealth of knowledge on this site. The other is that when it comes to working on these boats the members interview and grill you on your intentions like a prospective son in law. I know it is for the same reason too. There is a great deal of Passion here for Correct Crafts. I think I have fallen in love. |
Posted By: TRBenj
Date Posted: November-05-2011 at 12:00pm
I dont think anyone has questioned your assembly... you havent started rebuilding yet, really. I think we were questioning your plan, but again, without understanding the basis for the choices you made, I think thats to be expected. Now that youve explained your rationale, its pretty clear youve put some thought into this- so bravo. I still wouldnt go down the same path, but I do understand your approach. I will say that if you were mainly interested in using ply for shaping the stringer core, there may be other choices out there that wouldnt rot. I know Joe built one foam-cored stringer boat, not totally unlike how CC builds boats nowadays. As far as lagging into the end grain, Id avoid that... maybe drill a larger diameter hole and fill with thickened resin, then drill a pilot for the lags... Pete has suggested this in the past when lagging into weaker materials. ------------- |
Posted By: Morfoot
Date Posted: November-05-2011 at 12:24pm
Mike, as one of the older members of the site and one who personnaly knows most of the guys who have done stringer jobs I don't think anyone has accused you of shoddy workmanship. I haven't done one myself but having read all the stringer rebuilds here I would definately trust their knowledge and experience. The members that have done a stringer job are only concerned with the material choice used for the stringer replacement. The task at hand is trully a labor of love and many manhours of one that you won't be able to recoup monetarily should you decide to ever sell the boat. The main concern is if you are going to do all this work then go with what is known to work tried and true. YES, CC did not go the extra mile back in the day to assure that this task wouldn't have to be done again down the road. I too am concerned about you using plywood stringers as I do have experience with that in a Procraft fish-n-ski I had before I bought my Correct Craft and it wasn't a good experience. HOWEVER.... Maybe you can prove us wrong by your choice. uk1979 is restoring his CC by going all composite and coming up with some really neat ideas and thinking WAY outside the box in his methods. It's a neat thread to follow. Keep up the good work and drive on. Thanks for the thread and the updates on the progress. I like your boat hoist and the cradle for the hull. Pretty Crafty!  ------------- "Morfoot; He can ski. He can wakeboard.He can cook chicken.He can create his own self-named beverage, & can also apparently fly. A man of many talents."72 Mustang "Kermit",88 SN Miss Scarlett, 99 SN "Sherman" |
Posted By: must_dash
Date Posted: November-05-2011 at 1:45pm
|
I think that all discussions are good as it aids the flow of information between interested parties. As mentioned there are many reasons to choose one material over another.
If CC had done the job properly back in the 80s then we wouldn't be having this discussion....... However at that time they used their best knowledge and went with it. 25 years later we can tell them that they were wrong. But we don't know what the design life was for the boat. Look at modern cars, anything over 10yrs old needs attention. The answer to the argument will be to meet back here in 25 years time and see how all the different materials used in replacement stringer jobs have faired! That's my twopence worth. Planning a stringer job for next winter so I have a vested interest in the reasoning behind different materials. Not to alienate a member because he is outside the perceived box. ------------- 1986 Martinique - sold When we ask for advice, we are usually looking for an accomplice. |
Posted By: BuffaloBFN
Date Posted: November-05-2011 at 9:09pm
Sometimes things don't translate so well over the interweb. I don't think anyone meant to alienate. I do think we have had this discussion before, and maybe because of that some are firmly decided on whatever it is they're decided on. That might translate as blunt sometimes? 2 points Tom on looking into your project well ahead of time...unless you got the bad news here. 
I also think Pete's point about 'flexural modulus' is an important one and underdiscussed in this thread; and maybe in search of a user friendly name. Fiber boats bend. I bet most of us have seen a center windsheild fall through in rough water on a non CC. ------------- http://correctcraftfan.com/diaries/details.asp?ID=2331&sort=&pagenum=12&yrstart=1986&yrend=1990" rel="nofollow - 1988 BFN-sold "It's a Livin' Thing...What a Terrible Thing to Lose" ELO |
Posted By: uk1979
Date Posted: November-06-2011 at 11:00am
Wow thanks for the bump Tim that’s quite something coming from a composite expert. As for this approach this just how I view ply and sure it would work if done well with glass between the layup and extra build around it, all comes down to is it worth all the effort and still have the risk of delam years later the problem with ply is you can only seal (CEPS or thinned epoxy) the outer veneers and different depths across the edges as the glue in the ply will prevent deeper penetration so will leave the middle layers unprotected from moisture along with some layers will be cross grain and more moisture absorbent, the hole build up will need to be very well coated in epoxy maybe wrapped in cloth before fitting to the hull for some piece of mind, using solid timber warming first then CEPS it all over should give a deeper penetration over ply all round along with no delam issues, both methods are reliant on how well the restring is carried out in an old hull for a long service life. If you won’t to build a wood base stringer system may be better to build your own ply using constructional veneers CEPS first then lay up with epoxy/cloth and clamp long flat bed just a bit wider than the stringer width then trim to size, down side to this is the wood will become neutral bayonet and will be heavy, I have found that using this method and placing under water for three weeks with no epoxy coating just sawn edges and sanded faces The ply stood up well with just a .3mm or 2.8% increase in thickness and no delam. I’m not sure if your just using the cradle to move the hull around but when it’s time to refit the stringers may be good to support the hull off the cradle at the transom and each side at the chine, I know it’s a small boat but there may be a small risk of the hull flexing in once all the old stringers are removed which would give it more hook and a slower Mustang which is not aloud here. Keep up the great work and thanks for saving another CC. ------------- Lets have a go 56 Starflite 77 SN 78 SN 80 BFN |
Posted By: mountaineerminer
Date Posted: November-11-2011 at 1:27pm
|
"The answer to the argument will be to meet back here in 25 years time and see how all the different materials used in replacement stringer jobs have faired!"
Must_Dash, My thoughts exactly... "when it’s time to refit the stringers may be good to support the hull off the cradle at the transom and each side at the chine" uk, This is a concern I had and plan to look into a better way to support the hull. Do you think I am better off trying to support it from the chines and transom area or building 4 or 5 bunks that run parallel to the transom? I am not sure how to describe this all that well; I might just need to describe in a picture. Gary, I will try and get some pictures of the knobs with dimensions tonight. I definitely think I will be trying to cast some new ones; the old plastic/resin feels quite fragile. -Mike |
Posted By: uk1979
Date Posted: November-12-2011 at 9:20am
Mike The way I see it supports each side of the transom and 2 each side of the chine in line with the windshield should be fine some add a support to the keel as well just before the pylon its up to you, making up ribs would work too but allot more work and ensuring the hull is true and level could be a pain to do. There is the argument that depending how big a guy you are you will push the hull out with your weight which is a fair point but my guess is the hull would run faster. My self I took the sub stringers out first and replaced then took the main stringers out one at a time and replaced using the old to hold the hull shape while the hull was up on 4 stands this way will take allot longer to do but you can use the old to register/brace the new,if your going for a all out approach I do feel leaving 2 or 3 small tabs of the old glass sticking up 1/4 or so on the stringer runs make life easier registering the new. With your set up of lifting if you clamp some timber across the deck and plum down at marked points to the hull then lift and plum down again we can see how much flex there is once all the stringers are removed as I have not see this data on here and would be a great help for the flat bottom boats. ------------- Lets have a go 56 Starflite 77 SN 78 SN 80 BFN |
Posted By: BuffaloBFN
Date Posted: November-12-2011 at 10:50am
Initially I was very concerned about this. It turned out to be a non-issue with my '88. +1 on what Roger said about replacing stringers one at a time...at least on the mains. ------------- http://correctcraftfan.com/diaries/details.asp?ID=2331&sort=&pagenum=12&yrstart=1986&yrend=1990" rel="nofollow - 1988 BFN-sold "It's a Livin' Thing...What a Terrible Thing to Lose" ELO |
Posted By: mountaineerminer
Date Posted: December-22-2011 at 1:28am
|
Long time no post,
Since my last post I have completely ground out the hull and most of the sides using both a 4 1/2" angle grinder and a 7" angle grinder both affixed with a flap wheel. All the old gel in the bilge was removed as well at the unwetted glass under the old stringers. I roughed up the entire hull, but will do a final sand with a DA prior to glassing. This process seemed like an eternity and took place over about three weekends. Before rolling the hull in the garage I laminated the stringers using US Composites epoxy and two layers of glass cloth, cut, and sanded to final dimensions. Below are some pictures of the glove box, console, and controls that I picked up from John B and Aaron. The brown console on the right is supposedly from a Barracuda SS. Its definitely different than the Mustang console as it was made to run into the motor box with the battery directly behind the console. I purchased this console for the controls. 
John, The holes in the corners of the glovebox fit up exactly; I take this to mean that this boat was originally equipped with the glove box and it wasn't an after thought some time in the last 40 years. I will just have to fill the holes that the aftermarket box was installed with. 

Gary, I have finally taken some measurements of the knobs for you. Diameter of the ridge around the knob 
Measurement from the flat threaded end to the round top 
The next 2 images show the closest measurment I could get of the full diameter of the knob minus the rigde and flat spot. 

Mike |
Posted By: john b
Date Posted: December-22-2011 at 1:55am
|
I'm glad you're happy with it. It deserved a good home and I know it found one. I hope to see your Mustang when its done. ------------- 1970 Mustang "Theseus' paradox" If everyone else is doing it, you're too late! |
Posted By: mountaineerminer
Date Posted: December-22-2011 at 2:03am
| Thanks John...I might need to make my way to the windy city again. Last time I was there was 7 years ago when my father and I went to pick up parts for an 88 Toyota supra turbo. It was a good trip, only our Yankee asses didn't realize we changed time zones!!! |
Posted By: mountaineerminer
Date Posted: December-22-2011 at 2:12am
|
Kinda of a second post on the same question...I am far from convinced that is the correct mirror for a 68-69 Mustang, it should be much smaller i think, but was it originally attached to the windsheild or the dash?
Minus the hour meter I think the gauges are in the correct position. What are eveyones thoughts considering I will be reinsalling the center console. Fuel, oil pressure, horn, bilg, and blower are to the right of the steering wheel. Mike |
Posted By: Gary S
Date Posted: December-22-2011 at 2:18am
A BIG thank you.I didn't realize they had a ridge,don't think I'll be able to find them but diameter will be easier now. Just like everything else CC they must have had different consoles over the years,heres mine out of a 'Cuda,it's just taller.John brought your white one over on his visit. If I cut the lower portion off,it's identical.
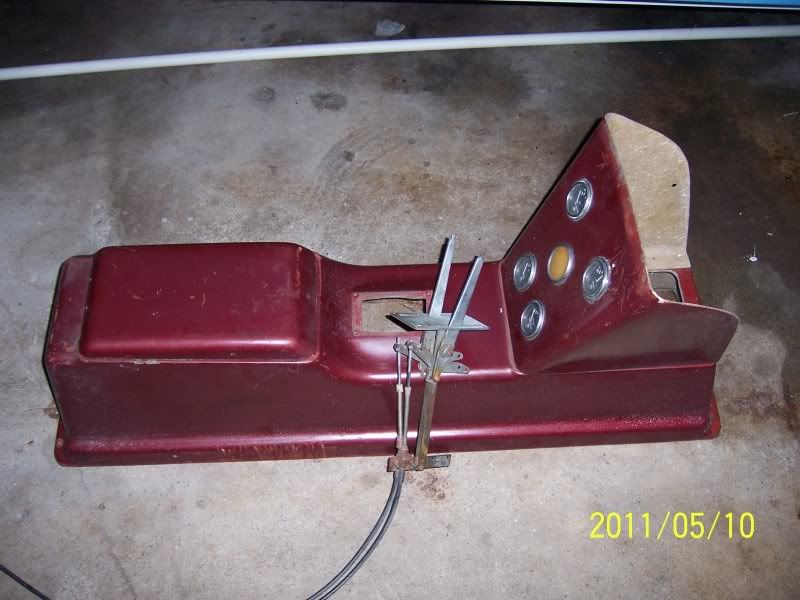 ------------- http://www.correctcraftfan.com/diaries/details.asp?ID=1711&sort=&pagenum=1&yrstart=1966&yrend=1970" rel="nofollow - 69 Mustang HM SS 95 Nautique Super Sport |
Posted By: Gary S
Date Posted: December-22-2011 at 2:45am
|
I filled the console gauge holes in Mike because in John's and mine they installed them in the dash that year. I can't remember your year but by the look of the dash some gauges must have been in the console.
Mine- 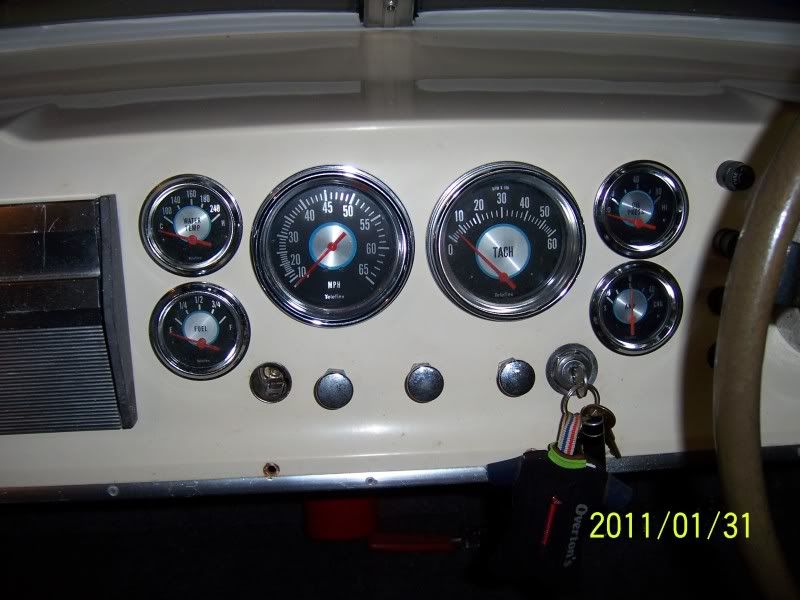
Johns- 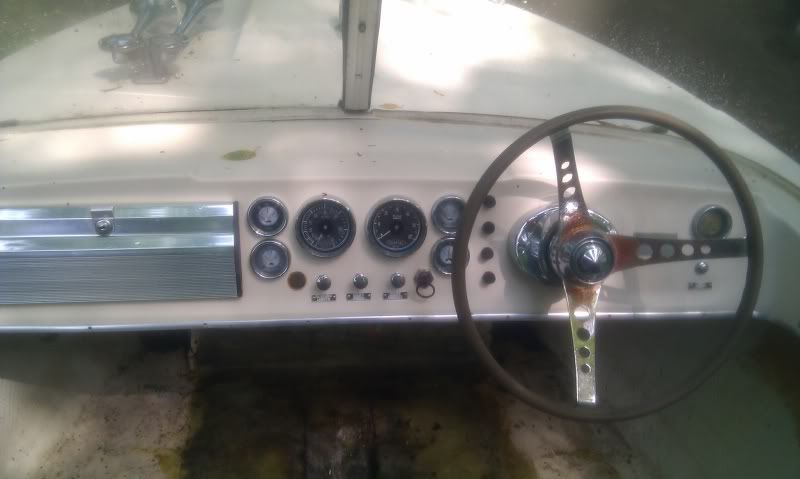
Diary posting- 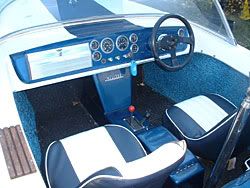
------------- http://www.correctcraftfan.com/diaries/details.asp?ID=1711&sort=&pagenum=1&yrstart=1966&yrend=1970" rel="nofollow - 69 Mustang HM SS 95 Nautique Super Sport |
Posted By: john b
Date Posted: December-22-2011 at 2:51am
Turbo car? I love turbo cars! 13:39 @ 109. Not nearly the fastest 2.2 in my chapter of the club, but a good sleeper! http://www.sdac-chicago.org/drag-racing - turbo cars ------------- 1970 Mustang "Theseus' paradox" If everyone else is doing it, you're too late! |
Posted By: mountaineerminer
Date Posted: December-22-2011 at 2:57am
| ya....i had a thing for late 80's turbo cars. I have had 2 Supras and a 300zx. its funny because 300HP was amazing them...my trailblazer SS has 400hp and would spank both with a boat behind it, lol |
Posted By: john b
Date Posted: December-22-2011 at 3:09am
|
Bet it wouldn't spank the 134cid minivan in our chapter, or my old turbo minivan (mini) either. It may be a match for my 89 turbo GTC. ------------- 1970 Mustang "Theseus' paradox" If everyone else is doing it, you're too late! |
Posted By: mountaineerminer
Date Posted: January-06-2012 at 3:17pm
|
Hardware Questions,
Am I correct to assume that I should replace my rudder port due to the crack seen in the pic below? 
If I do need to replace it, where is the best place to find the correct replacement? The ones listed on N3 and NatiqueParts seem to be outside mount and Buck Alogonquin dosent appear to have anyting in the correct diminsons in an inside mount(4x4 flange, 3" bolt spacing, 2 1/2" under flange). 
Getting the cart before the horse on this one, but.....does anyone know of a replacment for the thru-hull speedo pickup/pitot tube? Has anyone had luck fixing a damaged one? 
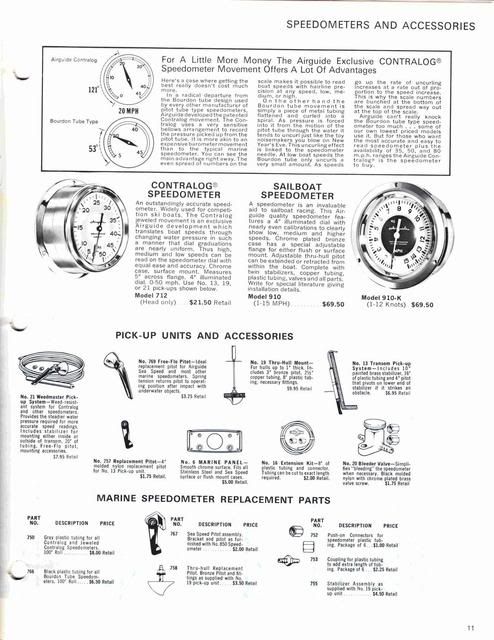
Thanks! Mike |
Posted By: john b
Date Posted: January-06-2012 at 3:36pm
|
I have a spare rudder port. If you need one, which it looks like you do, ill put it on ice for you when you're ready. I will keep it as spare parts if you go another way. In any case it will be here.
I am feeling better about parting the 69 Mustang knowing that much of it will help keep others on the water. ------------- 1970 Mustang "Theseus' paradox" If everyone else is doing it, you're too late! |
Posted By: peter1234
Date Posted: January-06-2012 at 4:30pm
|
i replaced mine this yr with the closest thing i could find it was from buck algonquin and all dimensions were right except the lower length , i just shortened it to match my old one . the other difference is that the port is much thicker but the hole in my hull had room for it . ------------- former skylark owner now a formula but I cant let this place go |
Posted By: SNobsessed
Date Posted: January-06-2012 at 8:06pm
|
For reference, www.deepblueyachtsupply.com sells these type of items.
Used is the way to go, they are expensive new! ------------- “Beer is proof that God loves us and wants us to be happy.” Ben Franklin |
Posted By: Gary S
Date Posted: January-06-2012 at 9:50pm
|
Peter wasn't it you that had a thread going about the poor hi speed handling of your boat? And wasn't it Reid ? that suggested shorting the rudder port.Looks to me he could cut it off where the crack stops and it will still be longer than the hull thickness.He would have to shim the top to make up the difference. ------------- http://www.correctcraftfan.com/diaries/details.asp?ID=1711&sort=&pagenum=1&yrstart=1966&yrend=1970" rel="nofollow - 69 Mustang HM SS 95 Nautique Super Sport |
Posted By: mountaineerminer
Date Posted: January-06-2012 at 10:58pm
|
Gary,
I guess under that theory I could even cut off the cracked portion (keep from spreading)and use the spacer between the rudder and the bottom of the rudder port to maintain the same length if needed. Or, I could braze or silver solder the crack.... I am worring about this now because I am getting ready to fit the wood at the stern that the rudder port goes through and I dont want to set it up for my current rudder port if I need to replace it with a slightly different version. John, Will you be around tomorrow? I wanted to give you a call, I had a few questions. Thanks guys! |
Posted By: peter1234
Date Posted: January-07-2012 at 11:53am
|
Gary yes I only changed mine because it was bent and Reid recommended shortening it (it seems to have helped). even if he cant reuse the cutoff portion on top you can get bronze or brass spacers i believe. ------------- former skylark owner now a formula but I cant let this place go |
Posted By: john b
Date Posted: January-07-2012 at 3:34pm
Do you mean me? I am always around, call anytime even if just to talk. Be aware that I really have no knowledge pertaining to the rudder assembly that will help you make a decision. There are others here who have experience and, most likely, have good answers. My Mustang project is easy, I am, to borrow a phrase from Pete, just keeping it original. I don't intend to change anything except the automotive carburetor. It is interesting that my 69 & 70 Mustangs have different rudders. I think the ports are the same, but I would have to check to be absolutely certain. Yours is probably the same as the 69. My spare rudder port is up in the "Land of Cheese". ------------- 1970 Mustang "Theseus' paradox" If everyone else is doing it, you're too late! |
Posted By: john b
Date Posted: January-07-2012 at 3:54pm
|
Just another thought. Cutting the sleve shorter will necessarily result in higher loading on the remaining surface area and less vertical stability. It may be that surface loading is not particularly important and the compromise of a shorter sleve provides some desired handling effect for some reason, but the fact that it cracked would cause me to carefully consider whether I want to subject it to even higher loading pressures. ------------- 1970 Mustang "Theseus' paradox" If everyone else is doing it, you're too late! |
Posted By: mountaineerminer
Date Posted: February-06-2012 at 9:47pm
|
Looking for a tip or some insight:
When replacing the blocks that the exhaust tips go through what is the best way to duplicate the compound angle of the hole in the wood? I used the old blocks as a guide and drilled them out with a hole saw before glassing to the transom. Although this seemed to accurately duplicate the angle of the hole it is a little difficult to line up accurately. More than likely I am just being too nit-picky and the tips where not perfectly straight to begin with but maybe I am missing something. Thanks! |
Posted By: mountaineerminer
Date Posted: March-25-2012 at 7:04pm
|
Gary, John, or anyone else intimate with the center console SS boats of the mid-late 60's; is the deck/sole depressed under the console? I know the floor pan has a cut-out where the console mounted, but what about the glass and foam under the pan? I am mocking up the “plumbing” and started to think about routing the control cables. The set of controls I have extends slightly below the bottom of the console and will need a depression to extend into. Thanks for any insight, -Mike |
Posted By: john b
Date Posted: March-25-2012 at 7:37pm
|
Yes, I believe the floor is cut out all the way to the hull, but don't take my word for it. I am far from an expert. Wait for Gary or Vondy or another export to reply before you do anything. ------------- 1970 Mustang "Theseus' paradox" If everyone else is doing it, you're too late! |
Posted By: mountaineerminer
Date Posted: March-27-2012 at 12:51am
|
After a test fit of the console and controls I would say your right John. You need all the room you can get for a smooth radius on the cable. That leads me to another observation. Although my boat has an MSS serial number, it probably did not have the console from the factory…. At a crossroad once again! |
Posted By: john b
Date Posted: June-17-2012 at 2:52am
|
This may be a little late, Mike, but here is what the pitot looks like. I finally remembered to bring it home and take a photo. ------------- 1970 Mustang "Theseus' paradox" If everyone else is doing it, you're too late! |
Posted By: mountaineerminer
Date Posted: January-05-2014 at 4:52am
|
John, I just saw your post on the pitot. I had stopped posting but have not stopped working on the boat, haha. I have been exceptionally busy with work the last several months. I actually just found NOS pitots for sale on ebay last week. I bought 2 encase I ran one into a log or something. They have more available, here is the link; http://www.ebay.com/itm/231058716243?ssPageName=STRK:MEWNX:IT&_trksid=p3984.m1497.l2649 I need to get some updated pictures up soon. I have gotten a lot done so far. Mike |
Posted By: mountaineerminer
Date Posted: January-05-2014 at 5:11am
|
This pic does no justice to the work gone on over the last 2 years. Ill try to get some of the detailed past photos up soon. http://s845.photobucket.com/user/MountaineerMiner/media/c336421b-44cc-419d-b992-0d99e3ed3ae4_zpsc20b76b0.jpg.html" rel="nofollow"> 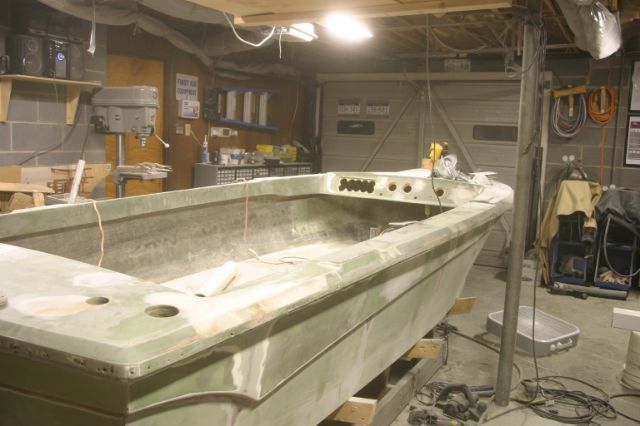
|
Posted By: Gary S
Date Posted: January-05-2014 at 12:23pm
|
Mike,sorry I dropped the ball on your posts,I missed your question completely. This is the best picture I have of where the console went, CC just cut everything away where the console went. They cut the cross member out in the front where the controls are,you can see where I replaced it and they cut into the pylon mount for clearance for the glove box. 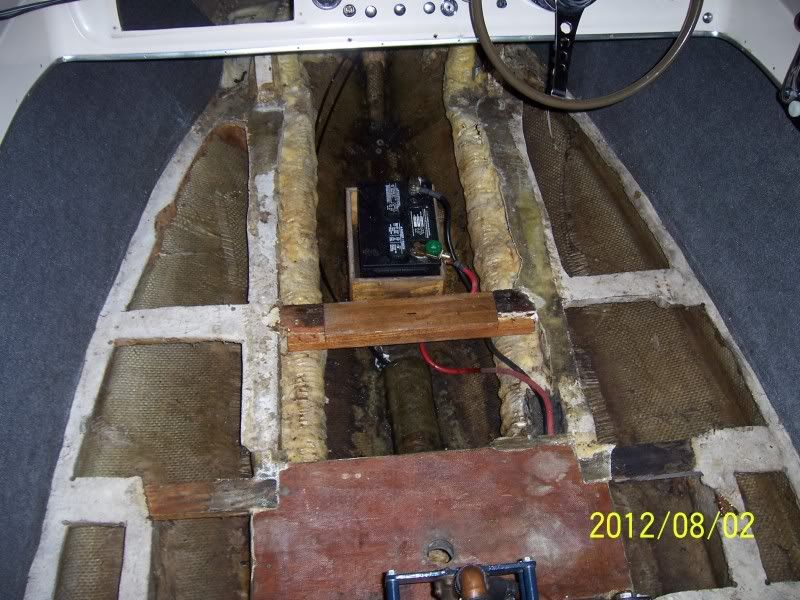 I ended up cutting a section out of the box and making it shorter rather than cutting into the pylon mount again 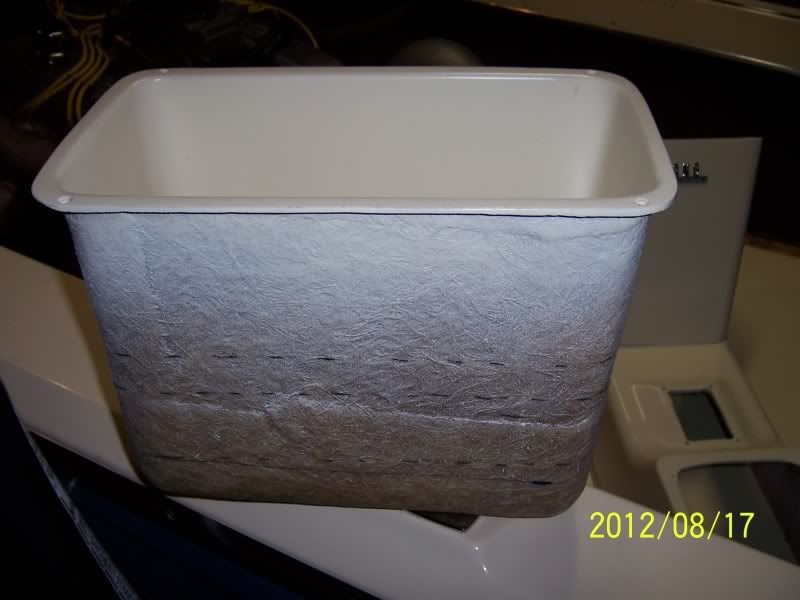 This is the best picture I have for the control cut out, this is my sub floor. I also had to cut thru about half way thru that cross member in the first picture too. 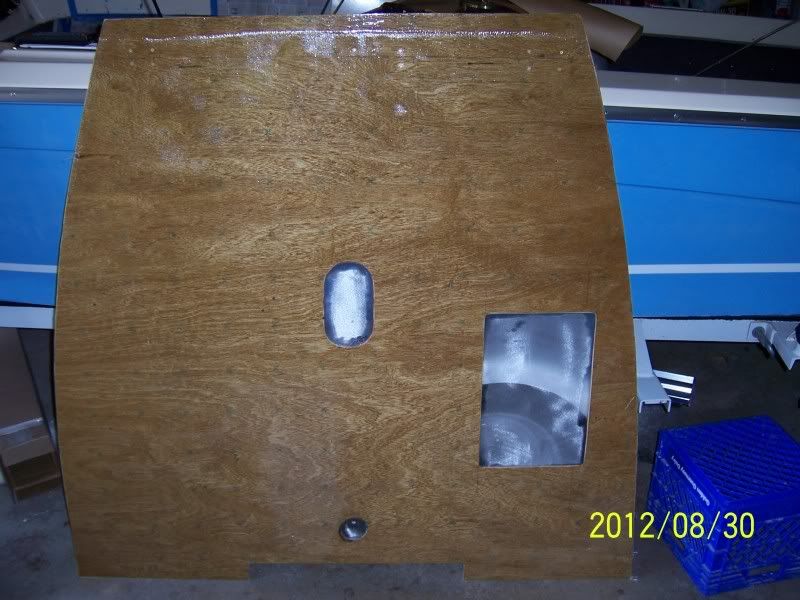 ------------- http://www.correctcraftfan.com/diaries/details.asp?ID=1711&sort=&pagenum=1&yrstart=1966&yrend=1970" rel="nofollow - 69 Mustang HM SS 95 Nautique Super Sport |
Posted By: mountaineerminer
Date Posted: January-05-2014 at 1:58pm
|
Thanks Gary, I ended up making the hole much bigger than that, haha! Since I don't have a center console box I left the pylon support intact. I am planning on building a mold and making a box to fit into the console once the boat is put back together. |
 Gary S wrote: