71' Martinique Winter Stringer Project
Printed From: CorrectCraftFan.com
Category: Repairs and Maintenance
Forum Name: Boat Maintenance
Forum Discription: Discuss maintenance of your Correct Craft
URL: http://www.CorrectCraftFan.com/forum/forum_posts.asp?TID=24098
Printed Date: November-19-2024 at 2:31am
Topic: 71' Martinique Winter Stringer Project
Posted By: Metallman56
Subject: 71' Martinique Winter Stringer Project
Date Posted: November-09-2011 at 8:23pm
|
Started my stringer project today. my first goal was to get the fuel tank out. pretty simple. hopefully the rest of the project is that easy, though i doubt it will be. i dont even have the seats out yet, but i wanted to get the floor up a little bit just to give myself an idea of what nightmires lay head. sorry for the kinda blurry pics. my phone was all i had.
no more tank 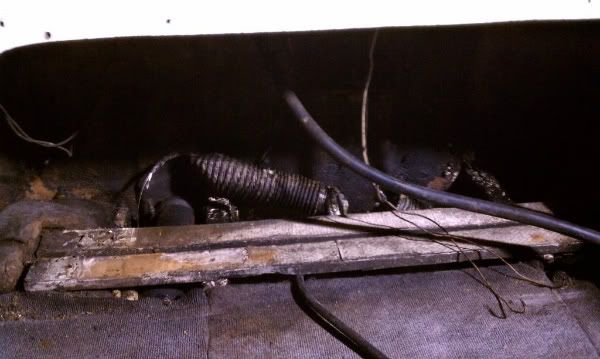
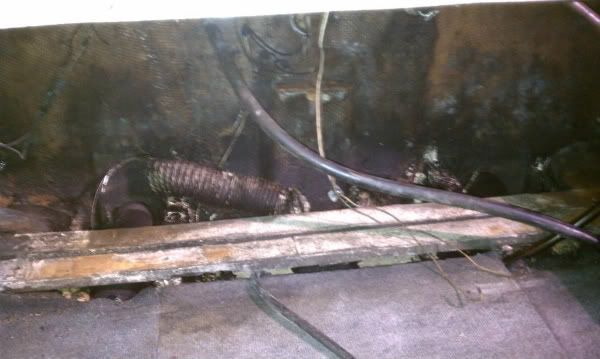
under the floor board, drives side 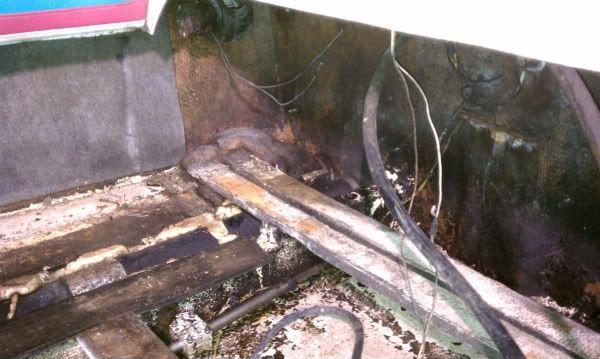
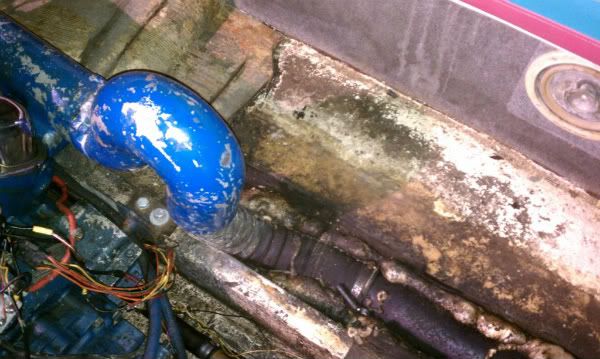
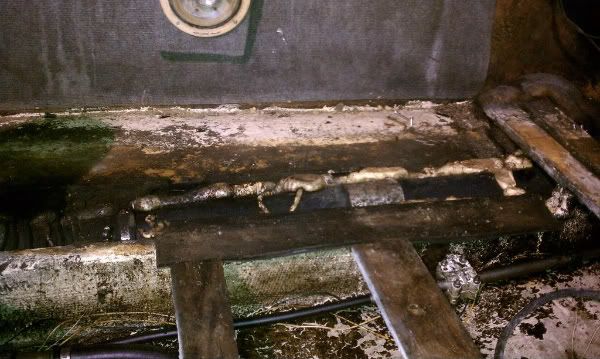
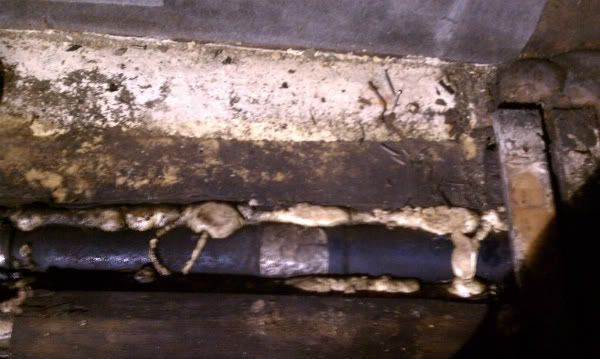
looks like its going to be a fun winter. 
|
Replies:
Posted By: BuffaloBFN
Date Posted: November-09-2011 at 9:41pm
Another one saved on CCFan 
------------- http://correctcraftfan.com/diaries/details.asp?ID=2331&sort=&pagenum=12&yrstart=1986&yrend=1990" rel="nofollow - 1988 BFN-sold "It's a Livin' Thing...What a Terrible Thing to Lose" ELO |
Posted By: Keeganino
Date Posted: November-11-2011 at 12:43am
|
You are on the right track. Get the engine and everything else out before you start cutting the floor out. The dust will be around for months as it is. Have fun with it. I will do another one some day. ------------- "working on these old boats may not be cost effective but as it shows its what it brings into your life that matters" -Roger http://www.correctcraftfan.com/diaries/details.asp?ID=4897" rel="nofollow - 1973 Skier |
Posted By: Metallman56
Date Posted: November-12-2011 at 2:23am
|
well worked on it more tonight.
pic of the tank, gonna need a new one, rust inside. Links?? 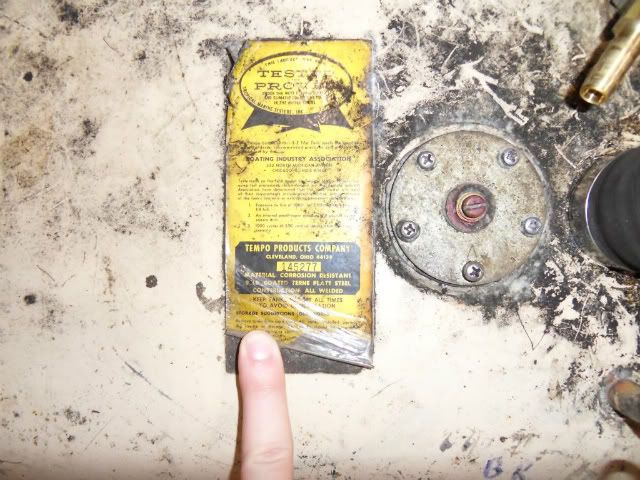
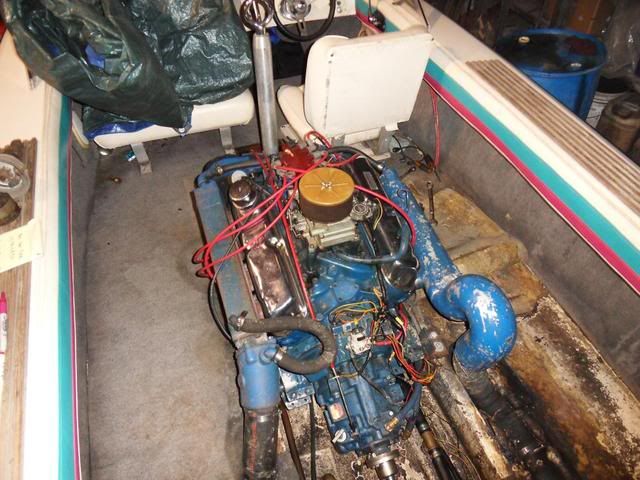
motor out 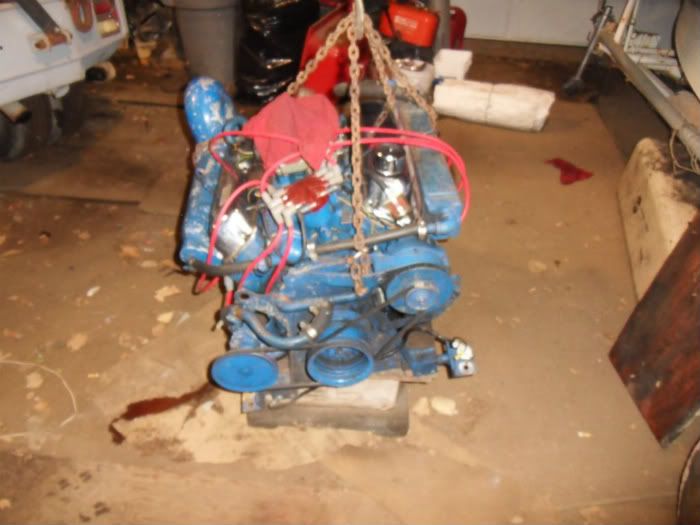
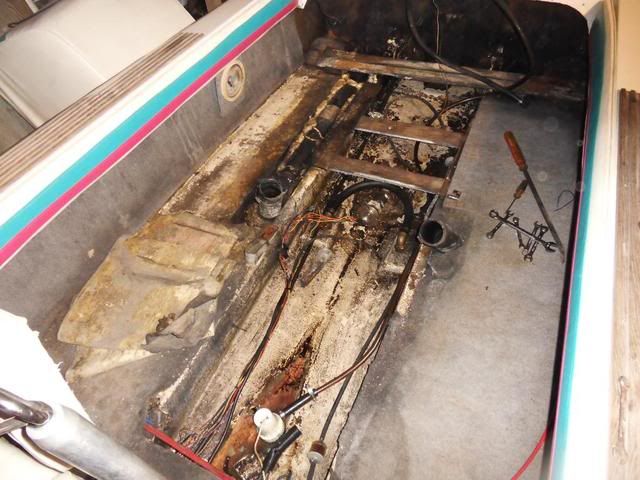
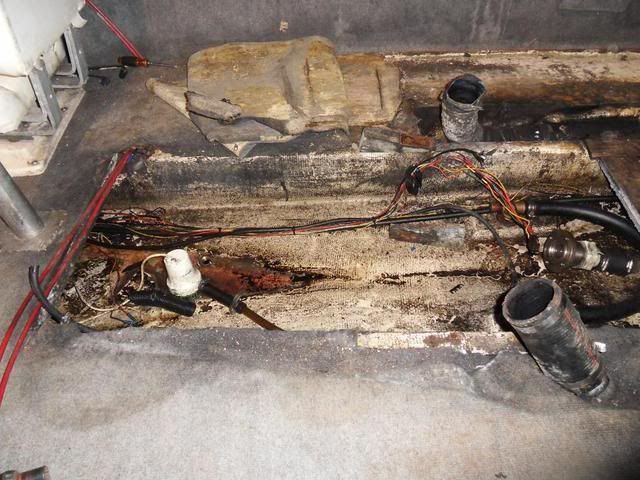
seats out, wow look at what color the carpet USED to be 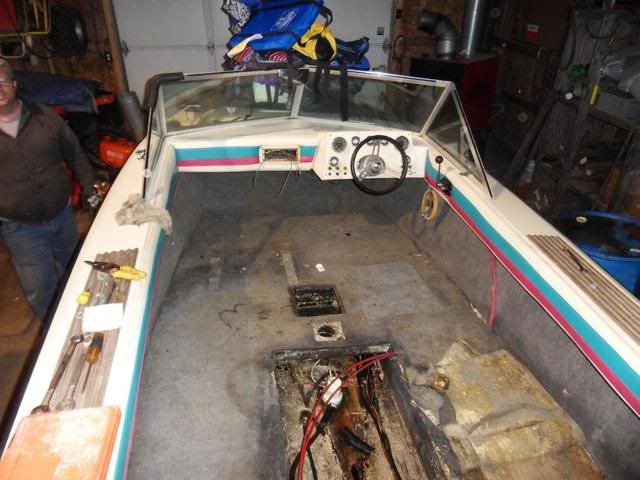
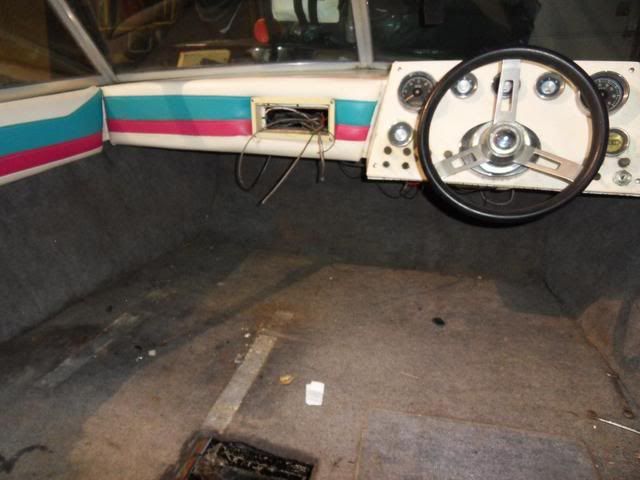
carpet next 
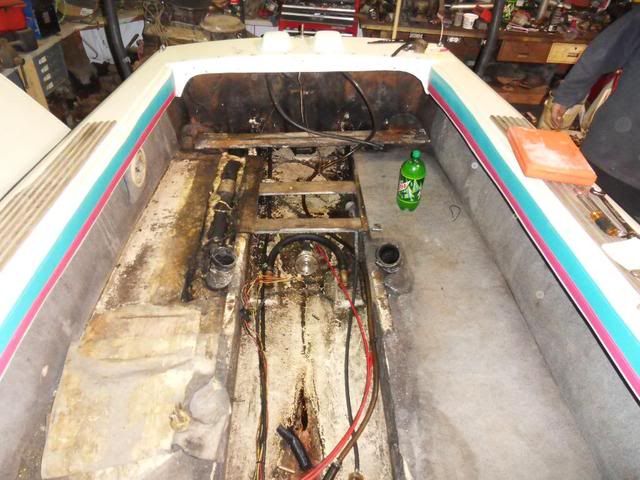
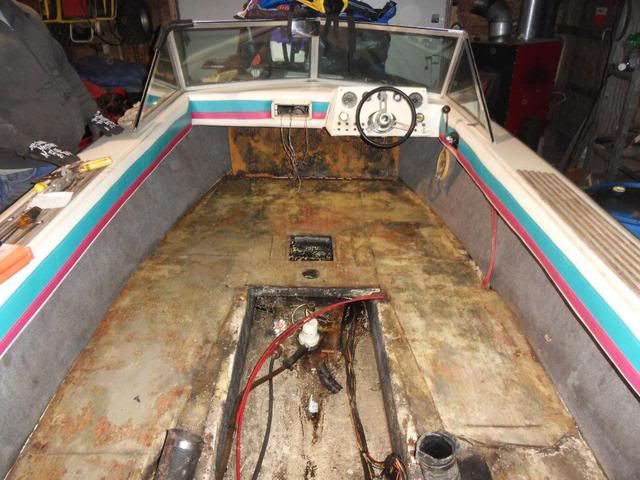
looks like the floor was half assed pieced together. anyone else seen this? 
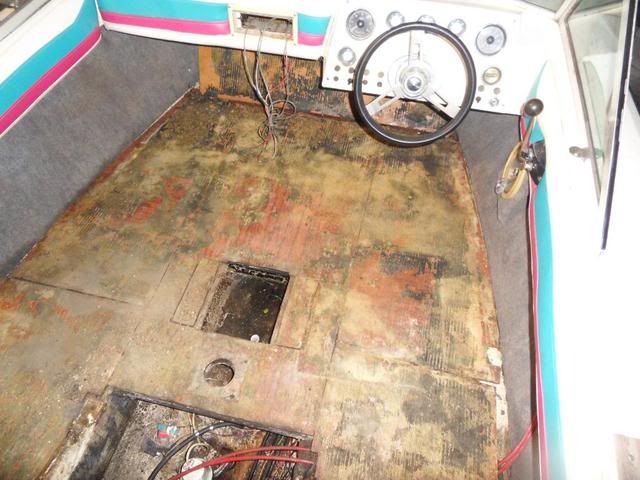
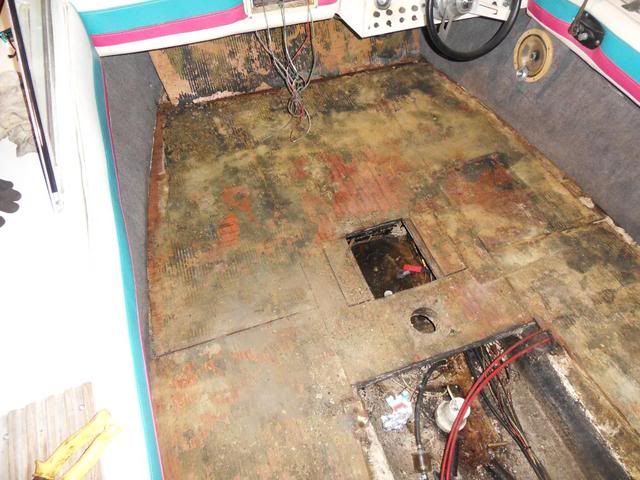
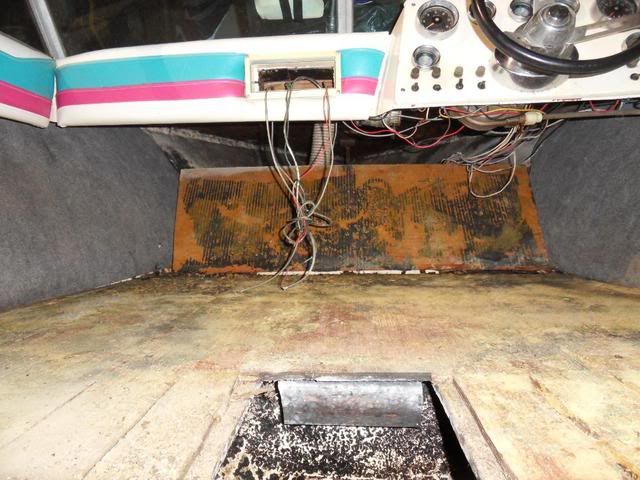
and then the floor was last to go tonight 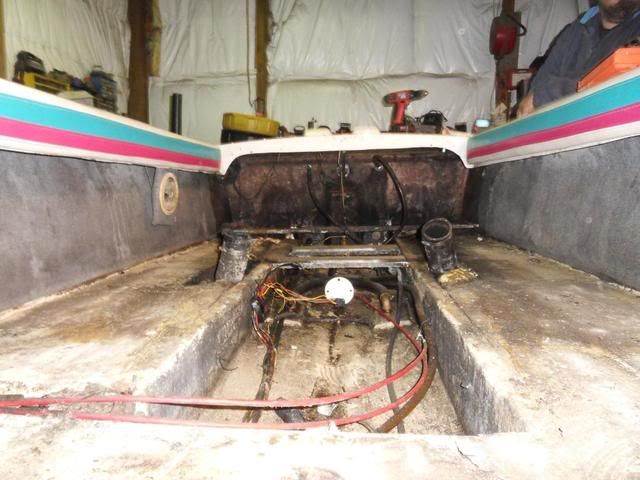

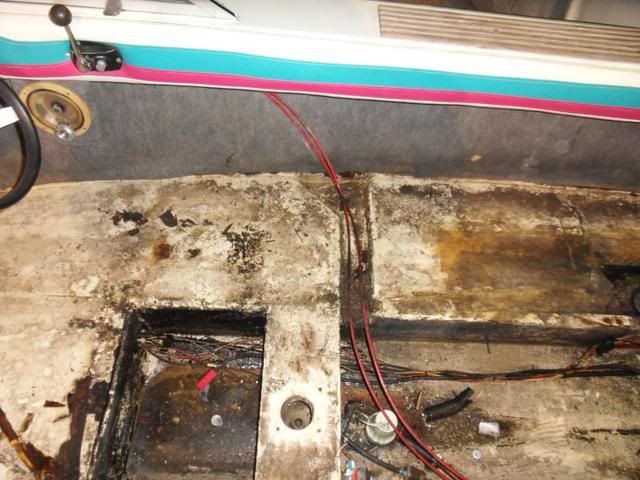
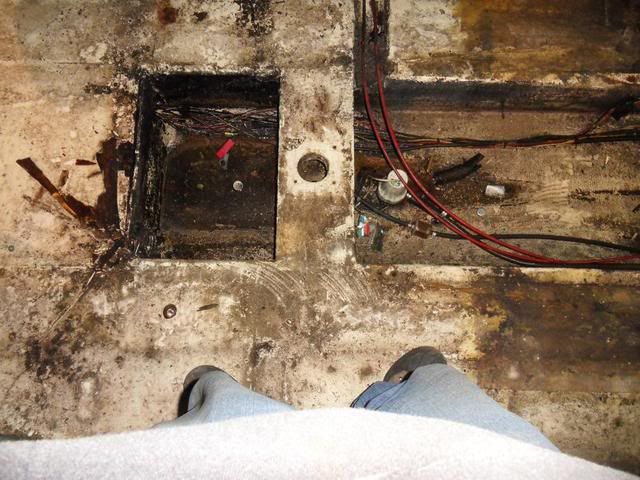
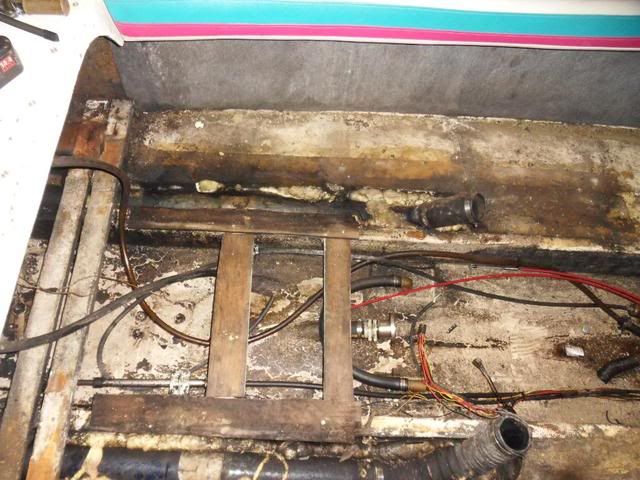
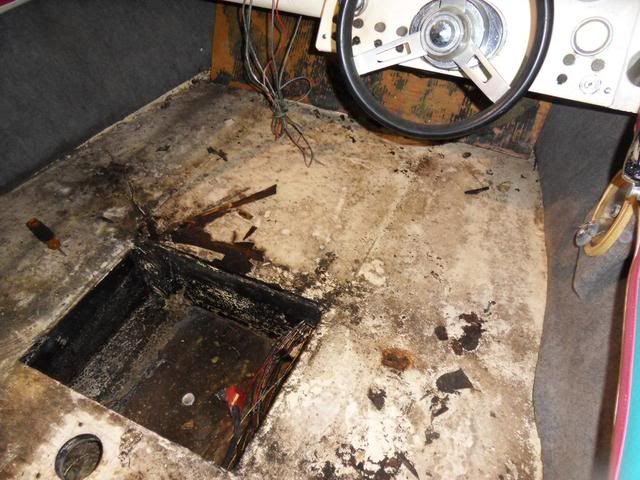
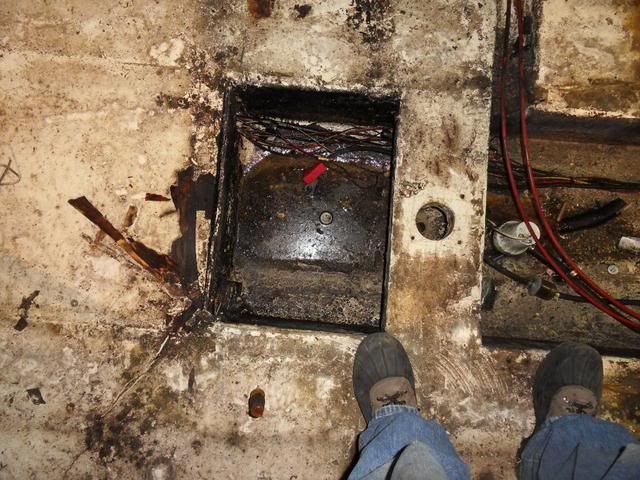
pretty sure water isnt suppose to seep out of the wood when you press on it. 
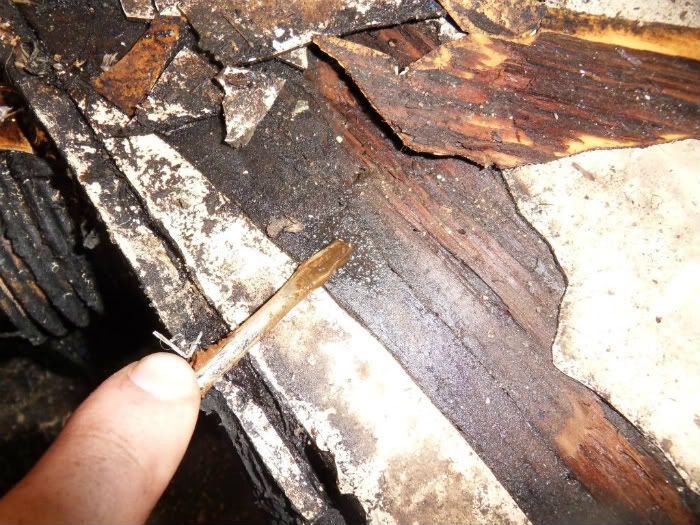
and got a hint of what the foam is going to be like. gee i cant wait to pull it out. 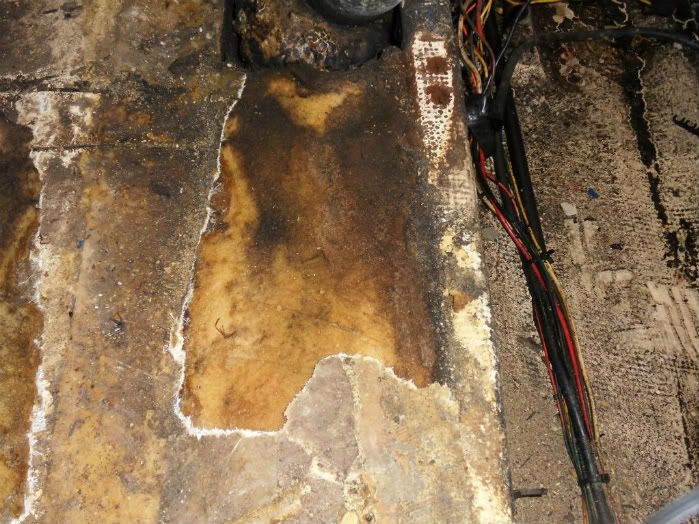
next time i work on it, goals are going to be getting the side panels, and kick panel(?) out. possibly getting whatever the hell is on top of the foam out as well. looks like a thin layer of fiberglass, if i had to guess. . . |
Posted By: 8122pbrainard
Date Posted: November-12-2011 at 8:59am
|
An option for your fuel tank is to clean it up and use a liner on the inside. Paint the outside. ------------- /diaries/details.asp?ID=1622" rel="nofollow - 54 Atom /diaries/details.asp?ID=2179" rel="nofollow - 77 Tique 64 X55 Dunphy Keep it original, Pete < |
Posted By: Metallman56
Date Posted: November-13-2011 at 2:41am
| i heard of those tank restore kits. first wave cleans all the crap out, the second coats so it wont happen again. part of me says save the money, the other part says, its out replace it. lots of time to decide. |
Posted By: 8122pbrainard
Date Posted: November-13-2011 at 8:39am
|
The tank liner is very common in antique and classic boat restorations. Cars too. ------------- /diaries/details.asp?ID=1622" rel="nofollow - 54 Atom /diaries/details.asp?ID=2179" rel="nofollow - 77 Tique 64 X55 Dunphy Keep it original, Pete < |
Posted By: SNobsessed
Date Posted: November-13-2011 at 12:01pm
|
The same company that makes POR15 also makes the gas tank repair coating. I used it on a project & it works good. Costs about $50, cheaper than a new tank. ------------- “Beer is proof that God loves us and wants us to be happy.” Ben Franklin |
Posted By: BuffaloBFN
Date Posted: November-13-2011 at 12:38pm
|
A stray thought; it might be a good idea to soak some teak oil into those step pads if you leave them in place. Epoxy drips turn up in the strangest places. ------------- http://correctcraftfan.com/diaries/details.asp?ID=2331&sort=&pagenum=12&yrstart=1986&yrend=1990" rel="nofollow - 1988 BFN-sold "It's a Livin' Thing...What a Terrible Thing to Lose" ELO |
Posted By: Metallman56
Date Posted: November-13-2011 at 3:23pm
| What's the best way to.get the glass up between the floor.and the foam? Using a pry bar so far has been a long tedious process. |
Posted By: Keeganino
Date Posted: November-13-2011 at 3:50pm
Cut all around the perimeter where the floor meets the hull and stringers and it should come up in large pieces. See the grinder in the back. I used a diamond wheel. 
You can see the line I cut where the floor meets the hull. 
The fiberglass floor comes out easily once you have cut around the edges. 
 ------------- "working on these old boats may not be cost effective but as it shows its what it brings into your life that matters" -Roger http://www.correctcraftfan.com/diaries/details.asp?ID=4897" rel="nofollow - 1973 Skier |
Posted By: 8122pbrainard
Date Posted: November-13-2011 at 6:27pm
|
Jim,
Keegan's restoration turned out fantastic. I admire him undertaking the challenge and doinig his "homework" This included searching and reading plenty of threads on the process. I encourage you to do the same. The existing knowledge base here on CCfan is really unbelievable. People with brands other than a CC come here! If my memory is correct, I believe it was Joe (inNY) that suggested the diamond blade. Cheap from HF!! I've used them too and they do work great. When you get into the corners, get the Multimaster out. I have the original Fein but as soon as their patent ran out there are plenty of cheap "knock-offs", made in China and not so good units out there. ------------- /diaries/details.asp?ID=1622" rel="nofollow - 54 Atom /diaries/details.asp?ID=2179" rel="nofollow - 77 Tique 64 X55 Dunphy Keep it original, Pete < |
Posted By: Metallman56
Date Posted: November-13-2011 at 7:42pm
|
very cool thanks for the advice. buying a diamond cut off wheel before i get back in there. this is no doubt a huge job, and tips and tricks i'm sure will make it a little easier.
as far as the planing goes thanks for the advice. i have went through several posts on here about stringers. guess i missed the part about the diamond cut off wheel. when i posted my last post, i was actually at lunch after about 2 hours of screwing with it and thought, there had to be a better way. more pics to follow, more progress made today. :) |
Posted By: Metallman56
Date Posted: November-13-2011 at 8:22pm
well firsts things first today, pulling the kick panel.
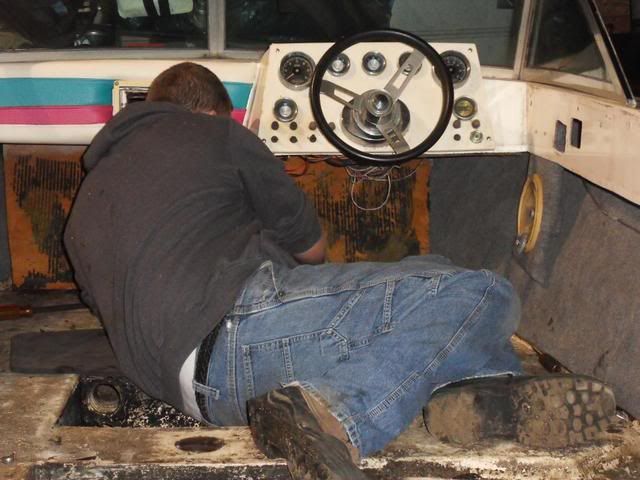
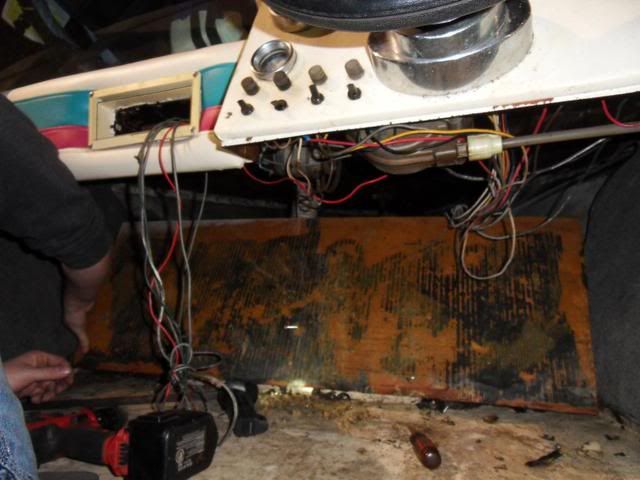
pics of whats behind it. yikes. anyone need bumpers? 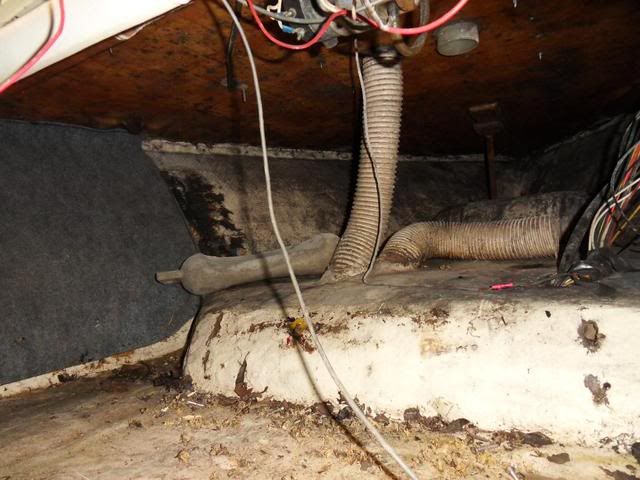
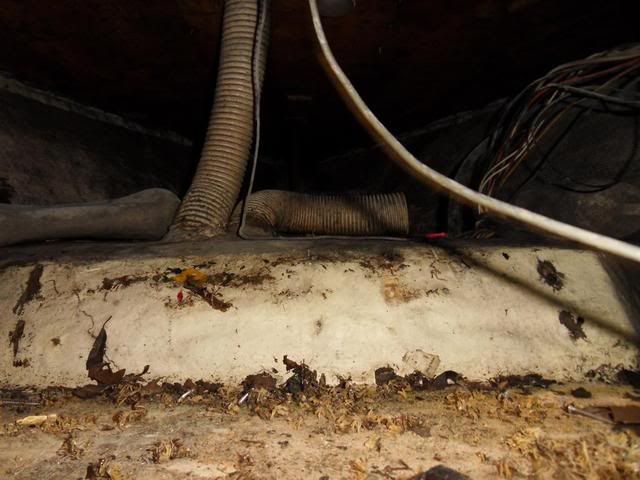
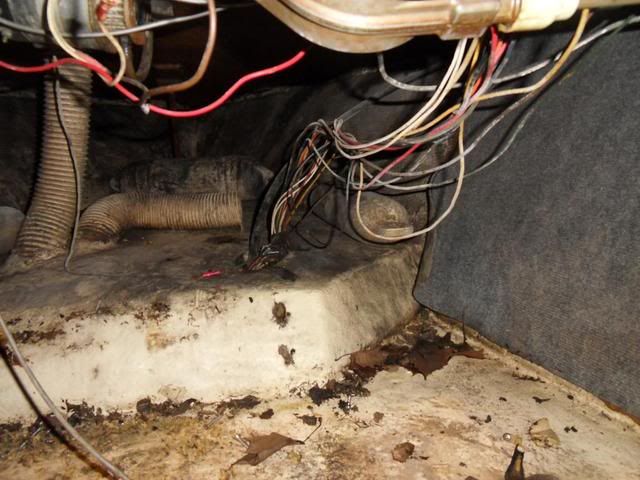
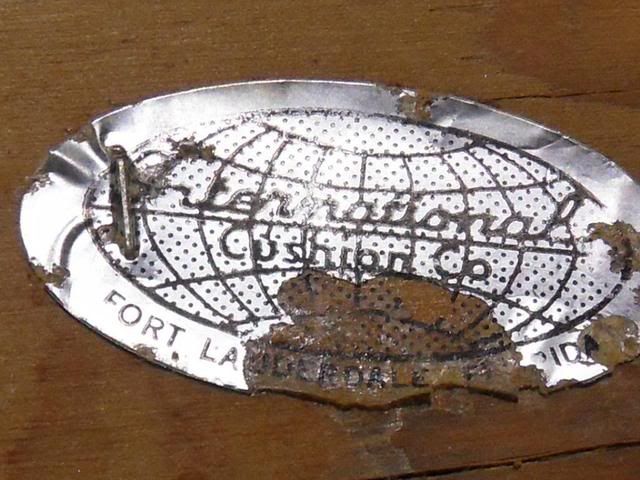
this was on the back side of the trim where the radio goes. thought it was cool. the only sticker i have found thats not on the motor. it reads "international cushion co." 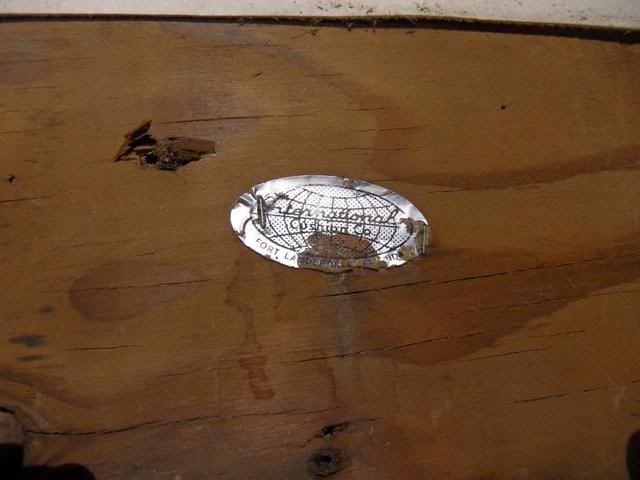
i decided to pull the support for the ski pole next. unreal the pole still worked seeing how much of its support was roted wood. 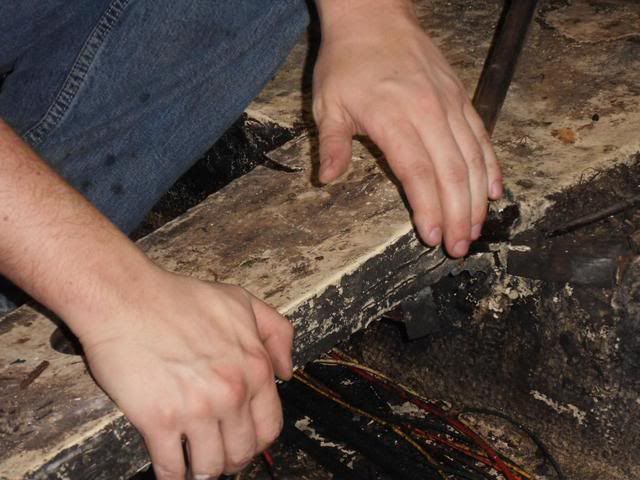
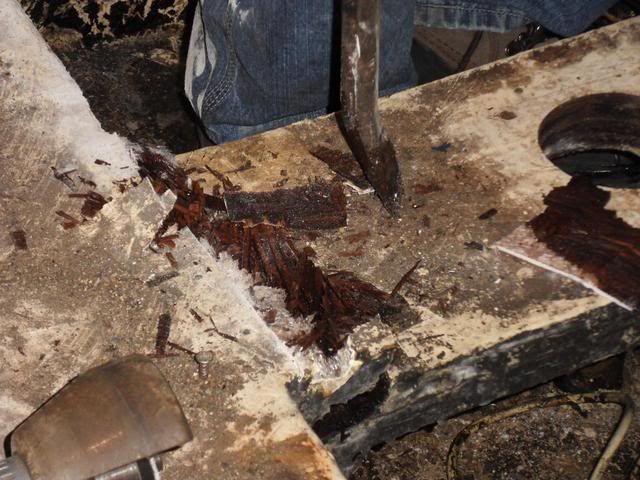
the rest of my day was spent trying to pull the fiber glass between the floor and the foam. next time i'll have my hands on a diamond cutoff wheel. so hopefully it goes by faster. today was a whole bunch of prying. 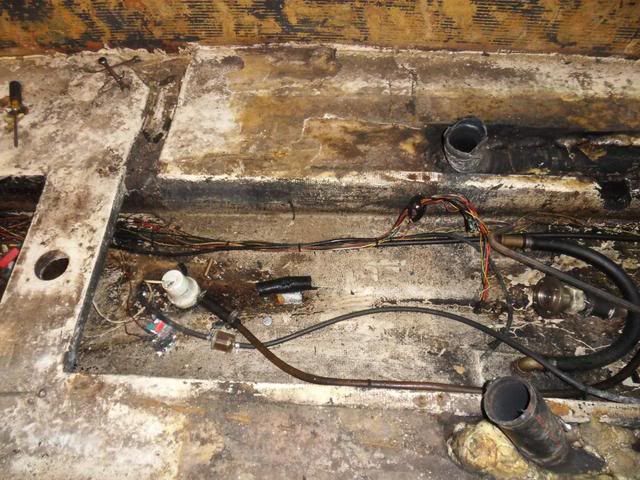
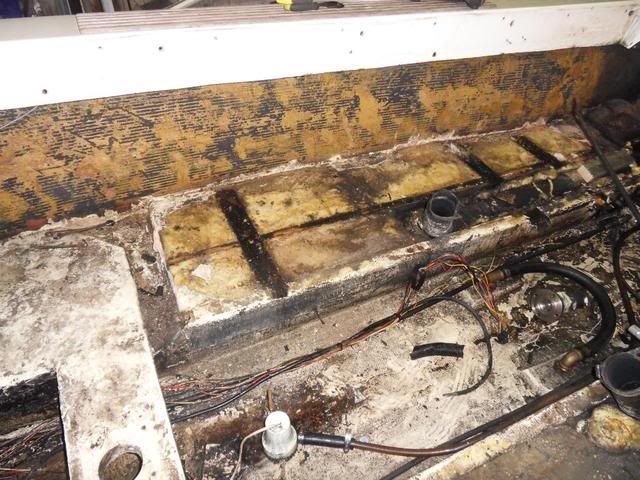
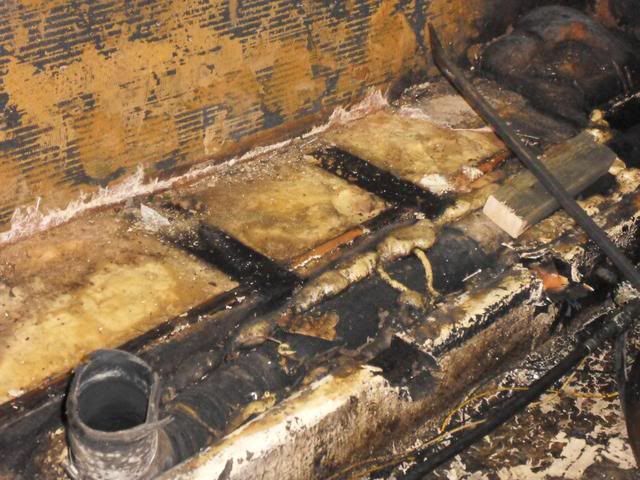
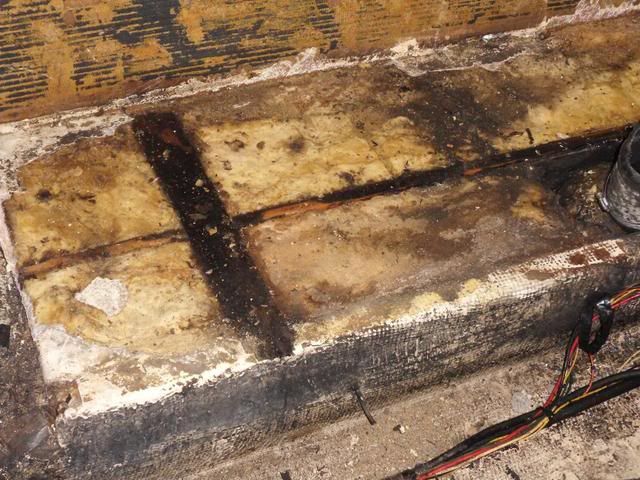
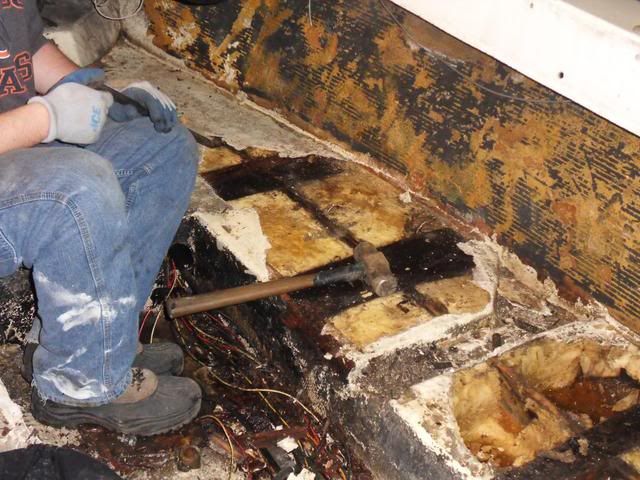
really wet foam 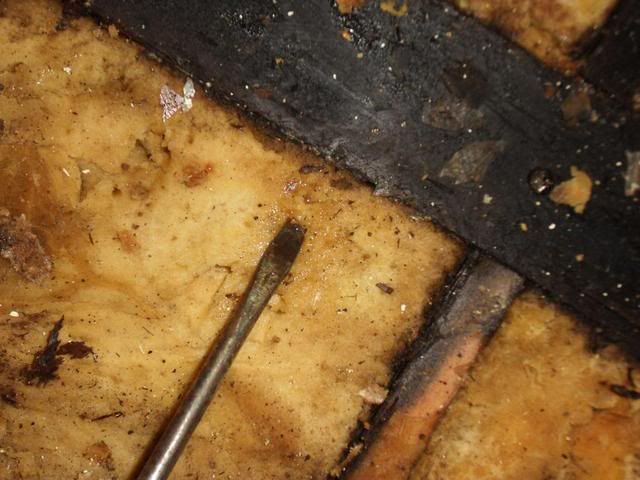
once my back started to hurt from forcing the fiberglass up, i decided to stand up and start getting the exposed foam out. we have a shovel that has a regular handle, but a very small spade. it worked perfect. i was amazed at how much water was still there! 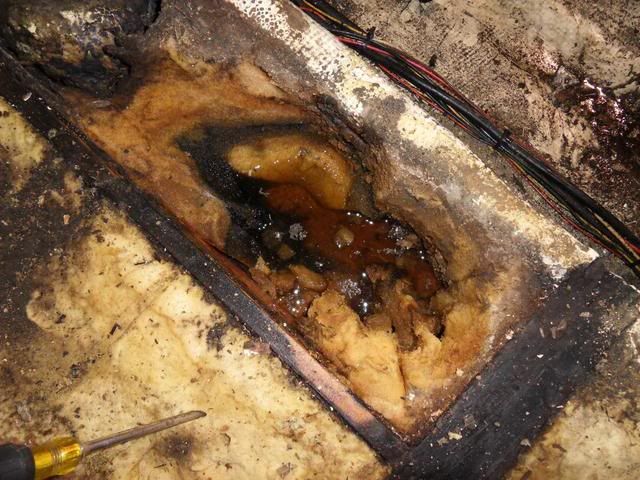
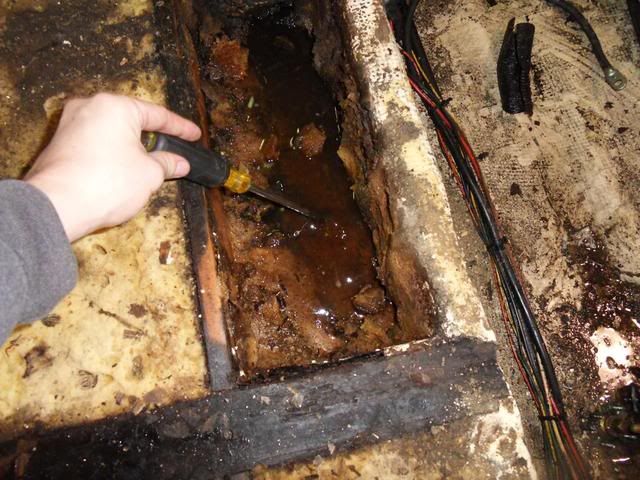
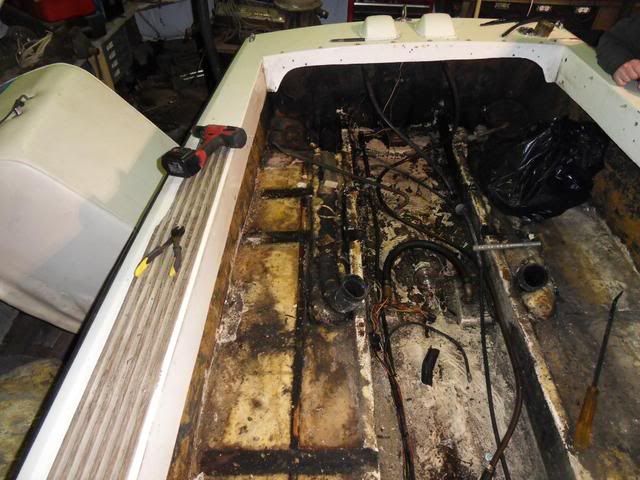

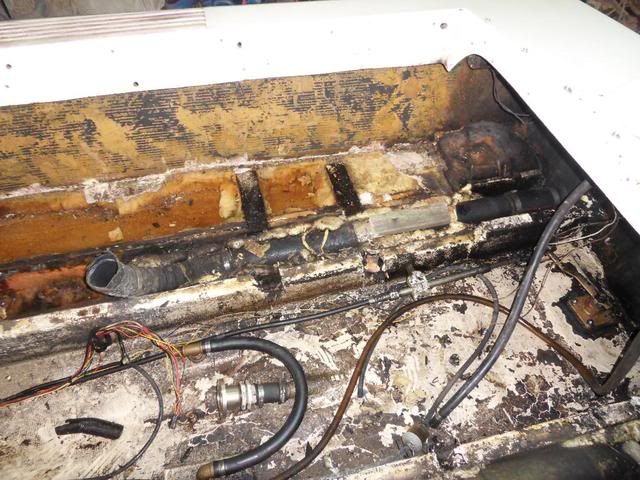
and thats how it sits now. i've got about 12 hours in it so far. so not bad i dont think for whats done. now i cant wait to get that cut off wheel. life should be easier. i know its gonna be worth it in the end, but wow its a lot of work. i'm praying i can have it done by may. |
Posted By: Metallman56
Date Posted: November-16-2011 at 10:40pm
well more work today, about 4 hours total. wow is ther a lot of foam. its one thing to see it in pics, anther to see it, lift it, and smell it. most of the wet foam smells like budwieser farts. pretty gross.
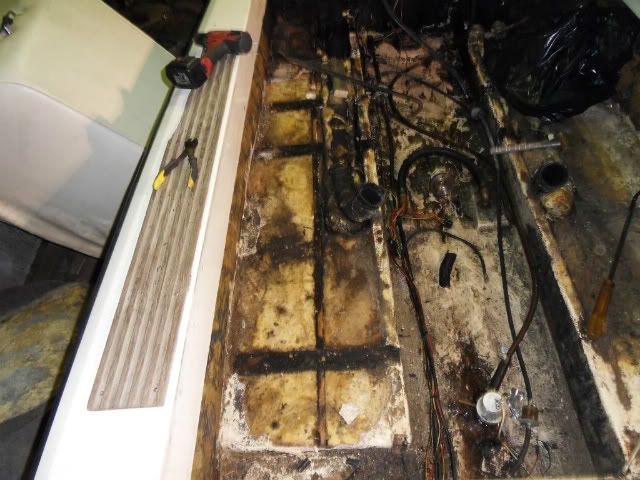
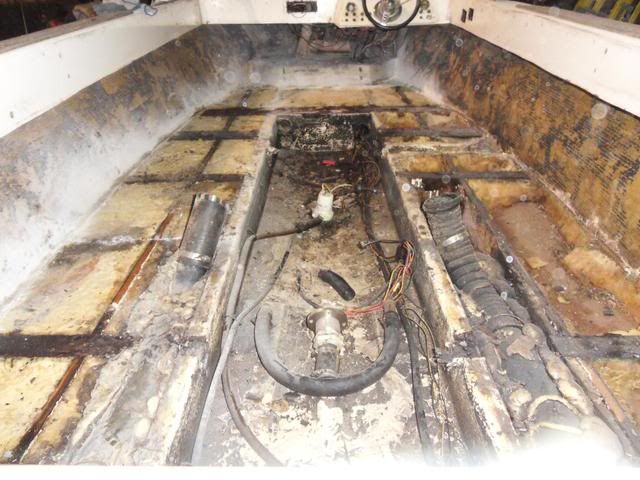
i'm not sure yet if i'm going to take out the section under the dash yet. i looks like a lot more work, and the foam i'm taking out just before it isnt wet. 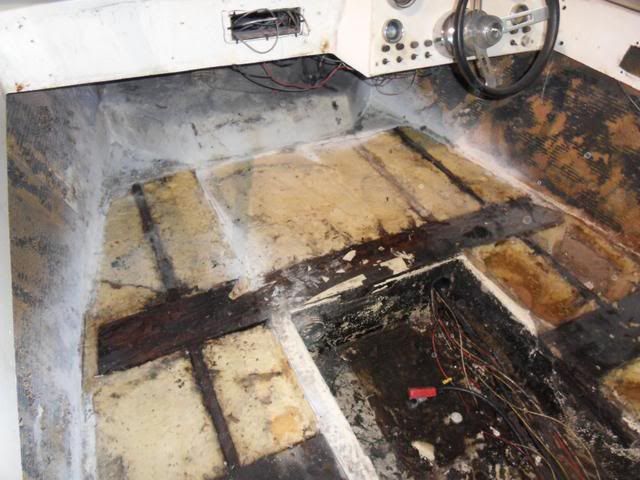
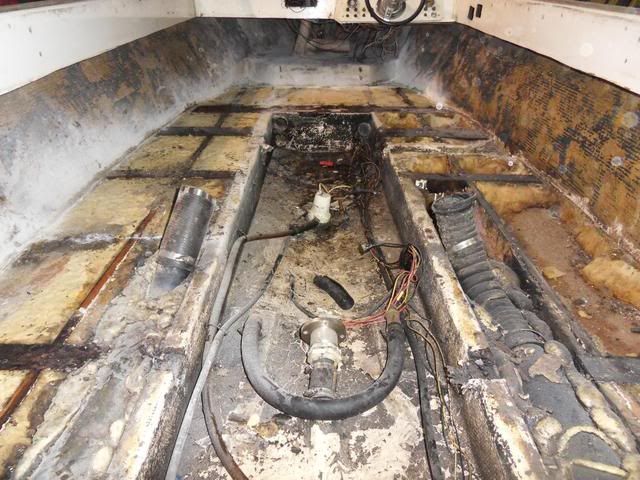
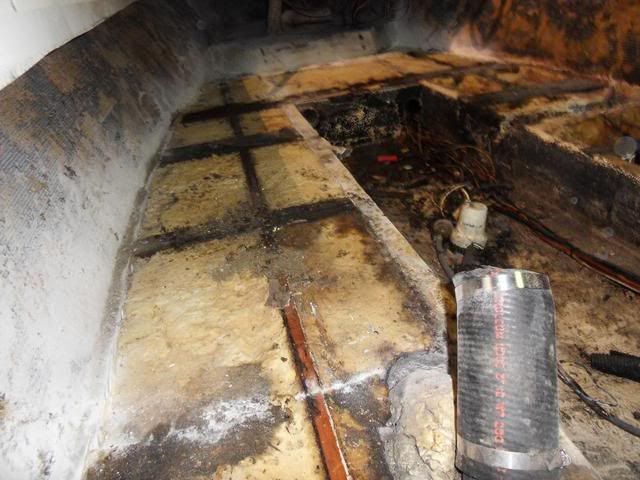
so far the worst rot i have foud has been the board that the ski pole goes in. 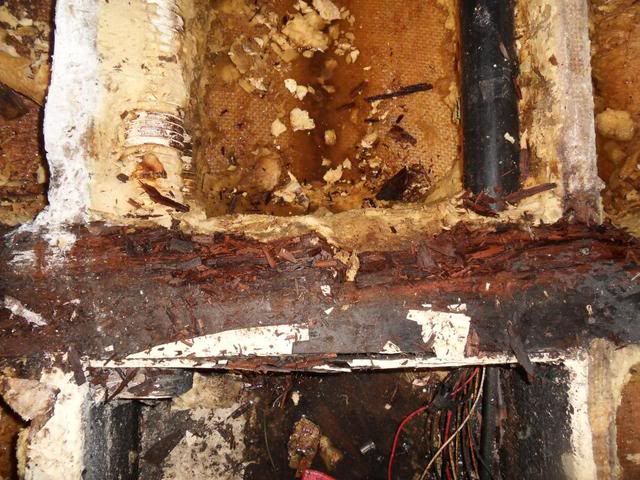
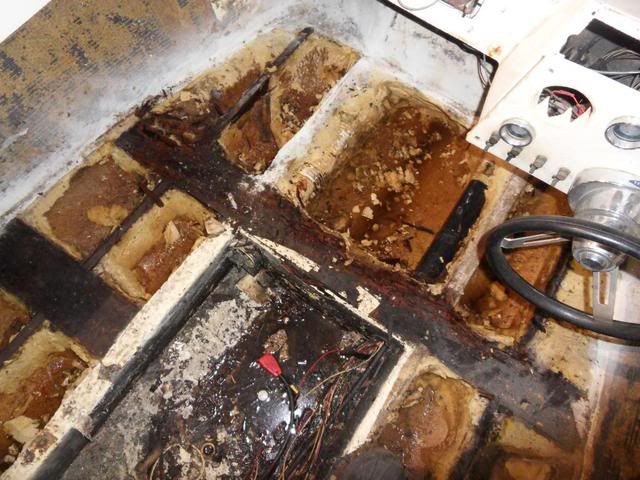
most of the foam is out. small pieces and hard to reach areas are still left. but for the most part, the real bad stuff is gone. 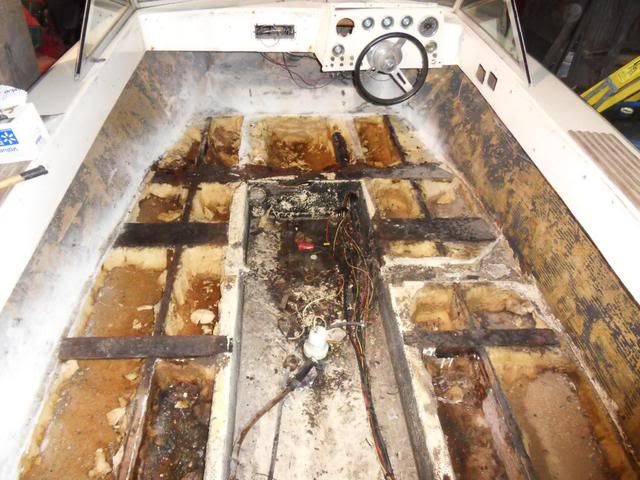
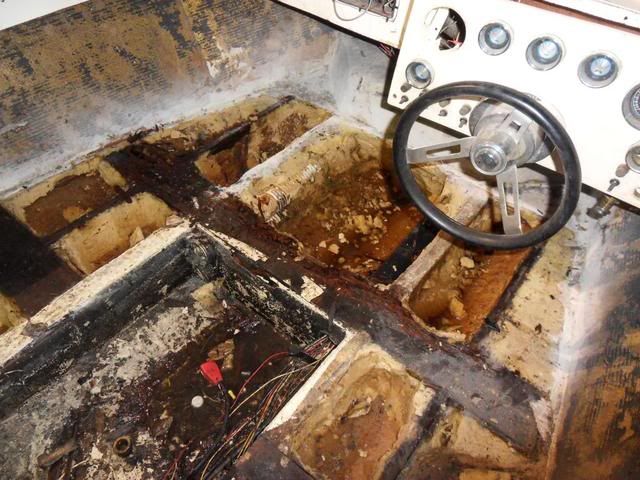
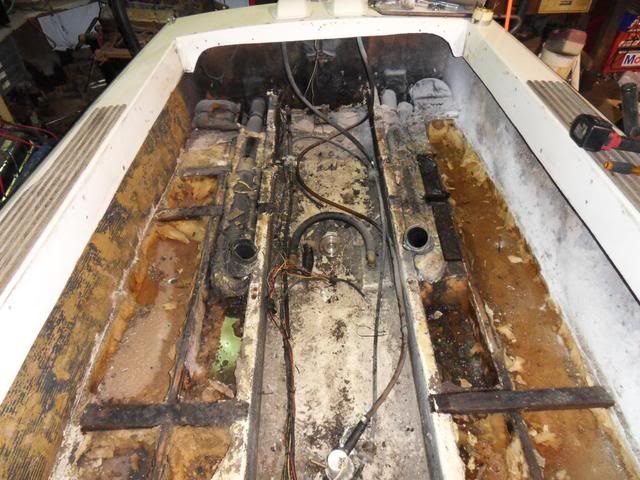
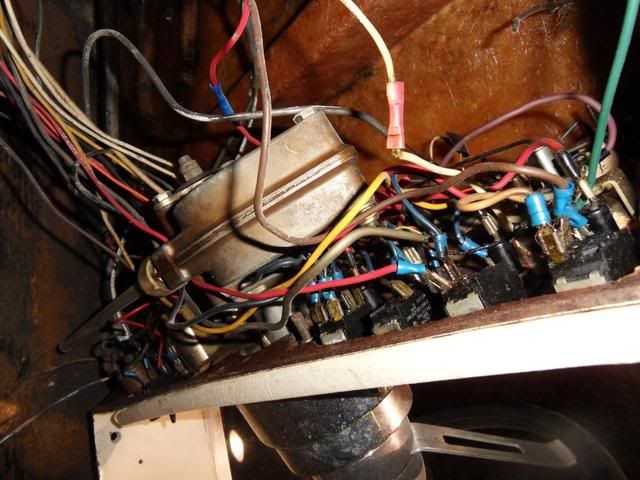
i dont know what i'm scared of more. rewiring, or getting the stringers back perfect so everything lines up exactly how it should. either way, heres the birds nest of wires i have to deal with. 
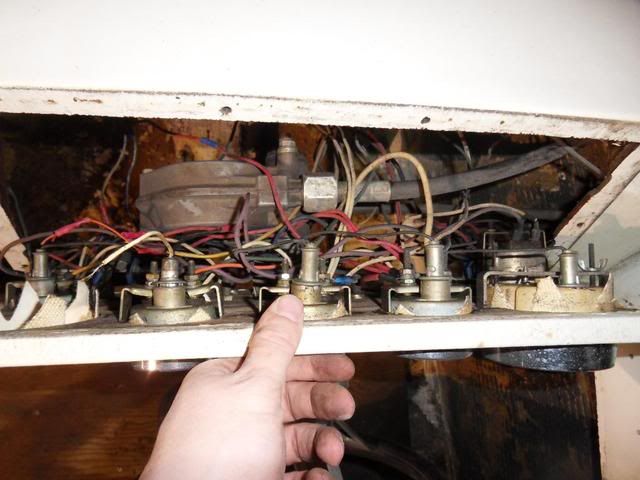
|
Posted By: Metallman56
Date Posted: November-16-2011 at 10:42pm
also i went through your whole post today Keegan. awesome work! i can only hope mine comes out as nice as yours. thats definatly a boat to be proud of! 
|
Posted By: eric lavine
Date Posted: November-17-2011 at 9:49am
|
are you not saying to yourself, Why the f do they pack this foam in here, wood is for structure, foam is for floating, look at it this way, foam is like the fat in your body, bones are the wood, if either one is missing in your body what would happen?
you know, this brings up a raw subject, im working on a 34 Pachnaga, did the transom and the owner assured me that his 40 year expert had him convinced that the boat was going to snap in half because he has some soft floors midship, he said the engine stringers were in great shape, well it has 2 big block chevy's in there, the L-brackets that hold the engines up were almost at a 45 degree angle becuse of weight and rot, I took pics, I went ahead and gutted the engine cradles and rebuilt, obviously it took as long to do the cradles as it did the transom, so the price went up. He brought his mouth piece "the wife" i could turn this into a long story, but anyways, I said look, in 20 some years i have never seen a boat snap in half, in those 20 years I have seen at least 5 engines either laying in the bildge or up on their sides from torque ripped right from the stringers, I went on to explain that he has 2000 lbs of iron concentrated in a small area on rot.. ------------- "the things you own will start to own you" |
Posted By: eric lavine
Date Posted: November-17-2011 at 10:00am
|
one more quickie, gotta a 20 ft wellcraft center counsel, guy was thrilled he only paid 15 hundies for it, bought a newer trailer dumped a thousand in it and was paying me to swap trailers. I walk to the back of the boat climb up on the 185 horse that was hanging on it and starting jumping up and down, i thought this thing was going to rip right off the back and the guy was like wtf are you doing to my boat, I look inside and see a big pile of wood chips, complete rot, the transom was bowed so bad you would of thought it was built that way....he wanted me to plate it and i said nope, you can do whatever you want to do with it but i wont be a part of it.
Once agin i had to explain to this guy the forces that are applied to the back of this boat, the boat is about 2000 lbs and you have this engine pushing all of this mass ------------- "the things you own will start to own you" |
Posted By: eric lavine
Date Posted: November-17-2011 at 10:01am
|
sorry for stealing your thunder
------------- "the things you own will start to own you" |
Posted By: Keeganino
Date Posted: November-17-2011 at 3:24pm
|
Thanks for the compliment. You have to remove the airbox foam so that you can replace the conduit. The dryer type flex hose cracks and is a major point of water intrusion in most of these older models. Most of the rebuilds use pvc to replace the flex duct.
I did not rewire my boat. Just coil the bundle of wires and zip tie it together and hook it back up when you are done. ------------- "working on these old boats may not be cost effective but as it shows its what it brings into your life that matters" -Roger http://www.correctcraftfan.com/diaries/details.asp?ID=4897" rel="nofollow - 1973 Skier |
Posted By: Metallman56
Date Posted: November-18-2011 at 1:27am
| damnit, i really didnt want to take it out. i wonder if i can just cut out the part between the 2 main stringers, run my pvc, and then reglass the part i took out. |
Posted By: connorssons
Date Posted: November-19-2011 at 9:32pm
| Dont start half assing it already, do it right the first time. cool it has a H/M in it. you should try to find the other manifold for it. good luck! |
Posted By: Metallman56
Date Posted: November-21-2011 at 12:15am
|
not trying to half ass, just trying to work smarter not harder. if it needs to come out it will :)
any link to a h/m exhaust manifold, please let me know. i've been looking for one for about a month now. |
Posted By: Metallman56
Date Posted: November-22-2011 at 1:07pm
well more progress last night. started to cut into the airbox, and started to defoam. probably the dryest foam so far, but it was still wet.
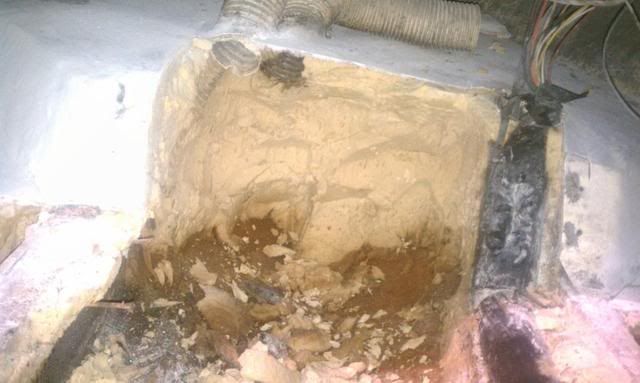
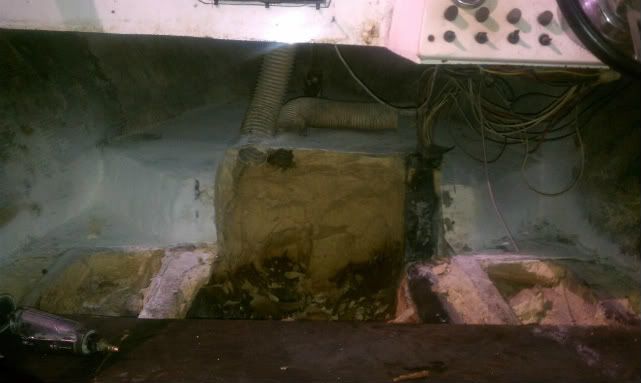
i do have a question. in all the other stringer replacement forums i have read, it seems like the stringers have stopped somewhere around the battery box. mine however are still going under the dash. i'm starting to get worried about how far they go to the front. it wouldnt be a problem if i had space. but under the bow there almost isnt any. looks like at this point i have no choice but to unfoam them, and try to find the end. i just pray they stop soon. |
Posted By: TRBenj
Date Posted: November-22-2011 at 1:28pm
|
On all the flat bottom boats Ive disassembled, the main stringers stop at the air box- theres usually a piece tacked onto the end of the board that helps form the kick panel surface. ------------- |
Posted By: Metallman56
Date Posted: November-22-2011 at 1:45pm
| i really hope thats the case. i'll have to cut some more into it before i can really tell. |
Posted By: Hollywood
Date Posted: November-22-2011 at 3:01pm
|
look at those boots, must be really wet foam in there
da bears ------------- |
Posted By: Metallman56
Date Posted: November-23-2011 at 12:52am
not that much water, lol. but if i would have stepped in it with my shoes, well wet cold feet really isnt fun 
|
Posted By: connorssons
Date Posted: November-24-2011 at 5:17pm
Those manifolds are really hard to come by, I have 3 great sets but thay are spoken for. 3 H/M powered separators  How far from coldwater MI are you? How far from coldwater MI are you?
|
Posted By: Metallman56
Date Posted: November-24-2011 at 11:39pm
less then 90 miles. 
|
Posted By: Metallman56
Date Posted: December-09-2011 at 4:13am
well finally got back to working on the boat today. havent really touched it sense thanksgiving. working retail after thanksgiving is our busy time :(. which means more time at work, less on the boat. thankfully tonight i discoverd where the stringers end (finally). which is what my goal was.
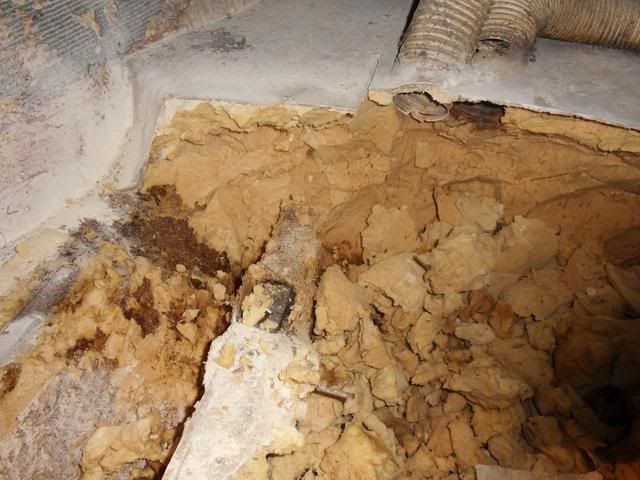
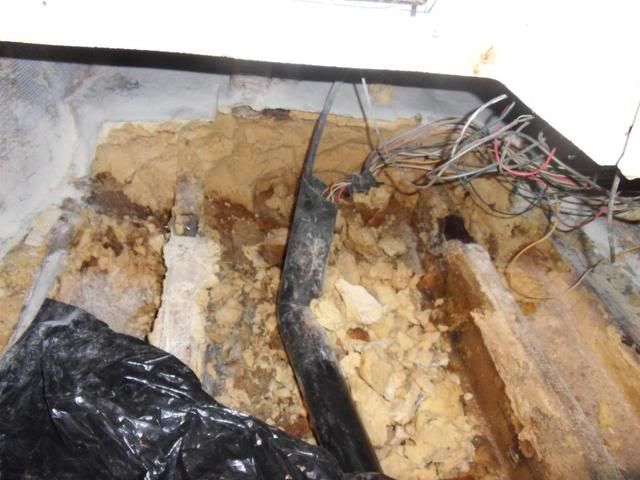
tetnus anyone? nails from the stringer that held in the pipes before foam. . . . . i think. 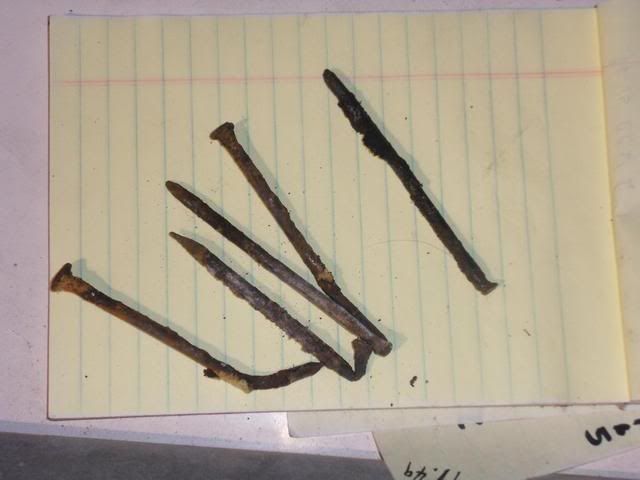
next step is to clean up a little bit, and pull a stringer, hopefully on sunday. my brother should be stopping by to help. my plan is to cut the stringer about an inch from the floor board, using a cutoff wheel. with the guide on the cutoff wheel, it should only go through the glass, not the stringer. then it will hopefully just come out. with all my research on here that's one part that is a little vague. one post there in, the next there out. hopefully i'm doing it right. one last thing about the foam up front. simply put i'm not going to replace it. there is no way a full grown adult could climb up there and not only refoam, but reglass too. and seeing as though i dont trust a child, and dont know any . . . . . little people, i'm just going to leave it be. i think it will be fine though, cause as i have said before, the stuff up front has been the driest foam yet. |
Posted By: TRBenj
Date Posted: December-09-2011 at 11:37am
|
I would highly recommend a diamond blade on a 4.5" angle grinder for cutting out the stringers. Stay as close to the hull as you can (without breaking through).
I cant see your pictures, but how do you plan on replacing the vent hoses and conduit (steering cable, control cables, etc) if you leave the old air box in? I found some pretty wet foam in the nose of my Ski Tique, and opted to replace that whole thing while I was in there. I wouldnt skimp now that youre this far. Its not a lot of fun working up under the bow, and it is tight... but at 6', 195 lbs Ive done several. ------------- |
Posted By: connorssons
Date Posted: December-09-2011 at 11:07pm
Come on man you can fit i did! 6ft230lb you will find more wet foam up there  
|
Posted By: Metallman56
Date Posted: December-11-2011 at 3:00am

ill be honest, i stuggled to get the glass and foam away from stringers end. i think i could take the foam and glass out, its just reglassing that i'm having a hard time imagining how thats going to work. i suppose i "could" leave the glass and just take out the foam. . . . . havent really thought about that. i think thats at least doable. if i dont replace all the foam until the front of the boat, i'm deep enough where i can cut out the factory plastic where the wires and stearing are ran. thats no problem. and i can get new air hoses ran as well. i intend to use pvc pipe to run both air, and wires/stearing. air down the left side, wires/stearing down the right. also sealed battery box. i guess i have some time to think about it, once i have a string out, it might open up more room. i'm only replacing one stringer at a time. so maybe that might free up more room. |
Posted By: Metallman56
Date Posted: December-12-2011 at 12:11am
well today i finally got my first stringer out. i have to admit it was a lot harder then i thought it was going to be. i understand now why you said as close to the hull as i could get. i cut the glass all the way around the stringer and used a jack to put pressure on it. a bfh (big freakin hammer) and it was out. a tip though, is i noticed that if i took out the glass off the stringer first, i could see what was going on with the stringer itself. which helped me figure out what needed to happen next. i thought it was glued down from the factory. its not, its just glassed in from the floor up. all 1 piece. what we ended up doing was cutting a piece out about 2" from the back of the boat.
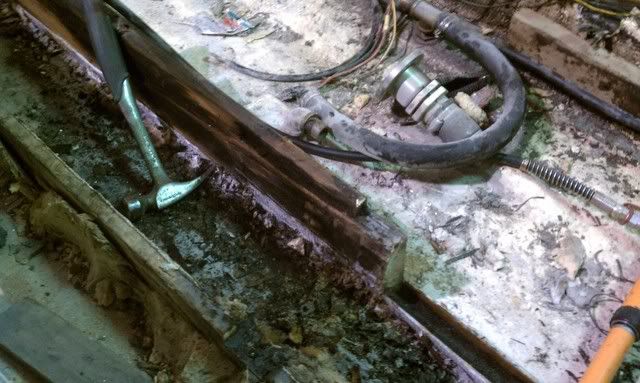
once that was done the rest literally just lifted out. im guessing the big piece was around 50 lbs. very wet, and heavy. heres what it looks like now, with 1 stringer gone. 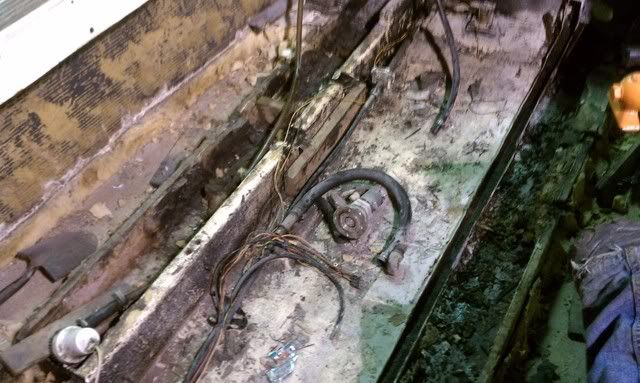
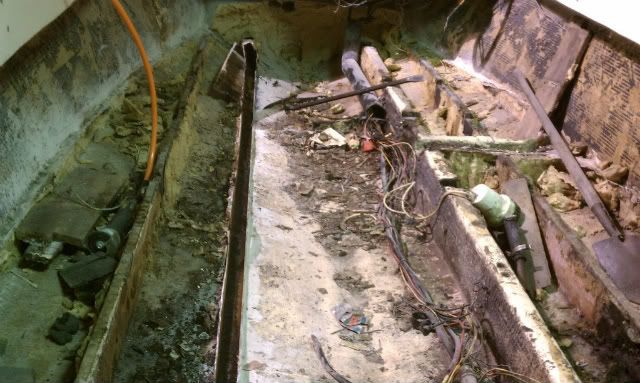
next is to find some douglas fir and make a new srtinger. then glass. also i need to start cleaning up my mess so i can put it back in. still trying to decide if i want too keep unfoaming the front. thanks for all the help so far guys. i'm still hoping to have it done by spring, and without you guys i doubt it will happen. 
|
Posted By: connorssons
Date Posted: December-12-2011 at 12:44am
GET THE FOAM OUT OF THE FRONT! if you cut the glass closer to the floor the less grinding.  looking good! your in the suck zone now, but it only gets better looking good! your in the suck zone now, but it only gets better   [LOLit,s definetly worth the extra work [LOLit,s definetly worth the extra work
|
Posted By: connorssons
Date Posted: December-12-2011 at 12:50am
| Quick question? how do have the hull supported. still on trailor or on stands. thats very inporant. |
Posted By: Metallman56
Date Posted: December-12-2011 at 12:56am
| its on the trailer right now. no extra stands. from what i've read, you dont need extra support IF you do one at a time. is that wrong? |
Posted By: Metallman56
Date Posted: December-12-2011 at 12:58am
if i get the foam out do i have to cut the glass up there? thats my main concern, is reglassing. if its just getting foam out, i think i can do that. i should have a shovel long enough. |
Posted By: connorssons
Date Posted: December-12-2011 at 1:04am
| The glass looks pretty delamed! take the xtra time and put a couple supports in. cut the air box out and redo you will get a better job. check out the threads on supporting the hull thay are very good. |
Posted By: Metallman56
Date Posted: January-04-2012 at 1:27pm
i need a little help. through all my research i remember seeing a list of supplys like glass and foam. it was pretty much exactly what one would need for the stringer rebuild. well like an idiot i didnt bookmark it, but thought i did  whooops. after about 25 mins of searching the forum, i cant find it. any help would be awesome. whooops. after about 25 mins of searching the forum, i cant find it. any help would be awesome.
also work is about to begin again. buying new stringers on friday, sense christmas is finally over. 5 months to go, hopefully its enough time. |
Posted By: 8122pbrainard
Date Posted: January-04-2012 at 1:30pm
|
It's US Composites ------------- /diaries/details.asp?ID=1622" rel="nofollow - 54 Atom /diaries/details.asp?ID=2179" rel="nofollow - 77 Tique 64 X55 Dunphy Keep it original, Pete < |
Posted By: Jllogan
Date Posted: January-04-2012 at 1:50pm
|
try a google site search, there are a few lists. Try stringer list or shopping list. Also just accept the fact you are going to have to make more than one order to uscomposites. They are by far the most knowledgeable and affordable. ------------- http://correctcraftfan.com/diaries/details.asp?ID=5792&sort=&pagenum=1" rel="nofollow - 1986 Ski Nautique 2001 |
Posted By: Metallman56
Date Posted: January-06-2012 at 8:44pm
|
us composites it is. now if i could just find that list. oh well
today i got my first day off with time to actually work on the boat sense before christmas. found douglas fir and got my 2 new stringers. they sold them in 20' boards, so i think i'm going to use the excess to make cross members. below are the pics of the old stringer on top of the new one. going to be tracing out a pattern from the old stringer, then cutting the new one. getting the right angles on the bottom of the stringer is going to take some time. 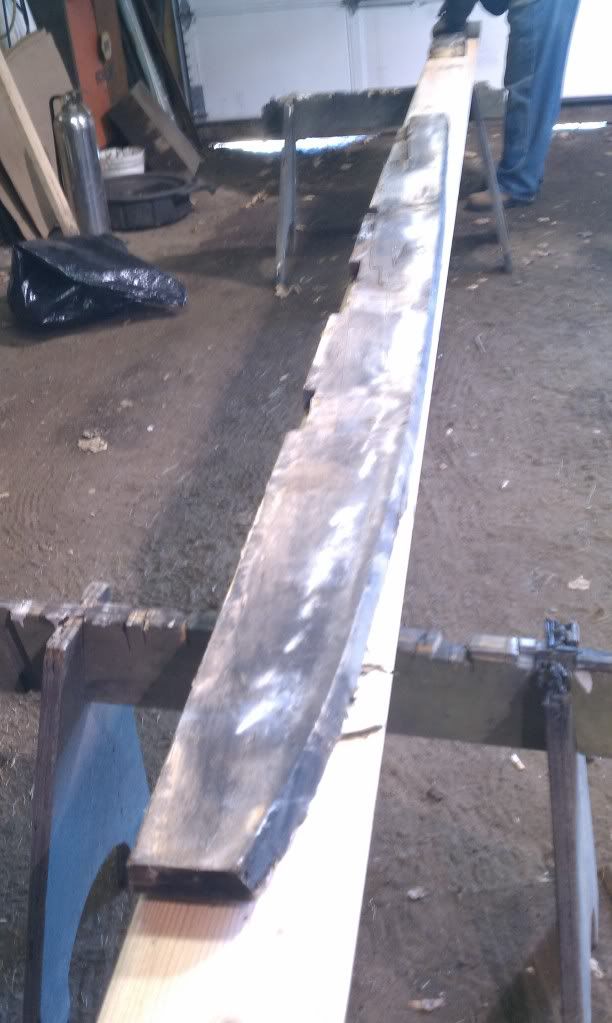
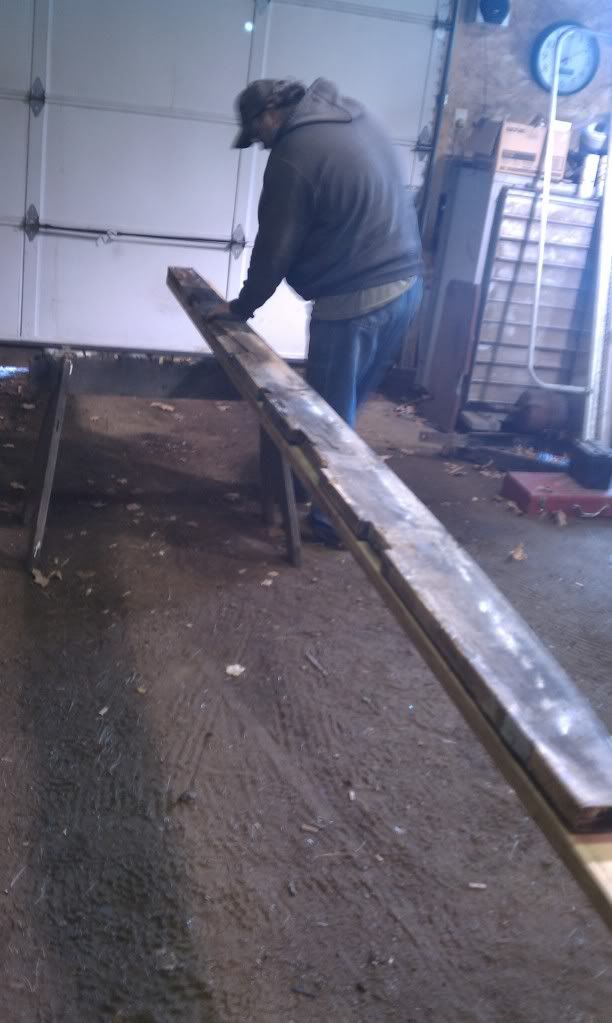
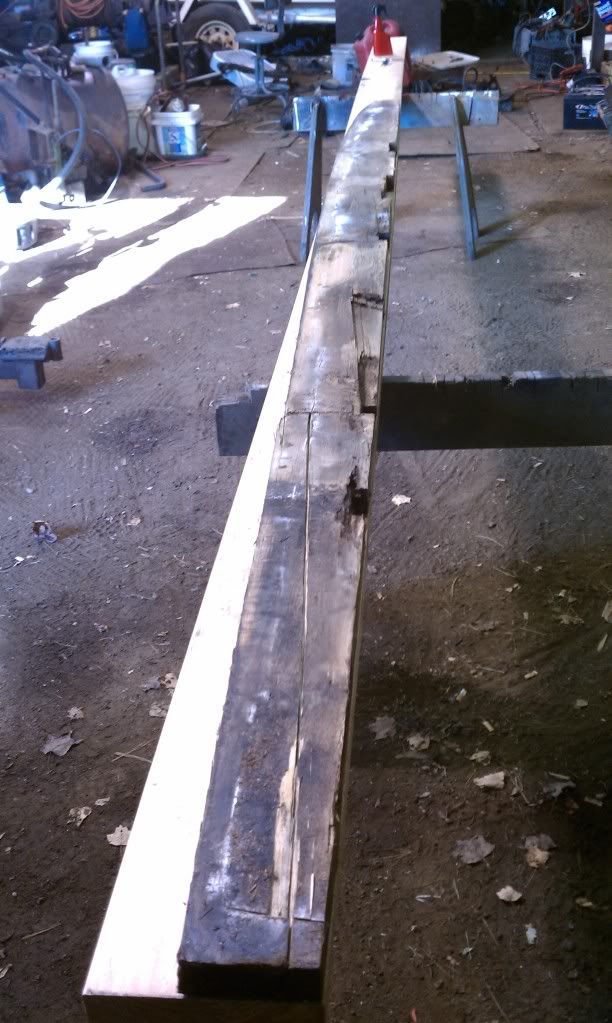
also the factory bolted the engine down from the top with lag bolts. what i'm going to do is drill the bolts in the stringer from the bottom up. that way if i do need to pull the motor a time or two, i'm not making the holes in the stringers bigger and bigger. it has to be exact, but i think i can do it, and it's going to be worth it in the long run. |
Posted By: 8122pbrainard
Date Posted: January-06-2012 at 9:36pm
|
Jim,
If you don't have one already, get yourself a power hand planer. HF has a pretty cheap one and they make short work for the bottom edge bevel. I don't feel the bolt from the bottom of the stringer is a good idea. In fact, I feel it's a real bad idea. Even if you try to epoxy them in, if they ever spin on you when you are trying to remove the nut, you'll have a big problem. Also think about the bolt head VS: all the threads of a lag. The bolt head has a pretty small surface area compared the all the grab of a lag. Lags have been used since day one of the inboard engine with out problems. Even if the lag starts to loosen after repeated removals, you can always pour some epoxy down the holes. The idea also limits the fore to aft adjustment of the engine. You'll never get them in the correct spot especially with a re stringer job. ------------- /diaries/details.asp?ID=1622" rel="nofollow - 54 Atom /diaries/details.asp?ID=2179" rel="nofollow - 77 Tique 64 X55 Dunphy Keep it original, Pete < |
Posted By: SNobsessed
Date Posted: January-06-2012 at 10:41pm
|
Also, a hole all the way thru the stringer is a stress riser (weak point).
it is best to come down from the top like original. Eric has an alternative design - bury an aluminum shank in the stringer that is pre-tapped for a machine screw. That will take some real precision engineering or you will be screwed (pun intended) when it doesn't line up! ------------- “Beer is proof that God loves us and wants us to be happy.” Ben Franklin |
Posted By: Metallman56
Date Posted: January-07-2012 at 2:50am
great points. so lags from the top it is, i suppose. i thought it was a good idea too. thanks for saving me the heartache 
|
Posted By: 8122pbrainard
Date Posted: January-07-2012 at 9:51am
Jim, Good to hear. I do commend you for "thinking outside the box". Keep the pictures coming. ------------- /diaries/details.asp?ID=1622" rel="nofollow - 54 Atom /diaries/details.asp?ID=2179" rel="nofollow - 77 Tique 64 X55 Dunphy Keep it original, Pete < |
Posted By: Metallman56
Date Posted: January-11-2012 at 2:39am
ok so i have found 2 "lists" of materials from us compostis. the first is from a barefoot, which i believe is a overall bigger boat then mine. the second is from a mustang, which is smaller then mine. so i'm thinking somewhere in the middle. i inclueded the quotes from the original poster(s) just so i dont steal anyones list.
i'm thinking price should be around $1200. i'm at the point in the project where i'm going ot be waiting on materials soon. i guess i should have been more proactive in decemeber. money was tight around xmas though, and i really didnt have the time. hopefully materials wont kill my spring deadline. i have to be honest, when i look at my boat right now i think to myself "god i hope it floats again." i know it will, but i also know i'm a long way away from the finish line. thanks so far for all the support, and the support in the future. also next day off is friday, so more pics will come. this week i'm logging 6 days at work and about 55 hours.  there just not enough time in the day, or energy in me lol. there just not enough time in the day, or energy in me lol.
|
Posted By: TRBenj
Date Posted: January-11-2012 at 10:48am
|
The BFN list is ours... so a few comments.
- You need to decide on a rebuild method and then plan your material list accordingly. Wood vs. composite, foam vs. no foam, ply floor vs. glass over foam, layup schedules, etc. -The BFN list above was a composite rebuild with lots of laminating, every panel was pre-glassed, and there were alot of extra support pieces that required extra glass. -We did ok on the glass itself, but ended up using somewhere between 12-15 gallons of resin. You *might* squeak by with 10 gal... but you'll be cutting it close. -We didnt end up using the aero-cab. We used the milled fiber pretty much exclusively for the structural stuff. 50lbs is overkill for a single boat. 10 lbs of the aero-cab is probably enough (its much lighter, so volume is somewhat comparable) and its a close second in terms of strength. -Having a bunch of the measuring cups from USC is a good idea for the bigger batches. For smaller batches of resin where you can meter with the pumps, solo cups work well. ------------- |
Posted By: Jllogan
Date Posted: January-11-2012 at 12:01pm
|
Agreed you should have plenty of aerocab, remember Keegs boat was a wood floor with a fiberglass layering top and bottom, this will require a little less resin and a little less cloth than a foam/fiberglass. His list looks alot like mine because well, I am doing the wood floor as well.
-I got a variety of cups as they arent expensive and have markings for measurements which is nice when you are mixing 2 part things (foam, CPES) -Also pick up a couple of paint suits from USC, they are cheap and will be nice not to get stuff all over your clothes and then get it on the side of the boat or something. -Little things like stir sticks, plenty of acetone, rags and definitely get their 100ct of disposable gloves. - have you thought about your bilge coating yet? May want to get that stuff from usc too, if you are doing gelcoat or something you cant get in your local stores (some guys have done the epoxy garage floor coating) - I got my CPES from jamestown as it was on sale at the time and I got free shipping, so it was a little cheaper then. - I bought only the 3:1 kits, because I didnt really want/think I needed the fast kit. ------------- http://correctcraftfan.com/diaries/details.asp?ID=5792&sort=&pagenum=1" rel="nofollow - 1986 Ski Nautique 2001 |
Posted By: Metallman56
Date Posted: January-12-2012 at 1:09pm
|
i guess i havent revealed my plan yet have i? whops. ok so heres my plan.
cut stringers and sand them down to make them fit correctly. also i'll be makeing the cross supports out of the same douglas fir as the stringers, sense i'll have about 16' left over. more strenth, same cost, why not? then i'll be putting in the stringer with a boat load (no pun intended) of epoxy. once dryed i'll glass it in. then pull stringer #2 and repeat process. once stringers are both back in then i'll take out the floor supports. douglas fir for those as well. expoy those back in. pvc to air box up top. over build battery box and seal it. not exactly sure how yet, but i know i'll come up with something when that time comes. the bat box is going to be over done. epoxy down floor and cut holes for foam. pour foam and cut down excess the final step is going to be one of 2 things. fiberglass on top, then carpet, or something a little out of the box. i live next door to the rv capitol of the world. i'm pretty positive i could get sheets of fiberglass. my thought is if thats the case, buy a couple of sheets, and layer them up, probably about 2x depending on thickness. first sheet would get expoy'ed to the floor, then glassed in and sealed on the sides. same step for the second sheet. i'm yet to look into this option and see how big of a sheet i can get, but it sounds like it might save me a ton of time next is gel coat in the bilge, probably off white. then carget, motor, interior, and finally seeing if it floats. |
Posted By: 8122pbrainard
Date Posted: January-12-2012 at 1:20pm
|
Jim,
You didn't mention the CPES. ------------- /diaries/details.asp?ID=1622" rel="nofollow - 54 Atom /diaries/details.asp?ID=2179" rel="nofollow - 77 Tique 64 X55 Dunphy Keep it original, Pete < |
Posted By: Jllogan
Date Posted: January-12-2012 at 2:11pm
|
CPES is understood or at least it better be!!!
Well I think that list is a good start anyway and should get you most of the way if not all. You may have to order again but you will know you are running out before you do so youll have time to get more. Dive IN!!! ------------- http://correctcraftfan.com/diaries/details.asp?ID=5792&sort=&pagenum=1" rel="nofollow - 1986 Ski Nautique 2001 |
Posted By: lakedog55
Date Posted: January-12-2012 at 10:07pm
|
Man,
Great project! It gets better then worse then better again, Take good measurements on the heights of your stringers where the motor mounts. About that tank give me a shout I got a 31 gal aluminium out of a 85 SN. Mike croft922@aol.com ------------- Lakedog55 |
Posted By: TRBenj
Date Posted: January-12-2012 at 10:10pm
Im not following... can you expand on this? ------------- |
Posted By: lakedog55
Date Posted: January-12-2012 at 10:10pm
|
on supporting the boat I had a secondary seperated from the hull, cut one just like it and still it was high of the hull. Installed supports and it sat perfectly. ------------- Lakedog55 |
Posted By: Metallman56
Date Posted: January-13-2012 at 12:00am
|
i guess i'm confussed. i thought that using non treated (cpes) if you were glassing everything in was the way to do. i'm pretty sure i read somewhere on here that the fiber glass doesnt stick to the lumber if its treated. guess i thouhght that inclueded cpes. judging by reactions i guess i'm wrong on that.
lakedog55, thanks for the offer on the tank, but i think i'm going to stick with mine. i'm gonna try that tank restore stuff. if it works thats going to save me the time of replumming and wiring a new tank. TRBenj, my idea is to put a lot of expoy down in the empty channel, then set the stringer on top of that. let it sit for a couple, or few days until it dried, then reglass the srtinger in. i know the stringers probably wont ever come out again, but if i get anther 40 years out of the stringers, and i'm hoping too, that would put me at about 70 years old. if i have still have the boat by then. . . . . well i guess i'll pay someone to redo it 
|
Posted By: connorssons
Date Posted: January-13-2012 at 1:31am
| cpes all bare wood! glass will stick to it. dont use treated wood [ green colored ] as in deck materials or anything pre treated from lumber yards. jeff |
Posted By: 8122pbrainard
Date Posted: January-13-2012 at 8:28am
|
CPES is a thin epoxy that seals the wood. It soaks is pretty deep especially on end grain where you need it the most. It's also an excellant primer. I'm surprised you didn't pick up on it with all your reading of stringer threads and the reason I didn't explain what it is. Sorry. Jamestown distributors has it. ------------- /diaries/details.asp?ID=1622" rel="nofollow - 54 Atom /diaries/details.asp?ID=2179" rel="nofollow - 77 Tique 64 X55 Dunphy Keep it original, Pete < |
Posted By: TRBenj
Date Posted: January-13-2012 at 10:23am
Im not aware of any stringer jobs (at least not any that were done appropriately and documented on CCF) that simply installed new stringers without glassing them in... thats pretty much a given unless youre pioneering a new rebuilding technique. When people say "treated", they mean pressure treated (green) lumber. As Pete explained, CPES is simply a thinned epoxy resin. Being thinner, it wicks further into the wood than epoxy would by itself- so it essentially plasticizes the exterior surfaces. I think you have a little more reading to do on your bedding method as well. I would not recommend bedding with pure epoxy. The 2 most common methods are epoxy soaked mat, and thickened epoxy resin (with a high strength filler like milled fiber or aerosil-cabosil). Doing straight epoxy would be a runny mess, and not nearly as strong. I cant see your pictures, but hopefully the channels youre referring to have been trimmed down extremely low- 1/4" or less. Theyre more for a guide/work aid when rebuilding, and shouldnt be counted on for any strength. That will come from the new glass. ------------- |
Posted By: Jllogan
Date Posted: January-13-2012 at 11:45am
Tim, He did say after he bedded them he would glass them in, in his original post. Also I assumed since he was pricing a thickener he would use thickened epoxy to bed, or at least after he poured a little out he would have come to that conclusion 
Definitely use CPES, it should actually help with adhesion and it waterproofs your wood, but well thats been said. You can also get it from rotdoctor, whichever is cheapest. They make a cold weather and warm formula. I am using the cold as Im in ohio and its 25 out right now. I think since you are doing a wood floor you will need about 2 gallons. jamestown is 189.99 and rotdoctor is 195.48. Sometimes jamestown has free shipping too ------------- http://correctcraftfan.com/diaries/details.asp?ID=5792&sort=&pagenum=1" rel="nofollow - 1986 Ski Nautique 2001 |
Posted By: Metallman56
Date Posted: January-13-2012 at 4:37pm
|
ok then. CPES will be added to my list. that makes sense i have read a lot of people using it, but always wondered why if the glass wasnt going to stick as well. that makes sense now.
i guess there is some confussion, i will be glassing in the stringers. before the stringer(s) go in though i will be putting expoy in the channels. not exactly sure how yet thought, this being my first (and hopefully only) time doing this. but yes both stringers will be reglassed. thanks again for all the help guys. after reading several threads they start to bleed together, and you dont remember which one is which, who did what, or how. i thank everyone for thier imput. and great catch on the CPES. :) |
Posted By: Metallman56
Date Posted: January-26-2012 at 2:40am
2 gallons of cpes get ordered tonight or tomorrow. finally have the funds to kickstart the project again!!! 
|
Posted By: Metallman56
Date Posted: January-27-2012 at 2:19am
|
just ordered cpes from jamestown
FY!!!!! SHIPPING CODE FSHIP50 WILL GET YOU FREE SHIPPING RIGHT NOW FROM JAMESTOWN!!!!! UPS GROUND ONLY!!!! |
Posted By: Jllogan
Date Posted: January-27-2012 at 11:44am
|
I have been experimenting with homebrew CPES and I have been pleased with the results. Just take epoxy resin and thin with around 50% xylene (from your local home improvement store). So if you run out, that could work. I ran out and didnt want to wait to get more in the mail. Also I used it for all above the floor applications such as the piece of wood in front of fuel tank, etc. Just an FYI. ------------- http://correctcraftfan.com/diaries/details.asp?ID=5792&sort=&pagenum=1" rel="nofollow - 1986 Ski Nautique 2001 |
Posted By: 8122pbrainard
Date Posted: January-27-2012 at 11:54am
Justin, Just a word of caution here. Tim did some experimenting as well as Roger over in England. I believe Roger went to the extent of digging up the MSDS on the CPES and found some pretty exoite solvents in the CPES. I have a feling they are used to make sure when the epoxy starts to "kick" you don't end up with solvent entrapment. I have a feeling the Xylene isn't "fast" enough. ------------- /diaries/details.asp?ID=1622" rel="nofollow - 54 Atom /diaries/details.asp?ID=2179" rel="nofollow - 77 Tique 64 X55 Dunphy Keep it original, Pete < |
Posted By: Jllogan
Date Posted: January-27-2012 at 12:09pm
|
possibly, it is much less stinky anyways. This is why I used it on non fital above the floor parts such as that piece of wood and the kickpanel etc. I wouldnt use it on my stringers unless I was sure but so far it seems to be ok, it evaporated a little less slowly but I also probably didnt thin it as much as the CPES. I believe CPES is somewhere around 80% solvent. This may end up being more like a sealer. ------------- http://correctcraftfan.com/diaries/details.asp?ID=5792&sort=&pagenum=1" rel="nofollow - 1986 Ski Nautique 2001 |
Posted By: Jllogan
Date Posted: January-27-2012 at 12:10pm
I see your spelling improved. ------------- http://correctcraftfan.com/diaries/details.asp?ID=5792&sort=&pagenum=1" rel="nofollow - 1986 Ski Nautique 2001 |
Posted By: TRBenj
Date Posted: January-27-2012 at 12:23pm
|
Ive done minimal experimenting myself, as I havent built a wood stringered boat in a while... but here's the link that has the "Home Brew CPES" info:
http://www.epoxyproducts.com/penetrating4u.html - Penetrating Epoxies Pete, they did some experimenting on how long it took for the different blend to set up- the more solvent, the longer it took... but eventually everything set up. Even if it doesnt perform quite as well as the professionally mixed CPES, I would guess its better than not using any at all.. and at 1/4 the price, not a bad way to go. ------------- |
Posted By: Jllogan
Date Posted: January-27-2012 at 12:31pm
|
especially for non structural treatment. ------------- http://correctcraftfan.com/diaries/details.asp?ID=5792&sort=&pagenum=1" rel="nofollow - 1986 Ski Nautique 2001 |
Posted By: uk1979
Date Posted: January-27-2012 at 8:28pm
|
The main solvents in the CPES are Toluene, Xylene and Isopropyl Alcohol. Not good for drinking. Take care,
Had good results thinning @75% Xylene and epoxy, Its always a personal choice over cost as Tim said. ------------- Lets have a go 56 Starflite 77 SN 78 SN 80 BFN |
Posted By: Metallman56
Date Posted: January-31-2012 at 12:30am
i dont know about making CPES  but its definatly on its way :) but its definatly on its way :)
|
Posted By: Metallman56
Date Posted: February-07-2012 at 12:07am
|
wow i didnt expect getting the bottom angle of the stringer right would be such a pain. 2 days of filing it down by hand to get the correct angle and i'm not even done yet. only about a foot to go, ran out of time tonight.
once the angle is right, i have to cut out the cross members, and then cpes. my order from us composites should be in on friday. hopefully sunday i make leaps and strides, because i work 12 days straight after that. looks like some long nights ahead. my May deadline is starting to get painfully close, and i have a LOT of work to do. |
Posted By: 8122pbrainard
Date Posted: February-07-2012 at 8:04am
A cheap power hand plane for HF is what most use. ------------- /diaries/details.asp?ID=1622" rel="nofollow - 54 Atom /diaries/details.asp?ID=2179" rel="nofollow - 77 Tique 64 X55 Dunphy Keep it original, Pete < |
Posted By: TRBenj
Date Posted: February-07-2012 at 10:52am
Yup! That $30 cheapo tool will turn a 2 day project into a 2 minute one. ------------- |
Posted By: Jllogan
Date Posted: February-07-2012 at 11:32am
|
yes I agree, that was one of the trickier parts. Its alot of fit and check thats for sure. ------------- http://correctcraftfan.com/diaries/details.asp?ID=5792&sort=&pagenum=1" rel="nofollow - 1986 Ski Nautique 2001 |
Posted By: Metallman56
Date Posted: February-14-2012 at 1:03am
|
3 coats of cpes on stringer #1. waiting for it to cure. i definatly mixed too much, lol. once mixed, i wonder how long it stays good for when sealed. something tells me its not going to like it is suppose to after so long. i'm sure its going to go to waste which sucks. i thought it would be a lot thicker then it was. noob mistake, live and learn i suppose.
us composites came today. 8 boxes over 200 lbs. sweet. |
Posted By: Metallman56
Date Posted: April-15-2012 at 3:57pm
|
well finally got to work on the boat after a freaking month. god i hate my job. i'm quitting, so that will give me some more time in 12 more days!! ok so cpes cured, and the stringer looks awesome. put it in the boat, and i'm about 1/2 high. didnt have time to measure it from front to back, so i'm relaly hopping its 1/2" down the whole thing. then i can just take an extra 1/2 off the top, re-cpes, and epoxy it in. warm weather really puts a fire under my butt. i really really want it to be done, cant wait to drive it. still hope it floats  also i'm thinking, maybe muffleres wont make it back in. . . . .. maybe |
Posted By: Metallman56
Date Posted: April-20-2012 at 1:05am
|
1 more question. from a lot of posts i have read most just skip over how exactly to put the stringers in correctly. maybe i am readying the wrong posts, but most of them just say "putting stringer in next" then theres just a pic of it back in. from what i can tell, most if not all use just straight expoy. put i really cant tell if 2"cloth goes in there as well. i also saw where keegan took too much wood off the back part of the stringer. everyone one said just use epoxy it will be fine. so a little advice there would be appreciated. also one the stinger is back in, will the epoxy alone be enough to support the boat when i take out #2, or would it be wise to glass it in before #2 comes out? thanks again guys, and more pics and progress to come soon. with my new job comes not only nights to work on it, but weekends too. ahhh weekends, almost forgot what those were 
|
Posted By: 8122pbrainard
Date Posted: April-20-2012 at 9:00am
|
Jim, Yes, you must be reading the wrong threads.  The stringers are bedded to the hull with thickened epoxy that creates a fillet between the stringe vertical side and the hull. Then yes, you will want to do at least two layers of glass layup before you go to the other side. The stringers are bedded to the hull with thickened epoxy that creates a fillet between the stringe vertical side and the hull. Then yes, you will want to do at least two layers of glass layup before you go to the other side.The only time you what to use just unthickened epoxy is with the glass layup. ------------- /diaries/details.asp?ID=1622" rel="nofollow - 54 Atom /diaries/details.asp?ID=2179" rel="nofollow - 77 Tique 64 X55 Dunphy Keep it original, Pete < |
Posted By: BuffaloBFN
Date Posted: April-20-2012 at 10:28am
|
FWIW-I also used a strip of mat under the stringer. It helped to hold the 'butter' in place and was intended to take up any minor gaps. ------------- http://correctcraftfan.com/diaries/details.asp?ID=2331&sort=&pagenum=12&yrstart=1986&yrend=1990" rel="nofollow - 1988 BFN-sold "It's a Livin' Thing...What a Terrible Thing to Lose" ELO |
Posted By: Metallman56
Date Posted: April-21-2012 at 12:07am
|
thanks guys |
Posted By: Metallman56
Date Posted: May-23-2012 at 3:28am
|
so today the final test fit of stringer #1 was complete. this was thanks to the power plainer i bought today. my god that thing works awesome for shaping the bottom of the stringer. i also applied more cpes to the bottom after we took off that extra 1/2. tomorrow if the cpes is cured enough stringer #1 goes back in. i just want to double check that i know exactly what i'm doing before i put it in. first i'm going to put down the 2" glass i bought from u.s.c (FG-C02R). then i'm going to mix the medium epoxy 3:1 and carfully put that on top of the 2" glass. next in goes the stringer. followed by heavy objects on top to make sure stringer does not move. seems pretty straight forword but i want to get this right the first time. if i'm missing something please post, and please feel free to talk to me like i've never done this before. |
Posted By: 8122pbrainard
Date Posted: May-23-2012 at 9:21am
|
Jim, At this point it sounds like you are doing a great job but, some pictures sure would help us. You know that old saying!  ------------- /diaries/details.asp?ID=1622" rel="nofollow - 54 Atom /diaries/details.asp?ID=2179" rel="nofollow - 77 Tique 64 X55 Dunphy Keep it original, Pete < |
Posted By: Metallman56
Date Posted: May-23-2012 at 11:50am
|
sadly i do not have any pics right now. and by the time i can post some tonight stringer #1 will already be in, hopefully. i guess what i'm looking for is a detailed step by step how to on putting a stringer back in the boat. this is the one thing i dont want to screw up. it seems to me getting a stringer out that has been set in with expoy would be about 10x harder then taking out the original stringer. so i just want to make sure its done right the first time. thanks again for all the help! |
Posted By: Metallman56
Date Posted: May-24-2012 at 12:10pm
something came up last night and stringer #1 didnt go in. i was however able to get a pic. its from a camera phone, and its dark so sorry for the poor clarity.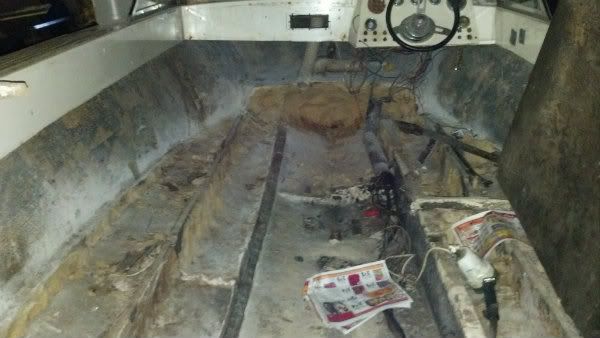 no stringer in yet, just wanted to double check how exactly it is suppose to go back in. |
Posted By: 8122pbrainard
Date Posted: May-24-2012 at 12:23pm
|
Jim, From the picture and without a better description, I can't tell what the problem is. ------------- /diaries/details.asp?ID=1622" rel="nofollow - 54 Atom /diaries/details.asp?ID=2179" rel="nofollow - 77 Tique 64 X55 Dunphy Keep it original, Pete < |
Posted By: uk1979
Date Posted: May-24-2012 at 12:55pm
|
Jim, Have you ground off the old gel around the stringer as the picture looks like its still there from over the pond ? ------------- Lets have a go 56 Starflite 77 SN 78 SN 80 BFN |
Posted By: 8122pbrainard
Date Posted: May-24-2012 at 1:51pm
Yes! I had to run to a meeting so I couldn't spend much time looking at the picture. Roger is correct - the glass on the hull next to where you are bonding the new wood in needs to be ground down. You need to get the bilge gel coat off and get to some decent glass. Jim, Have you been able to go through some of the other stringer replacement threads? Plenty of pictures and great info. Still, do keep the pictures and any questions coming our way. ------------- /diaries/details.asp?ID=1622" rel="nofollow - 54 Atom /diaries/details.asp?ID=2179" rel="nofollow - 77 Tique 64 X55 Dunphy Keep it original, Pete < |
 Metallman56 wrote:

