broken seat base help
Printed From: CorrectCraftFan.com
Category: Repairs and Maintenance
Forum Name: Boat Maintenance
Forum Discription: Discuss maintenance of your Correct Craft
URL: http://www.CorrectCraftFan.com/forum/forum_posts.asp?TID=5484
Printed Date: January-19-2025 at 1:35am
Topic: broken seat base help
Posted By: 88 Nautique
Subject: broken seat base help
Date Posted: January-09-2007 at 2:22am
I pulled my seats out to recarpet and found my driver seat pedistal base is cracked at the flange that screwes to the floor. Not being experienced on fibergla$$ing, does anyone have suggestions to repair the cracked and broken fibergla$$? Do you think I could still buy the piece from CC?
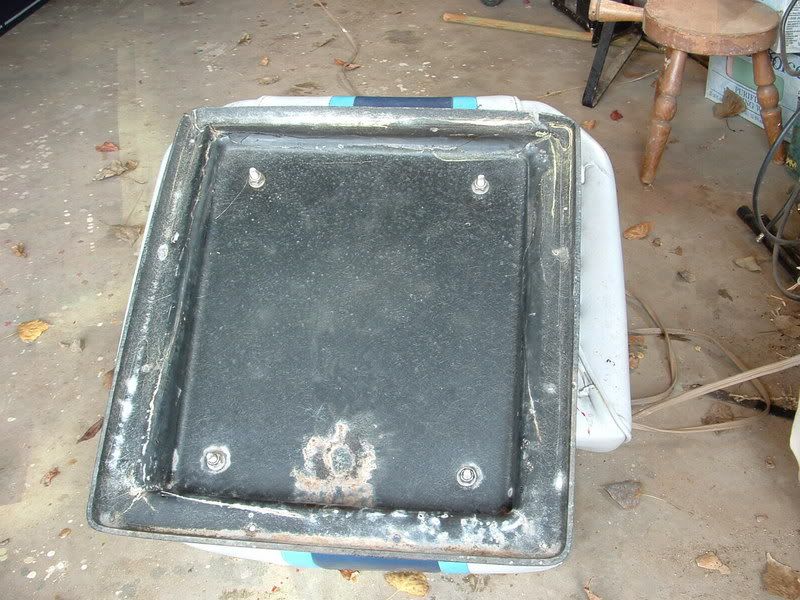
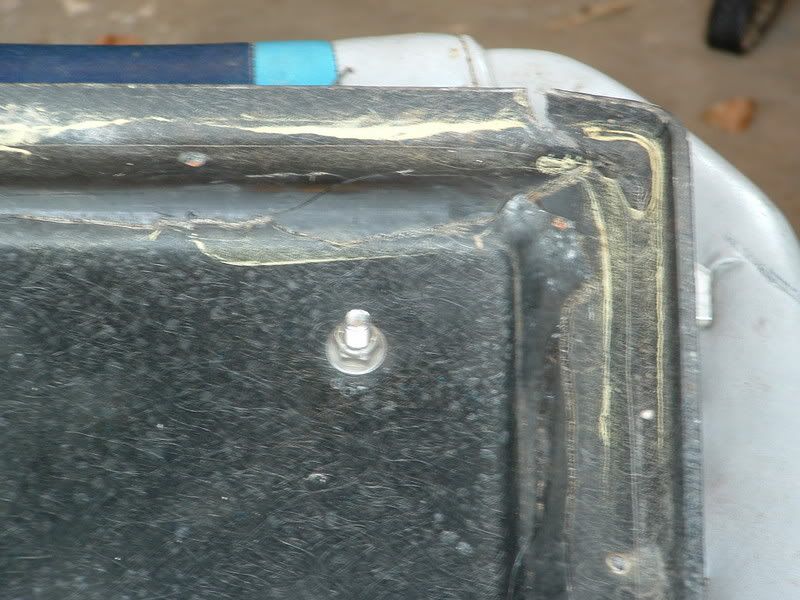
Thanks Kurt ------------- http://www.correctcraftfan.com/diaries/details.asp?ID=1657" rel="nofollow - My 88 Nautique |
Replies:
Posted By: SkiBum
Date Posted: January-09-2007 at 8:35am
|
In my opinion your seat base can be repaired. I would grind/sand several inches from the damage area. Then, apply epoxy resin and three layers of gla$$. Use a heavy (2oz) chopped strand mat for the middle layer of gla$$. I would do that on the inside and let it cure. Then do the same on the outside. Then do some sanding on the outside and your better than new. ------------- Bill http://www.freewebs.com/billsboatworks - http://www.freewebs.com/billsboatworks www.freewebs.com/billsboatworks 1987 SN Rebuild Project |
Posted By: TRBenj
Date Posted: January-09-2007 at 8:54am
|
I agree with SkiBum, that can be repaired with gla$$. The only problem being that the exterior is gelcoat (I think) so I would try and keep the gla$$ on the inside for aesthetic purposes. If youre really picky, the piece (or similar) may still be available from CC- the seat base hasnt changed that much over the years. ------------- |
Posted By: Hollywood
Date Posted: January-09-2007 at 9:52am
~$300, repair it yourself. ------------- |
Posted By: eric lavine
Date Posted: January-09-2007 at 10:12am
|
By repairing it yourself you can make better than it ever was. its one of those things that your afraid to dive into and when its done you say that was'nt bad at all, ------------- "the things you own will start to own you" |
Posted By: SkiBum
Date Posted: January-09-2007 at 10:31am
|
It is a really easy repair. I agree with TRBenj, you don't have to do the outside if you want to protect the gel cote appearance. Give it a try. You will learn a little about working with fibergla$$. You will save a lot of money. You can take pride in your craftsmanship when finished.
By the way, I have a silly question for you. Which way does the base face? Does the lower end of the slope face the bow? My seats have been out for a month and I can't remember. ------------- Bill http://www.freewebs.com/billsboatworks - http://www.freewebs.com/billsboatworks www.freewebs.com/billsboatworks 1987 SN Rebuild Project |
Posted By: TRBenj
Date Posted: January-09-2007 at 2:01pm
Nope, the other way. Tilts the seat back a bit. BTW, $300 for the base from CC? What a joke. ------------- |
Posted By: Hollywood
Date Posted: January-09-2007 at 2:26pm
|
It was definitely mid-high $2xx, I figure after shipping I didn't want to low ball anyone on an estimate.
All the edges were cracked completely off of ours, threw a couple L-brackets on each side and it's rock solid and doesn't look too bad, the seat hides it pretty well. ------------- |
Posted By: PLBC
Date Posted: January-09-2007 at 3:35pm
|
Yep, the base was way over 200, no hardware either. New sliding rails were about 20 a piece IIRC. I'll post some pictures later. ------------- http://www.correctcraftfan.com/diaries/details.asp?ID=5164&sort=&pagenum=1" rel="nofollow - 99 |
Posted By: BlondieGurl1443
Date Posted: January-09-2007 at 7:12pm
| hey Kurt, i visited ur myspace and i sent you a friend request!!! it looked liked you needed a friend! |
Posted By: 88 Nautique
Date Posted: January-10-2007 at 12:56am
|
Thanks BlondieGurl. It looked pretty pathetic didn't it. "Kurt has 0 friends"
Now I have one friend in there. Kurt ------------- http://www.correctcraftfan.com/diaries/details.asp?ID=1657" rel="nofollow - My 88 Nautique |
Posted By: MaddMarxx
Date Posted: January-10-2007 at 2:11am
|
When I worked at "cc" I made a few of those, they came in (white,taffy,gray,lt blue) If you don't want to fix it yourself, send it to me I will fix it for you!!
If not maybe..Nautiquefanatic has one he wants to sell.. |
Posted By: PLBC
Date Posted: January-10-2007 at 8:49am
3 brackets along front and back and 2 on each side.10 dollars in material plus whatever the new rails cost.

 ------------- http://www.correctcraftfan.com/diaries/details.asp?ID=5164&sort=&pagenum=1" rel="nofollow - 99 |
Posted By: David F
Date Posted: January-12-2007 at 10:11am
|
I upgraded the seat in my '77 Martinique with that exact seat base and then had the same failure shortly thereafter. The solution is to add 1/4" thick ( or so) strips of wood under the flange before you screw it to the floor. The wood helps support the seat base and thus no cracking. ------------- |
Posted By: 88 Nautique
Date Posted: April-19-2007 at 2:39pm
|
I'm ready to make the repairs on my pedistal. I'm building a wooden frame and the pedistal will sit upside down on the frame. The frame will hold the outer flange while I weigh the pedistal down to hold the flange to it's origional position. I have sanded where I will put the strips of mat.
My questions: 1. Do I need so sand clear down to the fiberglass or just rough up the surface? 2. Do I need to clean the sanded surface with anything before I start? 3. David F sugested 1/4" wooden strips under the flange to support the weight. Could I just build that up with fiberglass matt or should I use wood strips encased in fiberglass? Thanks all Kurt ------------- http://www.correctcraftfan.com/diaries/details.asp?ID=1657" rel="nofollow - My 88 Nautique |
Posted By: 8122pbrainard
Date Posted: April-20-2007 at 6:56am
|
88, I would really rough up the surface with a grinder. I don't think you need to go all the way to the base glass. Wipe it down with acetone. Building up the flange with layers of glass is a great idea. The wood would work but we have enough rot on this site already!! ------------- /diaries/details.asp?ID=1622" rel="nofollow - 54 Atom /diaries/details.asp?ID=2179" rel="nofollow - 77 Tique 64 X55 Dunphy Keep it original, Pete < |
Posted By: Bremsen
Date Posted: April-22-2007 at 8:53pm
|
Here is how I did mine. Pretty much what everyone else has suggested.
Braced and reformed close to original shape 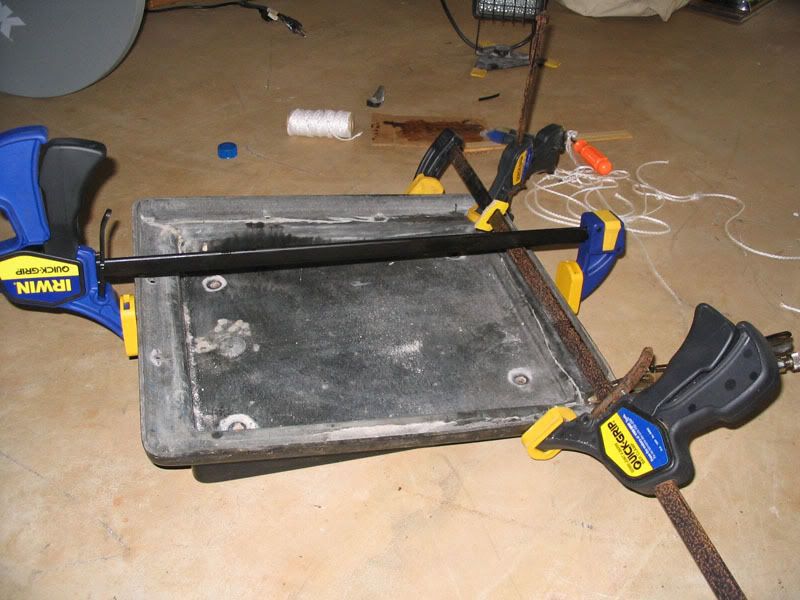
Grinded/smoothed the cracks. Then sanded with 60grit. (wish I would have filled the cracks with kitty hair, but oh well). 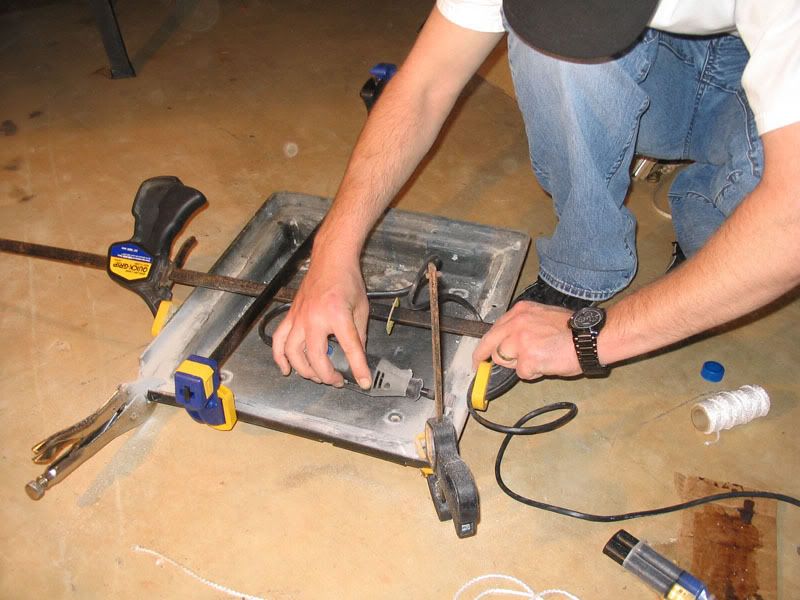
Cut/tear some glass mat into 2-3" squares. Mix up some resin, brush some onto the surface, lay the mat down and dab the brush to saturate the mat. Finally, roll out the air bubbles 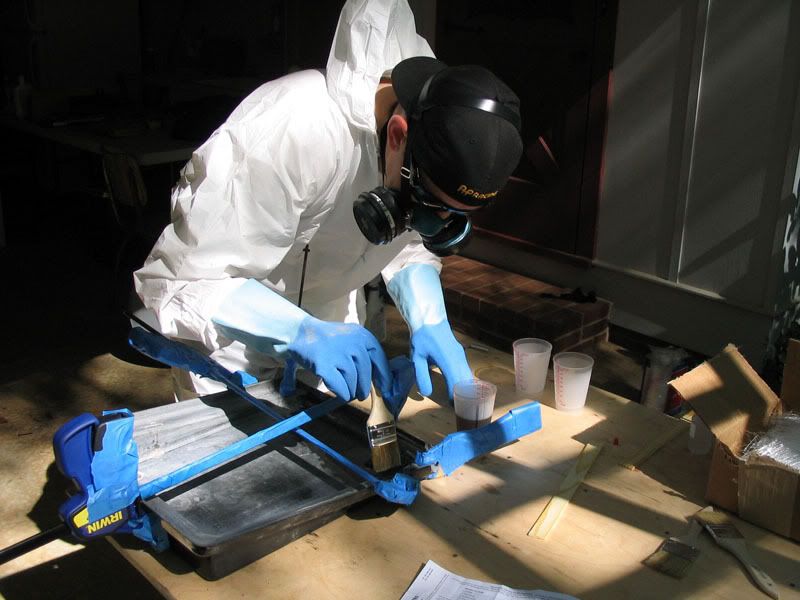
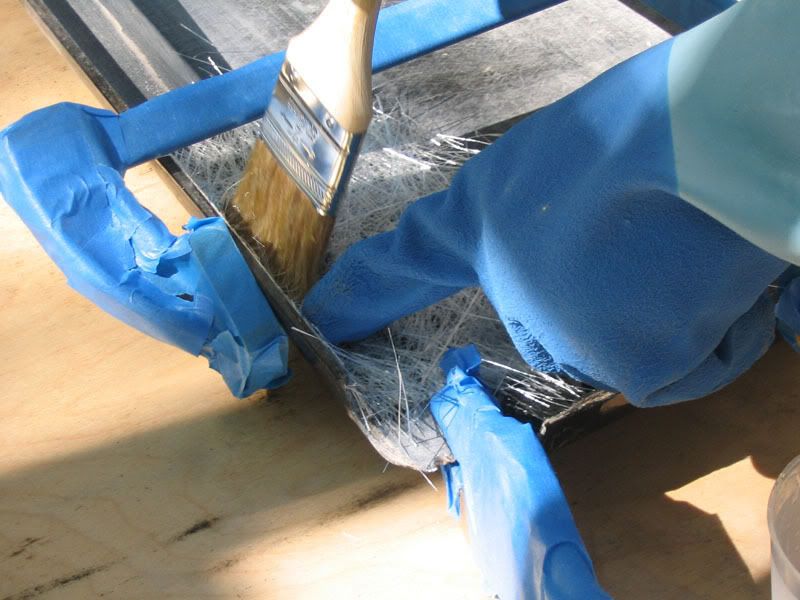
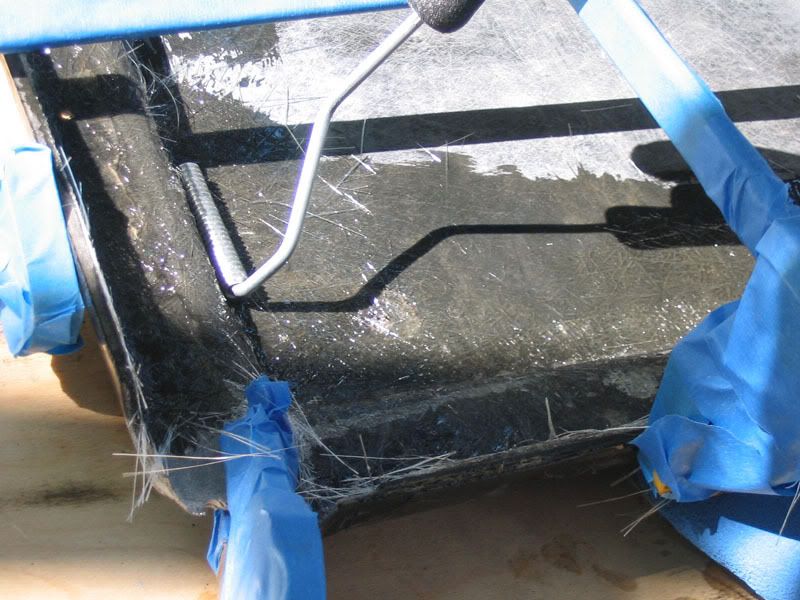
This is where I left it. 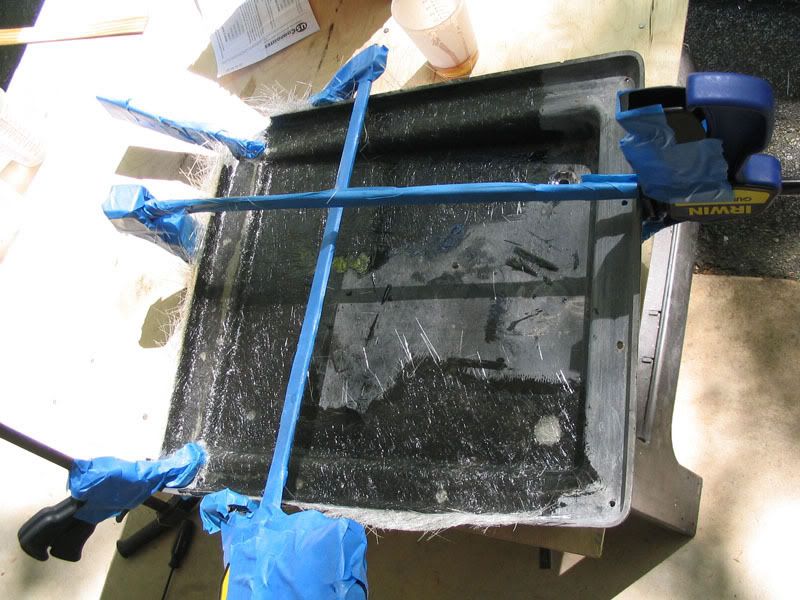
Next weekend I'll remove the clamps, fix the corners and lay more mat down on the entire base. I'll fill the top cracks with kitty hair and smooth with bondo. Then paint. Good thing to know about the seat tracks, I've got mine working, but $40 for new ones sounds like a good price. I purchased all my supplies at UScomposites. This is my first venture into fiberglass and have to agree with everyone else....its not that bad at all. ------------- http://www.correctcraftfan.com/diaries/details.asp?ID=923&sort=&pagenum=3&yrstart=1986&yrend=1990 - Our 88 SN2001 |
Posted By: emccallum
Date Posted: April-22-2007 at 9:36pm
| You look like an expert! |
Posted By: 88 Nautique
Date Posted: April-24-2007 at 6:09am
|
Ryan,
Are youu going to build up the outer flange area to support the weight so it doesn't crack again? ------------- http://www.correctcraftfan.com/diaries/details.asp?ID=1657" rel="nofollow - My 88 Nautique |
Posted By: 8122pbrainard
Date Posted: April-24-2007 at 7:39am
|
Yes, the 1 layer of mat isn't going to do it. I hope your'e adding more.
Ryan, It looks like your'e ready to go out on a Haz Mat emergency responce!! ------------- /diaries/details.asp?ID=1622" rel="nofollow - 54 Atom /diaries/details.asp?ID=2179" rel="nofollow - 77 Tique 64 X55 Dunphy Keep it original, Pete < |
Posted By: Bremsen
Date Posted: April-24-2007 at 8:22am
|
Actually, its 2-3 layers already, but I am going to add a lot more thickness to it. I just needed to hold its shape so I can remove the clamps and fix the corners. May even make the whole edge solid, but I'm not sure yet.
Peter, lol...you like the tyvek.  Yes, I know it looks a little silly, but I didn't destroy any clothes and didn't get any fiberglass or resin on me. Very well worth the $6 IMO cause I tend to be a little messy when I work....you should see me eat ribs. I did get a lot of looks from neighbors driving by. Next round I am switching to disposable latex gloves.....those HD gloves are a bit cumbersome. Yes, I know it looks a little silly, but I didn't destroy any clothes and didn't get any fiberglass or resin on me. Very well worth the $6 IMO cause I tend to be a little messy when I work....you should see me eat ribs. I did get a lot of looks from neighbors driving by. Next round I am switching to disposable latex gloves.....those HD gloves are a bit cumbersome.------------- http://www.correctcraftfan.com/diaries/details.asp?ID=923&sort=&pagenum=3&yrstart=1986&yrend=1990 - Our 88 SN2001 |
Posted By: Bremsen
Date Posted: April-30-2007 at 7:55pm
|
Well, I figured I'd give an update. It's no stringer/floor repair, but maybe someone will take something from it.
removed the clamps, everything held. I also stuck the broken corner back into place, it actually held its self. 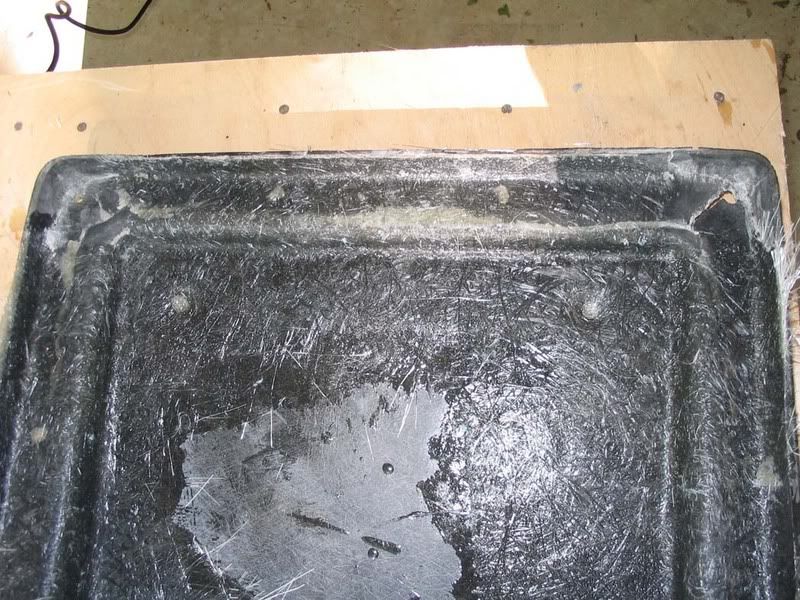
I cut some smaller pieces to build up the corner a little. 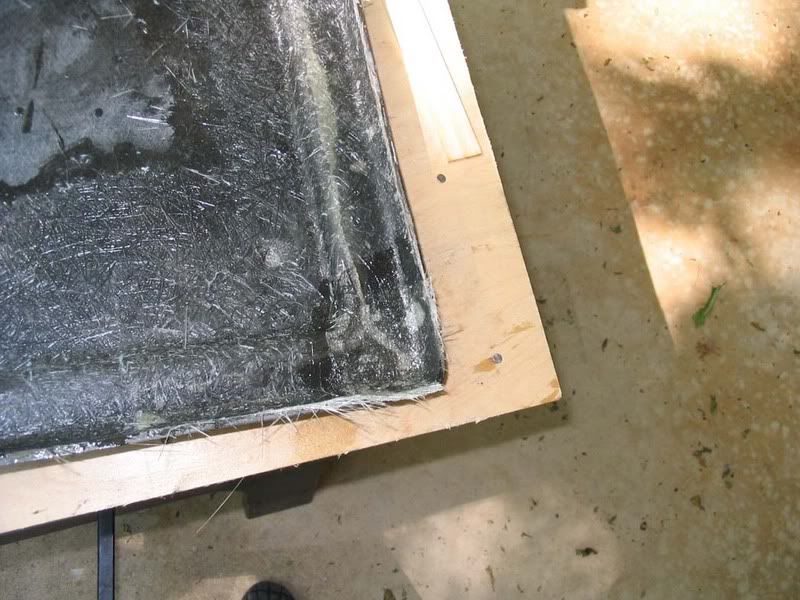
The added another 2 layers of mat to the back side. 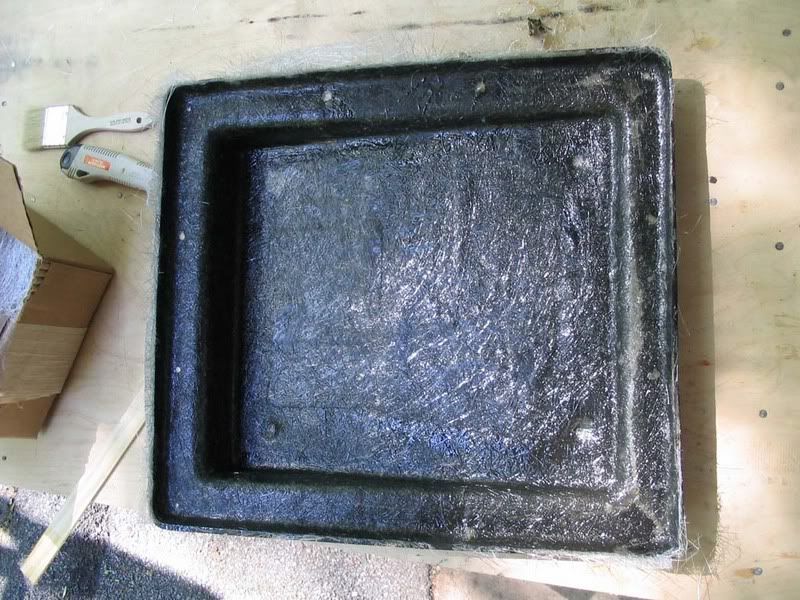
flipped the seat over and started topside. It was pretty badly cracked/broken. 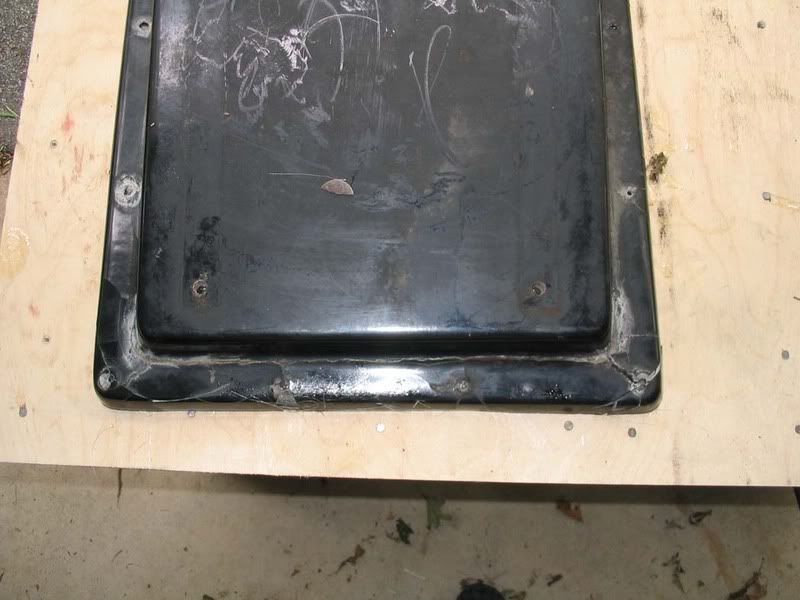
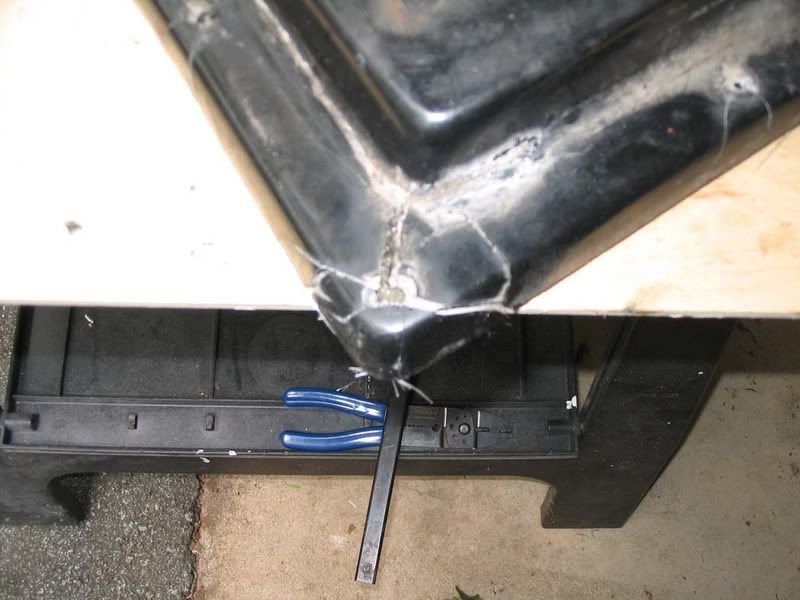
Used the dremel to grind down the sharp edges and make a recess for the 'kitty hair' 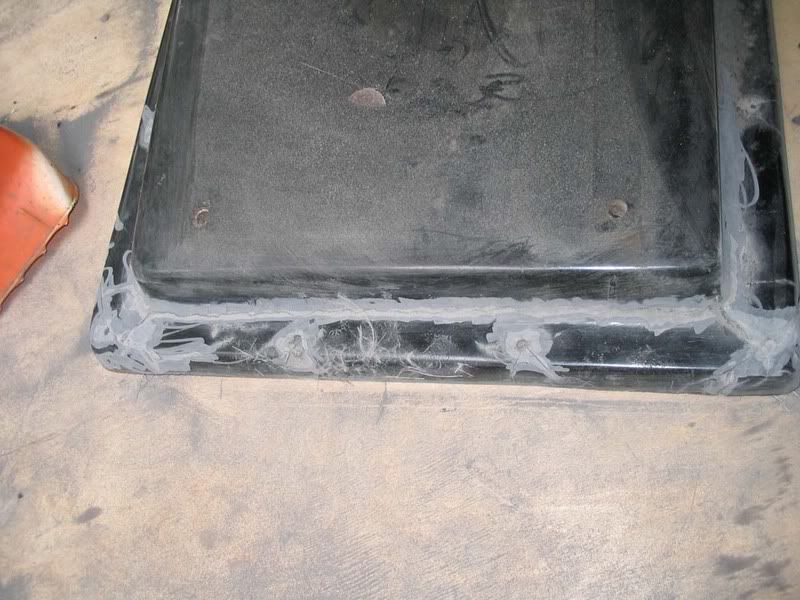
I prefer Evercoat products, but as usual Bondo brand is all the local store had 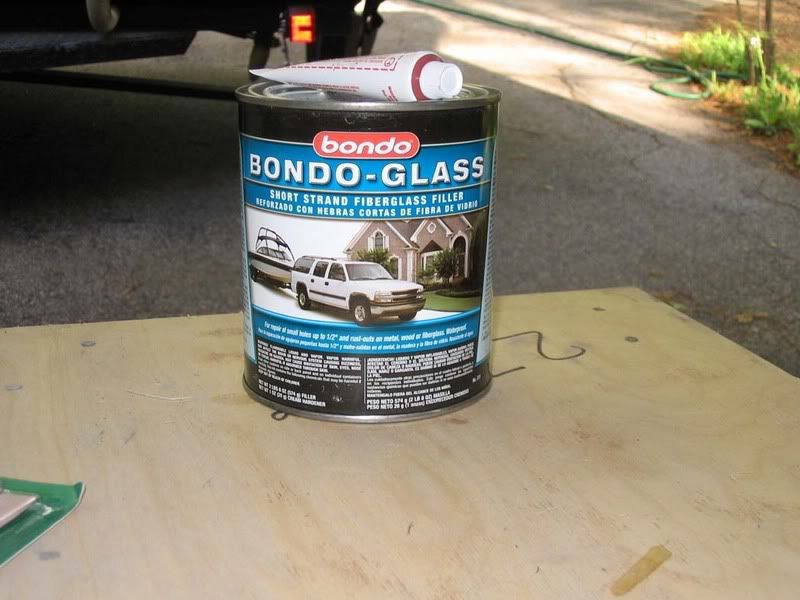
Mixed it up and put a coat on. 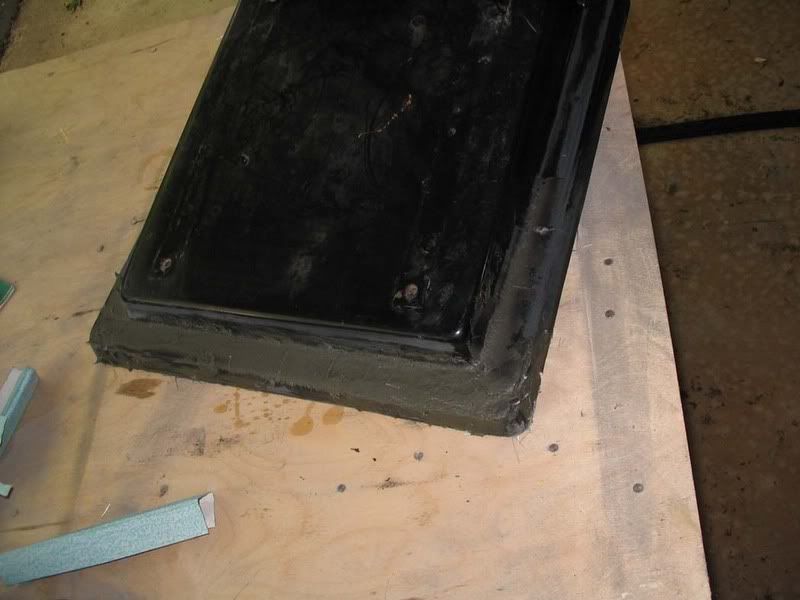
Decided to put in a layer of cloth for added strength. 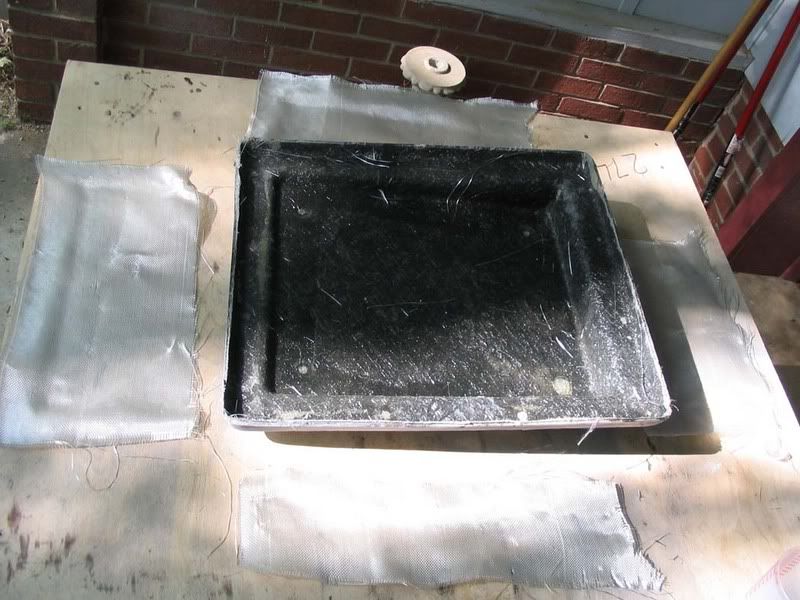
Back to the top, I sanded down the kitty hair. There are a couple spots I need to fill one more time before moving to bondo. 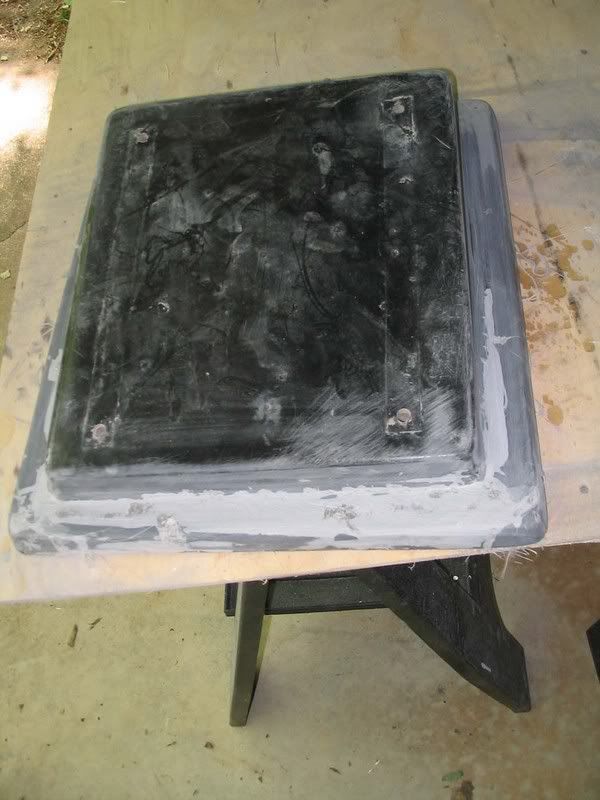
Back underneath I applied another layer of mat to the entire edge, and then finished up the whole underside with more mat. On the final layer I added the sanding wax to the resin per instructions. After seeing I wasn't the only one with a base like this I wanted to make sure it didn't break again. I decided to cut off the lip underneath so that the entire edge sits against the floor. Hopefully that will prevent it from breaking again (only time will tell). 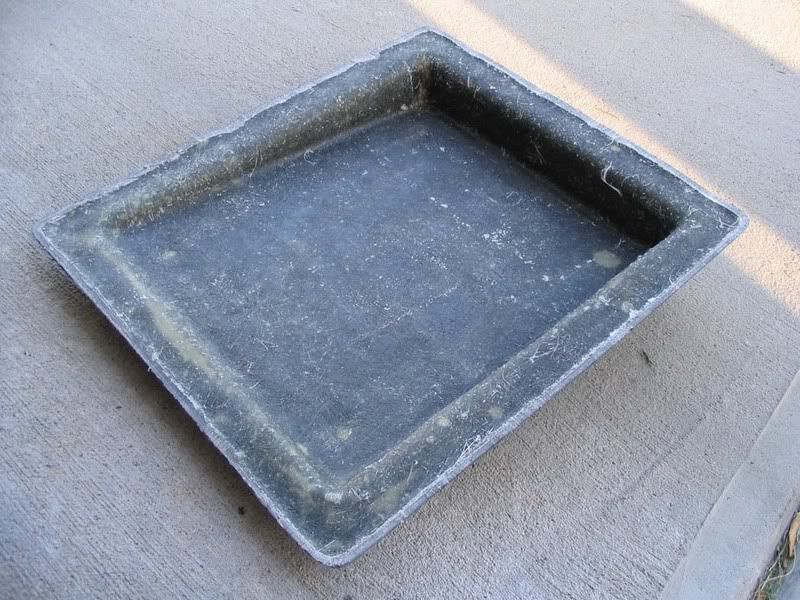
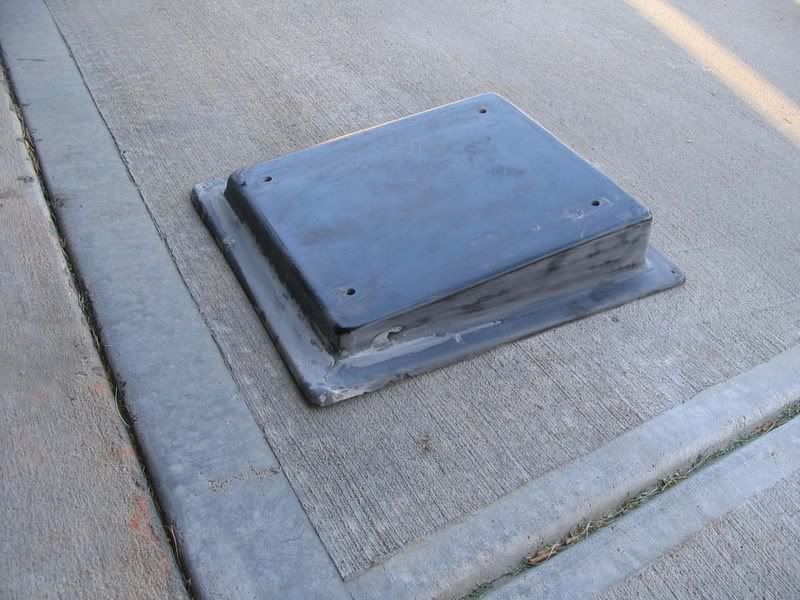
And thats where it sits for now. I will post one more update when its all done. Sorry for hijacking your post 88, hopefully it will help you or someone else down the road. ------------- http://www.correctcraftfan.com/diaries/details.asp?ID=923&sort=&pagenum=3&yrstart=1986&yrend=1990 - Our 88 SN2001 |
Posted By: 88 Nautique
Date Posted: May-01-2007 at 12:14am
|
I'm glad you hijacked this thread. I'm learning. I wish I could watch someone applying the matt. I've never seen anyone applying fiberglass. I've put one layer of matt on, but when I brush the resin on, the fibers get brushed off the matt and ball up on the brush. The layer went on good, and is good and strong, but I'm sure there is a better way of doing it. Or maybe not. Is this job supposed to be so messy?
Maybe explain to me how you apply the matt and resin. I still have more layers to put on, but I've been putting it off. How much resin do you mix up at a time? I mixed up 3 oz. but it set up before I was finished. I should have read a book or something.Keep posting... I'm learning from it. Kurt ------------- http://www.correctcraftfan.com/diaries/details.asp?ID=1657" rel="nofollow - My 88 Nautique |
Posted By: Bremsen
Date Posted: May-01-2007 at 6:59am
|
I was mixing up about 5oz at a time which was just enough for one layer of 3/4oz mat. If the resin is setting too fast back off the MEKP a little.
To lay the mat down, I brush a light coat of resin on the base, then set the piece of mat on the part. I dip the brush back in the resin and then stab the ends of the bristles into the mat. You shouldn't 'brush' the mat. I keep doing that until the mat is just saturated and I can't see any air bubbles. The front (tall) corners were the most difficult since the mat has to conform to a bunch of angles, so I tried to use smaller pieces for that area. In total I used about 5-6 layers of mat and 1 layer of cloth on the whole base. It's now solid as a rock. Keep at it, you'll get the hang of it. I had never laid fiberglass before this project either. My only previous experience was autobody work, so I'm familiar with fillers and sanding. But thats it. I'm sure I made some mistakes, but thats all a part of learning. ------------- http://www.correctcraftfan.com/diaries/details.asp?ID=923&sort=&pagenum=3&yrstart=1986&yrend=1990 - Our 88 SN2001 |
Posted By: rudderdad
Date Posted: May-02-2007 at 11:16pm
|
18 wheelers!! I mean go to a heavy truck dealer, (i.e. Peterbilt, Kenworth, Freightliner, etc.,) Their body shops do fiberglass everyday. Go to a 18 wheeler bone yard, and those seat rails are on nearly everyone of the trucks driver seats. ------------- rudderdad |
Posted By: Bremsen
Date Posted: May-03-2007 at 12:25pm
|
Thanks for the tip rudderdad. There are actually a lot of heavy truck places nearby so I'll see what they've got. ------------- http://www.correctcraftfan.com/diaries/details.asp?ID=923&sort=&pagenum=3&yrstart=1986&yrend=1990 - Our 88 SN2001 |
Posted By: Bremsen
Date Posted: May-15-2007 at 10:23pm
|
Finished it all up over the last two weekends. I'm very pleased with the outcome.
Filled one more time with the kitty hair and then applied bondo 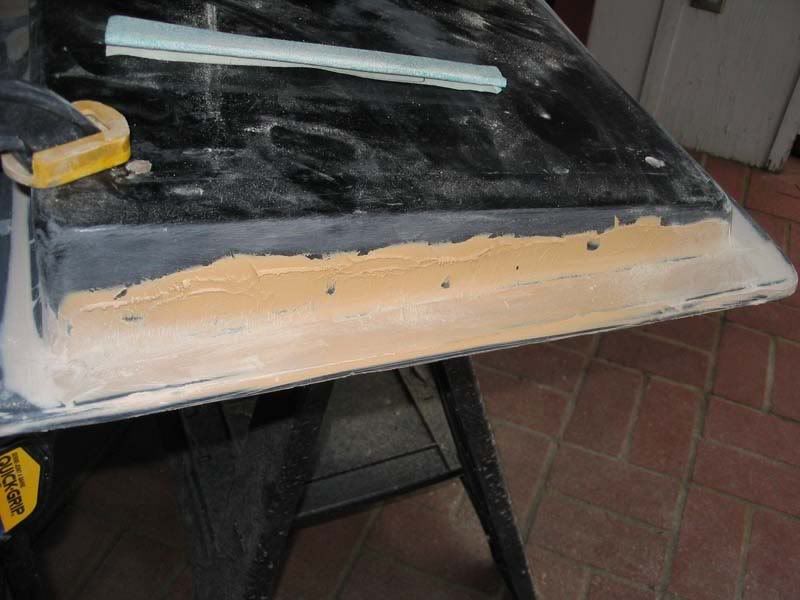
And then sanded....and sanded some more. Drilled the new holes and cleaned for primer. 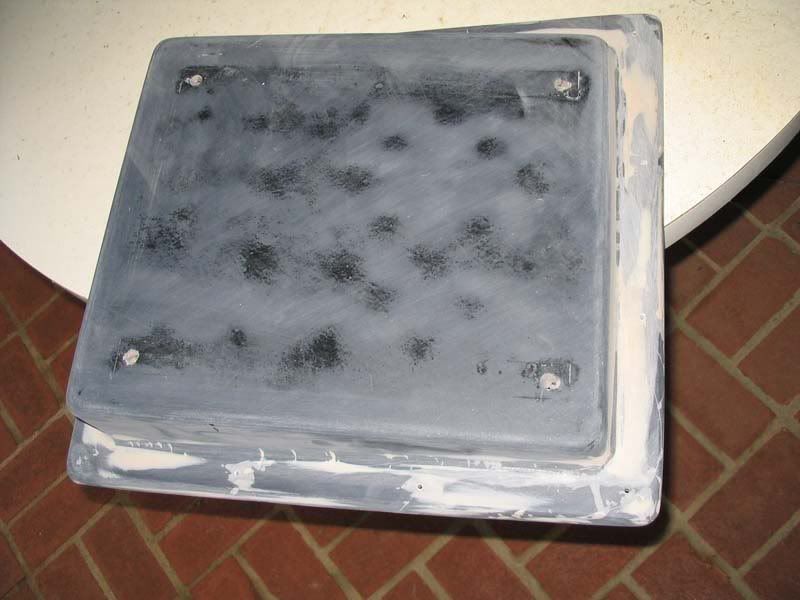
Heavy build primer. 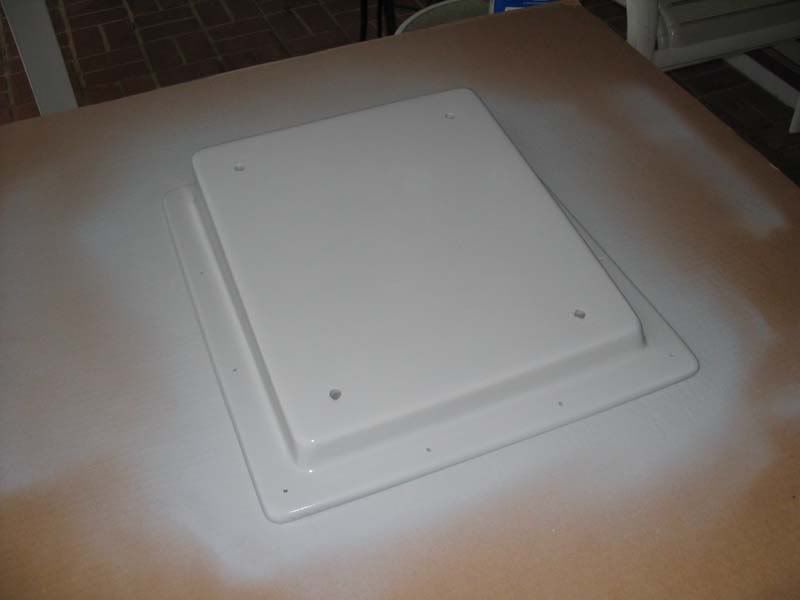
Wetsanded with 400grit 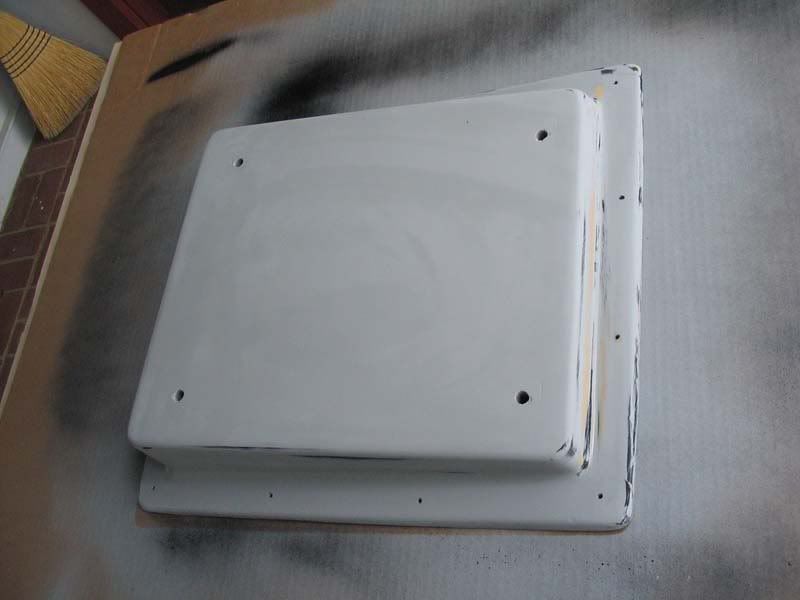
Painted 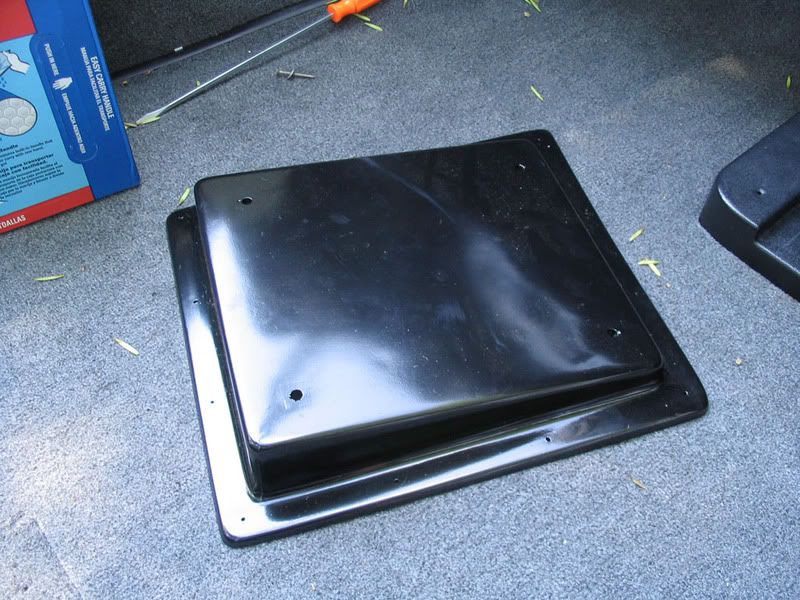
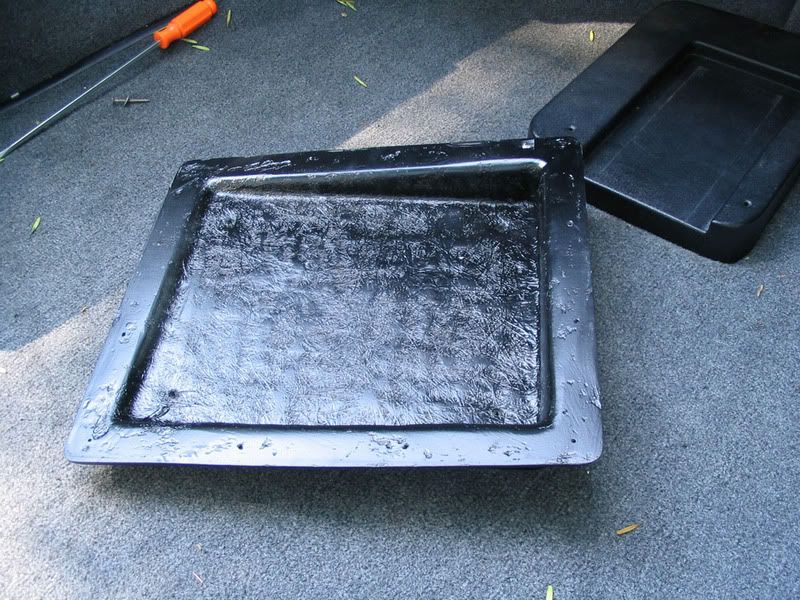
Assembled 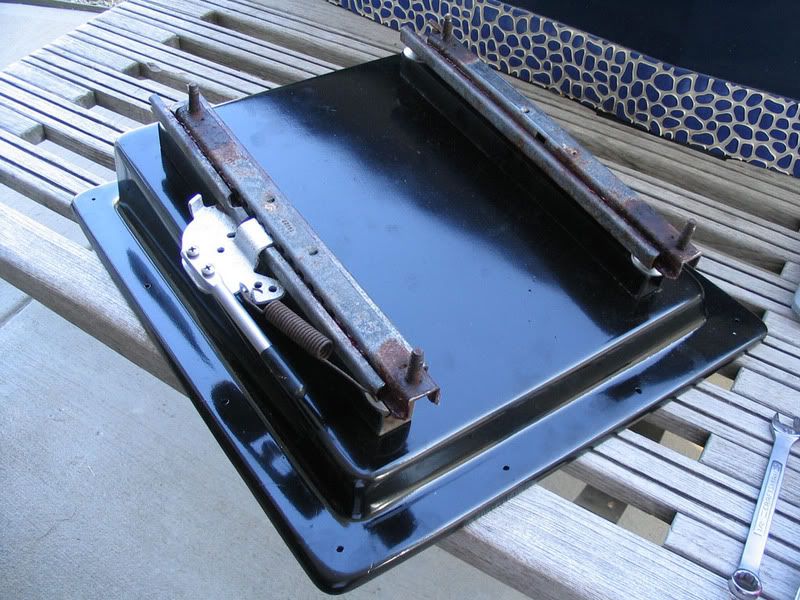
Done!! 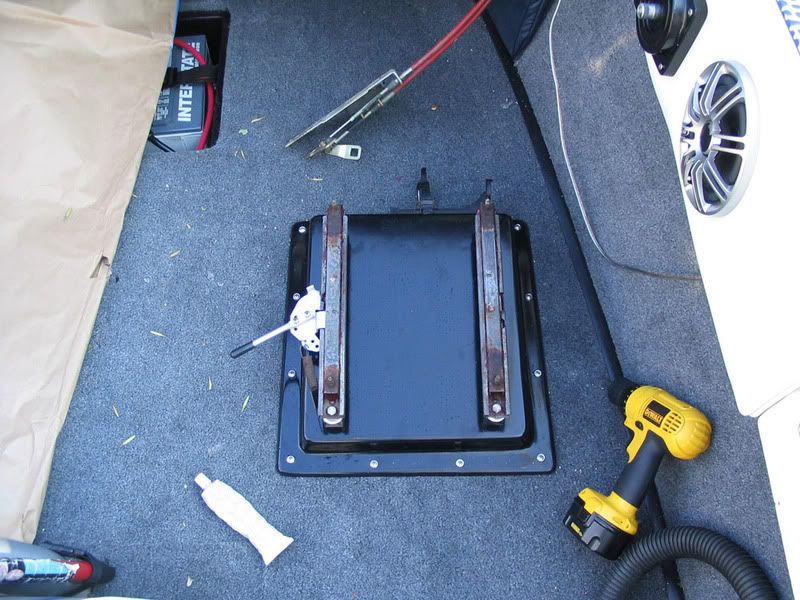
------------- http://www.correctcraftfan.com/diaries/details.asp?ID=923&sort=&pagenum=3&yrstart=1986&yrend=1990 - Our 88 SN2001 |
Posted By: 8122pbrainard
Date Posted: May-16-2007 at 5:08am
|
Ryan, Looks like it will never break again! It's to bad most of it will be hidden so the good work you have done can't be seen. ------------- /diaries/details.asp?ID=1622" rel="nofollow - 54 Atom /diaries/details.asp?ID=2179" rel="nofollow - 77 Tique 64 X55 Dunphy Keep it original, Pete < |
Posted By: 87BFN owner
Date Posted: May-16-2007 at 9:35pm
|
You went through all that and didn't paint the track... What's with that??? Just giving you so crap the base looks great. ------------- |
Posted By: Jim_In_Houston
Date Posted: May-16-2007 at 10:10pm
|
So, where do you get those fancy smancy sliding seat rails? I need some. ------------- Happy owner of a '66 and a '68 Mustang |
Posted By: Bremsen
Date Posted: May-17-2007 at 10:30am
haha, thats why I take pics and post them on the internet. At least someone sees the work that went into it. 
87, I know...they're almost embarrasing. I was going to buy some new ones but procrastinated too long. These would have been a real pain to paint so I just cleaned them up and greased them good. My only consolation is that you can't see them once the seat is in place. I'll probably replace them eventually b/c I know they're down there. Jim, as far as I know you can still get them from the dealer. They may still be using the same ones on new boats, my boss has the same ones on his 99 pro air. I've heard they're around $40. I never checked the heavy truck places like Rudderdad suggested...but that sounds like a good idea since they're about as generic as seat sliders can be. ------------- http://www.correctcraftfan.com/diaries/details.asp?ID=923&sort=&pagenum=3&yrstart=1986&yrend=1990 - Our 88 SN2001 |
Posted By: Barracuda
Date Posted: March-14-2008 at 10:35am
|
Bremsen- Great job on the seat base repair!
Thanks for posting your step by step and including photos. This thread will certainly be one that many will reference when they have the seat base issue (I'd better check mine). -Brad ------------- Former: http://www.correctcraftfan.com/diaries/details.asp?ID=759" rel="nofollow - '86 Nautique http://www.correctcraftfan.com/diaries/details.asp?ID=507" rel="nofollow - '65 Barracuda |
 TRBenj wrote: