Damage boat project |
Post Reply 
|
Page <1 34567 10> |
| Author | ||
emccallum 
Platinum Member 

Joined: August-08-2006 Location: Clarks Hill SC Status: Offline Points: 1084 |
 Post Options Post Options
 Thanks(0) Thanks(0)
 Quote Quote  Reply Reply
 Posted: April-12-2017 at 11:43am Posted: April-12-2017 at 11:43am |
|
|
Tap the adjuster lockbolt down a bit, I had the same issue. Lube, pry,cuss, pry,cuss.....finally it moves, but way too far!
Great job on the rebuild! |
||
 |
||
SNobsessed 
Grand Poobah 
Joined: October-21-2007 Location: IA Status: Offline Points: 7102 |
 Post Options Post Options
 Thanks(0) Thanks(0)
 Quote Quote  Reply Reply
 Posted: April-12-2017 at 10:45am Posted: April-12-2017 at 10:45am |
|
|
MIke - If you don't have any glass filler on hand, you can chop up some cloth with scissors. It is pretty slow & tedious, & the pcs are inconsistent. Much better to get a manufactured filler as it will be easier to work with & end up smoother.
You might want to fill the divots in several layers. If you put too much on at one time, gravity will win. Another tip much like your wood block mold support, I have used a big sponge to support uncured mix in an overhead application. Use plastic sheet as a barrier of course. |
||
|
“Beer is proof that God loves us and wants us to be happy.”
Ben Franklin |
||
 |
||
Mike9812121298 
Senior Member 
Joined: March-24-2017 Location: Seattle Status: Offline Points: 139 |
 Post Options Post Options
 Thanks(0) Thanks(0)
 Quote Quote  Reply Reply
 Posted: April-12-2017 at 7:13am Posted: April-12-2017 at 7:13am |
|
 |
||
tryathlete 
Platinum Member 

Joined: April-19-2013 Location: Lake Villa, IL Status: Offline Points: 1797 |
 Post Options Post Options
 Thanks(0) Thanks(0)
 Quote Quote  Reply Reply
 Posted: April-12-2017 at 3:18am Posted: April-12-2017 at 3:18am |
|
|
Mike--did you get the New shaft yet? Would be great to start playing with that alignment as that's the important step of all steps in finishing up. External hull glass and gel is window dressing compared to getting the alignment right.
|
||
 |
||
Mike9812121298 
Senior Member 
Joined: March-24-2017 Location: Seattle Status: Offline Points: 139 |
 Post Options Post Options
 Thanks(0) Thanks(0)
 Quote Quote  Reply Reply
 Posted: April-12-2017 at 2:36am Posted: April-12-2017 at 2:36am |
|
|
Like I said. I haven't done the alignment. I just temp installed it.
|
||
 |
||
8122pbrainard 
Grand Poobah 

Joined: September-14-2006 Location: Three Lakes Wi. Status: Offline Points: 41040 |
 Post Options Post Options
 Thanks(0) Thanks(0)
 Quote Quote  Reply Reply
 Posted: April-12-2017 at 12:10am Posted: April-12-2017 at 12:10am |
|
Mike, I see you are viewing this thread I suspect there's a reason!! Tell us about the alignment. |
||
 |
||
8122pbrainard 
Grand Poobah 

Joined: September-14-2006 Location: Three Lakes Wi. Status: Offline Points: 41040 |
 Post Options Post Options
 Thanks(0) Thanks(0)
 Quote Quote  Reply Reply
 Posted: April-11-2017 at 11:38pm Posted: April-11-2017 at 11:38pm |
|
|
And Mike, don't forget, we want to hear how you did the strut to log alignment. That's a big gap in your posting and a MAJOR concern.
|
||
 |
||
91nautique 
Senior Member 
Joined: May-26-2005 Status: Offline Points: 104 |
 Post Options Post Options
 Thanks(0) Thanks(0)
 Quote Quote  Reply Reply
 Posted: April-11-2017 at 11:08pm Posted: April-11-2017 at 11:08pm |
|
|
Mike, prep it and let us see how it looks....
|
||
 |
||
Mike9812121298 
Senior Member 
Joined: March-24-2017 Location: Seattle Status: Offline Points: 139 |
 Post Options Post Options
 Thanks(0) Thanks(0)
 Quote Quote  Reply Reply
 Posted: April-11-2017 at 10:59pm Posted: April-11-2017 at 10:59pm |
|
|
I get it taken off tonight and apply the epoxy tonight. I'll try to upload some pics before I call it quits for the night
|
||
 |
||
tryathlete 
Platinum Member 

Joined: April-19-2013 Location: Lake Villa, IL Status: Offline Points: 1797 |
 Post Options Post Options
 Thanks(0) Thanks(0)
 Quote Quote  Reply Reply
 Posted: April-11-2017 at 10:48pm Posted: April-11-2017 at 10:48pm |
|
|
Get the six pack, dig that junk out and get back on track with epoxy resin and glass. Whew--thought it was going to be a basket case for a moment there!
|
||
 |
||
Mike9812121298 
Senior Member 
Joined: March-24-2017 Location: Seattle Status: Offline Points: 139 |
 Post Options Post Options
 Thanks(0) Thanks(0)
 Quote Quote  Reply Reply
 Posted: April-11-2017 at 10:43pm Posted: April-11-2017 at 10:43pm |
|
|
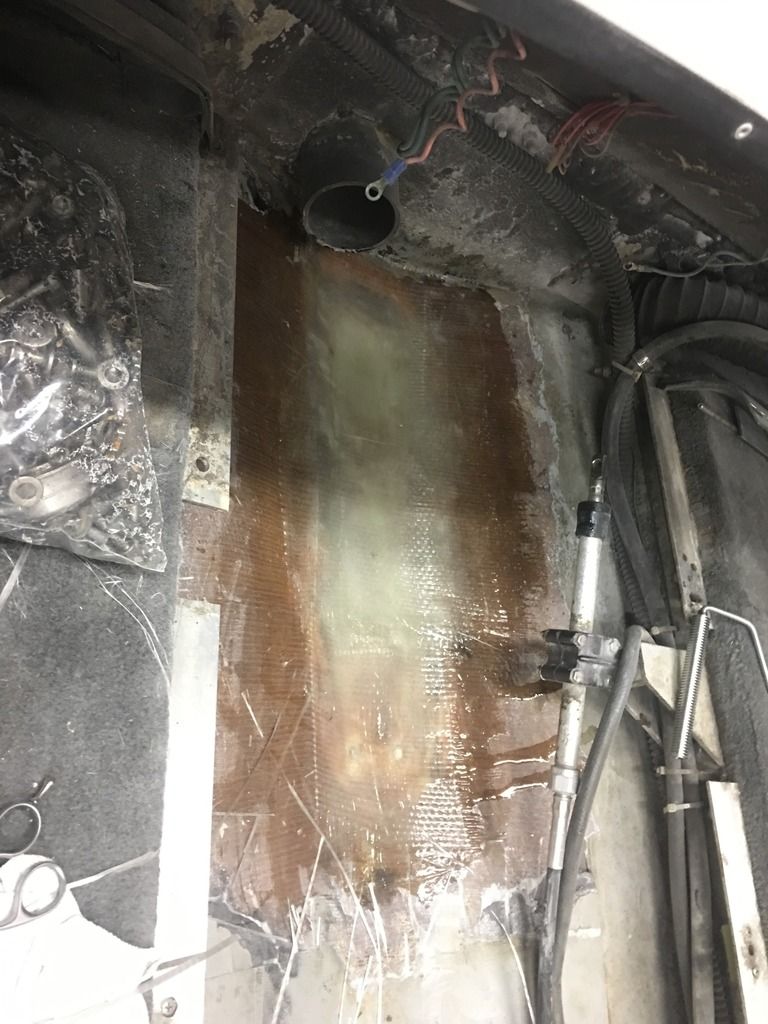
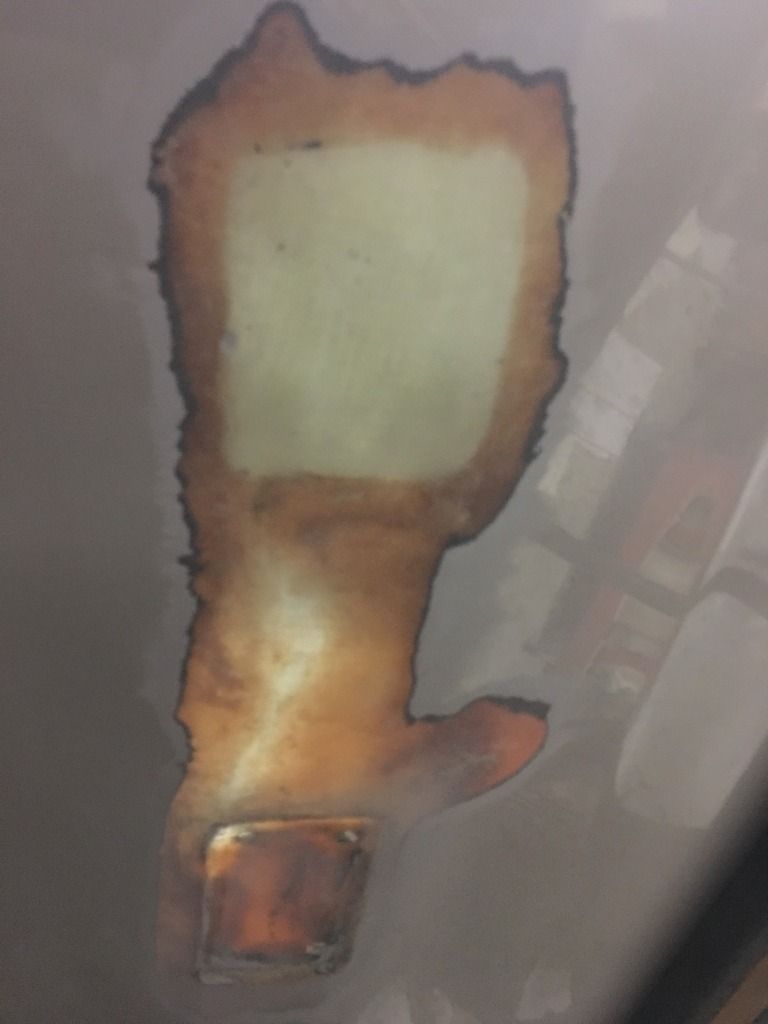
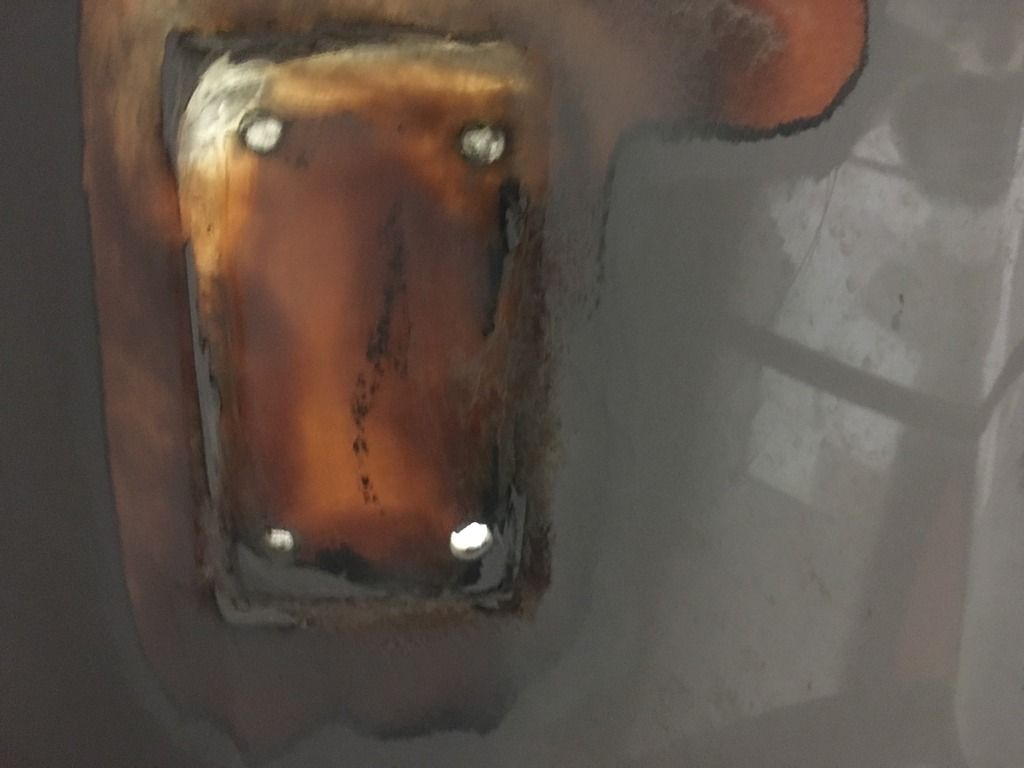
Well sounds like I know what I'm doing tonight. Might have to pick up a extra 6 pack. Easy fix, could I chop up some fiberglass and mix that into the expoxy?
|
||
 |
||
91nautique 
Senior Member 
Joined: May-26-2005 Status: Offline Points: 104 |
 Post Options Post Options
 Thanks(0) Thanks(0)
 Quote Quote  Reply Reply
 Posted: April-11-2017 at 10:40pm Posted: April-11-2017 at 10:40pm |
|
Mike, Yes, you need to communicate. Bondo just like that urethane adhesive is not the recommended material. I asked once before and you never answered. Are you getting guidance off site? If so, it's poor guidance. Sorry. Bondo is polyester resin mixed with talc. They whip it to make it lighter. It absorbs water big time. There is still time to sand it off. Epoxy resin with cabosil would be a much more permanent filler. This guy isn't listening to anything but his wallet. I hate to think of the poor guy that buys this boat. why come on here and ask for advice you aren't going to follow. yikes.... Well, I don't want to rain on your parade, but I am thinking that BONDO is a big mistake, especially below the waterline guess I am a slow typer, but not the only one with the same opinion |
||
 |
||
Dreaming 
Platinum Member 

Joined: May-21-2010 Location: Tacoma, WA Status: Offline Points: 1870 |
 Post Options Post Options
 Thanks(0) Thanks(0)
 Quote Quote  Reply Reply
 Posted: April-11-2017 at 10:17pm Posted: April-11-2017 at 10:17pm |
|
|
I guess I am a slow typer, but not the only one with the same opinion
 |
||
 |
||
Dreaming 
Platinum Member 

Joined: May-21-2010 Location: Tacoma, WA Status: Offline Points: 1870 |
 Post Options Post Options
 Thanks(0) Thanks(0)
 Quote Quote  Reply Reply
 Posted: April-11-2017 at 10:15pm Posted: April-11-2017 at 10:15pm |
|
|
yikes.... Well, I don't want to rain on your parade, but I am thinking that BONDO is a big mistake, especially below the waterline. Polyester body fillers especially the automotive type are hygroscopic, meaning they absorb water. There are marine fillers (evercoat makes one), but they are not for below the waterline IIRC. Polyester fillers are also brittle, and not meant for areas that are going to experience flexing or substrate movement. I would suggest that you do some sanding and get that stuff off. Break out the epoxy, and thicken it (cabosil, micro balloons, talc, etc) to use as filler. That is water proof and will hold up well in a high stress, underwater application. You are making good progress, but I think that the speed of your repair is causing you to make some critical mistakes. Leaving the BONDO in place will likely have you redoing your repair, fixing the blisters in the gel, or trying to contain the gel repair area after the BONDO comes off in large chunks when it delaminates from the glass, or cracks from the flexing. Your skill set and speed are impressive, I love watching your progress, and would love to see this boat back on the water. Worst case, your whole repair is compromised and the boat ends up on the bottom... sometimes when I think who's going to be in my boat/car, etc. it causes me to re-think my easy solutions.
|
||
 |
||
peter1234 
Grand Poobah 

Joined: February-03-2008 Location: United States Status: Offline Points: 2756 |
 Post Options Post Options
 Thanks(0) Thanks(0)
 Quote Quote  Reply Reply
 Posted: April-11-2017 at 10:12pm Posted: April-11-2017 at 10:12pm |
|
|
This guy isn't listening to anything but his wallet. I hate to think of the poor guy that buys this boat. why come on here and ask for advice you aren't going to follow.
|
||
|
former skylark owner now a formula but I cant let this place go
|
||
 |
||
SNobsessed 
Grand Poobah 
Joined: October-21-2007 Location: IA Status: Offline Points: 7102 |
 Post Options Post Options
 Thanks(0) Thanks(0)
 Quote Quote  Reply Reply
 Posted: April-11-2017 at 9:59pm Posted: April-11-2017 at 9:59pm |
|
|
Bondo is polyester resin mixed with talc. They whip it to make it lighter. It absorbs water big time. There is still time to sand it off. Epoxy resin with cabosil would be a much more permanent filler.
|
||
|
“Beer is proof that God loves us and wants us to be happy.”
Ben Franklin |
||
 |
||
8122pbrainard 
Grand Poobah 

Joined: September-14-2006 Location: Three Lakes Wi. Status: Offline Points: 41040 |
 Post Options Post Options
 Thanks(0) Thanks(0)
 Quote Quote  Reply Reply
 Posted: April-11-2017 at 9:44pm Posted: April-11-2017 at 9:44pm |
|
Mike, Yes, you need to communicate. Bondo just like that urethane adhesive is not the recommended material. I asked once before and you never answered. Are you getting guidance off site? If so, it's poor guidance. Sorry. |
||
 |
||
Mike9812121298 
Senior Member 
Joined: March-24-2017 Location: Seattle Status: Offline Points: 139 |
 Post Options Post Options
 Thanks(0) Thanks(0)
 Quote Quote  Reply Reply
 Posted: April-11-2017 at 9:44pm Posted: April-11-2017 at 9:44pm |
|
|
I try to do some work on the boat every day. I've been pulling some late nights because I've been working 7 days a week 9-10 hrs a day. Headed down south this sat to pick up a 1972 Kawasaki h2 750. That's the next project. Getting a greatly good deal on it.
The drive shaft will need a shim because it sits about 1/4 inch above. I just did a temp installl because I got excited to get a look at it. Picked up a used oj 14-16 prop for 70 bucks. I wanted to get a good baseline with the boat. Tonight I'll try to finish up the sanding and hopefully get to gel coat by this weekend. |
||
 |
||
JPASS 
Grand Poobah 

Joined: June-17-2013 Location: Orlando Status: Offline Points: 2283 |
 Post Options Post Options
 Thanks(0) Thanks(0)
 Quote Quote  Reply Reply
 Posted: April-11-2017 at 9:35pm Posted: April-11-2017 at 9:35pm |
|
|
Bondo?
|
||
|
'92 Correctcraft Ski Nautique
|
||
 |
||
Gary S 
Grand Poobah 

Joined: November-30-2006 Location: Illinois Status: Offline Points: 14096 |
 Post Options Post Options
 Thanks(0) Thanks(0)
 Quote Quote  Reply Reply
 Posted: April-11-2017 at 9:21pm Posted: April-11-2017 at 9:21pm |
|
|
Before you start smearing on that hull you should really ask
|
||
 |
||
flyweed 
Gold Member 
Joined: July-11-2016 Location: WI Status: Offline Points: 539 |
 Post Options Post Options
 Thanks(0) Thanks(0)
 Quote Quote  Reply Reply
 Posted: April-11-2017 at 9:14pm Posted: April-11-2017 at 9:14pm |
|
|
Wow..you got some SERIOUS work in since your last post. Yeah, please tell us how the shaft alignment all went.
|
||
|
'93 Ski Nautique NWZ, Air Boom Tower
Drink Tonight..for tomorrow We Ride! |
||
 |
||
8122pbrainard 
Grand Poobah 

Joined: September-14-2006 Location: Three Lakes Wi. Status: Offline Points: 41040 |
 Post Options Post Options
 Thanks(0) Thanks(0)
 Quote Quote  Reply Reply
 Posted: April-11-2017 at 9:02pm Posted: April-11-2017 at 9:02pm |
|
|
Mike,
I've been wondering what you've been up to!  How did the strut to log and then the shaft to engine alignment go? How did the strut to log and then the shaft to engine alignment go?
|
||
 |
||
Mike9812121298 
Senior Member 
Joined: March-24-2017 Location: Seattle Status: Offline Points: 139 |
 Post Options Post Options
 Thanks(0) Thanks(0)
 Quote Quote  Reply Reply
 Posted: April-11-2017 at 7:55pm Posted: April-11-2017 at 7:55pm |
|
 |
||
8122pbrainard 
Grand Poobah 

Joined: September-14-2006 Location: Three Lakes Wi. Status: Offline Points: 41040 |
 Post Options Post Options
 Thanks(0) Thanks(0)
 Quote Quote  Reply Reply
 Posted: April-09-2017 at 10:03pm Posted: April-09-2017 at 10:03pm |
|
Mike, You can not compare pictures from another boat hull as to where the proper strut position (depth into the hull) is to your hull. They all differ. Have you watched the alignment video? It may give you a better idea of the strut position needed to align the prop shaft up with the log (hole in bottom of boat). |
||
 |
||
8122pbrainard 
Grand Poobah 

Joined: September-14-2006 Location: Three Lakes Wi. Status: Offline Points: 41040 |
 Post Options Post Options
 Thanks(0) Thanks(0)
 Quote Quote  Reply Reply
 Posted: April-07-2017 at 6:13am Posted: April-07-2017 at 6:13am |
|
|
Mike,
Using shims (SS washers) between the strut base and hull is a common method to align the strut (pitch and yaw) so, don't worry too much about the recess being off. Also, just like the recess for the rudder port, the same router method can be used for the strut recess. |
||
 |
||
Mike9812121298 
Senior Member 
Joined: March-24-2017 Location: Seattle Status: Offline Points: 139 |
 Post Options Post Options
 Thanks(0) Thanks(0)
 Quote Quote  Reply Reply
 Posted: April-07-2017 at 2:15am Posted: April-07-2017 at 2:15am |
|
 |
||
Mike9812121298 
Senior Member 
Joined: March-24-2017 Location: Seattle Status: Offline Points: 139 |
 Post Options Post Options
 Thanks(0) Thanks(0)
 Quote Quote  Reply Reply
 Posted: April-07-2017 at 2:04am Posted: April-07-2017 at 2:04am |
|
|
Thanks for the link. I'm gonna start the mock up of the rudder mount tonight. If anyone has there boat handy could u take pics of the strut mount?
|
||
 |
||
8122pbrainard 
Grand Poobah 

Joined: September-14-2006 Location: Three Lakes Wi. Status: Offline Points: 41040 |
 Post Options Post Options
 Thanks(0) Thanks(0)
 Quote Quote  Reply Reply
 Posted: April-06-2017 at 8:00am Posted: April-06-2017 at 8:00am |
|
|
Mike,
Here's Tim's recess project in his BFN clearance improvement thread Please take the time to review what Tim did. |
||
 |
||
Mike9812121298 
Senior Member 
Joined: March-24-2017 Location: Seattle Status: Offline Points: 139 |
 Post Options Post Options
 Thanks(0) Thanks(0)
 Quote Quote  Reply Reply
 Posted: April-06-2017 at 7:59am Posted: April-06-2017 at 7:59am |
|
|
I hear what u guys are saying. I'll end up making a recess for the rudder mount. Sometime I can get a little lazy. I laid down some more glass, started grinding at the bottom. It looks like the driveshaft strut mount is sitting maybe 1/8 of a inch higher on one side. Does anyone have a pic of the mount so I can get a better idea of what it should look like.
   |
||
 |
||
8122pbrainard 
Grand Poobah 

Joined: September-14-2006 Location: Three Lakes Wi. Status: Offline Points: 41040 |
 Post Options Post Options
 Thanks(0) Thanks(0)
 Quote Quote  Reply Reply
 Posted: April-06-2017 at 7:14am Posted: April-06-2017 at 7:14am |
|
Mike, I agree that the effort to recess the rudder port is worth the effort. You're doing a great job but I feel that you are missing some of our comments and suggestions. I and others mentioned making plastic spacers to mimic the recesses which would have been the easy way. Now, as Mark mentioned, the recess will need to be ground out. A template can be made for using a router to make a nice clean recess. I know Tim used the method for his BFN project. I'll see if I can find Tim's thread but now it's off to work for me!! If you have any problems understanding what anyone of us is saying, please say so and we would be happy to explain it farther. |
||
 |
||
Post Reply 
|
Page <1 34567 10> |
|
Tweet
|
| Forum Jump | Forum Permissions  You cannot post new topics in this forum You cannot reply to topics in this forum You cannot delete your posts in this forum You cannot edit your posts in this forum You cannot create polls in this forum You cannot vote in polls in this forum |