 Boats For Sale:


1980 Ski Nautique Total Restoration |
Post Reply 
|
Page <1 45678 12> |
| Author | |
Watauga 
Senior Member 

Joined: June-12-2009 Location: United States Status: Offline Points: 208 |
 Post Options Post Options
") Thanks(0) Thanks(0)
 Quote Reply Quote Reply
 Posted: January-28-2015 at 2:42pm Posted: January-28-2015 at 2:42pm |
|
That's a nice ride, Doug! I always liked that color combo. You can usually find me at Fish Springs Marina, where we keep our boats, or in the Cove Ridge area, where we hang out while out on the water.
My family have always been Watauga lake rats; pretty much grew up on Watauga including working on the lake for almost 10 years. I think that Watauga is going to suffer from more pressure this coming summer because of the issue over at Boone Lake. Unofficially I have heard that Boone will remain at a lower level this year which will result in more folks coming over to Watauga. If that happens I will concentrate on more week-nights and sunrise Saturdays for footin' and skiing on Watauga. |
|
 |
|
|
wataugasn84
Senior Member

Joined: January-06-2013 Location: East Tennessee Status: Offline Points: 118 |
Post Options
Thanks(0)
Quote Reply
Posted: January-26-2015 at 3:07pm |
|
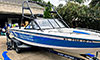
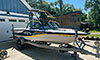
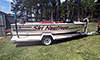
What do you think!
 All original just cleaned and buffed out. Restored trailer, and due to a hail storm I am having new interior installed this winter. All original just cleaned and buffed out. Restored trailer, and due to a hail storm I am having new interior installed this winter.
|
|
|
Watuugasn84
|
|
|
|
|
wataugasn84
Senior Member
Joined: January-06-2013 Location: East Tennessee Status: Offline Points: 118 |
Post Options
Thanks(0)
Quote Reply
Posted: January-26-2015 at 2:58pm |
|
Arklie,
Very nice build very informative and detailed. Boat is looking good and getting close to being ready for the water. I hope to see you this year on Watauga lake , it's our primary lake.I live close and would be glad to assist or be a go-fer if you need an apprentice. I have picked up several things just from reading this build. I think I will need to do some extra polishing to be the best looking 2001 on the lake this year. I have the name of a local upholster if you need one.(Nice signature) |
|
|
Watuugasn84
|
|
|
|
|
Gary S
Grand Poobah 

Joined: November-30-2006 Location: Illinois Status: Offline Points: 14096 |
Post Options
Thanks(0)
Quote Reply
Posted: January-02-2015 at 7:34pm |
|
Correct on the pushrods but they might be reusable anyway, they won't be skimming the heads and block that much, but it will be best to check . See if you can get Tom Monroe' s book on rebuilding your small block Ford
|
|
|
|
|
Watauga
Senior Member
Joined: June-12-2009 Location: United States Status: Offline Points: 208 |
Post Options
Thanks(0)
Quote Reply
Posted: January-02-2015 at 2:55pm |
|
I did my final cleaning yesterday and dropped everything off at the machine shop early this morning. There wasn't anything nice about removing the rubberized coating on the oil pan. After taking a quick look they advised boring 30 over and a new cam as well. I suspected the new cam requirement but was a little surprised in the boring.
Here are a few questions for the GP motor heads. Is the Melling 24209 the correct cam for the 351w RR engine? Summit Cam Is this the correct lifter? Summit Lifter And finally, I assume I will not be able to determine the correct pushrod length until reassembly?   
|
|
|
|
|
Watauga
Senior Member
Joined: June-12-2009 Location: United States Status: Offline Points: 208 |
Post Options
Thanks(0)
Quote Reply
Posted: December-29-2014 at 11:29pm |
|
Made a quick trip to my friend's machine shop this evening. He told me to disassemble it and bring it in.
I got a pretty good amount of it disassembled tonight; pretty much everything except the valves. I think it looks pretty good inside overall. I broke one compression ring when I got a little careless. The bearings, crank, cam, lifters, and pistons look amazingly good. I am going to rustle up a valve spring compressor tomorrow evening so I can disassemble the heads, remove some journal plugs and hopefully get the components to the machine shop on Wednesday, if everything goes well. My friend is going to advise me on which rebuild kit to purchase.  
|
|
|
|
|
Watauga
Senior Member
Joined: June-12-2009 Location: United States Status: Offline Points: 208 |
Post Options
Thanks(0)
Quote Reply
Posted: December-28-2014 at 10:07pm |
|
Turning the corner here and moving to the engine work. I was planning only on replacing the exterior seals and gaskets, and the timing chain and gears, but it looks like i have opened the proverbial can of worms.
I started by draining the oil for 24 hours. When I removed the oil pan there was around 1" of slude in the sump. I removed the oil pickup and pump, then moved to the timing chain cover. Here is a picture of the chain and gears and they are in the shape I expected. I am surprised the chain did not jump off the gears. This engine has 1,200 hours and was running fine.  When I removed the carborator I saw rust inside of the manifold. The boat has been stored inside so I assume the rust was caused by condensation perhaps. I decided to remove the intake to get a better look and happy to see the rust was contained in the intake, the deck, pushrods, lifter, rockers look good. The pistons and bores look good from below, but I haven't removed the heads yet for a better inspection.  I guess I need to go ahead and pull the heads and send everything to the local shop to get inspected, or do you motor heads suggest I totally disassemble it before taking it in for inspection. Do you have a suggestion on a particular Summit rebuild kit? |
|
|
|
|
Watauga
Senior Member
Joined: June-12-2009 Location: United States Status: Offline Points: 208 |
Post Options
Thanks(0)
Quote Reply
Posted: December-20-2014 at 7:29pm |
|
TRBenj,
I have already been in touch with Christines and will probably go with them. Ouch! The local shop that redid this boat about 20 years ago did a good job on it without cutting too many corners, but she went through a nasty divorce and closed shop a long time ago. I am pretty sure my foam is all reusable except maybe the coaming pad foam, but not because of deterioration. The original coaming pad backer boards never fit perfectly so I remade them without considering the originals as a template. Christines charges an additional $250 for diamond pleating, or $100 for stripes. That being the case, this boat would cost over $1,700 for the complete interior including the coaming pads. The water warms enough around here to begin skiing early in May on good days. My goal is to have this boat ready by then, therefore I need to get the skins ordered soon, I agree. |
|
|
|
|
TRBenj
Grand Poobah

Joined: June-29-2005 Location: NWCT Status: Offline Points: 21133 |
Post Options
Thanks(0)
Quote Reply
Posted: December-20-2014 at 6:54pm |
|
Not sure who you're using for skins, but if you're planning to go original (Christine's did the diamond pleating on my '80 after I asked real nice) then you may want to order sooner than later- there's usually a few month backlog.
|
|
|
|
|
Watauga
Senior Member
Joined: June-12-2009 Location: United States Status: Offline Points: 208 |
Post Options
Thanks(0)
Quote Reply
Posted: December-20-2014 at 6:21pm |
|
Cold and rainy day here in the mountains; had a hard time getting started today and ran out of steam early. I did get the marine plywood cut and edge routed to replace the wood in the observers and drivers seats. Got one coat of CPES on both sides and all edges. I was thinking about Starboard instead of the marine ply until I checked the price. I think Starboard is better, but I already had enough plywood here in my way along with the CPES, resin and biaxial. Trying to get all the upholstery prep work done so that I can be ready to order the skins.
 If you look closely you can see the 351w mounted on the engine stand waiting patiently for some attention. |
|
|
|
|
quinner
Grand Poobah

Joined: October-12-2005 Location: Unknown Status: Offline Points: 5828 |
Post Options
Thanks(0)
Quote Reply
Posted: December-19-2014 at 2:10pm |
|
Dub Deuces with spinners?? Curb Feelers??
Everything is looking Great, very nice work!! |
|
|
|
|
Watauga
Senior Member
Joined: June-12-2009 Location: United States Status: Offline Points: 208 |
Post Options
Thanks(0)
Quote Reply
Posted: December-19-2014 at 1:26pm |
TRBenj, I agree, maybe after I recover from the overall restoration I can find some affordable wheels that show a little better. |
|
|
|
|
Watauga
Senior Member
Joined: June-12-2009 Location: United States Status: Offline Points: 208 |
Post Options
Thanks(0)
Quote Reply
Posted: December-19-2014 at 1:23pm |
Chris, I have coordinated responses to every major disaster in North America over the last 10 years; currently active at 8 locations in 6 states in the US. |
|
|
|
|
TRBenj
Grand Poobah
Joined: June-29-2005 Location: NWCT Status: Offline Points: 21133 |
Post Options
Thanks(0)
Quote Reply
Posted: December-19-2014 at 8:24am |
|
The wheels aren't my taste but the PVC looks good. Tim, flex PVC (white) was what correct craft put over the guides in the late 80's... I know our '88 had it. You can still put the nautique guide pads over them, but they're more of a style choice than functional.
|
|
|
|
|
Morfoot
Grand Poobah

Joined: February-06-2004 Location: South Lanier Status: Offline Points: 5312 |
Post Options
Thanks(0)
Quote Reply
Posted: December-19-2014 at 6:47am |
|
A local ski bud of mine has had the flexable PVC on his guide ons for years and they have held up fabulously. The only draw back is that he has white on his black trailer but over the years they have gotton pretty dingy looking from water stains and Father Time. Good call on going with the black. Nice restore on the trailer including the wheels!
 |
|
|
"Morfoot; He can ski. He can wakeboard.He can cook chicken.He can create his own self-named beverage, & can also apparently fly. A man of many talents."72 Mustang "Kermit",88 SN Miss Scarlett, 99 SN "Sherman"
|
|
|
|
|
Toertel
Gold Member 

Joined: August-26-2013 Location: Atlanta Status: Offline Points: 775 |
Post Options
Thanks(0)
Quote Reply
Posted: December-19-2014 at 1:08am |
|
great work! are you based in GA? if so, ya need to come to a reunion
|
|
|
1994 Sport Nautique
|
|
|
|
|
SNobsessed
Grand Poobah
Joined: October-21-2007 Location: IA Status: Offline Points: 7102 |
Post Options
Thanks(0)
Quote Reply
Posted: December-19-2014 at 12:59am |
|
Looks great! What disasters have you aided?
|
|
|
“Beer is proof that God loves us and wants us to be happy.”
Ben Franklin |
|
|
|
|
Watauga
Senior Member
Joined: June-12-2009 Location: United States Status: Offline Points: 208 |
Post Options
Thanks(0)
Quote Reply
Posted: December-18-2014 at 7:48pm |
|
Thanks, All.
Richard, They will not rotate because of the 90* bend on the lower section. They will spin maybe 15 or 20 degrees with some difficulty, and then return to their original position. If your trailer is a newer one without the 90* bends they may spin. Just measure your guides before you order. Mine were around 1 5/8 - 1 11/16 or so. I tried to get it local and checked with the large plumbing contractor suppliers, but no one had it around here. I looked around on the web and found out pretty quickly that there are 2 major suppliers of flexible PVC that sell over the internet. One of the suppliers sells some odd sizes, e.g., 1 3/4 and 1 7/8. I really wanted the 1 7/8 size but it would have been almost double in cost, plus a lot of shipping on top of that. Then I checked Amazon and was surprised they had the 2", and that is was available for Prime Shipping. I made a decision to order the 2" and if they were too loose I was going to make some bushings, but there were not needed. This stuff is pretty soft, even in the cold weather we are seeing today. I would do it again in a minute, and I am pretty picky. As far as cutting it - I used one of those cheap PVC pinch cutters that goes up to 2" and it went through it like butter. A sharp pocket knife or hacksaw would easily work as well. Here is my final trailer picture showing my inexpensive NT rims. 
|
|
|
|
|
rebel skier
Gold Member

Joined: October-17-2014 Location: Middle Tenn Status: Offline Points: 772 |
Post Options
Thanks(0)
Quote Reply
Posted: December-18-2014 at 6:42pm |
|
No doubt! I hope the wife does not get me the Nautique guide post pads from this site's store for Christmas like I asked for. I want to to Arklie's route.
Arklie, do you think they will rotate when loading the boat? |
|
|
|
|
8122pbrainard
Grand Poobah

Joined: September-14-2006 Location: Three Lakes Wi. Status: Offline Points: 41040 |
Post Options
Thanks(0)
Quote Reply
Posted: December-18-2014 at 6:14pm |
|
The PVC on the guide ons looks great.
|
|
|
|
|
SNobsessed
Grand Poobah
Joined: October-21-2007 Location: IA Status: Offline Points: 7102 |
Post Options
Thanks(0)
Quote Reply
Posted: December-18-2014 at 3:07pm |
Hmmm, never had that feeling -- not! Great idea on the black flex for the guide poles. That should look very nice. |
|
|
“Beer is proof that God loves us and wants us to be happy.”
Ben Franklin |
|
|
|
|
malcolm2
Senior Member

Joined: June-13-2010 Location: Nashville Status: Offline Points: 235 |
Post Options
Thanks(0)
Quote Reply
Posted: December-18-2014 at 2:57pm |
|
Awesome. Keep up the good work. I have been to Watauga a few times, beautiful lake! I hope I can see this work personally one day.
A quick google of "spare tire mount" and this popped up.... $20. It is an option. Clark spare tire mount link |
|
|
|
|
Watauga
Senior Member
Joined: June-12-2009 Location: United States Status: Offline Points: 208 |
Post Options
Thanks(0)
Quote Reply
Posted: December-18-2014 at 2:28pm |
|
I was going to get the wheels sandblasted and powdercoated, but my powdercoater wanted $25 each just to sandblast them. I settled on new wheels from Northern Tool for $38 each, plus I used the $10 off coupon I had. So I came out better. As one member suggested, I will clean up the better of the old wheels and find a tire for it to use as a spare.
I settled on 2" black flexible PVC pipe for the guides. I found a 25' roll on Amazon for $45.00 or so and free prime shipping. They also had the 2" black caps for around $2.50 or so. Not sure I am going to glue them on permanent until I load it a time or two. The 2" size is a tad big, but I think it will allow the pipes to drain out easily and allow some movement when the boat contacts them. They are tight enough that they could never blow off, and the pipe feels like electrical Carflex or a similar product but much softer. I think it will work good. It is available in White, Black and Grey.    I spent more time and money on this project then I anticipated. This pretty much concludes the trailer project. I am thinking about fabricating a spare tire mount and a secure bow tie-down. I will think more about those things after I finish the boat. |
|
|
|
|
Watauga
Senior Member
Joined: June-12-2009 Location: United States Status: Offline Points: 208 |
Post Options
Thanks(0)
Quote Reply
Posted: December-13-2014 at 9:01pm |
|
I have the trailer pretty much finished except for the protection on the guide poles (still haven't settled on the right covering just yet), and square u-bolts to hold the axle to the leaf springs. When I cleaned the rust off the originals I realized they were really beyond repair. I cleaned them up with a brass wire brush on a bench grinder and ran a die down them a few times, but they are shot. They are a size that is uncommon, just like everything else on one of these trailers. I finally found them at Croft Trailer Supply in Kansas City; they should be here early next week, hopefully.
 Installed the bunk carpet and cut some new decals from the .EPS files downloaded from the CCF Website.  I spliced the coaming pads and trimmed them to the correct size, chamfered the back edge with a router, marked the mounting holes, and installed stainless T-Nuts before applying a couple coats of CPES. I think they are ready for the upholstery shop now.  The only other thing I got done was replacing the Airguide speedometer line from the rear of the boat to the instrument panel/dash. There wasn't anything nice about that job. I can only assume the tube was installed under the gunnel while at the factory before the top deck was installed on the hull. There was at least 12-15 zip-ties securing that thing. Had to use a stubby screwdriver to get the screws out and reinstalled. Glad that is over. I still need to run the electrical wires for the Electro Marine Speedo, but thinking about using miniature zip-ties to secure it to the Airguide tubing, not sure just yet/ |
|
|
|
|
dwcar
Platinum Member

Joined: February-11-2007 Location: Houston Texas Status: Offline Points: 1103 |
Post Options
Thanks(0)
Quote Reply
Posted: December-11-2014 at 9:45pm |
|
Very nice!!
|
|
|
83Ski
|
|
|
|
|
Watauga
Senior Member
Joined: June-12-2009 Location: United States Status: Offline Points: 208 |
Post Options
Thanks(0)
Quote Reply
Posted: December-09-2014 at 1:07pm |
|
Will do, HW. Good idea.
TRBenj, I will keep the remnant of them. I belive they are a Truck-Lite product, as are the tail lights. Both were/are high quality products. As an example-the tail lights are gasketed and all fasteners are stainless including all the internal guts. One of the marker lights is actually almost perfect, although weathered. The other has about 1/2 of the housing cracked and missing although the actual lens and light is okay. For any unfamiliar with the originals- the lens must be twisted to remove it. I will keep them in hopes of finding some parts sometime in the future or passing them off to someone else. Relative to the axle bolts I used on the bow stop. They are part #175668 from Etrailer. The part is a Redline product, the u-bolt 9/16" in diameter and 7 3/4" long and has an inner width of 2-1/2" and came with nuts. I also ordered part #115208GALV matching shackle-straps to go along with them. The u-bolts and included nuts were $8.00 each and the straps were $1.85 or so. So you are looking at $40 to upgrade them. I am pretty gentle when loading, but I have witnessed some folks slamming their Correct Crafts into the stop with a lot of force, never did understand that. I have also read recently of some folks braking hard to bring the boat up against the stop after loading. If their u-bolts are in as bad of a shape as mine were they may be in for a rude awakening some day. |
|
|
|
|
TRBenj
Grand Poobah
Joined: June-29-2005 Location: NWCT Status: Offline Points: 21133 |
Post Options
Thanks(0)
Quote Reply
Posted: December-09-2014 at 12:13pm |
|
Like HW said, that's a #3.
I like those axle bolts on the bow stop- what size are they? The marker light housings are oddball and NLA but the lights that install into them are readily available... Don't throw the old housings away! Trailer looks really good. |
|
|
|
|
Hollywood
Moderator Group

Joined: February-04-2004 Location: Twin Lakes, WI Status: Offline Points: 13512 |
Post Options
Thanks(0)
Quote Reply
Posted: December-09-2014 at 11:59am |
|
It is simply a #3. Seems like only few of then have the keel bunk like you do. I suggest rounding off the top, inside edge (purple line here) of the main bunks. Any pressure points during loading and unloading will wear through the carpet here very quickly. They usually wear through about 2/3 of the way up but you might as well do the entire length. Your carpet will last much longer.

|
|
|
|
|
SWANY
Senior Member

Joined: August-12-2014 Location: batavia Status: Offline Points: 384 |
Post Options
Thanks(0)
Quote Reply
Posted: December-09-2014 at 11:42am |
|
Looks great!
|
|
|
|
|
Watauga
Senior Member
Joined: June-12-2009 Location: United States Status: Offline Points: 208 |
Post Options
Thanks(0)
Quote Reply
Posted: December-09-2014 at 11:22am |
|
Thanks, All, for the suggestions and advice.
I have been slowly working on the trailer while waiting on engine parts. I have replaced all of the lights except the taillights with LEDs and run the new wiring harness in PEX. I hope to make all the electrical connections this evening if the rain lets up. I could not find any original style side marker lights so I went with some armored ones. The clearance lights were easily obtainable, though. The original u-bolts that held on the front nose-stop were in pretty rough shape so I replaced them with new axle u-bolts that were a little beefier  The coupler was bent up pretty badly so I replaced it with a heavier-duty version. I considered a Bulldog cast coupler, but opted out for this one instead. Attached with grade 8 bolts and new safety chain.  I Brainardized the mounting of the bunks by countersinking the stainless hex head bolts.  And took Joel's good advice on using PEX for wiring conduit. For the dropouts to the marker light and clearance lights I simply ground an oval in the PEX.  My bunk carpet arrived yesterday, so if the rain quits this evening I should be able to install the carpeting. I bought some stainless staples to do it with.  I bought a over 80 light to hang on the brackets Pete identified for me. The light was pretty flimsy so mounted it on a piece of heavy duty aluminum angle and secured everything with stainless bolts.  I replaced all of the bearings, races, seals, etc. in the factory hubs. In case it helps someone in the future, here are the part numbers: Grease Seal: 171255TC Outer Race: L44610 Outer Bearing: L44649 Inner Race: L68111 Inner Bearing: L68149 I also bought new fake buddy bearings and bras from Northern Tool and installed them as well.  Finally, I have been waiting on these spring and shackle bushings. I finally got them yesterday from Northeast Marine in Oxford MA. They were not easy to find, but really inexpensive at $1.05 each.  Question for the day. Can anyone tell me by looking at these pictures what model trailer this is? It doesn't really matter to me, but I would like to know. I have been looking for a lowboy with fiberglass tub, but it seams those are as rare as hens teeth? |
|
|
|
|
Post Reply
|
Page <1 45678 12> |
 Tweet
Tweet
|
| Forum Jump | Forum Permissions You cannot post new topics in this forum You cannot reply to topics in this forum You cannot delete your posts in this forum You cannot edit your posts in this forum You cannot create polls in this forum You cannot vote in polls in this forum |


 Topic Options
 TRBenj wrote: