 Boats For Sale:


Plan B: Rust Mitigation on Ram-Lin |
Post Reply 
|
Page <1234> |
| Author | ||
C-Bass 
Platinum Member 

Joined: November-18-2008 Location: Columbus, IN Status: Offline Points: 1248 |
 Post Options Post Options
") Thanks(0) Thanks(0)
 Quote Reply Quote Reply
 Posted: June-08-2010 at 11:41am Posted: June-08-2010 at 11:41am |
|
I think he might have addressed this ..

|
||
 |
||
|
emccallum
Platinum Member

Joined: August-08-2006 Location: Clarks Hill SC Status: Offline Points: 1084 |
Post Options
Thanks(0)
Quote Reply
Posted: June-08-2010 at 12:58pm |
|
|
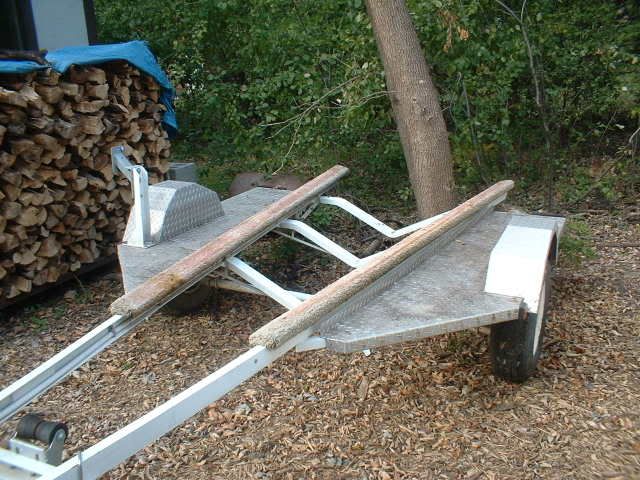
I am coming in late on this thread. I redid my trailer last year. It wasnt as bad as yours. The wet carpet is what is killing the trailer. I went back with Al on mine. I cleaned up the rust just as you did, and used a Rustoleum paint. Several coats using a brush. Not as pretty as a spray can. I kept the carpet on the inside of the fenders as the boat can hit these.
I used a trailer light rubber grommet where the guide pole goes thru the Al. 
|
||
|
||
|
M3Fan
Grand Poobah 

Joined: October-22-2005 Location: United States Status: Offline Points: 3185 |
Post Options
Thanks(0)
Quote Reply
Posted: June-08-2010 at 2:05pm |
|
|
How'd you get those aluminum steps cut like that? Cost? I was going to throw the sh*tty carpet ones back on, at least temporarily.
|
||
|
2000 SN GT40 w/99 Graphics/Gel
2016 SN 200 OB 5.3L DI https://forum.fifteenoff.com |
||
|
||
|
MartyMabe
Grand Poobah

Joined: February-21-2006 Location: High Point,NC Status: Offline Points: 3974 |
Post Options
Thanks(0)
Quote Reply
Posted: June-08-2010 at 2:18pm |
|
|
Don't forget you have to get a 5 x 10 sheet of metal.
Wherever you get the metal from they'll cut it. Mine was $175 for the aluminum diamond plate 5' x 10'- and they cut it with a plasma cutter. They did a bad job, I complained and he took $25 off. I then put the black trim loc on the edges. |
||
|
||
|
MartyMabe
Grand Poobah
Joined: February-21-2006 Location: High Point,NC Status: Offline Points: 3974 |
Post Options
Thanks(0)
Quote Reply
Posted: June-08-2010 at 2:31pm |
|
|
||
|
emccallum
Platinum Member
Joined: August-08-2006 Location: Clarks Hill SC Status: Offline Points: 1084 |
Post Options
Thanks(0)
Quote Reply
Posted: June-08-2010 at 2:39pm |
|
|
I had a friend cut them for me. Pretty tedious to get it right. Mine looks good, not perfect. The edge is sanded and rounded. I like Marty's idea of the Trim Loc.
|
||
|
||
|
weitekampt
Senior Member 

Joined: July-08-2006 Location: Fisher, IL Status: Offline Points: 457 |
Post Options
Thanks(0)
Quote Reply
Posted: June-08-2010 at 2:40pm |
|
|
Good call on the POR. I used that stuff on the oil pan on my diesel truck. It was rusting and starting to seep. It took a week to prep, but worth it DEFINITELY! If the POR wasn't good enough, I used some epoxy putty over some areas. Then for added insurance, I scuffed the POR and sprayed 1/2 a can of rustoleum in several coats. Working on your trailer would be a piece of cake, imagine doing all that around your steering linkage, wiring harnesses, axle, etc!!! That POR basically welded that pan onto the block!
I am glad you addressed your trailer early like you did. Now you will have some pretty good protection for many years. I know of guys that sprayed POR out of a air gun and got beautiful results with car like finishes. You can always bulletproof your paintjob like that in 5 years! Nice work! |
||
|
||
|
M3Fan
Grand Poobah
Joined: October-22-2005 Location: United States Status: Offline Points: 3185 |
Post Options
Thanks(0)
Quote Reply
Posted: June-08-2010 at 2:49pm |
|
|
One feature that I think helps kill these trailers are/is the staples on the underside of the bunks holding the carpet on. Imagine a 2500lb boat bouncing around on the bunks for 10 years, sandwiching the bunk underside and staple heads directly into the painted frame. Over time, the staples probably wear away the paint and presto- the carpet is right there to hold in the moisture and start the conversion to Fe2o3 on the frame rails. That's why the outer edge of the frame was in worse shape than the inner frame, I'd bet. However, I think that not hiding those staples under the bunks and cutting the carpet rather than wrapping it under on the outside of the bunks will look terrible. Thoughts/solutions?
|
||
|
2000 SN GT40 w/99 Graphics/Gel
2016 SN 200 OB 5.3L DI https://forum.fifteenoff.com |
||
|
||
|
8122pbrainard
Grand Poobah

Joined: September-14-2006 Location: Three Lakes Wi. Status: Offline Points: 41040 |
Post Options
Thanks(0)
Quote Reply
Posted: June-08-2010 at 3:12pm |
|
|
A hand held "Skill" saw with a carbide tipped blade works wonders on diamond plate. Just use a straight edge for a guide and wear safety glasses.
|
||
|
||
|
8122pbrainard
Grand Poobah
Joined: September-14-2006 Location: Three Lakes Wi. Status: Offline Points: 41040 |
Post Options
Thanks(0)
Quote Reply
Posted: June-08-2010 at 3:58pm |
|
|
I did these running boards and fenders with the "Skill" saw and a hand break. (and a TIG) No need for edge trim because all the edges are turned down. Plus, you'll always be catching it with feet/shoes pulling it off! Edge trim also doesn't like to go over the "diamonds". If you get it sized for the diamonds then it's too loose in between. If sized for the base thickness then it wants to come off at the diamonds.
|
||
|
||
|
MartyMabe
Grand Poobah
Joined: February-21-2006 Location: High Point,NC Status: Offline Points: 3974 |
Post Options
Thanks(0)
Quote Reply
Posted: June-08-2010 at 4:54pm |
|
|
Silicone the trim loc to the edges! But I didn't do that. Mine's staying on pretty well for now.
As for the carpet, I stapled mine on the inside of the bunk, wrapped it under the bunk, lag bolted the bunk to the trailer, continued the carpet over the top of the bunk,back to the inside of the boards, then stapled again. All staples are then on the inside of the bunks,and can't be seen, with the boat on the trailer or off the trailer. Somebody says I shouldn't have went under the bunk, because the water holding in the carpet, but I'll see in another 20 years or so. It's not like your using the trailer to ski around the lake all day, it's out drying in the parking lot, or some only see the water at the beginning of the season and then the end of it. But hey, we live and learn. So we can decipher this mess in another 20 years. 
|
||
|
||
|
8122pbrainard
Grand Poobah
Joined: September-14-2006 Location: Three Lakes Wi. Status: Offline Points: 41040 |
Post Options
Thanks(0)
Quote Reply
Posted: June-08-2010 at 5:00pm |
|
|
Marty,
You really want me to get going on the silicone subject???  Since you've missed why I dislike the stuff, it doesn't stick!! At least go with a polyurethane like 5200 or 4200. It's adhesion is by far superior. Since you've missed why I dislike the stuff, it doesn't stick!! At least go with a polyurethane like 5200 or 4200. It's adhesion is by far superior.
|
||
|
||
|
M3Fan
Grand Poobah
Joined: October-22-2005 Location: United States Status: Offline Points: 3185 |
Post Options
Thanks(0)
Quote Reply
Posted: June-08-2010 at 7:34pm |
|
This makes sense. I like this idea better than staple heads directly contacting trailer frame. |
||
|
2000 SN GT40 w/99 Graphics/Gel
2016 SN 200 OB 5.3L DI https://forum.fifteenoff.com |
||
|
||
|
M3Fan
Grand Poobah
Joined: October-22-2005 Location: United States Status: Offline Points: 3185 |
Post Options
Thanks(0)
Quote Reply
Posted: June-11-2010 at 12:11pm |
|
|
How time flies when you are "in the zone" on a project. I started on the bunk re-carpeting at about 9PM. When I finished I walked back in the house and it was 12:30AM. Very surprising/shocking, especially when my alarm went off at 5:20 AM.
Bunks look outstanding. Went with the factory staple-under-then-flap-over technique. I even added the strip of "padding" carpet atop the bunks before flapping the main carpet over, giving the bunks that rounded factory look. Here is how strong POR-15 is: I wanted to use a little bit to dip each screw in so that the holes would be that much less prone to future rust. The lid of the POR-15 was SO FUSED to the can that the inner lip of the can actually completely pulled inside out and deformed before the top popped off. Incredible. Basically, the container must be destroyed to re-open the can! |
||
|
2000 SN GT40 w/99 Graphics/Gel
2016 SN 200 OB 5.3L DI https://forum.fifteenoff.com |
||
|
||
|
MartyMabe
Grand Poobah
Joined: February-21-2006 Location: High Point,NC Status: Offline Points: 3974 |
Post Options
Thanks(0)
Quote Reply
Posted: June-11-2010 at 1:16pm |
|
|
Oh, I forgot to mention, I used a Dewalt air stapler.
The POR-15----yes upon opening you must use it all or the way I did it was to take a plastic baggie, make sure no POR-15 is dripped where the lid goes, put the plastic baggie, then hammered the top on. Mine held up for 7 months. I was lucky. So yes, you only buy what you need on this and no extra. |
||
|
||
|
dmiracle
Senior Member

Joined: July-22-2008 Location: Johns Creek, GA Status: Offline Points: 300 |
Post Options
Thanks(0)
Quote Reply
Posted: June-14-2010 at 6:46pm |
|
|
Thanks to Marty and others for the valuable information in this thread, I'm now thinking I'm ready to tackle my own trailer restoration.
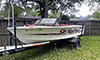
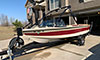
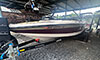
I have a 1993 single axle that's in decent shape and looks identical to MartyMabe's with very little rust. I'm thinking it's a Ramlin? I'll try and post some pictures. I do however have some preliminary questions: Rust - very minor on the "tabs" that the wood side steps bolt to and some appears to be existent under the bunks but I have not removed these yet. I'm thinking I can probably brush off with a wire brush or power tool. How are the bunk boards attached to the frame? Fenders - Mine appear to be bolted on via square "tabs" on the front and back side of the wheel. Marty - The fenders you showed on ebay don't seem to have these. How did you connect your new fenders? Actuator - It would appear that replacing my actuator would be fairly straight forward however I'm wondering about the brakes. Once you install the replacement and connnect the brake line, is there a process for bleeding the brakes? Turnbuckle - My trailer did not have one but rather, the previous owner had attached a chain. If the nose of the boat isn't snug into the bow stop, it will porpoise somewhat over bumps which makes me nervous. I've heard negative things about the original turnbuckles. Comments? Thanks for your help guys. Doug Miracle |
||
|
||
|
MartyMabe
Grand Poobah
Joined: February-21-2006 Location: High Point,NC Status: Offline Points: 3974 |
Post Options
Thanks(0)
Quote Reply
Posted: June-14-2010 at 9:47pm |
|
|
Go at the rust places with a hand-held grinder with 80 grit paper if possible. Get POR-15 or some kind of rust-inhibitor paint and you'll be fine.
There are lag screws under the carpet on the bunks, about 10 or 12 of them. You might have to replace some or all of these. As for the fenders, yes you have to get some more 'tabs' cut to weld to the fenders to mount. I had to make mine about an inch longer(wider), because my fenders were more rounded than elongated. Because of the limited space on this site to post pics, e-mail me and I'll be happy to send you all the pics you want to look at before you get started! 
|
||
|
||
|
kapla
Grand Poobah

Joined: March-27-2008 Location: BA, Argentina Status: Offline Points: 6148 |
Post Options
Thanks(0)
Quote Reply
Posted: June-15-2010 at 12:44am |
|
hey Marty what about using photobucket?
|
||
|
<a href="">1992 ski nautique
|
||
|
||
|
dmiracle
Senior Member
Joined: July-22-2008 Location: Johns Creek, GA Status: Offline Points: 300 |
Post Options
Thanks(0)
Quote Reply
Posted: June-16-2010 at 11:39am |
|
|
Marty - sent you a pm with my e-mail address. Thanks for the offer of pictures.
|
||
|
Doug
|
||
|
||
|
dmiracle
Senior Member
Joined: July-22-2008 Location: Johns Creek, GA Status: Offline Points: 300 |
Post Options
Thanks(0)
Quote Reply
Posted: June-16-2010 at 5:24pm |
|
|
For whatever it's worth, I contacted Ramlin to get prices from them on 1993 trailer parts. Was referred to Orlando CC. Here's the pricing:
Fenders (painted black, galvanized, or raw steel)- $100 each Turnbuckle - $64 Actuator - $342 (Whoa!!) Bunk Carpet - $26 per roll, 12,14,16 inch widths/19 - 23 feet lengths LED light replacements - $44 light bar, $15 side lights, $26 tail lights They also sent me the attached measurement template for the fenders... 
|
||
|
Doug
|
||
|
||
|
MartyMabe
Grand Poobah
Joined: February-21-2006 Location: High Point,NC Status: Offline Points: 3974 |
Post Options
Thanks(0)
Quote Reply
Posted: June-16-2010 at 5:45pm |
|
|
Fenders----E-bay $20 for the pair
Bunk Carpet-E-bay, but was too short, so Lowe's 2' x 25' $20 LED lights--E-bay rear ovals 2 red markers 4 yellow markers $35 for the whole set E-bay POR-15 Rep gave me a pint FREE! Diamond plate $150 local dealer Trim-Loc ---E-bay 75' roll $20 $245-$250 total |
||
|
||
|
MartyMabe
Grand Poobah
Joined: February-21-2006 Location: High Point,NC Status: Offline Points: 3974 |
Post Options
Thanks(0)
Quote Reply
Posted: June-16-2010 at 5:50pm |
|
Doug, try e-mail address mtmabe@northstate.net pm seems to not work at times |
||
|
||
|
dmiracle
Senior Member
Joined: July-22-2008 Location: Johns Creek, GA Status: Offline Points: 300 |
Post Options
Thanks(0)
Quote Reply
Posted: June-16-2010 at 6:16pm |
|
|
Haha!
Thought my post would make you feel good Marty. You forgot to add "Money left in my pocket - PRICELESS" my email - dougmiracle@gmail.com 
|
||
|
Doug
|
||
|
||
|
MartyMabe
Grand Poobah
Joined: February-21-2006 Location: High Point,NC Status: Offline Points: 3974 |
Post Options
Thanks(0)
Quote Reply
Posted: June-16-2010 at 6:22pm |
|
|
actuator
Oh! I forgot to mention. Didn't know the extent on my brakes,wheel cylinders so I began bidding on the pair of bolt-on backing plates,wheel cylinders, brake shoes, etc, everything included, just bolt in on,, and I won it! $25 FREE SHIPPING from Wisconsin No one else bid on it, so I've got it for future use I guess! |
||
|
||
|
dmiracle
Senior Member
Joined: July-22-2008 Location: Johns Creek, GA Status: Offline Points: 300 |
Post Options
Thanks(0)
Quote Reply
Posted: July-21-2010 at 7:28pm |
|
|
I'm not as good as Marty is when it comes to huntin' the bargains but I thought I'd share what I felt was a pretty good source for the OEM (Peterson Manufacturing)lights on my 93" CC trailer.
Below is the list of all new replacement parts with prices that I've ordered today from www.foxtaillights.com/ 
|
||
|
Doug
|
||
|
||
|
dmiracle
Senior Member
Joined: July-22-2008 Location: Johns Creek, GA Status: Offline Points: 300 |
Post Options
Thanks(0)
Quote Reply
Posted: July-21-2010 at 7:30pm |
|
|
BTW....
I know I have a lashing coming from Pete regarding the clips. I'm ready to take it like a man but hey......they're original, I get points for that don't I? |
||
|
Doug
|
||
|
||
|
8122pbrainard
Grand Poobah
Joined: September-14-2006 Location: Three Lakes Wi. Status: Offline Points: 41040 |
Post Options
Thanks(0)
Quote Reply
Posted: July-21-2010 at 8:10pm |
|
Doug, You're cool! I just never liked the clips. Yes, very original but practicality is involved when it comes down to wiring up a trailer. I've just seen too many problems with them and yes, as mentioned they gouge into the paint. Chris's idea with the electric tape is a good one. Seems he's on the same page as I am plus, just as anal!! 
|
||
|
||
|
dmiracle
Senior Member
Joined: July-22-2008 Location: Johns Creek, GA Status: Offline Points: 300 |
Post Options
Thanks(0)
Quote Reply
Posted: July-22-2010 at 4:30pm |
|
|
Can anyone tell me what size brake/backing plates to purchase for the 1993 Trailer?
Thanks. |
||
|
Doug
|
||
|
||
|
dmiracle
Senior Member
Joined: July-22-2008 Location: Johns Creek, GA Status: Offline Points: 300 |
Post Options
Thanks(0)
Quote Reply
Posted: July-23-2010 at 5:54pm |
|
|
Bumping this question up in hopes of the correct size backing plates for my 1993 trailer.
Thanks guys. |
||
|
Doug
|
||
|
||
|
MartyMabe
Grand Poobah
Joined: February-21-2006 Location: High Point,NC Status: Offline Points: 3974 |
Post Options
Thanks(0)
Quote Reply
Posted: July-24-2010 at 1:57am |
|
|
brakes
I'll check Saturday. I think it's the 12". You can measure your drum. Inside diameter and that will give you the needed info. Still check e-bay!! |
||
|
||
|
Post Reply
|
Page <1234> |
 Tweet
Tweet
|
| Forum Jump | Forum Permissions You cannot post new topics in this forum You cannot reply to topics in this forum You cannot delete your posts in this forum You cannot edit your posts in this forum You cannot create polls in this forum You cannot vote in polls in this forum |


 Topic Options
 Andy wrote: