 Boats For Sale:


New addition to the stable - ACME 470 Installed |
Post Reply 
|
Page <12345 7> |
| Author | |
lewy2001 
Grand Poobah 

Joined: March-19-2008 Location: NSW Australia Status: Offline Points: 2234 |
 Post Options Post Options
") Thanks(0) Thanks(0)
 Quote Reply Quote Reply
 Posted: February-16-2010 at 1:15am Posted: February-16-2010 at 1:15am |
|
Andrew I did the change over to dexron in the off season. Drain the existing oil (actually you have to suck it out). Fill with Dexron (as much as you can get in there) run a little while while engaging F & R then drain again and add fresh dexron.
This is the thread Trans Oil Change |
|
|
If you're going through hell, keep going
89 Ski <a href="http://www.correctcraftfan.com/diaries/details.asp?ID=5685" ta |
|
 |
|
|
Chopper
Gold Member 

Joined: June-15-2006 Location: Australia Status: Offline Points: 821 |
Post Options
Thanks(0)
Quote Reply
Posted: February-15-2010 at 10:13pm |
|
So Eric if I understand you correctly, I get teh trans up to operating temp, drain oil, fill up to the top, and drain again (or do I have to get back up to operating temp again) then repeat at least 1 more time.
probably a sill question, but do I need a pump to drain the old oil.? |
|
|
|
|
eric lavine
Grand Poobah
Joined: August-13-2006 Location: United States Status: Offline Points: 13413 |
Post Options
Thanks(0)
Quote Reply
Posted: February-15-2010 at 9:33am |
|
to switch to Dexron, you'll need to flush it at least twice with new oil at op temp, there is a reason they switched, fill it to the top each time for better dilution
|
|
|
"the things you own will start to own you"
|
|
|
|
|
storm34
Grand Poobah

Joined: November-03-2008 Location: Dexter Iowa Status: Offline Points: 4492 |
Post Options
Thanks(0)
Quote Reply
Posted: February-15-2010 at 3:24am |
|
Dang Chopper.....Looking GOOD!!! You'll be skiing in no time!
|
|
|
|
|
Chopper
Gold Member
Joined: June-15-2006 Location: Australia Status: Offline Points: 821 |
Post Options
Thanks(0)
Quote Reply
Posted: February-15-2010 at 3:09am |
|
Yes an oil change is on the cards before I hit the water.!
I take it that particular brand finter doesn't rate highly with you guys.? I note that the tranny is running the engine oil as per the book. Is it recomended to keep this arrangement or switch to dextron.? Lewy, I've only vacuumed the carpet in those pics. The vinyl still needs a good scrub. |
|
|
|
|
boat dr
Grand Poobah

Joined: June-27-2004 Location: United States Status: Offline Points: 4245 |
Post Options
Thanks(0)
Quote Reply
Posted: February-15-2010 at 1:48am |
|
FL1-A
Motorcraft |
|
|
|
|
lewy2001
Grand Poobah
Joined: March-19-2008 Location: NSW Australia Status: Offline Points: 2234 |
Post Options
Thanks(0)
Quote Reply
Posted: February-15-2010 at 1:26am |
|
Andrew looking good. My boat had a Fram filter on it when it arrived also. They must be cheap in US. I like the Baldwin or Ryco filters here in Oz. The interior has cleaned up nicely.
|
|
|
If you're going through hell, keep going
89 Ski <a href="http://www.correctcraftfan.com/diaries/details.asp?ID=5685" ta |
|
|
|
|
MartyMabe
Grand Poobah

Joined: February-21-2006 Location: High Point,NC Status: Offline Points: 3975 |
Post Options
Thanks(0)
Quote Reply
Posted: February-15-2010 at 1:02am |
|
Chopper ; Better get that FRAM oil filter off there before the vultures come out after ya!

|
|
|
|
|
Chopper
Gold Member
Joined: June-15-2006 Location: Australia Status: Offline Points: 821 |
Post Options
Thanks(0)
Quote Reply
Posted: February-14-2010 at 10:51pm |
|
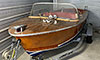
Quick update - with pics this time.
I removed & drained the tank, cleaned up the bilge a bit, and reassembled. Couple of pics of the engine completed & some interior stuff too. I didn't get to start her up again yet for a number of reasons. Maybe tonight. Bilge before 
Bilge after 
Tank 
Engine 
Engine 1 
Seat cushion 
This is the only real blemish in the carpet. 
|
|
|
|
|
Chopper
Gold Member
Joined: June-15-2006 Location: Australia Status: Offline Points: 821 |
Post Options
Thanks(0)
Quote Reply
Posted: February-12-2010 at 2:57am |
Cheers Rob, Yes I found that info in the manual. Will check the base timing over the weekend as time permits. |
|
|
|
|
rubitlarman
Newbie 
Joined: May-07-2005 Location: New Zealand Status: Offline Points: 32 |
Post Options
Thanks(0)
Quote Reply
Posted: February-12-2010 at 2:51am |
|
Originally posted by 79nautique
it might be the Gas causing the problem, or it might be the pro-tec which cannot be adjusted as it's a direct ignition system and runs solely off of sensors. Chopper, the ProTech base timing can be adjusted, just like a distributor eg turning the distributor housing. You need to discconnect the knock sensor (and maybe the oil pressure????) so the computer doesn't adjust the timing internally. Base timing is around 12 degrees if i remember correctly. A quick search should bring something up. Rob |
|
|
More power is needed till the fear of speed is overcome by the thrill of acceleration
|
|
|
|
|
Chopper
Gold Member
Joined: June-15-2006 Location: Australia Status: Offline Points: 821 |
Post Options
Thanks(0)
Quote Reply
Posted: February-11-2010 at 10:42pm |
If anything I think my carb is too rich at the moment. it's just had a complete overhaul too, but I won't rule it out. I still havent set the mixture yet so I will do that too. I pulled out the gas tank last night & drained the old gas. It definately had that "old stale gas smell". I'll get some fresh stuff & see how that goes over the weekend. |
|
|
|
|
79nautique
Grand Poobah

Joined: January-27-2004 Location: United States Status: Offline Points: 7872 |
Post Options
Thanks(0)
Quote Reply
Posted: February-11-2010 at 1:30pm |
|
Sea foam is a top end engine cleaner that can be used in the oil or gas or poured throught the carb to clean the valves and tops of the pistons of carbon. You can do the same thing with tranny fluid or water through the carb just do it on land hooked up to a fake-a-lake/hose has it smokes to bet all hell for a few minutes and it's not to healthy for the fish.
|
|
|
|
|
79nautique
Grand Poobah
Joined: January-27-2004 Location: United States Status: Offline Points: 7872 |
Post Options
Thanks(0)
Quote Reply
Posted: February-11-2010 at 1:26pm |
|
it might be the Gas causing the problem, or it might be the pro-tec which cannot be adjusted as it's a direct ignition system and runs solely off of sensors. Another possibility is the carb is too lean or the accel pump is too slow or not working right. With the engine off and the flame arrestor removed. Disconnect the throttle cable at the carb so you can move the throttle, put as your looking into the carb throat move the throttle slowly on the carb and watch for the stream off gas too shoot out, it should squirt the entire time the throttle is being moved if not then it needs replaced or adjusted so that it does.
|
|
|
|
|
Chopper
Gold Member
Joined: June-15-2006 Location: Australia Status: Offline Points: 821 |
Post Options
Thanks(0)
Quote Reply
Posted: February-11-2010 at 12:44am |
What is Seafoam.? some kind of dewatering additive.? Yes draining the tank / fuel system is a good idea. I started it with the same gas it left the USA with so chances are it's a bit  by now as it would have been sitting around for quite a while now. by now as it would have been sitting around for quite a while now.
Might make a start on pulling the tank tonight. I should have some time on Sunday to pull it out of the shed & run it on the hose for a while. |
|
|
|
|
akabulla
Gold Member

Joined: November-15-2008 Location: United States Status: Offline Points: 649 |
Post Options
Thanks(0)
Quote Reply
Posted: February-10-2010 at 11:47pm |
|
Well that's exciting! My engine sat around for about 2 years and back-fired a little at first. After I ran it a little and flushed all the crap out of the engine from it sitting around it started to run perfect.
I would run it a little longer with some fresh fuel and see if it clears up. Maybe put a little seafoam in the fuel. |
|
|
|
|
Chopper
Gold Member
Joined: June-15-2006 Location: Australia Status: Offline Points: 821 |
Post Options
Thanks(0)
Quote Reply
Posted: February-10-2010 at 9:59pm |
|
SHE RUNS.!

I borrowed some leads last night for the trial. After I got the fuel up to the carby, it gave a couple of coughs & sprung back to life. Idle is really smooth, but I am experiencing some backfiring through the carb when I give it a rev. Could this be timing.? Does the static timing of the protech adjust the same as a regular points dizzy.? I took some pics for you guys, but my camera just went flat when I went to download, so I'll have to wait until tomorrow to upload them. |
|
|
|
|
kapla
Grand Poobah

Joined: March-27-2008 Location: BA, Argentina Status: Offline Points: 6148 |
Post Options
Thanks(0)
Quote Reply
Posted: February-04-2010 at 3:52pm |
|
pics would be good:
as for the rwp..you might wanna download the 1993 or 1990 manual from the reference section..will explain that..I think its bolt in...but as i´m not in the boat and canñt check it right now i´m not sure. eventually someone will reply... I guess you are really excited to put the boat in the water in go skiing!!! good luck mate |
|
|
<a href="">1992 ski nautique
|
|
|
|
|
Chopper
Gold Member
Joined: June-15-2006 Location: Australia Status: Offline Points: 821 |
Post Options
Thanks(0)
Quote Reply
Posted: February-03-2010 at 11:50pm |
|
OK so I've got all my shiny new bits on.

Starter is back on. Will give it a crank tomorrow I'll have to take some new pics for you guys as it looks pretty. just a quick question about the RWP, (I'll search for the answer, but that function isn't working for me at the moment) Is the RWP is installed with "bolt out" for the 91.? |
|
|
|
|
Chopper
Gold Member
Joined: June-15-2006 Location: Australia Status: Offline Points: 821 |
Post Options
Thanks(0)
Quote Reply
Posted: January-27-2010 at 5:35am |
|
A nice box of goodies arrived from DIM today.! Can't wait to get home this weekend to fit my shiny new water pump.
|
|
|
|
|
Chopper
Gold Member
Joined: June-15-2006 Location: Australia Status: Offline Points: 821 |
Post Options
Thanks(0)
Quote Reply
Posted: January-27-2010 at 5:33am |
Yeah I don't want to know what a new one might be.! He rebuilt the starter on the 89 for me & never had any more problems, so should be all good. |
|
|
|
|
eric lavine
Grand Poobah
Joined: August-13-2006 Location: United States Status: Offline Points: 13413 |
Post Options
Thanks(0)
Quote Reply
Posted: January-24-2010 at 1:08pm |
|
if your really crafty, you could take it apart and clean, just from sitting it will corrode and the armature will darken. if you dicede to just watch for the brushes that they dont go flying. I could only imagine what a starter would cost in your neck, unless you have a good rebuilder. i recently removed one that was frozen from the genset i bought, i cut the brush area, sandblasted and put back together, it was good as new
|
|
|
"the things you own will start to own you"
|
|
|
|
|
TRBenj
Grand Poobah

Joined: June-29-2005 Location: NWCT Status: Offline Points: 21142 |
Post Options
Thanks(0)
Quote Reply
Posted: January-24-2010 at 12:34pm |
|
The hammer trick is really only good for a stuck starter... I dont think it would solve a recurring problem anyways! Sounds like you need to rebuild or replace.
|
|
|
|
|
Chopper
Gold Member
Joined: June-15-2006 Location: Australia Status: Offline Points: 821 |
Post Options
Thanks(0)
Quote Reply
Posted: January-24-2010 at 5:24am |
|
that was the first thing I tried.!

It does work, but won't engage by itself. I'd rather get it fixed & be reliable then have to wack it witha hammer regularly |
|
|
|
|
TRBenj
Grand Poobah
Joined: June-29-2005 Location: NWCT Status: Offline Points: 21142 |
Post Options
Thanks(0)
Quote Reply
Posted: January-23-2010 at 2:53pm |
|
Andrew, before you go to too much trouble, give the starter a few taps with a hammer. Sometimes they need a little coaxing after sitting for a long time.
|
|
|
|
|
akabulla
Gold Member
Joined: November-15-2008 Location: United States Status: Offline Points: 649 |
Post Options
Thanks(0)
Quote Reply
Posted: January-23-2010 at 2:09pm |
|
Andrew, That mechanism is what engages the gear forward in the starter to mesh with the flywheel.
Here is a good video showing the movement of the starter: http://www.youtube.com/watch?v=5qaYm4s_ksU&feature=related This is a really good video where the guy explains exactly how the starter works and how to repair them cheap plus he shows exactly what the solenoid does. It is a long 12 minutes but great info! http://www.youtube.com/watch?v=CxjPpytfnv0 |
|
|
|
|
Chopper
Gold Member
Joined: June-15-2006 Location: Australia Status: Offline Points: 821 |
Post Options
Thanks(0)
Quote Reply
Posted: January-23-2010 at 12:21pm |
|
Cheers Joey,
I rigged up a switch up at the dash wiring loom for the ignition on / off and a start "key" plug. The remote solenoid was clicking away and nothing else. So I ran 12V straight from the battery to the starter - nothing. Just some weak sparks. Pulled the starter & tested the wire to it. Solenoid is working fine as there is power to the starter +ve. I hooked the starter up to a battery on the bench and it just sparked again.? So I pulled the cover off. Not sure what the mechanism under it is, but it moves in & out. If I push it in & apply power, the cog engages & spins. Looks like I'm off to the auto electrician again on Monday.! I might get it going sometime this month 
|
|
|
|
|
akabulla
Gold Member
Joined: November-15-2008 Location: United States Status: Offline Points: 649 |
Post Options
Thanks(0)
Quote Reply
Posted: January-22-2010 at 7:10pm |
|
Sorry man, I got so lost in my train off thought I screwed that all up. I started typing the above explanation and came back to it 4 hours later.
It is the purple wire in the diagram above that provides power to the Coil when the key is in position 1. So then all you need to do is jump A to S in the above picture to start it and then pull the purple wire to stop the engine. |
|
|
|
|
akabulla
Gold Member
Joined: November-15-2008 Location: United States Status: Offline Points: 649 |
Post Options
Thanks(0)
Quote Reply
Posted: January-22-2010 at 6:55pm |
|
Andrew,
I was going to wait to chime in so someone could give you the exact procedure but I will give you a starting point. In the service manual of your engine in the reference section there are several wiring diagrams for the engine system towards the end of the manual. I would start there. The way the ignition system works is you have the main power coming from the battery to either the starter or the starter solenoid depending on your setup. Then when the key is turned into the first position 12Vs power one screw on the solenoid and then when the key is turned all the way to start the engine another 12Vs is sent to a third screw on the solenoid. When the key is in the third position the power from the second position is still maintained. When the key is turned off the power from position 1 is cut which stops the engine. On my setup when I needed to test the engine I hooked the main power from the battery using the larger cable to one screw on the soleniod and then I jumped that power to the screw on the soleniod that would be hooked up to key position 1 and then jumped that to key position 2 to start it. After it starts remove the jumper from key position 2 and to stop it remove the 12v supply from the screw for key position 1. If I remeber right key position 1 is the red wire in the diagram and key 2 is the Yellow/Red. Here is a list of all the colors from the harness and engine which I think is pretty standard on all CC boats. CIRCUIT CIRCUIT ENGINE HARNESS NUMBER NAME WIRE COLOR 1. GROUND BLACK 2. TACHOMETER GRAY 3. WATER TEMPERATURE TAN 4. ENGINE ALARM TAN/BLACK 5. IGNITION PURPLE/WHITE 6. BATTERY RED/WHITE 7. STARTER YELLOW/RED 8. OIL PRESSURE LT. BLUE 9. CHECK ENGINE LIGHT BROWN/WHITE 10. DATA LINE ORANGE/BLACK I know that isn't the exact answer but maybe it will help you get started until someone else chimes in. There may be an easier way. I know this isn't your setup but was one of the diagrams I found while doing my rebuild that I found helpful. It might help piece it together. 
If you tie into the harness of the engine then make sure your transmission is in Neutral or it won't start because of the safety switch. Obvisouly even if you don't tie into the harness you want to make sure it is in Neutral anyways. 
|
|
|
|
|
eric lavine
Grand Poobah
Joined: August-13-2006 Location: United States Status: Offline Points: 13413 |
Post Options
Thanks(0)
Quote Reply
Posted: January-22-2010 at 10:20am |
|
dont worry about the trans, it takes a good half hour to heat up under no load
|
|
|
"the things you own will start to own you"
|
|
|
|
|
Post Reply
|
Page <12345 7> |
 Tweet
Tweet
|
| Forum Jump | Forum Permissions You cannot post new topics in this forum You cannot reply to topics in this forum You cannot delete your posts in this forum You cannot edit your posts in this forum You cannot create polls in this forum You cannot vote in polls in this forum |


 Topic Options
 rubitlarman wrote: