 Boats For Sale:


the long road ahead - 67 Nautique resto/mod |
Post Reply 
|
Page <1 23456> |
| Author | |
8122pbrainard 
Grand Poobah 

Joined: September-14-2006 Location: Three Lakes Wi. Status: Offline Points: 41045 |
 Post Options Post Options
") Thanks(0) Thanks(0)
 Quote Reply Quote Reply
 Posted: January-29-2010 at 8:38pm Posted: January-29-2010 at 8:38pm |
Mike, Only because the Gougeon boys have always made a point to explain the blush in all their publication. However now, who knows since they sold the company and the formula may have changed. Mas on the other hand makes a big point about their epoxy not having the blush. I don't know about supplies more oriented towards commercial like U.S. Composites. I've never seen much printed material from them. |
|
 |
|
|
skfitz
Senior Member 
Joined: October-15-2009 Location: Herculaneum Status: Offline Points: 138 |
Post Options
Thanks(0)
Quote Reply
Posted: January-29-2010 at 8:06pm |
ammonium carbamate It's made when CO2, the nitrogen compounds released by the resin, and atmospheric moisture react on the surface of your epoxy job. |
|
|
|
|
WakeSlayer
Grand Poobah

Joined: March-15-2006 Location: United States Status: Offline Points: 2138 |
Post Options
Thanks(0)
Quote Reply
Posted: January-29-2010 at 3:18pm |
|
I am curious to what made you recommend watching out for it since I am using West Systems.
|
|
|
Mike N
1968 Mustang |
|
|
|
|
8122pbrainard
Grand Poobah
Joined: September-14-2006 Location: Three Lakes Wi. Status: Offline Points: 41045 |
Post Options
Thanks(0)
Quote Reply
Posted: January-29-2010 at 3:01pm |
|
Mike's right on for the description. I don't know exactly what it is but it's like a by product of the cure. Some brands of epoxy don't do it so there must be a chemistry difference. It is water soluble so a solvet wipe won't cut it.
|
|
|
|
|
WakeSlayer
Grand Poobah
Joined: March-15-2006 Location: United States Status: Offline Points: 2138 |
Post Options
Thanks(0)
Quote Reply
Posted: January-29-2010 at 2:50pm |
|
Apparently it is a waxy sort of buildup that comes to the surface after the eopxy has cured. I constantly checked for it last year and never ran across it. It will prevent a good bond if not removed. Epoxy, primer, paint, etc will not stick properly. I believe just soap and water will remove it. Pete will better explain it than I.
|
|
|
Mike N
1968 Mustang |
|
|
|
|
storm34
Grand Poobah

Joined: November-03-2008 Location: Dexter Iowa Status: Offline Points: 4492 |
Post Options
Thanks(0)
Quote Reply
Posted: January-29-2010 at 2:33pm |
|
Mike/Pete, can you guys explain amine blush a little more? I've heard the term before and knew to wipe everything down if it cured but still a little lost as to what it actually is...
|
|
|
|
|
WakeSlayer
Grand Poobah
Joined: March-15-2006 Location: United States Status: Offline Points: 2138 |
Post Options
Thanks(0)
Quote Reply
Posted: January-29-2010 at 12:55pm |
|
Pete, I never found any blush last year when I did the Mustang. I will keep my eyes out and will wipe down anything I am recoating anyway, just in case. I have read about it before, and kind of thought that my shop conditions and the West help minimize if not eliminate any blushing. I could be wrong. I will not be in my shop til Monday, so will look again then.
As far as the layup, I am taking and mixing everything I have read and direct advice, together. |
|
|
Mike N
1968 Mustang |
|
|
|
|
Riley
Grand Poobah
Joined: January-19-2004 Location: Portland, ME Status: Offline Points: 7952 |
Post Options
Thanks(0)
Quote Reply
Posted: January-29-2010 at 10:41am |
|
Looks great Mike. We'll be doing the same thing come spring on the Barracuda and will be using this as a guide. I'm really interested in how you are going to apply the different types of cloth and exactly what they are.
|
|
|
|
|
8122pbrainard
Grand Poobah
Joined: September-14-2006 Location: Three Lakes Wi. Status: Offline Points: 41045 |
Post Options
Thanks(0)
Quote Reply
Posted: January-29-2010 at 9:46am |
|
Mike,
Since you're using West, make sure you wipe down the cured resin with a damp cloth to remove the amine blush. You only need to do it if the epoxy has cured. If you go with next layers after the previous ones have just "kicked", then it's not needed. |
|
|
|
|
Keeganino
Grand Poobah

Joined: October-27-2009 Location: North Carolina Status: Offline Points: 2063 |
Post Options
Thanks(0)
Quote Reply
Posted: January-29-2010 at 3:37am |
|
looking good! I am watching your progress. Just got my motor out today.
|
|
|
"working on these old boats may not be cost effective but as it shows its what it brings into your life that matters" -Roger
1973 Skier |
|
|
|
|
WakeSlayer
Grand Poobah
Joined: March-15-2006 Location: United States Status: Offline Points: 2138 |
Post Options
Thanks(0)
Quote Reply
Posted: January-29-2010 at 3:11am |
|
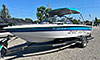
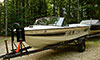
Got the port main stringer bedded tonight. Went really good. I put down a layer of thin consistency epoxy, and strip of wetted glass, and then peanut butter on top of that. Set the stringer in, centered and pushed down with moderate pressure until it sat down like when dry fit. I smoothed the beveled channel as well as I could with the excess. There just was not enough mixed up to do a proper fillet, but I will go back and do nicer ones after I get the second stringer set Monday. If I was not going out of town, I would get all the stringers in and a good deal of layup done this weekend.
Here are a couple pics I took earlier this week. 


|
|
|
Mike N
1968 Mustang |
|
|
|
|
WakeSlayer
Grand Poobah
Joined: March-15-2006 Location: United States Status: Offline Points: 2138 |
Post Options
Thanks(0)
Quote Reply
Posted: January-25-2010 at 2:49pm |
|
Joe, I measured the voids and they are roughly 6.75 x 8.75, I am figuring 3/4. I do have ply I can use, no big deal.
We got the stringers dry fit yesterday. After having the boat jacked up, and replacing the old stringers, there was a significant gap under the front half of the stringers. We compared new and old and they were about as exact as they could be. After going back and forth a couple times, we decided to drop the boat, and lift it slightly from the keel at about where the skeg is. This gave us a much better fit. There are still voids, but what I would expect now. We confirmed all of our measurements, and I like how they fit. I got 3 coats of CPES on them. After the first coat I noticed we had failed to create drain channels, and to radius the tops of the primaries. Ooops. Will do that tonight and get more CPES on those spots. I have not drilled the hole for my cable block post yet, either, but as I had to move the one on the Mustang due to the newer style cable. |
|
|
Mike N
1968 Mustang |
|
|
|
|
JoeinNY
Grand Poobah

Joined: October-19-2005 Location: United States Status: Offline Points: 5697 |
Post Options
Thanks(0)
Quote Reply
Posted: January-24-2010 at 4:12pm |
|
What size chunks of coosa you looking for Mike dimensions and thickness. I probably have scraps.
|
|
|
|
|
BuffaloBFN
Grand Poobah

Joined: June-24-2007 Location: Gainesville,GA Status: Offline Points: 6094 |
Post Options
Thanks(0)
Quote Reply
Posted: January-24-2010 at 3:58pm |
|
Mike, by '88 all of that was 3/4...in my boat anyway.
I gotta throw this in for anyone in the neighborhood; Sweetwater has some sweet fir ply that is the nicest ply I've worked with short of cabinet grade. It has very few voids, it's sanded nicely, and it drinks the CPES! |
|
|
|
|
WakeSlayer
Grand Poobah
Joined: March-15-2006 Location: United States Status: Offline Points: 2138 |
Post Options
Thanks(0)
Quote Reply
Posted: January-24-2010 at 3:51pm |
|
I have some nice chunks of 3/4 exterior left. Any reason to not just use that on my exhaust and rudder? Neither were that thick, but does it matter?
Got the exhaust mounts out. One was really bad, the second wasn't rotted nearly as bad, but still wet and delaminating. I drilled an inspection hole in my transom and am happy to say it bright yellow dry wood. I did one hole in the center. I may do a top and bottom just to be positive. |
|
|
Mike N
1968 Mustang |
|
|
|
|
8122pbrainard
Grand Poobah
Joined: September-14-2006 Location: Three Lakes Wi. Status: Offline Points: 41045 |
Post Options
Thanks(0)
Quote Reply
Posted: January-24-2010 at 3:26pm |
Yes |
|
|
|
|
Keeganino
Grand Poobah
Joined: October-27-2009 Location: North Carolina Status: Offline Points: 2063 |
Post Options
Thanks(0)
Quote Reply
Posted: January-24-2010 at 3:25pm |
|
Thanks pete. Is it true that the only difference between marine grade ply and external is the amount of voids between layers?
|
|
|
"working on these old boats may not be cost effective but as it shows its what it brings into your life that matters" -Roger
1973 Skier |
|
|
|
|
8122pbrainard
Grand Poobah
Joined: September-14-2006 Location: Three Lakes Wi. Status: Offline Points: 41045 |
Post Options
Thanks(0)
Quote Reply
Posted: January-24-2010 at 3:04pm |
|
Keegan,
Most home centers will have small 2'x2' sheets of exterior ply. I suggest it because ply will give you the support needed in both directions due to it's alternating grain in each layer. |
|
|
|
|
Keeganino
Grand Poobah
Joined: October-27-2009 Location: North Carolina Status: Offline Points: 2063 |
Post Options
Thanks(0)
Quote Reply
Posted: January-24-2010 at 2:52pm |
|
I am feeling you on that. I do not want to put ply back in there! But I sure as siht do not want to buy a $250 sheet of coosa!
|
|
|
"working on these old boats may not be cost effective but as it shows its what it brings into your life that matters" -Roger
1973 Skier |
|
|
|
|
WakeSlayer
Grand Poobah
Joined: March-15-2006 Location: United States Status: Offline Points: 2138 |
Post Options
Thanks(0)
Quote Reply
Posted: January-24-2010 at 1:37pm |
|
What would you replace the exhaust boards with? I really don't feel like paying for a big chunk of fir for two little squares. Is this foolish or is it ok to use some pine or whatever I have laying around.
I do have a fir 1x6, is this going to give me enough material with a 3 inch hole through the middle of it? It doesn't seem like there would be too much stress here. I believe the rudder port piece is 3/8" plywood. Tim, wanna send me a couple small squares of coosa? ha ha. |
|
|
Mike N
1968 Mustang |
|
|
|
|
eric lavine
Grand Poobah
Joined: August-13-2006 Location: United States Status: Offline Points: 13413 |
Post Options
Thanks(0)
Quote Reply
Posted: January-24-2010 at 1:33pm |
|
use a hand power planer if so, dont let it scare you when you get close to the glass
|
|
|
"the things you own will start to own you"
|
|
|
|
|
WakeSlayer
Grand Poobah
Joined: March-15-2006 Location: United States Status: Offline Points: 2138 |
Post Options
Thanks(0)
Quote Reply
Posted: January-24-2010 at 3:50am |
|
Alright, alright. I took out the rudder port entirely. It was half gone anyway.
We got all four stringers cut out, shaped, notched, and ready to dry fit tomorrow. My brother used an electric planar with an angle guide to shape the bottoms of the stringers. That took less time cutting the boards to height with a jigsaw. We have the hull litfed and level. We are going to set the old stringers in to confirm measurements. Dry fit stringers, and then start CPESing them. Hope to have the two primaries bedded by the end of the week, because I am going out of town. Not sure if we will be able to do that or not... One unfortunate observation I made was while cleaning the last bits of foam out around the exhaust I noticed a cavernous void on the inside glass lip of the starboard exhaust thru-hull. The wood is wasted to mush. All the way aruond the pipe. It is done for. I assume the other side is as well. Both will be coming out tomorrow as there is no way around this. I am still resisting the main transom board but will try to do a couple test holes tomorrow. If it is bad, it is coming out. |
|
|
Mike N
1968 Mustang |
|
|
|
|
TRBenj
Grand Poobah

Joined: June-29-2005 Location: NWCT Status: Offline Points: 21145 |
Post Options
Thanks(0)
Quote Reply
Posted: January-18-2010 at 8:04pm |
Mike, I dont think thats enough glass. I'm now planning to somewhat mirror Joe's schedule on the mains of the BFN with 2"x2, 4"x2, 8"x2. Instead of following that up with mat though, Im going to do Biax. At least one layer up each side, and then maybe one over the top to fully encapsulate them. On the secondaries, I wouldnt go any less than 3 layers of glass. Right now Im toying with the idea of doing 2"/4"/8" (1x each) followed by biax (and not wrapping the top). In the past, Ive done 3 layers of alternating mat and cloth, and that seemed to build a decent thickness. 1 layer just aint gonna cut it, especially if its cloth- that doesnt hold much resin at all. Maybe Im crazy, but I would want all the old wood out of the boat if I were digging in that far... just for peace of mind! Our rudder port wasnt terrible either, but the transom glass was wet throughout and mushy in spots. Just FYI! |
|
|
|
|
WakeSlayer
Grand Poobah
Joined: March-15-2006 Location: United States Status: Offline Points: 2138 |
Post Options
Thanks(0)
Quote Reply
Posted: January-18-2010 at 7:49pm |
|
Hull is ground out. Took 4 solid hours. For the life of me I cannot get it as pretty as I have seen photos of on this site. I ground from 4 inches outside the outer stringer, all the way across to the other side. The bilge was gelled, that was a biatch to get off. I guess I could have ground more but did not want to remove any excess material from the structure. I used my trusty diamond wheel, and two 40 grit flap disks. What a mess. I love my respirator, goggles, and tyvek suit.
I left a ~1" lip of the old primary stringer channel and beveled it off for a smooth edge for filletting after the new stringers are installed. I ground two drain channels on each side for water relief from outbboard of the stringers. I took the top glass cap off the rudder port and to my surprise the wood is in really good shape. Still rich colored and solid. In doing so I ended up taking the top layer of the ply off and it was a total bastard to chisel out flat. I am going to soak this in CPES a couple times, peanut butter sandwich a piece on top, and cap it back off. Even the port hole was solid with a pick in the sides of it. The boat at some point took a fairly hard shot on the strut. There is a good sized crack on the inside that was bondoed over. This will be filled and I will lay a couple layers of heavy mat over and re-drill the holes. I was going to drill into the transom but found no voids and am going to leave it for now. I can always go back and do that later. My goal at the moment is to get the stringers done and get it out of my shop. My layup plan is: bed the stringers and verify level, and measurements. using 8.7 oz tape 2", then 4", then 6" on primaries the 17 oz Knytex biaxial hull to hull over the stringer. (2x ?) bed secondaries, and simply tape once using 4" |
|
|
Mike N
1968 Mustang |
|
|
|
|
WakeSlayer
Grand Poobah
Joined: March-15-2006 Location: United States Status: Offline Points: 2138 |
Post Options
Thanks(0)
Quote Reply
Posted: January-16-2010 at 9:46pm |
|
Ground out. And dead tired.
|
|
|
Mike N
1968 Mustang |
|
|
|
|
WakeSlayer
Grand Poobah
Joined: March-15-2006 Location: United States Status: Offline Points: 2138 |
Post Options
Thanks(0)
Quote Reply
Posted: January-15-2010 at 6:16pm |
|
Not obviously skewed, it had a treated ply floor screwed and nailed down over the foam. Motor was way misaligned from the mounts starting to tear out. I did not give it the marble test. Took it for what it was. This boat was supposed to become a planter, and the more I looked at it, the more I liked it and wanted to resurrect her.
It will be fine. |
|
|
Mike N
1968 Mustang |
|
|
|
|
BuffaloBFN
Grand Poobah
Joined: June-24-2007 Location: Gainesville,GA Status: Offline Points: 6094 |
Post Options
Thanks(0)
Quote Reply
Posted: January-15-2010 at 4:05pm |
|
It's always easier to cut more than less! Was the floor skewed to one side?
|
|
|
|
|
WakeSlayer
Grand Poobah
Joined: March-15-2006 Location: United States Status: Offline Points: 2138 |
Post Options
Thanks(0)
Quote Reply
Posted: January-15-2010 at 1:45pm |
I have all those measurements, and a million photos. I figure I don't really have a choice, anyway. She will go back together a hell of a lot better than she was. |
|
|
Mike N
1968 Mustang |
|
|
|
|
8122pbrainard
Grand Poobah
Joined: September-14-2006 Location: Three Lakes Wi. Status: Offline Points: 41045 |
Post Options
Thanks(0)
Quote Reply
Posted: January-15-2010 at 1:25pm |
As Alan would say, they mustn't have sharpened up their "finishing hatchets" in a couple of days! |
|
|
|
|
TRBenj
Grand Poobah
Joined: June-29-2005 Location: NWCT Status: Offline Points: 21145 |
Post Options
Thanks(0)
Quote Reply
Posted: January-15-2010 at 1:22pm |
|
Mike, these boats were not precision built! I think as long as you get pretty close on the motor mount dimensions (height off hull, distance from the shaft log) so you can align it, you'll be just fine. Like Pete said, Id build to the larger one and shape from there.
|
|
|
|
|
Post Reply
|
Page <1 23456> |
 Tweet
Tweet
|
| Forum Jump | Forum Permissions You cannot post new topics in this forum You cannot reply to topics in this forum You cannot delete your posts in this forum You cannot edit your posts in this forum You cannot create polls in this forum You cannot vote in polls in this forum |


 Topic Options
 WakeSlayer wrote: