 Boats For Sale:


No Super Sucker needed |
Post Reply 
|
Page <1 34567> |
| Author | ||
79nautique 
Grand Poobah 

Joined: January-27-2004 Location: United States Status: Offline Points: 7872 |
 Post Options Post Options
") Thanks(0) Thanks(0)
 Quote Reply Quote Reply
 Posted: April-08-2010 at 5:16pm Posted: April-08-2010 at 5:16pm |
|
|
Loctite® Threadlocker 262™ (Automotive Aftermarket Only) is a permanent, high strength, red threadlocker that is applied to fasteners up to 3/4" (20 mm) in size before assembly.
clip from henkel's website regarding 262 loctite. You really don't want to use this Pete. Call Henkel they are very customer oriented and will send out samples to about any company for free. They also have classes (1 and 2 day) with college credit to boot, periodicly as well for free |
||
 |
||
|
8122pbrainard
Grand Poobah

Joined: September-14-2006 Location: Three Lakes Wi. Status: Offline Points: 41045 |
Post Options
Thanks(0)
Quote Reply
Posted: April-08-2010 at 5:24pm |
|
|
Chris,
Thanks for the proceedure. I guess I've been wasting the stuff through the years! I already had the 262 at home as well as the 290. With my last order to McMaster for the bolt, nuts, some sheet gasketing, etc. I ordered the 243 which is medium and considered removeable. That's what I plan on using. 262 is removeable and really not permanant. It just needs to be heated to about 450 F which actually is below the tempering temp of steel. We do it on a regular basis here at the plant on a couple of assemblies. Never had a issue and we re use the fasteners. |
||
|
||
|
eric lavine
Grand Poobah
Joined: August-13-2006 Location: United States Status: Offline Points: 13413 |
Post Options
Thanks(0)
Quote Reply
Posted: April-09-2010 at 9:52am |
|
|
I wanna know how 79 came up with the "R" and the "TM" symbol
|
||
|
"the things you own will start to own you"
|
||
|
||
|
79nautique
Grand Poobah
Joined: January-27-2004 Location: United States Status: Offline Points: 7872 |
Post Options
Thanks(0)
Quote Reply
Posted: April-09-2010 at 11:38am |
|
just cut and paste |
||
|
||
|
8122pbrainard
Grand Poobah
Joined: September-14-2006 Location: Three Lakes Wi. Status: Offline Points: 41045 |
Post Options
Thanks(0)
Quote Reply
Posted: April-17-2010 at 8:36pm |
|
|
I'm making some progress getting the Flexi back together. Lots of small chores that do need to be done but take time like making gaskets or cleaning up all the small parts.
In preparation of getting the trans back on I did have a repair to make to the case. This was another mistake on my part but not as bad as busting the hub off the planetary housing. The shift fork is fastened to the shaft with one of those big square head set screws and it's dimpled into the shaft or at least that's all I could see. Unbeknown there was also a woodruff key under the fork. Well Thinking the shaft was just rusted in, I started to do some rather heavy hammering to get it out of the case. It was too late before I realized I had busted the boss out on the inside of the case casting. All ground out and cleaned up you'll see where the boss is broken out on one side where the woodruff key entered the bore. The piece of urethane wrapped with fine line tape inside the bore of the boss is a "mold" for good old JB Weld! I knew the epoxy wouldn't stick to the tape and the urethane is soft enough so I felt it would come out easy. I "primed" the spot with the JB and then went over it with a 2 part epoxy putty. 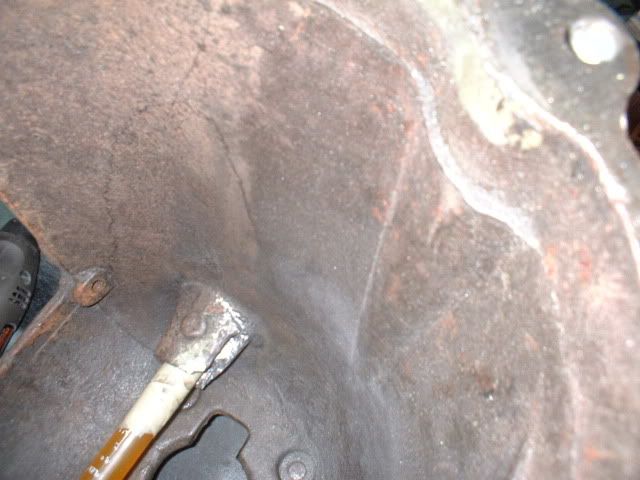
Here's the repair finished and boss reamed. 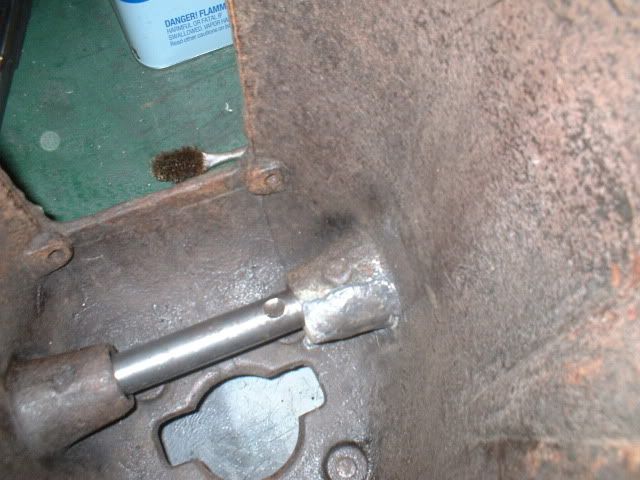
|
||
|
||
|
8122pbrainard
Grand Poobah
Joined: September-14-2006 Location: Three Lakes Wi. Status: Offline Points: 41045 |
Post Options
Thanks(0)
Quote Reply
Posted: April-18-2010 at 9:55pm |
|
|
Moving along but I didn't get the trans back together. I forgot that the output shaft sun gear is at work waiting for me to press it on the shaft and it goes in next!!
So, I continued on with more small stuff. 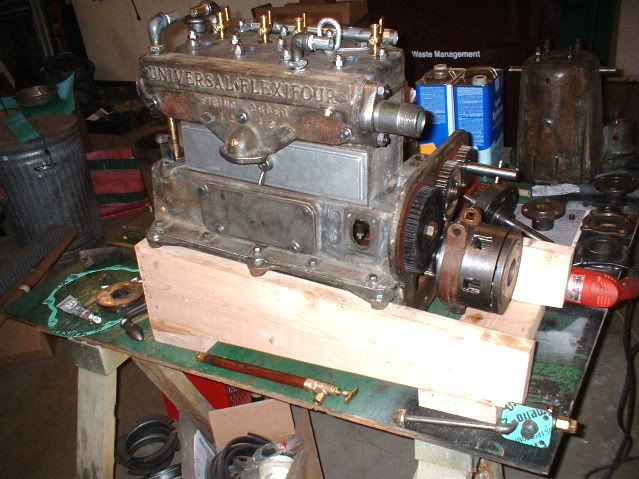
I got the oil pump (in front on right) rebuilt with a new plunger spring and ball bearings for the check valves courtesy of McMaster! Faced the check ball seats and fabbed a new bronze pick up screen. It took some time to form into the cup shape and solder to it's base. The "super sucker" (front left) I rebuilt with a new rubber plunger and new stem packing. Here's the PITA front main seal. It's a rope seal (remember I got the Gortex to put in it) but not the easiest to get in there, with the gaskets and the Permatex all at one time. The split brass housing is also the front trust bearing for the crank - tight fit!! The actual brass split housings needed some work too. The hubs are riveted and soldered to the thin brass backing plates. There were a couple of spots where the joint was "cold" soldered. I ground/cleaned them out the best I could used a acid flux but I still worried about one spot. I ended up getting the JB weld out again!! 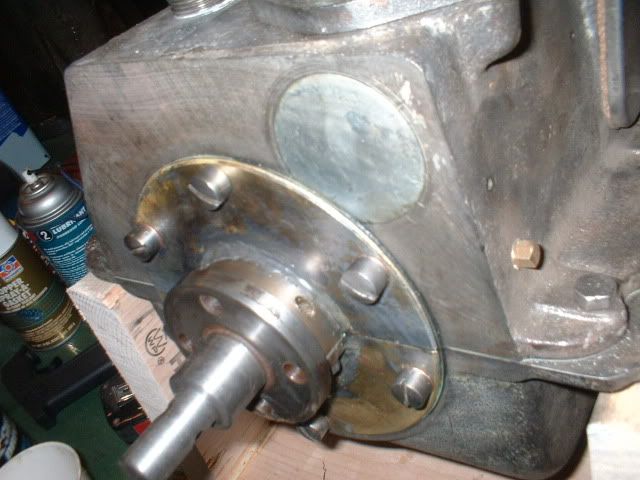
I went looking for period correct hose clamps. I found some NOS but the guy gets $30 each for them. I need 6 so it's on to plan "B" which is using the old two wire type. This is what they call a "Sherman" clamp: 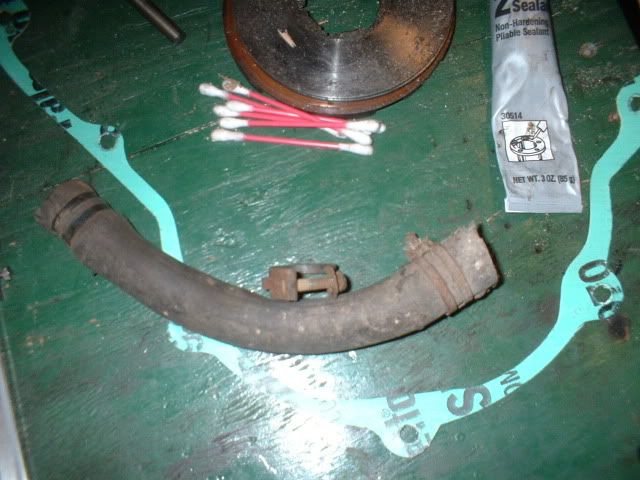

Besides these chores, I continued on with the wire wheeling and cleaning up remaining parts. Fasteners are taking quite some time. Some needed the hex's ground because of rust. No, I can't run out and buy some of these original fasteners. All hex's are heavy heads (larger) and new heavy bolts start at 1/2" size. Others are cheese heads and that's not because they are made in Wisconsin!!! See the front main seal and you'll see the heads look like a wheel of cheese. |
||
|
||
|
eric lavine
Grand Poobah
Joined: August-13-2006 Location: United States Status: Offline Points: 13413 |
Post Options
Thanks(0)
Quote Reply
Posted: April-19-2010 at 12:32am |
|
|
that thing blowing smoke yet??? I'm on my 32ND cylinder since this project started. sometimes that old ***************e is a pita!
|
||
|
"the things you own will start to own you"
|
||
|
||
|
Munday
Gold Member 
Joined: August-17-2004 Location: United States Status: Offline Points: 538 |
Post Options
Thanks(0)
Quote Reply
Posted: April-19-2010 at 9:26pm |
|
|
Pete I'll look for some clamps like you need if you post a pic of the ones you want.Have 3 drawers full of clamps from the old shop.A minimum ID would help too.
Bob |
||
|
If the only tool you have is a hammer,everything starts to look like a nail.
|
||
|
||
|
8122pbrainard
Grand Poobah
Joined: September-14-2006 Location: Three Lakes Wi. Status: Offline Points: 41045 |
Post Options
Thanks(0)
Quote Reply
Posted: April-19-2010 at 10:54pm |
|
|
Bob,
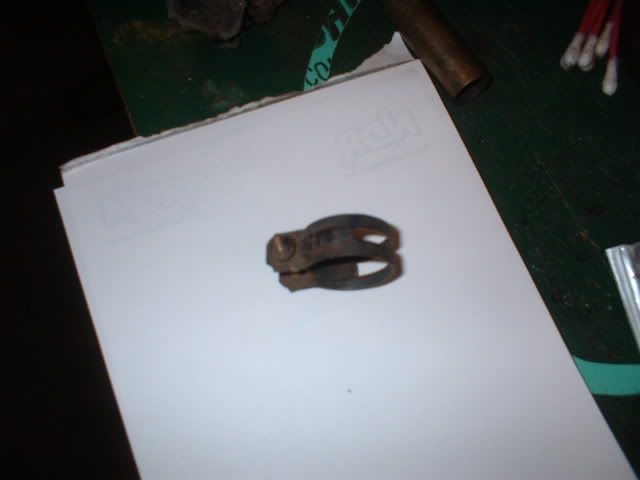
One of these day's you've got to clean out the left overs and put them on ebay!! A friend who rebuilds Chris engines and both sells and buys on ebay get's $5 each for rusty old Chris hose clamps! They are similar to the "Sherman" clamps but they have the thumb screw instead of the "stove bolt". Chris wanted the boat owner to be able to get the clogs out of the plumbing without needing tools!!! Here's some more pictures besides the other ones. I'm looking for 6 - 1" ID and 2 - 1&1/4" ID. 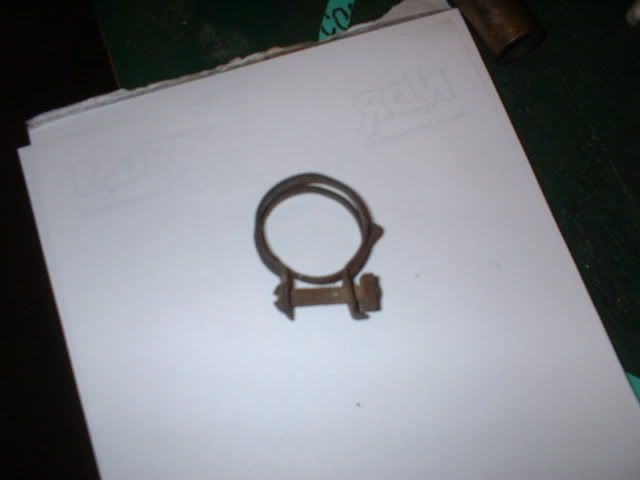
On another subject, I finally figured out the model of magneto I need. I went searching and found a guy in Cross Lake TWP. Maine. He got the business from his dad so he really knows his old magnetos. He's going to build one up for me but ouch, it's the most expensive part of this rebuilt/restoration!!! Period correct and looks just like the pictures I do have of the Flexi magneto equipped. It even has the proper mounting distances to the bracket on the engine. American Bosch DU4: 
One thing I learned and found interesting is what a optional "impulse coupling" is on a mag. It's sort of a spring wound coupling that when a engine is hand cranked to start will wind up and then "pop" the magnet over TDC producing a hotter spark. When running, the spring in the coupling relaxes/normalizes and the mag runs normal. It's sort of the same as the ballast resistor bypass we have now!!! It's a must have option for a hand crank. |
||
|
||
|
Keeganino
Grand Poobah

Joined: October-27-2009 Location: North Carolina Status: Offline Points: 2063 |
Post Options
Thanks(0)
Quote Reply
Posted: April-20-2010 at 12:39am |
|
|
Great work Pete. Looking good!
|
||
|
"working on these old boats may not be cost effective but as it shows its what it brings into your life that matters" -Roger
1973 Skier |
||
|
||
|
Gary S
Grand Poobah

Joined: November-30-2006 Location: Illinois Status: Offline Points: 14096 |
Post Options
Thanks(0)
Quote Reply
Posted: April-20-2010 at 1:34am |
|
|
Pete,would not these be period correct also? I have a 3/4" one of the type in your pic's,it's yours if you need it.
Our older IH had a mag and they too have an impulse coupler,must have something to due with the hand crank as you say. The mag went bad in the early '70s,Dad needed the tractor asap and IH sold a distributor conversion so that was the end of that. |
||
|
||
|
8122pbrainard
Grand Poobah
Joined: September-14-2006 Location: Three Lakes Wi. Status: Offline Points: 41045 |
Post Options
Thanks(0)
Quote Reply
Posted: April-20-2010 at 8:51am |
|
|
Gary,
I looked at the tower style "Wittek" clamps and I seem to remember finding that they weren't used until the late 30's. Correct me if I'm wrong as you're into the tractors more that I am. It's a alternate! I did find the site you linked to. Lots of tractor stuff out there!! The two wire with the stove bolt is the other alternate I mentioned. They will take some work too. Since they don't come small enough, I need to modify the threaded anchor point on the wire by rolling the "pig tail" back on it's circumference. I've got my fingers crossed that Bob will open up one of his drawers and find a cache!! |
||
|
||
|
Gary S
Grand Poobah
Joined: November-30-2006 Location: Illinois Status: Offline Points: 14096 |
Post Options
Thanks(0)
Quote Reply
Posted: April-20-2010 at 1:41pm |
|
|
Well Pete since our oldest tractor is a '47 my research has stopped there! You'd have to look at what some of the cars of the period used. How about the wire type like these # 10 in the pic, or were these used only by the English so that they would leak
 ? ?
|
||
|
||
|
Munday
Gold Member
Joined: August-17-2004 Location: United States Status: Offline Points: 538 |
Post Options
Thanks(0)
Quote Reply
Posted: April-20-2010 at 10:07pm |
|
|
Pete,I moved the clamps to the lake last fall.Not going this weekend Trey has a flat track race in Wichita KS.I'm pretty sure I can cover you on the clamps but will be 2 weeks till I can look.I have a couple of boxs of square nuts if you need any of those.
Bob |
||
|
If the only tool you have is a hammer,everything starts to look like a nail.
|
||
|
||
|
Gary S
Grand Poobah
Joined: November-30-2006 Location: Illinois Status: Offline Points: 14096 |
Post Options
Thanks(0)
Quote Reply
Posted: April-20-2010 at 10:38pm |
|
|
HW,I've got this one------
|
||
|
||
|
8122pbrainard
Grand Poobah
Joined: September-14-2006 Location: Three Lakes Wi. Status: Offline Points: 41045 |
Post Options
Thanks(0)
Quote Reply
Posted: April-20-2010 at 11:04pm |
|
Gary, You must have been sitting too close to HW at the last Chicago Beers meeting!! Good thing you weren't right next to him!! 
Bob, Your efforts are appreciated. Thanks. The couple weeks sure won't hurt me. I still need to find a carb and deal with the water pump. I gave up on the original pump. The gears and housing were so worn that every single wear surface would need to be built up and re machined. I got my hands on a old Sherwood gear pump that's still in good shape however will need mounting and drive shaft modifications. |
||
|
||
|
Munday
Gold Member
Joined: August-17-2004 Location: United States Status: Offline Points: 538 |
Post Options
Thanks(0)
Quote Reply
Posted: April-22-2010 at 1:33am |
|
|
I have an old pump.mounts for belt drive has to be below water line,not self priming.Has brass vaned impellor.Probably 6 inch dia.Might look period correct not sure.It was in a 50's boat I stripped years ago I wanted the velvet drive.But boat had been built of a bunch of salvage.Bought it at auction for 2 bills.Had to stop at a hardware store and rebolt the wheels on the trailer,thought I'd never get home that day.
Bob |
||
|
If the only tool you have is a hammer,everything starts to look like a nail.
|
||
|
||
|
8122pbrainard
Grand Poobah
Joined: September-14-2006 Location: Three Lakes Wi. Status: Offline Points: 41045 |
Post Options
Thanks(0)
Quote Reply
Posted: April-22-2010 at 10:50am |
|
|
Bob,
I started working on the Sherwood gear pump I got from the friend. The original pump was face mounted and this one is foot mounted so a simple angle bracket will do the job. Then it's some minor lathe mods to the shaft end to mount the gear drive. I'll get a picture posted of the results. Thanks for the thought. One of the interesting things about this old Sherwood gear pump I have is it's herringbone brass gears instead of the more common straight cut gears. The herringbone gears were a short lived attempt to improve the efficiency as well as increase the operating life of the typical gear pump. Then, when they got better at making a rubber impeller it took over because it drastically improved the operating life of the basic pump even though the impeller itself became a maintenance item. |
||
|
||
|
8122pbrainard
Grand Poobah
Joined: September-14-2006 Location: Three Lakes Wi. Status: Offline Points: 41045 |
Post Options
Thanks(0)
Quote Reply
Posted: April-22-2010 at 9:43pm |
|
|
I'm very happy with how the RWP conversion is going.
Here's the old face/flange mount pump less the drive shaft: 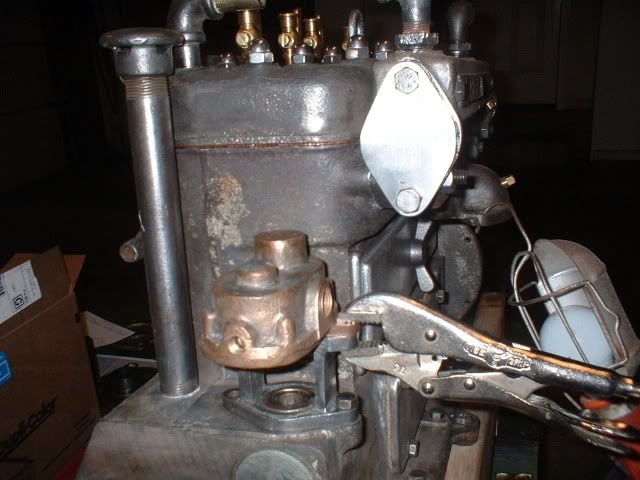
And here's here's the new foot mount: 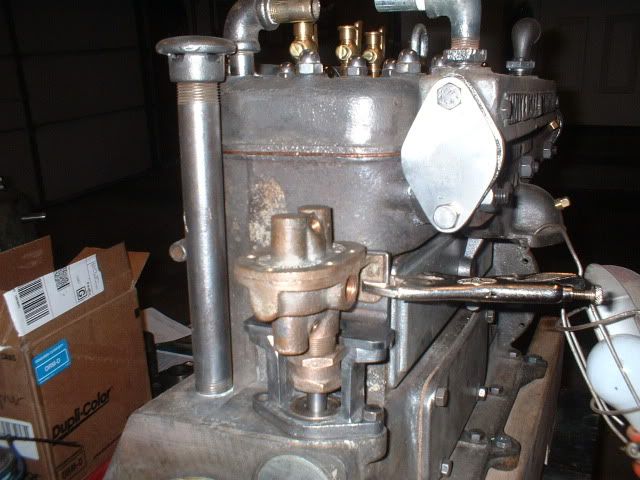
I found a old piece of 2x2x1/4 angle to adapt the foot mount and machined it up as close as possible to look like a casting. It was even all rusted up so it gives it that textured casting look. (except for the machined mounting surfaces to get a true 90 degree angle which are hidden) I ordered up some more GFO Gortex packing (Mcmaster) for the pump packing gland figuring since it was all apart I might as well repack it. The inside of this pump looks great but even more important is it does pump water!!! Now it's onto bushing down the old drive gear to 1/2" from 5/8" adding a roll pin through it's bore and slotting the end of the "new" pump shaft. |
||
|
||
|
Munday
Gold Member
Joined: August-17-2004 Location: United States Status: Offline Points: 538 |
Post Options
Thanks(0)
Quote Reply
Posted: April-23-2010 at 12:20am |
|
|
Thats a nice job.Blends in very well,much better than the pump I have.What are you looking for in carburation?
Bob |
||
|
If the only tool you have is a hammer,everything starts to look like a nail.
|
||
|
||
|
8122pbrainard
Grand Poobah
Joined: September-14-2006 Location: Three Lakes Wi. Status: Offline Points: 41045 |
Post Options
Thanks(0)
Quote Reply
Posted: April-23-2010 at 1:47pm |
|
|
Bob,
Thanks, As mentioned I'm happy with the way the "L" bracket turned out. Regarding the carb, the 1st and early 2nd series of the Flexifour's had the Zenith T3X on them. Below is a picture of 4 Zenith T4X's. The difference between the 3 and the 4 is the flange ID and the mounting hole/stud centers. The T3X that I need is a nominal 1" ID and the bolt center is 2&3/8". The ones with the upturned inlets are marine versions that came out real late in the mid 30's on the TX carb and the other is the automotive. They upturned the throat when someone decided it was a good idea to keep the gas in the carb when the float stuck instead of running into the bilge! It was about the same time when the marine engine builders decided to put fuel pumps on the engines getting away from the gravity bottom feed gas tanks's!!!! My Flexi is a gravity feed so it one thing I need to be careful about. 
|
||
|
||
|
8122pbrainard
Grand Poobah
Joined: September-14-2006 Location: Three Lakes Wi. Status: Offline Points: 41045 |
Post Options
Thanks(0)
Quote Reply
Posted: April-24-2010 at 10:24pm |
|
|
I got the trans back on - then off - then back on again!! The first time I forgot to install the bolt and spring assembly onto the planetary brake band. It's got to go on before the trans case. I'm glad I'm using non hardening Permatex!!
I thought I'd post a couple pictures of the tail end of the trans because the seal is interesting. It's old school but very fitting with the era. I cut off half the picture below but it shows part of the compression seal. It's inside the flange in my hand and looks like a toilet flange wax ring!!! The inside flange bolted to the trans case has the output shaft bearing but notice its outer face is tapered. The outside flange is tapered as well and the packing ring goes between both. When the outside flange is tightened it compresses the compression packing. Same principle as our prop shaft and rudder shaft packing. 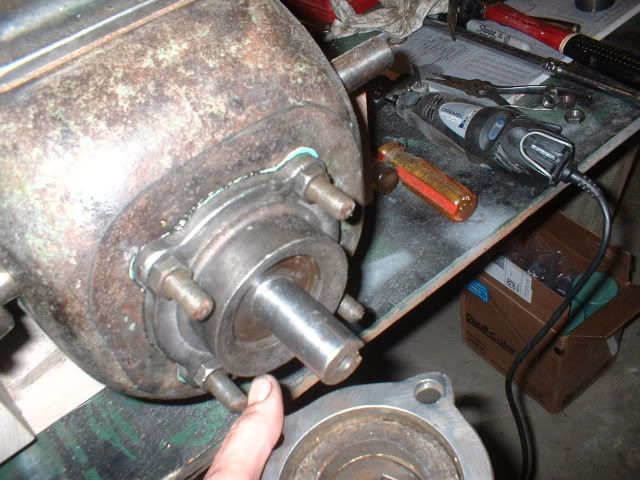
The sealing surface is actually the outside surface of the hub on the output flange. Here it is assembled. 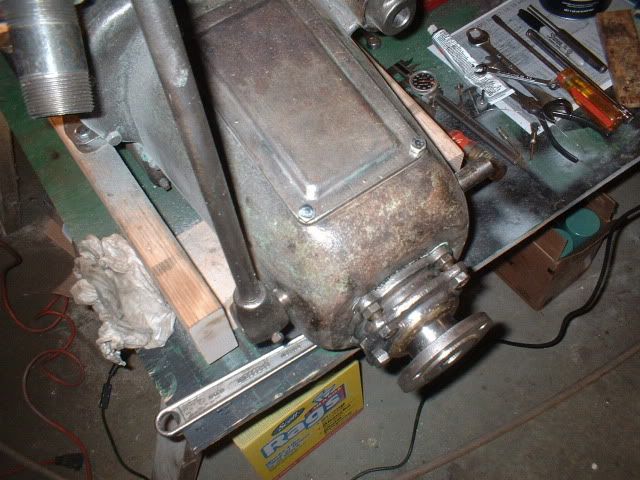
|
||
|
||
|
eric lavine
Grand Poobah
Joined: August-13-2006 Location: United States Status: Offline Points: 13413 |
Post Options
Thanks(0)
Quote Reply
Posted: April-25-2010 at 11:31am |
|
|
is that Volvo green paint under the bench?
|
||
|
"the things you own will start to own you"
|
||
|
||
|
8122pbrainard
Grand Poobah
Joined: September-14-2006 Location: Three Lakes Wi. Status: Offline Points: 41045 |
Post Options
Thanks(0)
Quote Reply
Posted: April-25-2010 at 5:41pm |
|
|
Eric,
Close!! It's Detroit Diesel Alpine Green! I found out that's the color Universal used back then. I'm sure the Alpine Green was around before GM started using it on their diesels!! I started painting some things today that need to be done pre assembly like the backside of the flywheel. The color matches real close to some old paint chips I saved. |
||
|
||
|
8122pbrainard
Grand Poobah
Joined: September-14-2006 Location: Three Lakes Wi. Status: Offline Points: 41045 |
Post Options
Thanks(0)
Quote Reply
Posted: April-25-2010 at 8:54pm |
|
|
The oil pump is back on and piped. It's a piston pump driven off a lob on the cam. Later years of the Flexi when they went from splash rod lub to pressure feed rods, the oil pump went rotary, gear driven and mounted inside the oil pan. Then the lobe and hole was used for a fuel pump.
The retro oil pressure gauge I found on ebay. I added a extra tee just in case I what to run a remote gauge to the helm. I did do some clean up on the spark and throttle controls. The linkage to the mag came with but it's so badly rusted it will need new bent rods. The throttle will be from scratch. 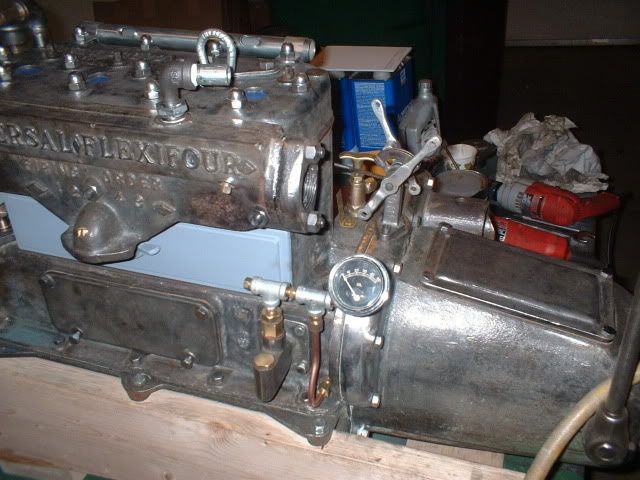
Water pump finished and back on. 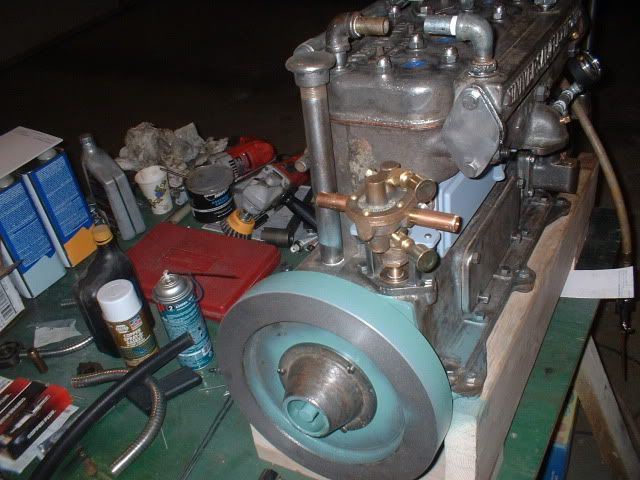
The rest of the time spent this weekend was on clean up prepping for paint. Lots of wire brushing and needle descaler work!! |
||
|
||
|
eric lavine
Grand Poobah
Joined: August-13-2006 Location: United States Status: Offline Points: 13413 |
Post Options
Thanks(0)
Quote Reply
Posted: April-26-2010 at 10:12am |
|
|
my second guess was Alpine
|
||
|
"the things you own will start to own you"
|
||
|
||
|
uk1979
Platinum Member
Joined: June-13-2007 Location: United Kingdom Status: Offline Points: 1423 |
Post Options
Thanks(0)
Quote Reply
Posted: April-26-2010 at 9:09pm |
|
|
Pete, thanks for taking the time to run your engine rebuild on here,I look forward to the updates.
|
||
|
Lets have a go
56 Starflite 77 SN 78 SN 80 BFN |
||
|
||
|
8122pbrainard
Grand Poobah
Joined: September-14-2006 Location: Three Lakes Wi. Status: Offline Points: 41045 |
Post Options
Thanks(0)
Quote Reply
Posted: April-27-2010 at 9:27am |
|
|
Roger, Thanks! I'm having lots of fun with this project. It's certainly a challenge because it's really not a unbolt, send to the machine shop and bolt it back together with new parts. The only problem is it's keeping me away from other projects I should be doing. Of course you always go for the fun ones rather than do things like work on the house!
I sure hope this thing fires up!! I'm probably going to get a non original carb just to get it running since finding the original is turning out to be difficult. I'll find one eventually but it just may take time! |
||
|
||
|
8122pbrainard
Grand Poobah
Joined: September-14-2006 Location: Three Lakes Wi. Status: Offline Points: 41045 |
Post Options
Thanks(0)
Quote Reply
Posted: April-30-2010 at 8:37pm |
|
|
On to some more details!!
Here's the old oil level indicator. The cork still floated but the rod was all rusted out. When I put the new rod (stainless welding wire) into the old cork it split. I should have "read" the grain of the cork!! Anybody need some corks? I had to get a bag of 10 out of McMaster. 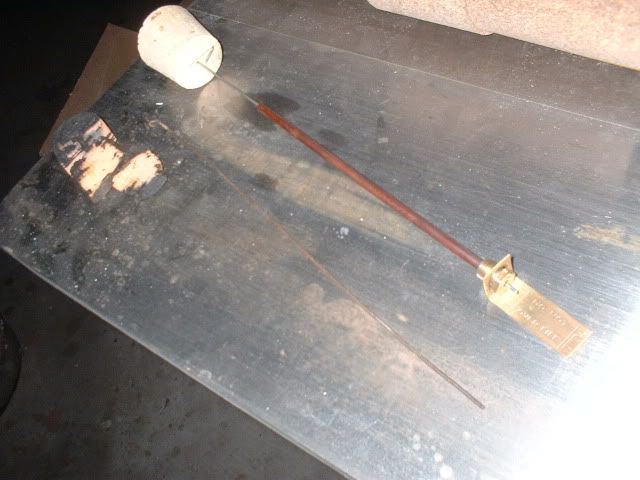
The actual indicator next to the engine badge: 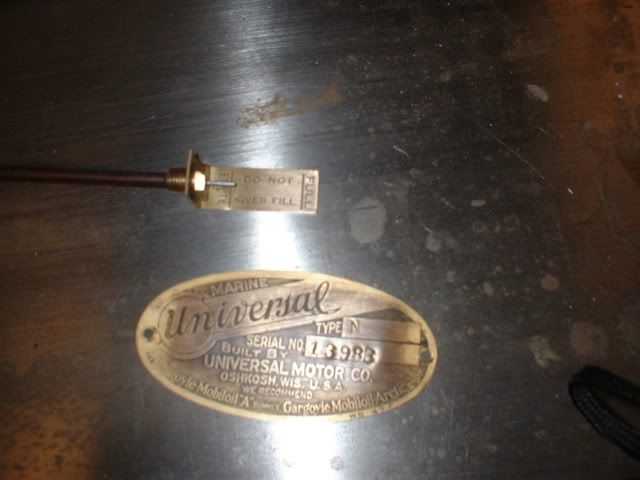
And finally my new shift knob. The old one was split and I only had half of it. At least there was enough of it to get the OD. Once again McMaster and they had the identical diameter phenolic round knob with the same threads!! 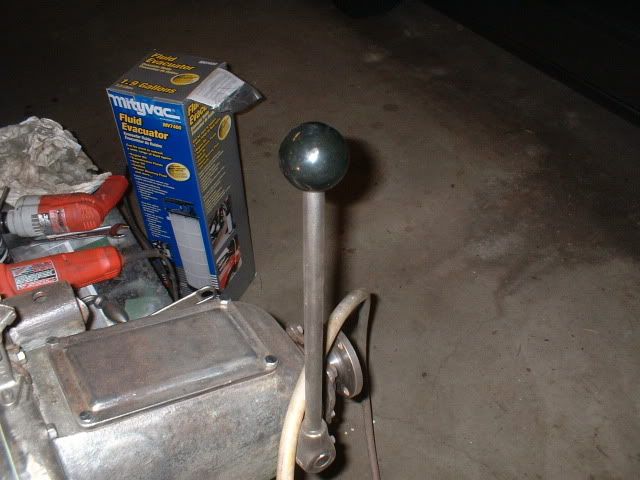
My wife keeps on asking me what the UPS guy is bringing me all the time from McMaster and. Just like Mike (wakeslayer) she hasn't seen the invoices but I do truthfully tell her the amounts aren't way out of line. Now, next week the magneto shows up and that's a different story. Mainely Magnetos called me today telling me they finished building me the mag. They rewound new coils - something like .007" wire and 20,000 turns!!! Mag with manual advance & impulse coupling, drive coupling, 8' of reproduction braided cloth covered plug wire and ring terminals came out to $514.00!! |
||
|
||
|
81nautique
Grand Poobah

Joined: September-03-2005 Location: Big Rock, Il Status: Offline Points: 5781 |
Post Options
Thanks(0)
Quote Reply
Posted: May-01-2010 at 11:02am |
|
|
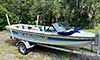
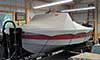
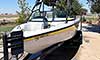
Pete, Have you ever posted a picture of the launch? Like to see what you've got ahead of you regarding the hull.
|
||
|
You can’t change the wind but you can adjust your sails
|
||
|
||
|
Post Reply
|
Page <1 34567> |
 Tweet
Tweet
|
| Forum Jump | Forum Permissions You cannot post new topics in this forum You cannot reply to topics in this forum You cannot delete your posts in this forum You cannot edit your posts in this forum You cannot create polls in this forum You cannot vote in polls in this forum |


 Topic Options
 eric lavine wrote: