 Boats For Sale:


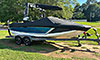
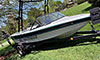


85 2001 LVL Stringer Project |
Post Reply 
|
Page <1 678910 13> |
| Author | ||
SNobsessed 
Grand Poobah 
Joined: October-21-2007 Location: IA Status: Offline Points: 7102 |
 Post Options Post Options
") Thanks(0) Thanks(0)
 Quote Reply Quote Reply
 Posted: June-10-2012 at 9:56am Posted: June-10-2012 at 9:56am |
|
|
Kris - maybe a glass removable floor section is in order!
You really set the bar high! |
||
|
“Beer is proof that God loves us and wants us to be happy.”
Ben Franklin |
||
 |
||
|
NCH20SKIER
Grand Poobah

Joined: December-16-2004 Location: United States Status: Offline Points: 2207 |
Post Options
Thanks(0)
Quote Reply
Posted: June-11-2012 at 12:12am |
|
|
Nice work Kris
|
||
|
'05 206 Limited
'88 BFN |
||
|
||
|
Big Pappa
Senior Member 

Joined: March-08-2006 Location: United States Status: Offline Points: 322 |
Post Options
Thanks(0)
Quote Reply
Posted: June-11-2012 at 2:54pm |
|
|
I wanted to be laying carpet this weekend but the place I was going to get my glue from sold all that he had just a few hours before I got there last week. Good news is he is supposed to have more in tomorrow so I will be laying carpet next weekend.
Since I could not lay carpet it was time to work on cleaning up the engine and getting it ready to be put back on the boat. I started with making a booth for sand blasting in to contain the sand and keep from making such a mess in the driveway and getting sand all over the place. It is just a 1/2" pvc frame with poly over it. It worked great!!  Then it was on to pulling the engine mounts so they could be blasted and painted. Plus since I am sure I am going to have to do a good bit of adjustment to get my alignment right I wanted to make sure things were as clean as possible so that the engine could be adjusted as easy as possible. I must say the front mounts had a lot more adjustment than I thought that they did!!  Next it was on to taping up the engine.   I had quite a few places where there was rust on the engine and I did not want to completely disassemble the engine so I could blast, or sand them all down. So I took my air grinder and knocked off as much as I possibly could (Pictures above was after this and ready for paint) then I shot on some primer that converts rust so that it is safe to paint over. Here is the engine after being painted with the rust primer.   After getting the engine painted it was on to sand blasting. I was able to get one of the exhaust manifolds and a front and rear engine mounts blasted. By then it was time to clean up. I am shooting to finish up blasting the mounts and get them all painted as well as getting the engine painted. Then I will be ready to put the carpet in this weekend. I also have my engine cradle back from being repaired so as soon as I get the engine painted I will get the cradle installed. I am nervous about drilling a bunch of holes in my brand new stringers!!!   Then I can lay the carpet and start getting ready to put the engine back in. Then I can lay the carpet and start getting ready to put the engine back in. 
|
||
|
||
|
Big Pappa
Senior Member
Joined: March-08-2006 Location: United States Status: Offline Points: 322 |
Post Options
Thanks(0)
Quote Reply
Posted: June-11-2012 at 2:58pm |
|
|
By the way those are old plugs that I had from when I painted the engine for my bronco (Same 351W). My good plugs are sitting safely waiting to go back in after painting.
|
||
|
||
|
Big Pappa
Senior Member
Joined: March-08-2006 Location: United States Status: Offline Points: 322 |
Post Options
Thanks(0)
Quote Reply
Posted: June-11-2012 at 3:02pm |
|
That would be awesome!! Thanks 
Thanks
|
||
|
||
|
Big Pappa
Senior Member
Joined: March-08-2006 Location: United States Status: Offline Points: 322 |
Post Options
Thanks(0)
Quote Reply
Posted: June-12-2012 at 4:45pm |
|
|
I went out and put a coat of paint on the engine yesterday afternoon and will put the final coat on tonight. I am also going to continue sand blasting this afternoon and hopefully get the mounts finished being blasted so I can start painting them and get them back on the engine so it is not hanging on my engine lift any longer.
That bring up a question, when I re assemble the engine mounts do I need to put any kind of lubricant or anti seize on the shafts going to the mounts on the block? I made Discount Inboard Marine happy this morning placing an order for a bunch of hoses, gaskets, bolts, maintenance items, etc... so I can get everything put back together. Should be like christmas around the house in a few days.  Stay tuned I will post up more pictures soon. |
||
|
||
|
Gary S
Grand Poobah

Joined: November-30-2006 Location: Illinois Status: Offline Points: 14096 |
Post Options
Thanks(0)
Quote Reply
Posted: June-12-2012 at 9:41pm |
|
|
Be careful sandblasting.I'm assuming your standing inside? Wear a really good resperator and tell me your not using regular sand.You don't want to get this
|
||
|
||
|
8122pbrainard
Grand Poobah

Joined: September-14-2006 Location: Three Lakes Wi. Status: Offline Points: 41045 |
Post Options
Thanks(0)
Quote Reply
Posted: June-12-2012 at 10:00pm |
|
|
Yes, Silica sand is big time bad!!
Today I just dumped the first batch of abrasive I had in my blast cabinet. It was Black Beauty. Very cheap but it does wear out. I refilled it with 36 grit garnet and will see how long it lasts. |
||
|
||
|
Big Pappa
Senior Member
Joined: March-08-2006 Location: United States Status: Offline Points: 322 |
Post Options
Thanks(0)
Quote Reply
Posted: June-12-2012 at 10:08pm |
|
I am sanding outside in this enclosure I made. 6' X 4' X 6'  I am using a small blast gun so I have to stop often to let this air out and to help keep my compressor cool. To answer your question yes, I am using a 3m respirator with prefilter and a pair of goggles or a full face shield, along with 3/4 sleeve gloves. |
||
|
||
|
Big Pappa
Senior Member
Joined: March-08-2006 Location: United States Status: Offline Points: 322 |
Post Options
Thanks(0)
Quote Reply
Posted: June-12-2012 at 10:10pm |
|
I thought of making myself a cabinet but I did not want to take time away from trying to get the boat completed to do it. I will build one one of these days and make blasting a lot more simple!!!
|
||
|
||
|
Gary S
Grand Poobah
Joined: November-30-2006 Location: Illinois Status: Offline Points: 14096 |
Post Options
Thanks(0)
Quote Reply
Posted: June-13-2012 at 2:03am |
|
|
Kris when it's time this place has info and parts for kits. I have had one of their built ones since 94 and could not be happier. Build the biggest one you can,you'll never know what you want to put in there. As for the media I have used everything but plastic and walnut shells. For aluminium I like glass beads, for rusty steel I like the silicon carbide followed by the glass beads. Silicon carbide does last longer but does wear out your nozzles and if not caught in time will go thru it and start eroding the gun too.
|
||
|
||
|
8122pbrainard
Grand Poobah
Joined: September-14-2006 Location: Three Lakes Wi. Status: Offline Points: 41045 |
Post Options
Thanks(0)
Quote Reply
Posted: June-13-2012 at 10:11am |
|
|
I bought my cabinet off ebay. It was only about $125 including shipping. However, it was a cheapy made in China but works. The only issue I've had is the O rings in the gun getting dislodged. It was also a PITA putting it together especially since the first time I put the top with the window on upside down. That required me to unscrew what had to be half of the 500 screws/nuts that come with it!
The garnet seems to be cutting about the same as the Black Beauty. I'll see it to stays sharper longer. My gun came with ceramic tips. Unless the steel tips are carbide or Stellite, the ceramic will hold up longer. Gary, My next step in media will be the silicon carbide. The cost is a real kicker though! |
||
|
||
|
Gary S
Grand Poobah
Joined: November-30-2006 Location: Illinois Status: Offline Points: 14096 |
Post Options
Thanks(0)
Quote Reply
Posted: June-13-2012 at 11:23am |
|
Yes it is expensive Pete but lasts much longer, so I bought a abrasive reclamer,it mounts on the side of the cabinet.I do use a carbide nozzel but silicon carbide media will still wear it out,just not as fast.I do use ceramic nozzles for back up. |
||
|
||
|
Big Pappa
Senior Member
Joined: March-08-2006 Location: United States Status: Offline Points: 322 |
Post Options
Thanks(0)
Quote Reply
Posted: June-13-2012 at 7:19pm |
|
|
Awesome thanks for the info guys!! I will definitely be looking into these for my cabinet in a few months!
|
||
|
||
|
Big Pappa
Senior Member
Joined: March-08-2006 Location: United States Status: Offline Points: 322 |
Post Options
Thanks(0)
Quote Reply
Posted: June-15-2012 at 3:10pm |
|
|
I was able to get my engine mounts put back together last night after blasting and painting them over the last couple of days.
 Then installed them back on the freshly painted engine.   I also bought some of this stuff, Roberts Temporary Carpet Protection, to go over my carpet once I get it installed for a little protection until I get a little closer to being finished. As I was in the boat last night I decided to put a layer down to see if it would protect my bilge from scratches and things until I had the engine and rear floor in. I think it is going to work pretty good.  I wish I would have had this stuff when I started and covered the entire top of the boat from the windshield to the Transom and the tops of the trailer fenders. That would have saved me a lot of clean up that I need to do now. Finally I started cleaning up the Carpet trim to see how hard it was going to be and it went pretty quick, to my surprise. The key is to have ample acetone on your rag as you rub it down!! I took a 5' piece and went from this.  To this in about 15 minutes.  My carpet glue is supposed to be in today so that means that tonight and tomorrow is all about getting the carpet installed in the boat. Once that is done it is time to start throwing parts at the boat getting everything installed in preparation of putting the engine back in next weekend. Anyone have any last minute carpet installing tips for me? |
||
|
||
|
storm34
Grand Poobah

Joined: November-03-2008 Location: Dexter Iowa Status: Offline Points: 4492 |
Post Options
Thanks(0)
Quote Reply
Posted: June-15-2012 at 3:20pm |
|
|
Make sure you leave 4-6" of carpet unglued around the edges where you'll put the trim. Once the trim is glued to the carpet then you can actually glue the remaining carpet down. Other than that, it's pretty straightforward.
What did you use for a silver top coat? We're priming with Cast Blast but need to source something that's close to the original silver. 
|
||
|
||
|
storm34
Grand Poobah
Joined: November-03-2008 Location: Dexter Iowa Status: Offline Points: 4492 |
Post Options
Thanks(0)
Quote Reply
Posted: June-15-2012 at 3:22pm |
|
|
Looks fantastic BTW. Top notch work there!
|
||
|
||
|
Big Pappa
Senior Member
Joined: March-08-2006 Location: United States Status: Offline Points: 322 |
Post Options
Thanks(0)
Quote Reply
Posted: June-15-2012 at 3:29pm |
|
Thanks!! I used this stuff. Rustoleum Engine Enamel I think it is the cast aluminum color. It is a little lighter than the stock color but I like it.
Thanks again!! 
|
||
|
||
|
Big Pappa
Senior Member
Joined: March-08-2006 Location: United States Status: Offline Points: 322 |
Post Options
Thanks(0)
Quote Reply
Posted: June-15-2012 at 3:34pm |
|
|
Also does anyone know of a source for the decals on the valve covers? One says Pleasure craft and the other has timing info on it.
When I was unmasking the engine the one that says Pleasure craft pulled off about half way. |
||
|
||
|
storm34
Grand Poobah
Joined: November-03-2008 Location: Dexter Iowa Status: Offline Points: 4492 |
Post Options
Thanks(0)
Quote Reply
Posted: June-15-2012 at 3:47pm |
|
|
Tim said that DWcar can get them or has them. I haven't looked into it yet, but we're about ready for them as well.
I'm headed to the river now, maybe Tim or DWcar will see this thread. Otherwise, I'll inquire over the weekend. |
||
|
||
|
Donald80SN
Grand Poobah
Joined: January-12-2009 Location: Denver, NC Status: Offline Points: 3896 |
Post Options
Thanks(0)
Quote Reply
Posted: June-15-2012 at 4:21pm |
|
|
Wow, great work. I need to repaint my engine this winter and fix a leaking rear seal. You may want to consider changing your damper plate out since you have the motor out of the boat.
More time and more money, but I would change it. Great build Donald |
||
|
||
|
Big Pappa
Senior Member
Joined: March-08-2006 Location: United States Status: Offline Points: 322 |
Post Options
Thanks(0)
Quote Reply
Posted: June-15-2012 at 5:06pm |
|
Thanks!! Is there a way to inspect the damper plate? I have spent quite a bit on this project so far and would rather not just throw more money at it if I do not have to. (Looked at skidim and looks like a new plate is around $200) What kind of life expectancy do these have? The boat has a little under 800 hours on it right now if that helps. |
||
|
||
|
Jllogan
Platinum Member 

Joined: May-18-2011 Location: canton, OH Status: Offline Points: 1728 |
Post Options
Thanks(0)
Quote Reply
Posted: June-15-2012 at 5:20pm |
|
|
its probably about time. You can get them cheaper from ebasicpower.com, skidim is over priced. I think I paid like 90. Check the springs and housing for cracks specifically. There was a recent thread with the part number. I forget what it is right now.
|
||
|
||
|
cphase
Gold Member

Joined: May-11-2010 Location: Newnan, GA Status: Offline Points: 795 |
Post Options
Thanks(0)
Quote Reply
Posted: June-15-2012 at 5:25pm |
|
|
Try this Link BP.
|
||
|
||
|
Big Pappa
Senior Member
Joined: March-08-2006 Location: United States Status: Offline Points: 322 |
Post Options
Thanks(0)
Quote Reply
Posted: June-15-2012 at 5:32pm |
|
|
Thanks for the links guys. This is the tag on my trans, I just want to make sure to get the correct part.

|
||
|
||
|
Big Pappa
Senior Member
Joined: March-08-2006 Location: United States Status: Offline Points: 322 |
Post Options
Thanks(0)
Quote Reply
Posted: June-15-2012 at 6:02pm |
|
|
Oh and just a note, the picture above was before painting. It was a pain to get that paint off the tag without removing the tag paint. It now looks clean as you can see in a picture above.
|
||
|
||
|
8122pbrainard
Grand Poobah
Joined: September-14-2006 Location: Three Lakes Wi. Status: Offline Points: 41045 |
Post Options
Thanks(0)
Quote Reply
Posted: June-17-2012 at 11:30am |
|
Kris, A tip I picked up over on the OWWM.com site since they are always dealing with old tags is to soak the tag overnight in water and dish soap. The paint will come right off without removing the original dye/paint on the tag itself. I truly believe it would even work with Eric's "deluxe" trans rebuild when he even paints the tag for you!!!
|
||
|
||
|
8122pbrainard
Grand Poobah
Joined: September-14-2006 Location: Three Lakes Wi. Status: Offline Points: 41045 |
Post Options
Thanks(0)
Quote Reply
Posted: June-17-2012 at 12:20pm |
|
Well, I'm off to try out the silicon carbide. I'm not happy with the garnet I just refilled the cabinet with. I don't feel it lasted as long (stayed sharp) as the Black Beauty. Plus, ether it's the humid weather or the garnet absorbs more water moisture. I'm having clogging issues in the gun and suction tube. I'm also finding that it takes more PSI to do the job. It sure will be nice when I get up north with a good true 5 HP compressor and the refrigerated air dryer. |
||
|
||
|
Big Pappa
Senior Member
Joined: March-08-2006 Location: United States Status: Offline Points: 322 |
Post Options
Thanks(0)
Quote Reply
Posted: June-18-2012 at 12:42pm |
|
Good to know, Thanks for the tip!! |
||
|
||
|
Big Pappa
Senior Member
Joined: March-08-2006 Location: United States Status: Offline Points: 322 |
Post Options
Thanks(0)
Quote Reply
Posted: June-18-2012 at 12:43pm |
|
Let us know how things go. |
||
|
||
|
Post Reply
|
Page <1 678910 13> |
 Tweet
Tweet
|
| Forum Jump | Forum Permissions You cannot post new topics in this forum You cannot reply to topics in this forum You cannot delete your posts in this forum You cannot edit your posts in this forum You cannot create polls in this forum You cannot vote in polls in this forum |


 Topic Options
 SNobsessed wrote: