Gelling,sanding and polishing |
Post Reply 
|
| Author | |
Gary S 
Grand Poobah 

Joined: November-30-2006 Location: Illinois Status: Offline Points: 14096 |
 Post Options Post Options
 Thanks(0) Thanks(0)
 Quote Quote  Reply Reply
 Topic: Gelling,sanding and polishing Topic: Gelling,sanding and polishingPosted: August-31-2012 at 11:23pm |
|
Been busting my butt trying to get this thing done so I can
at least try it out before I have to put it away for the year. I had waited too late last year and had trouble with the gel taking so long to set up when cool out,so I started when it was good and HOT. Very nerve racking and was worried that something would go wrong.Had in the past alot of trouble with bugs liking the fresh gel and was prepared this time. I think it turned out pretty good but need to see how it looks when it's outside. A big thanks to Tim Morfoot for some tips  In the end everything went fine,I think I'm ready for In the end everything went fine,I think I'm ready for that theft recovery boat with the side cut out! This is what I started with,a big hole where the control mounted! 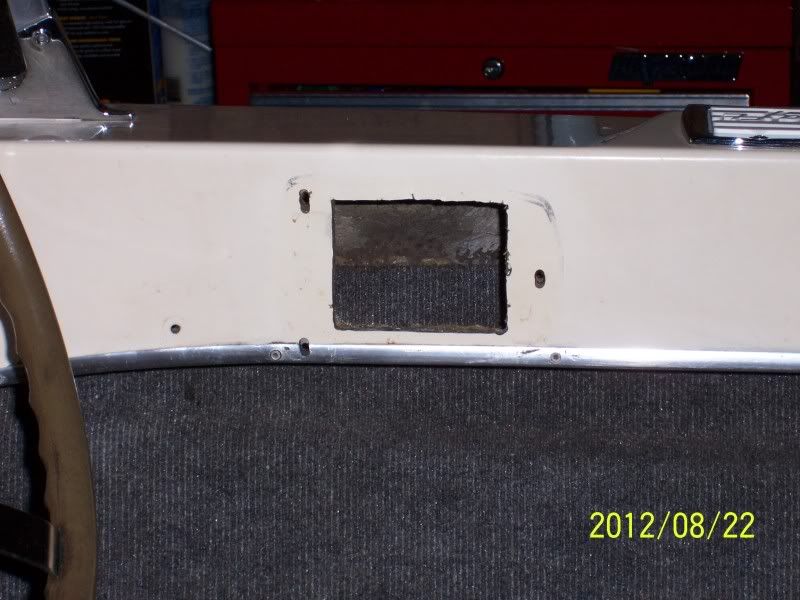 part way thru 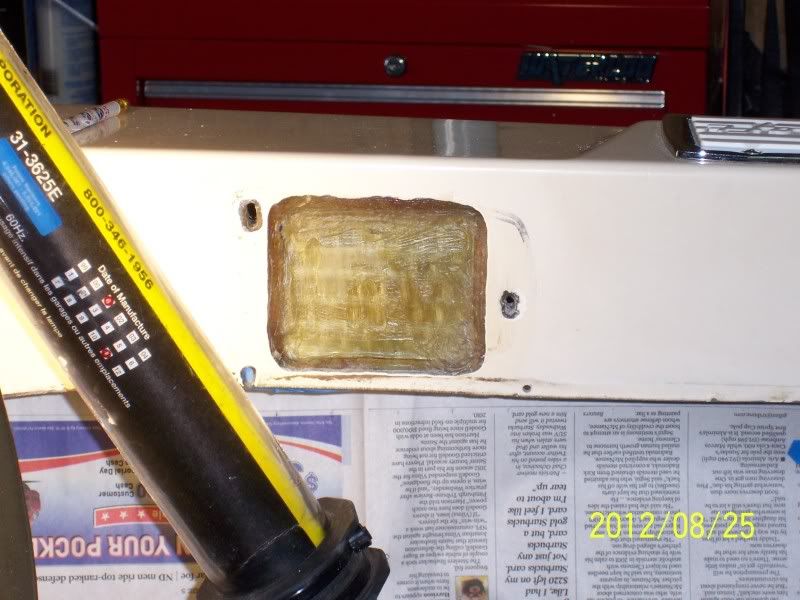 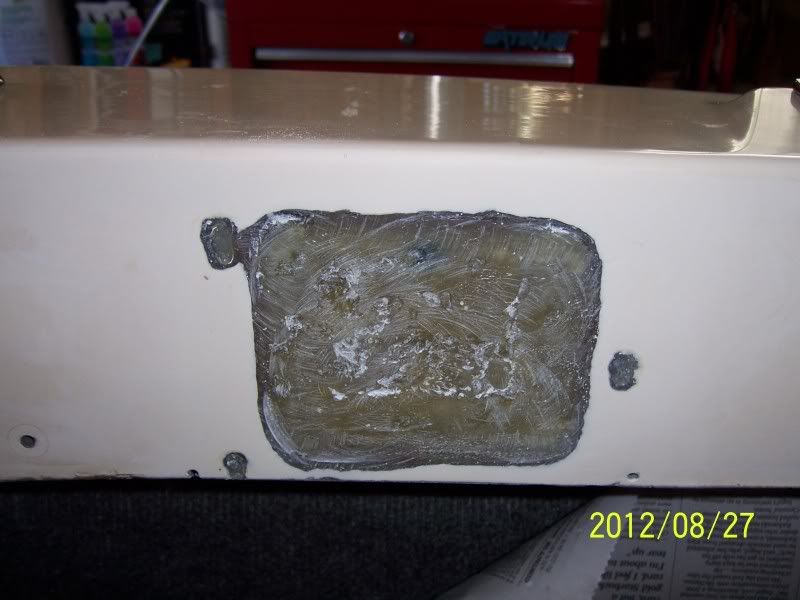 done- 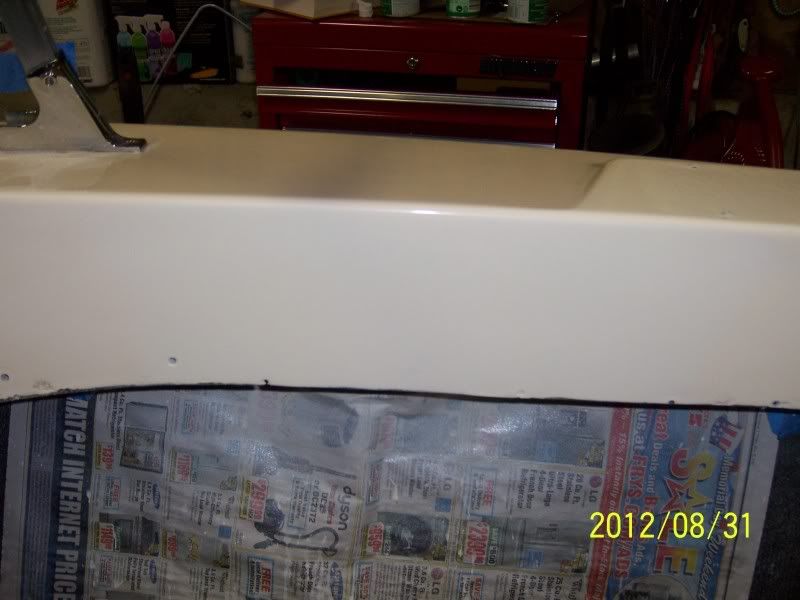 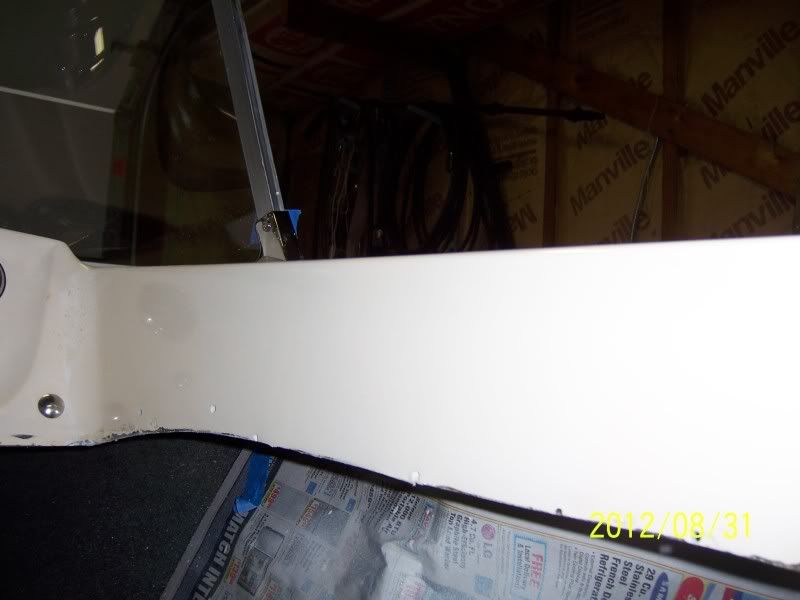 |
|
 |
|
nautique frk 
Platinum Member 

Joined: February-16-2004 Location: United States Status: Offline Points: 1784 |
 Post Options Post Options
 Thanks(0) Thanks(0)
 Quote Quote  Reply Reply
 Posted: September-01-2012 at 1:36am Posted: September-01-2012 at 1:36am |
|
Looks good !!
|
|
 |
|
pepatrick 
Senior Member 
Joined: July-26-2012 Location: Cumming, GA Status: Offline Points: 102 |
 Post Options Post Options
 Thanks(0) Thanks(0)
 Quote Quote  Reply Reply
 Posted: September-01-2012 at 2:38am Posted: September-01-2012 at 2:38am |
|
Wow...what is the secret. I have a few areas that will need to be touched up once I get it wet sanded. You cant even see where the hole was in yours...Great job!!
|
|
 |
|
gR@HaM 
Platinum Member 

Joined: May-01-2012 Location: UK Status: Offline Points: 1265 |
 Post Options Post Options
 Thanks(0) Thanks(0)
 Quote Quote  Reply Reply
 Posted: September-01-2012 at 6:48am Posted: September-01-2012 at 6:48am |
|
Nice job I've just had to do something very similar with the dash where PO had cut a hole for a large switch panel.
Possibly a stupid question, what are you doing with the throttle control?? 
|
|
|
'82 Ski Tique
|
|
 |
|
8122pbrainard 
Grand Poobah 

Joined: September-14-2006 Location: Three Lakes Wi. Status: Offline Points: 41045 |
 Post Options Post Options
 Thanks(0) Thanks(0)
 Quote Quote  Reply Reply
 Posted: September-01-2012 at 9:12am Posted: September-01-2012 at 9:12am |
|
Gary,
Nice!  Graham, Gary has the SS center console with the throttle and shift controls going in the boat. |
|
 |
|
Riley 
Grand Poobah 

Joined: January-19-2004 Location: Portland, ME Status: Offline Points: 7953 |
 Post Options Post Options
 Thanks(0) Thanks(0)
 Quote Quote  Reply Reply
 Posted: September-01-2012 at 9:57am Posted: September-01-2012 at 9:57am |
|
Gary, nice job! I'll have to get some pointers from
you as we've got a radio hole to fill. |
|
 |
|
8122pbrainard 
Grand Poobah 

Joined: September-14-2006 Location: Three Lakes Wi. Status: Offline Points: 41045 |
 Post Options Post Options
 Thanks(0) Thanks(0)
 Quote Quote  Reply Reply
 Posted: September-01-2012 at 10:01am Posted: September-01-2012 at 10:01am |
|
Gary,
You're going to need some new aluminum "J" molding. McMaster has it as well as the countersunk head Pop rivets. |
|
 |
|
dwcar 
Platinum Member 

Joined: February-11-2007 Location: Houston Texas Status: Offline Points: 1103 |
 Post Options Post Options
 Thanks(0) Thanks(0)
 Quote Quote  Reply Reply
 Posted: September-01-2012 at 10:03am Posted: September-01-2012 at 10:03am |
|
Nice work Gary!
|
|
|
83Ski
|
|
 |
|
reftech 
Senior Member 
Joined: February-27-2012 Location: easley sc Status: Offline Points: 140 |
 Post Options Post Options
 Thanks(0) Thanks(0)
 Quote Quote  Reply Reply
 Posted: September-01-2012 at 10:46am Posted: September-01-2012 at 10:46am |
|
Very nice job! Well done!
|
|
 |
|
SNobsessed 
Grand Poobah 
Joined: October-21-2007 Location: IA Status: Offline Points: 7102 |
 Post Options Post Options
 Thanks(0) Thanks(0)
 Quote Quote  Reply Reply
 Posted: September-01-2012 at 12:10pm Posted: September-01-2012 at 12:10pm |
|
Gary - Looks great!
Imagine paying a hourly rate to do such fine detail! |
|
|
“Beer is proof that God loves us and wants us to be happy.”
Ben Franklin |
|
 |
|
Gary S 
Grand Poobah 

Joined: November-30-2006 Location: Illinois Status: Offline Points: 14096 |
 Post Options Post Options
 Thanks(0) Thanks(0)
 Quote Quote  Reply Reply
 Posted: September-01-2012 at 3:23pm Posted: September-01-2012 at 3:23pm |
|
Thanks for the encouragement guy's. I've missed alot of great
boating weather this year and knew I would,but I think it's important to get this thing back together as intended. The hardest part of the project,to me anyway,is color matching, especially on a 43 year old! When I had started to repair chips, and holes I had ordered a stock quart of an Ivory from Mini Craft. It was not close enough so I cut out a piece out from behind the back seat and sent it in for a color match. Still was not good but by combining the two in a ratio I have figured out and writen down so I would not forget,it works for me. If I look close and because I know where to look,I can find them,but I'm not going to let anyone get that close  I call it my 20 ft Mustang I call it my 20 ft Mustang  . .The main key here and one that may not seem right,is you have to make the area you are repairing bigger. Grinding a bevel out from the damage solves that,it gives the mat and resin something to bond to.If you don't do this and just try to butt the new layers to the old,it will crack.It also in my case could crack where those 90 degree cuts come together,so they needed to be ground to a radius.After I did that I cut out a cardboard template of the hole and used that to cut a piece of glass I had to fit.I don't even know what it is called but it was a layer of mat bonded to a layer of 1/4" woven cloth. I resined it and let it set up and then ground to fit the bottom of the repair.After bonding it in,I then cut a piece of mat big enough to go over the whole backside of the hole plus about 1/2" over the old glass after sanding and wiping clean with acetone.Then on the outside just started adding layers of larger cutouts of matt,each time going further out on the bevel I had ground earlier. Here are a few more pictures I took.I also tried to brush on the gel to get the build up I needed because I was worried that I would run out of the matched gel I have. When you spray it you waste more because the gun and cup are so large. The final coat was sprayed ,I added Dura Tec clear to the mix at half of what is recommended,because to me 50/50 makes it too thin especially on a vertical surface. After a day I started by hand sanding. I had found out during they layup that the panel while looking flat is actually got a compound curve to it and I had to be careful not to sand thru.Had a small sag to remove so I started there with 600. I had overlapped the repair with gel by about 9" and so started sanding overall with 800 followed by 1000 and 2000 to blend it in. Finished up with 3M 05973 compound with a white foam pad. Pete thanks to you I always use McMaster Carr now even for sand paper. Already got the rivits from them but for the aluminium trim I went with original  trim from my supplier trim from my supplier in Sterling Illinois who unselfishly helped me with a floor, bucket seat with hardware and the trim from that Mustang he parted. Thanks Steve! Here are some more pictures and one tease of the trial fitting. 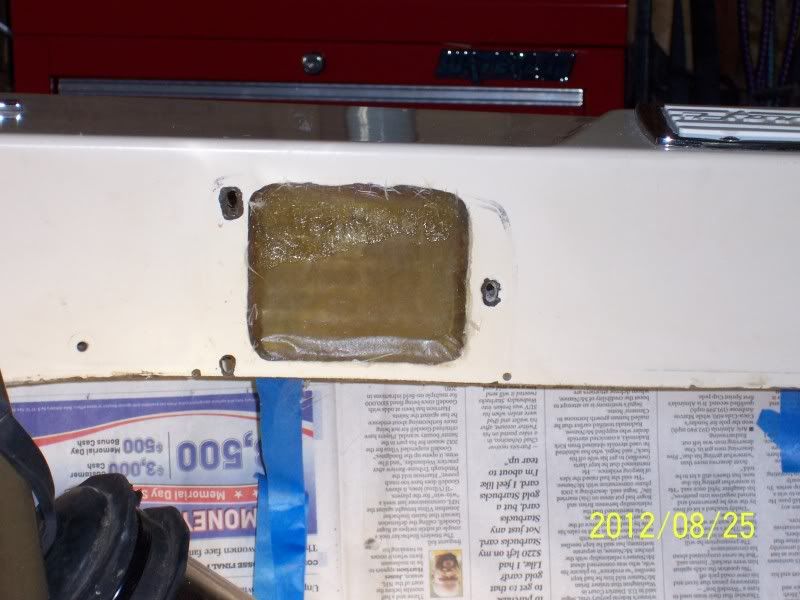  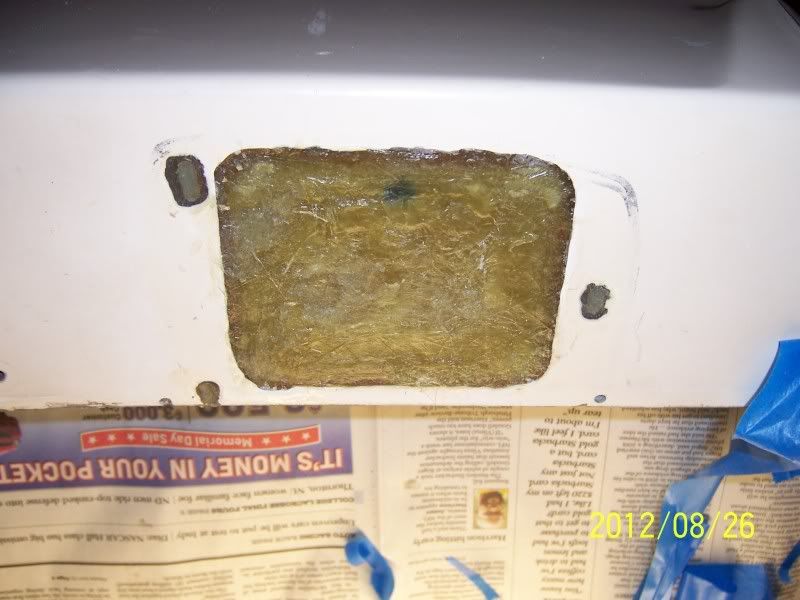 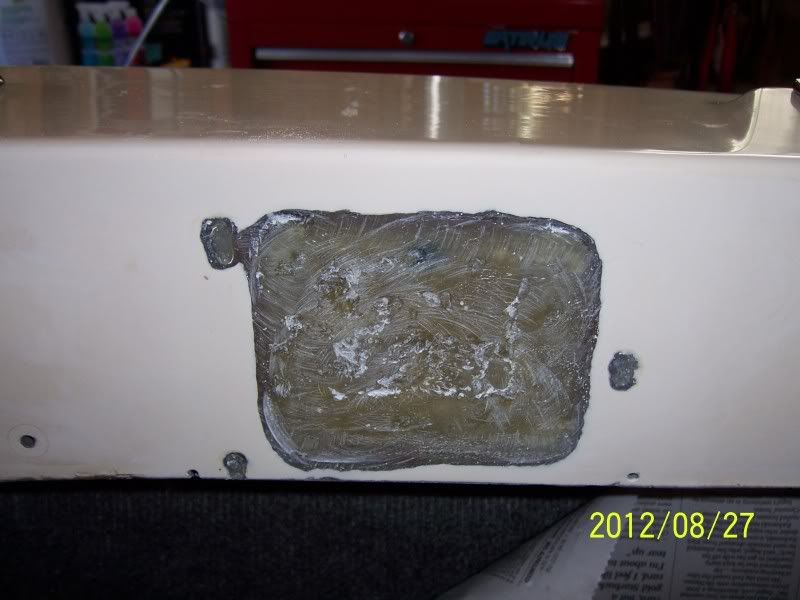 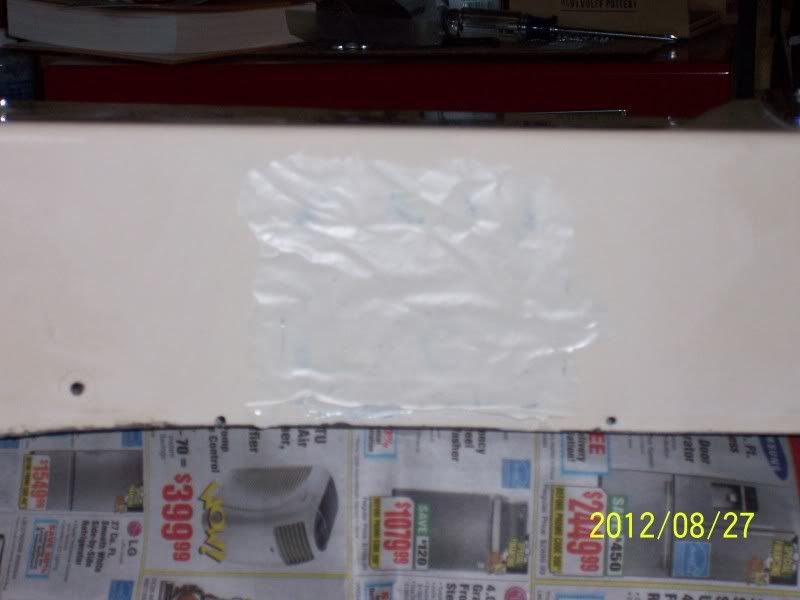 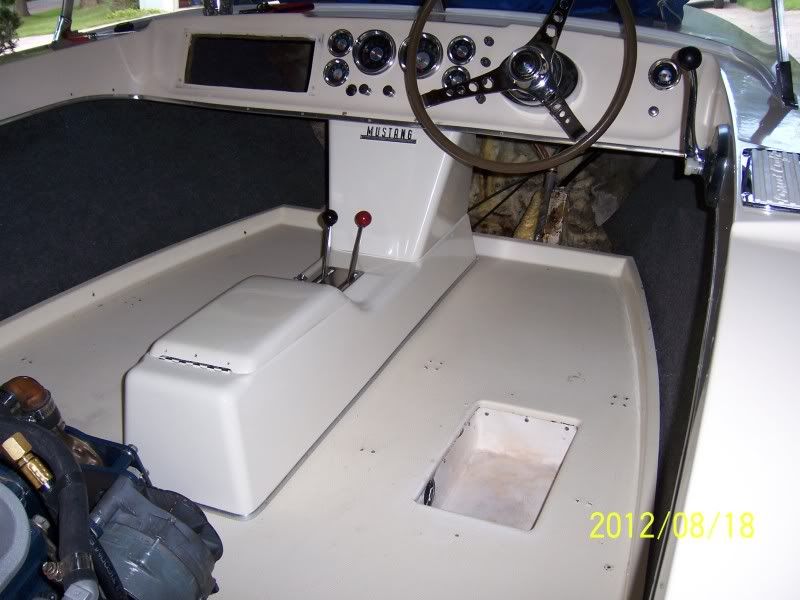
|
|
 |
|
MartyMabe 
Grand Poobah 

Joined: February-21-2006 Location: High Point,NC Status: Offline Points: 3980 |
 Post Options Post Options
 Thanks(0) Thanks(0)
 Quote Quote  Reply Reply
 Posted: September-02-2012 at 2:34pm Posted: September-02-2012 at 2:34pm |
|
And I'm getting ready to 'Cut' holes in the 93 Gary!! Gonna install the wired remote in the transom for the radio. Also gonna cut cup holders in the gunnels for the rear seat area. I'm getting rid of those plastic fold down cup holders at the bottom of the back seat near the floor.
|
|
 |
|
8122pbrainard 
Grand Poobah 

Joined: September-14-2006 Location: Three Lakes Wi. Status: Offline Points: 41045 |
 Post Options Post Options
 Thanks(0) Thanks(0)
 Quote Quote  Reply Reply
 Posted: September-02-2012 at 6:11pm Posted: September-02-2012 at 6:11pm |
|
Marty,
Cutting holes non original??   
|
|
 |
|
DrStevens 
Senior Member 

Joined: October-15-2011 Location: Columbus, OH Status: Offline Points: 422 |
 Post Options Post Options
 Thanks(0) Thanks(0)
 Quote Quote  Reply Reply
 Posted: September-02-2012 at 7:20pm Posted: September-02-2012 at 7:20pm |
|
Gary, it looks great!
|
|
 |
|
8122pbrainard 
Grand Poobah 

Joined: September-14-2006 Location: Three Lakes Wi. Status: Offline Points: 41045 |
 Post Options Post Options
 Thanks(0) Thanks(0)
 Quote Quote  Reply Reply
 Posted: September-02-2012 at 9:01pm Posted: September-02-2012 at 9:01pm |
|
Gary,
Did I miss something? Where did you get the glass sole pan? |
|
 |
|
Gary S 
Grand Poobah 

Joined: November-30-2006 Location: Illinois Status: Offline Points: 14096 |
 Post Options Post Options
 Thanks(0) Thanks(0)
 Quote Quote  Reply Reply
 Posted: September-02-2012 at 9:49pm Posted: September-02-2012 at 9:49pm |
I also must thank these others, Johnb for the battery tray from his departed SS and who also let me copy his side panels,The Godfather, Dave Hendricks for the "Mustang" emblem for the console and to Bruce for the heads up  The next step is the interior and not having any pictures of the original,I leaning toward a cream,to match the deck,motorbox so it looks like a 'glass one and then the rest like Rodneys. What do you think? 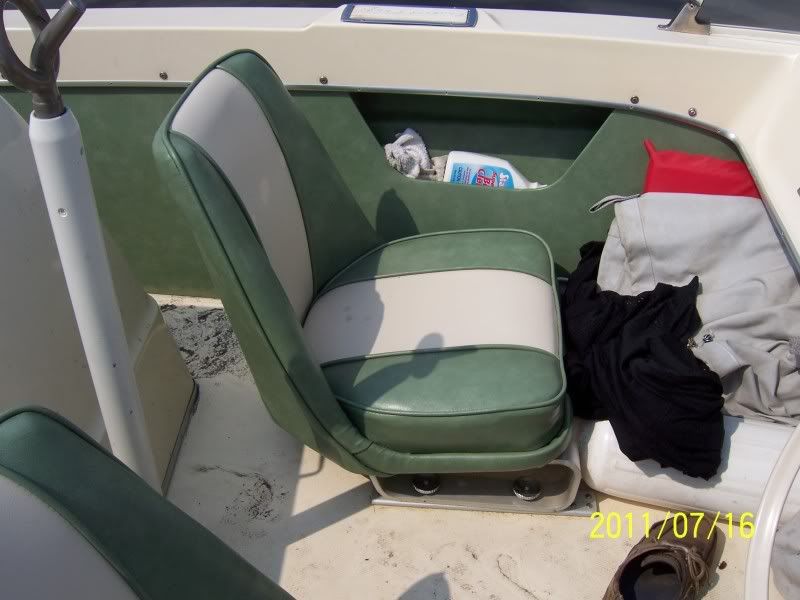 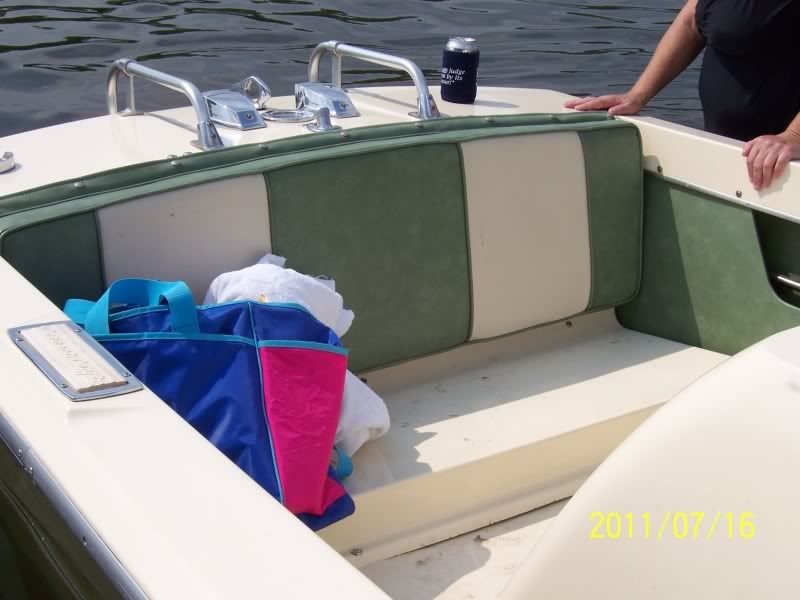
|
|
 |
|
Post Reply 
|
|
|
Tweet
|
| Forum Jump | Forum Permissions  You cannot post new topics in this forum You cannot reply to topics in this forum You cannot delete your posts in this forum You cannot edit your posts in this forum You cannot create polls in this forum You cannot vote in polls in this forum |