 Boats For Sale:


Jeffs 1988 BFN Rebuild |
Post Reply 
|
Page <123> |
| Author | ||
BFNSport 
Senior Member 

Joined: March-06-2010 Location: Lowell Michigan Status: Offline Points: 211 |
 Post Options Post Options
") Thanks(0) Thanks(0)
 Quote Reply Quote Reply
 Posted: January-19-2011 at 6:54pm Posted: January-19-2011 at 6:54pm |
|
Yes Johnsons work bench.They had 2"x6" 20'.But I was able to get both my stringers out of 1 board plus my center/keel stringer. $165.00 if I rember correctly that was over the holidays.Plus they have marine plywood ect. Jeff They will deliver to Grand Rapids for $20.00 |
||
 |
||
|
dochockey
Gold Member 

Joined: September-16-2009 Location: Colorado Status: Offline Points: 638 |
Post Options
Thanks(0)
Quote Reply
Posted: January-19-2011 at 8:33pm |
|
|
I'm familiar with L.L. They had a Grand Rapids store but it closed last summer. If your into woodworking your like a kid in a candy store there. I know they are top dollar, That's why I was wondering if you had another source?
|
||
|
1989 Teal Ski Nautique
1967 Mustang Harris Float Sunfish |
||
|
||
|
BFNSport
Senior Member
Joined: March-06-2010 Location: Lowell Michigan Status: Offline Points: 211 |
Post Options
Thanks(0)
Quote Reply
Posted: January-19-2011 at 9:46pm |
|
The store closed but they still deliver to G.R. I think its Wood Source?east end of 28th Streetbetween East Paris and Patterson .The price I felt was far clear,tight no knots. |
||
|
||
|
tullfooter
Grand Poobah 

Joined: March-02-2007 Location: White Lake, MI Status: Offline Points: 2225 |
Post Options
Thanks(0)
Quote Reply
Posted: January-19-2011 at 9:59pm |
|
|
Doc
Where in Michigan do you reside? Sounds like you are near GRap. Jeff Did not notice that in the pic on FB, you WERE working on your boat. Good man. 
|
||
|
Play hard, life's not a trial run.
'85 BFN '90 BFN White Lake, Michigan |
||
|
||
|
BFNSport
Senior Member
Joined: March-06-2010 Location: Lowell Michigan Status: Offline Points: 211 |
Post Options
Thanks(0)
Quote Reply
Posted: January-19-2011 at 11:07pm |
|
Yup its at the top of the list. |
||
|
||
|
dochockey
Gold Member
Joined: September-16-2009 Location: Colorado Status: Offline Points: 638 |
Post Options
Thanks(0)
Quote Reply
Posted: January-20-2011 at 3:22am |
|
|
I'm in Richland (Gull Lake)
|
||
|
1989 Teal Ski Nautique
1967 Mustang Harris Float Sunfish |
||
|
||
|
BFNSport
Senior Member
Joined: March-06-2010 Location: Lowell Michigan Status: Offline Points: 211 |
Post Options
Thanks(0)
Quote Reply
Posted: May-13-2011 at 11:51am |
|
|
I want to fair out my bilge do I have to grind every last bit of gelcote or will the epoxy go over the top.


And any sugestions on my screw up 
It is a about a 4" crack including the hole. 
I was gong to do a lay up on the inside then v/tapper out the outside build it up and glass.Is there any reason not to start on the inside first? |
||
|
||
|
quinner
Grand Poobah

Joined: October-12-2005 Location: Unknown Status: Offline Points: 5828 |
Post Options
Thanks(0)
Quote Reply
Posted: May-13-2011 at 1:09pm |
|
Been to Gull Lake a few times, been a while, IIRC local dealer was Ski Unique |
||
|
||
|
8122pbrainard
Grand Poobah

Joined: September-14-2006 Location: Three Lakes Wi. Status: Offline Points: 41045 |
Post Options
Thanks(0)
Quote Reply
Posted: May-13-2011 at 1:26pm |
|
|
Jeff,
You have the correct idea on the goofup. Yes, lay in the glass on the inside and gel fill the outside after Ving it out. This is the only place I recommend using polyester resin. Looking at the pictures, it does look like you've ground down the bilge coating enough. You just do not want to bond the new to the gel bilge coating and be as close to the glass in the hull as possible. The glass is the strength in a FRP and the resin is pretty much just the "glue". |
||
|
||
|
BFNSport
Senior Member
Joined: March-06-2010 Location: Lowell Michigan Status: Offline Points: 211 |
Post Options
Thanks(0)
Quote Reply
Posted: May-13-2011 at 1:52pm |
|
|
Pete do you mean for the inside patch?
Or both inside and out? |
||
|
||
|
BFNSport
Senior Member
Joined: March-06-2010 Location: Lowell Michigan Status: Offline Points: 211 |
Post Options
Thanks(0)
Quote Reply
Posted: May-13-2011 at 1:55pm |
|
|
I also found screw holes were the PO was re mounting a seat base and ran them out the bottom . They fixde with caulk
|
||
|
||
|
8122pbrainard
Grand Poobah
Joined: September-14-2006 Location: Three Lakes Wi. Status: Offline Points: 41045 |
Post Options
Thanks(0)
Quote Reply
Posted: May-13-2011 at 2:00pm |
|
|
Jeff,
Yes, the inside patch over the gouge, is where you want to use the polyester. Keep in mind the gel is poly and won't stick to the epoxy. If the gouge is real deep, you can add some cabosil to the poly resin and fill the bottom before you do the gel. Tape up the outside so you don't have resin running down the hull. I'd use 3M fine line tape. It's a poly tape and won't let anything past it. Let the patch set up and then do the V'ing. I'd use 3 layers of glass on the patch. |
||
|
||
|
8122pbrainard
Grand Poobah
Joined: September-14-2006 Location: Three Lakes Wi. Status: Offline Points: 41045 |
Post Options
Thanks(0)
Quote Reply
Posted: May-13-2011 at 2:03pm |
|

|
||
|
||
|
BFNSport
Senior Member
Joined: March-06-2010 Location: Lowell Michigan Status: Offline Points: 211 |
Post Options
Thanks(0)
Quote Reply
Posted: May-13-2011 at 2:33pm |
|
I could see myhself doing something like that.I cant say much I was having so much fun grinding...LOL Thanks Pete |
||
|
||
|
BFNSport
Senior Member
Joined: March-06-2010 Location: Lowell Michigan Status: Offline Points: 211 |
Post Options
Thanks(0)
Quote Reply
Posted: May-14-2011 at 1:42am |
|
|
A few more questions.My boat was over 50% gutted when I started and Im not sure what the floor was like.I just read the pumpkinpatch again and it sounds like 3/4 ply I like how Gregs turned out ,was that a factory reproduction or was all the ply of Gregs design? I did cut out under the dash forward and don t recall any ply floor.
Jeff |
||
|
||
|
dochockey
Gold Member
Joined: September-16-2009 Location: Colorado Status: Offline Points: 638 |
Post Options
Thanks(0)
Quote Reply
Posted: May-14-2011 at 2:37am |
|
They went out of business  They had a great mechanic. (Gull lake Marine) bought their inventory. So the mechanic went there. Last summer he was killed on his motorcycle. They had a great mechanic. (Gull lake Marine) bought their inventory. So the mechanic went there. Last summer he was killed on his motorcycle.
Gull lake is the deepest lake in lower Michigan. |
||
|
1989 Teal Ski Nautique
1967 Mustang Harris Float Sunfish |
||
|
||
|
Morfoot
Grand Poobah

Joined: February-06-2004 Location: South Lanier Status: Offline Points: 5320 |
Post Options
Thanks(0)
Quote Reply
Posted: May-14-2011 at 11:56am |
|
|
Jeff, when you go to repairing the goof cut your repair plys in rounded rectangles or circles making sure each ply has about 1/2" overlap over the prior one. Make the first ply slightly larger than the damage. Lay the smallest down first when you are ready to install it and work your way up to the largest ply.
If you have corners in your plies they will have more of a tendancy to lift up and secondly more stress is concentrated on corners. Rounding your repairs distributes load stresses more evenly and they lay down nicely. Making each ply bigger than the other makes for a stronger repair as you have 3 layers of glass bonded to the hull instead of just "one" thick one. 
|
||
|
"Morfoot; He can ski. He can wakeboard.He can cook chicken.He can create his own self-named beverage, & can also apparently fly. A man of many talents."72 Mustang "Kermit",88 SN Miss Scarlett, 99 SN "Sherman"
|
||
|
||
|
BFNSport
Senior Member
Joined: March-06-2010 Location: Lowell Michigan Status: Offline Points: 211 |
Post Options
Thanks(0)
Quote Reply
Posted: May-15-2011 at 10:54pm |
|
Thanks Morfoot |
||
|
||
|
BuffaloBFN
Grand Poobah

Joined: June-24-2007 Location: Gainesville,GA Status: Offline Points: 6094 |
Post Options
Thanks(0)
Quote Reply
Posted: May-15-2011 at 11:12pm |
|
|
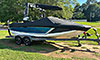
Luv that stand, but this concerns me a little...
|
||
|
||
|
BFNSport
Senior Member
Joined: March-06-2010 Location: Lowell Michigan Status: Offline Points: 211 |
Post Options
Thanks(0)
Quote Reply
Posted: May-15-2011 at 11:13pm |
|
|
Well I have just been convinced epoxy is the way to go I just removed several pounds of glass and never touched a grinder

Here is my bilge that I thought I was done grinding and thought I could glass my stringers down. Before 
After 
And the rudder port.Loooks like a bad repair. Glad I dug more. 


Looks like peanut brittle ,is this wood flour that I have been reading about? |
||
|
||
|
BFNSport
Senior Member
Joined: March-06-2010 Location: Lowell Michigan Status: Offline Points: 211 |
Post Options
Thanks(0)
Quote Reply
Posted: May-15-2011 at 11:16pm |
|
Whys that Greg the ?..stand.I have a rachet strap going all the way around the transom. Did you get my e-mail in regards to contact info. Jeff |
||
|
||
|
BuffaloBFN
Grand Poobah
Joined: June-24-2007 Location: Gainesville,GA Status: Offline Points: 6094 |
Post Options
Thanks(0)
Quote Reply
Posted: May-15-2011 at 11:23pm |
|
|
I really like the stand/cradle. My concern is that you got 2 mains out of 1 2x6.
No, I didn't get the contact info. I'll look for it if you re-send. Sorry I missed it. |
||
|
||
|
BFNSport
Senior Member
Joined: March-06-2010 Location: Lowell Michigan Status: Offline Points: 211 |
Post Options
Thanks(0)
Quote Reply
Posted: May-15-2011 at 11:52pm |
|
What would be the problm It was over sized laid the old stringers on the plank traced them out and cut.It was 18-20'long I think |
||
|
||
|
BFNSport
Senior Member
Joined: March-06-2010 Location: Lowell Michigan Status: Offline Points: 211 |
Post Options
Thanks(0)
Quote Reply
Posted: May-16-2011 at 4:04pm |
|
|
So is there a stopping point...LOL
Is this peeling apart because I have ground the top layer off? Or is this delaminating in the worst case? Or should I have ground this far in the first place? 
|
||
|
||
|
TRBenj
Grand Poobah

Joined: June-29-2005 Location: NWCT Status: Offline Points: 21169 |
Post Options
Thanks(0)
Quote Reply
Posted: May-16-2011 at 4:15pm |
|
|
We removed all glass that was used to attach the original stringers. That was no small task. Lots of work with the grinder, as well as flat bars to get it to peel up. In a few sections, more came up than we intended- we got hull glass up unintentionally. Might have been poor lamination or overzealous desctruction... or maybe a bit of both. We were sure to replace the hull glass in these sections (and then some).
Stringers out, but glass still in: 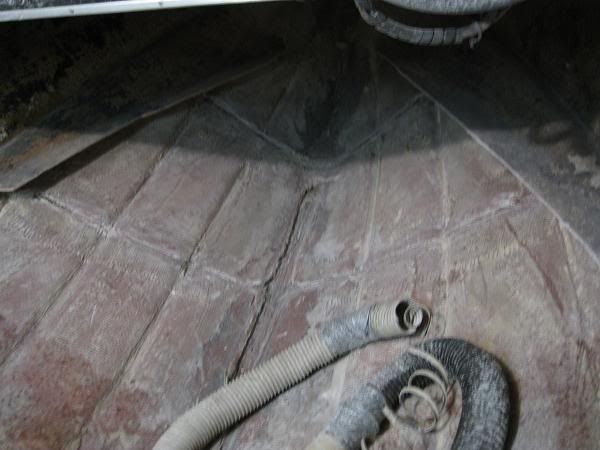
All stringer glass out: 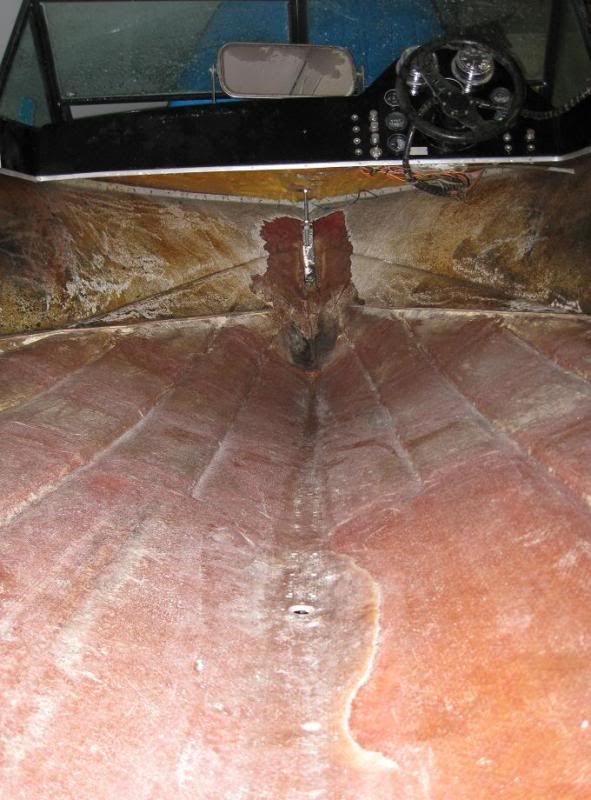
You can see where we took too much glass off in the foreground of the last picture, just to the right of the keel. Id say youre into the hull glass now. If its coming up easy, then take it off and be sure to replace it. If you can get to a spot where it comes off pretty hard, then grind the transition smooth and leave it. |
||
|
||
|
BFNSport
Senior Member
Joined: March-06-2010 Location: Lowell Michigan Status: Offline Points: 211 |
Post Options
Thanks(0)
Quote Reply
Posted: May-16-2011 at 4:23pm |
|
|
Thanks TRBenj for the quick response.That was my hunch that I need to keep going.The wood around the exhaust ports was ok/a little soft but pryed out the center piecs will not budge and looks good ,OK to leave?
JMD |
||
|
||
|
8122pbrainard
Grand Poobah
Joined: September-14-2006 Location: Three Lakes Wi. Status: Offline Points: 41045 |
Post Options
Thanks(0)
Quote Reply
Posted: May-16-2011 at 5:41pm |
|
|
Jeff,
You said the wood around the exhaust was OK but soft. I wouldn't take the chance on it and suggest you put new in. You're way into the hull anyway!! I agree with Tim and it does look like you have some delam in the hull. Just as he mentioned, get the loose stuff up and replace it. |
||
|
||
|
BFNSport
Senior Member
Joined: March-06-2010 Location: Lowell Michigan Status: Offline Points: 211 |
Post Options
Thanks(0)
Quote Reply
Posted: May-16-2011 at 7:03pm |
|
Pete, I did remove the soft wood around the exhaust ports popped right out. My question was the center board in the middle of the transom (between the exhaust ports )that attaches to the lifting eye is dry and would not budge I would like to leave it in place. CPECS it and re-glass? I spoke with US Composites today and I’m told I can use there thin 635 laminating epoxy for my CPES is that good info trying to order from one place. Sorry have to be careful using my phone when replying to post. |
||
|
||
|
BFNSport
Senior Member
Joined: March-06-2010 Location: Lowell Michigan Status: Offline Points: 211 |
Post Options
Thanks(0)
Quote Reply
Posted: May-16-2011 at 7:12pm |
|
|
Tim, Pete
What if any precautions did you take with the bottom of your hull while working on it? In your picture it looks close to the current state that mine is in. Is the 3 point stand still a viable solution when the hull is getting this “thin” it is very loose/flexible if that make any sense. I will be adding 2 more supports to the front under the windshield chine area, similar idea to what Greg did when he left it on the trailer. |
||
|
||
|
TRBenj
Grand Poobah
Joined: June-29-2005 Location: NWCT Status: Offline Points: 21169 |
Post Options
Thanks(0)
Quote Reply
Posted: May-16-2011 at 7:43pm |
|
We braced our BFN at the chine right near the windshield, and again at the transom. We also blocked the keel in 2 or 3 places. Once supported, we brought the trailer up to the hull as a brace, though it didnt really hold much (if any) weight- it was there to prevent flexing. Id repost my picture, but Im not allowed! |
||
|
||
|
Post Reply
|
Page <123> |
 Tweet
Tweet
|
| Forum Jump | Forum Permissions You cannot post new topics in this forum You cannot reply to topics in this forum You cannot delete your posts in this forum You cannot edit your posts in this forum You cannot create polls in this forum You cannot vote in polls in this forum |


 Topic Options
 8122pbrainard wrote: